

During mine and Carolyn's little sojourn to Kefalonia and Ithaca, Capt. Steve has been getting his marvellous collection of 1:1200 Anglo-Dutch warships back out on the table using General at Sea to recreate another battle from this interesting period of age of sail naval warfare.
 |
| Naval battle sites during the First Anglo-Dutch War, illustrating the position of the Battle of Plymouth in 1652. |
Continuing from the previous AAR covering his refight of The Battle of Livorno or Leghorn fought on the 4th March 1653, Steve sent me his most recent solo refight covering the Battle of Plymouth fought on the 28th August 1652, which I am sharing here.
 |
| Lieutenant-Admiral Michiel de Ruyter (1607–1676) - Ferdinand Bol. |
This battle heralded the introduction to the English of a certain Dutch admiral who would become a thorn in the flesh to English ambitions of naval dominance over the Dutch and a legendary naval commander in his own right, Michiel Adriaanszoon de Ruyter.
 |
| JJ's Wargames - The Battle of Livorno (Leghorn), 4th March 1653 |
Prior to his refight, and no-doubt aware of my flimsy knowledge of battles from the First Anglo-Dutch War, Steve sent me a link to a short twelve minute video summary of the battle and the background to its being fought, which I have linked below, if like me you are equally on the learning curve when it comes to this period of age of sail naval warfare.
As in the previous refight I have also copied out Steve's orders of battle and map set-up for the start positions of both fleets, with the orders of battle reflecting the explanation covered off in the previous AAR of how General at Sea works.

This effectively sees the respective fleets grouped into fighting units of between three to four vessels represented by a model on the table and thus allowing the large actions that were a peculiarity of this period to be better managed as a tabletop game.
 |
| The setup for the Battle of Plymouth |
I should also add that Steve is playing these games using Iain Stanford's as yet unpublished General at Sea Supplement, which, as well as including twenty-seven additional battle scenarios, also has a few rule changes which includes a doubling of all movement rates and gunnery ranges to better reflect the area occupied by the respective models plus some changes around tacking, breaking the line and head to head contact.
 |
| English Order of Battle |
 |
| Admiral Sir George Ayscue (ca 1616–1671) - Peter Lely Ayscue and De Ruyter had been personal friends before the war. |
The Dutch were able to force Ayscue to break off the engagement, and their convoy sailed safely into the Atlantic while Ayscue sailed to Plymouth for repairs.
 |
| Dutch Order of Battle |
A notable incident occurred during the battle when the largest Dutch vessel, the Dutch East India Company warship Vogelstruys, by Dutch standards heavily armed with a lower tier of 18-pounders, got separated from the rest of the Dutch fleet and was attacked by three English ships at once and boarded.
 |
| The Dutch East India Company warship Vogelstruys under her captain, Douwe Aukes in action at the Battle of Plymouth. |
Her crew was close to surrendering when her captain, the Frisian Douwe Aukes, threatened to blow her up first, and thus faced with this alternative the crew rallied, drove off the English boarding team and put up such a fight that the English vessels, much damaged with two in a sinking condition, broke off the attack.
In turn two it can be seen that Ayscue has decided to concentrate on the Dutch centre and rear, hoping to overwhelm them before the Dutch van can tack and intervene.
 |
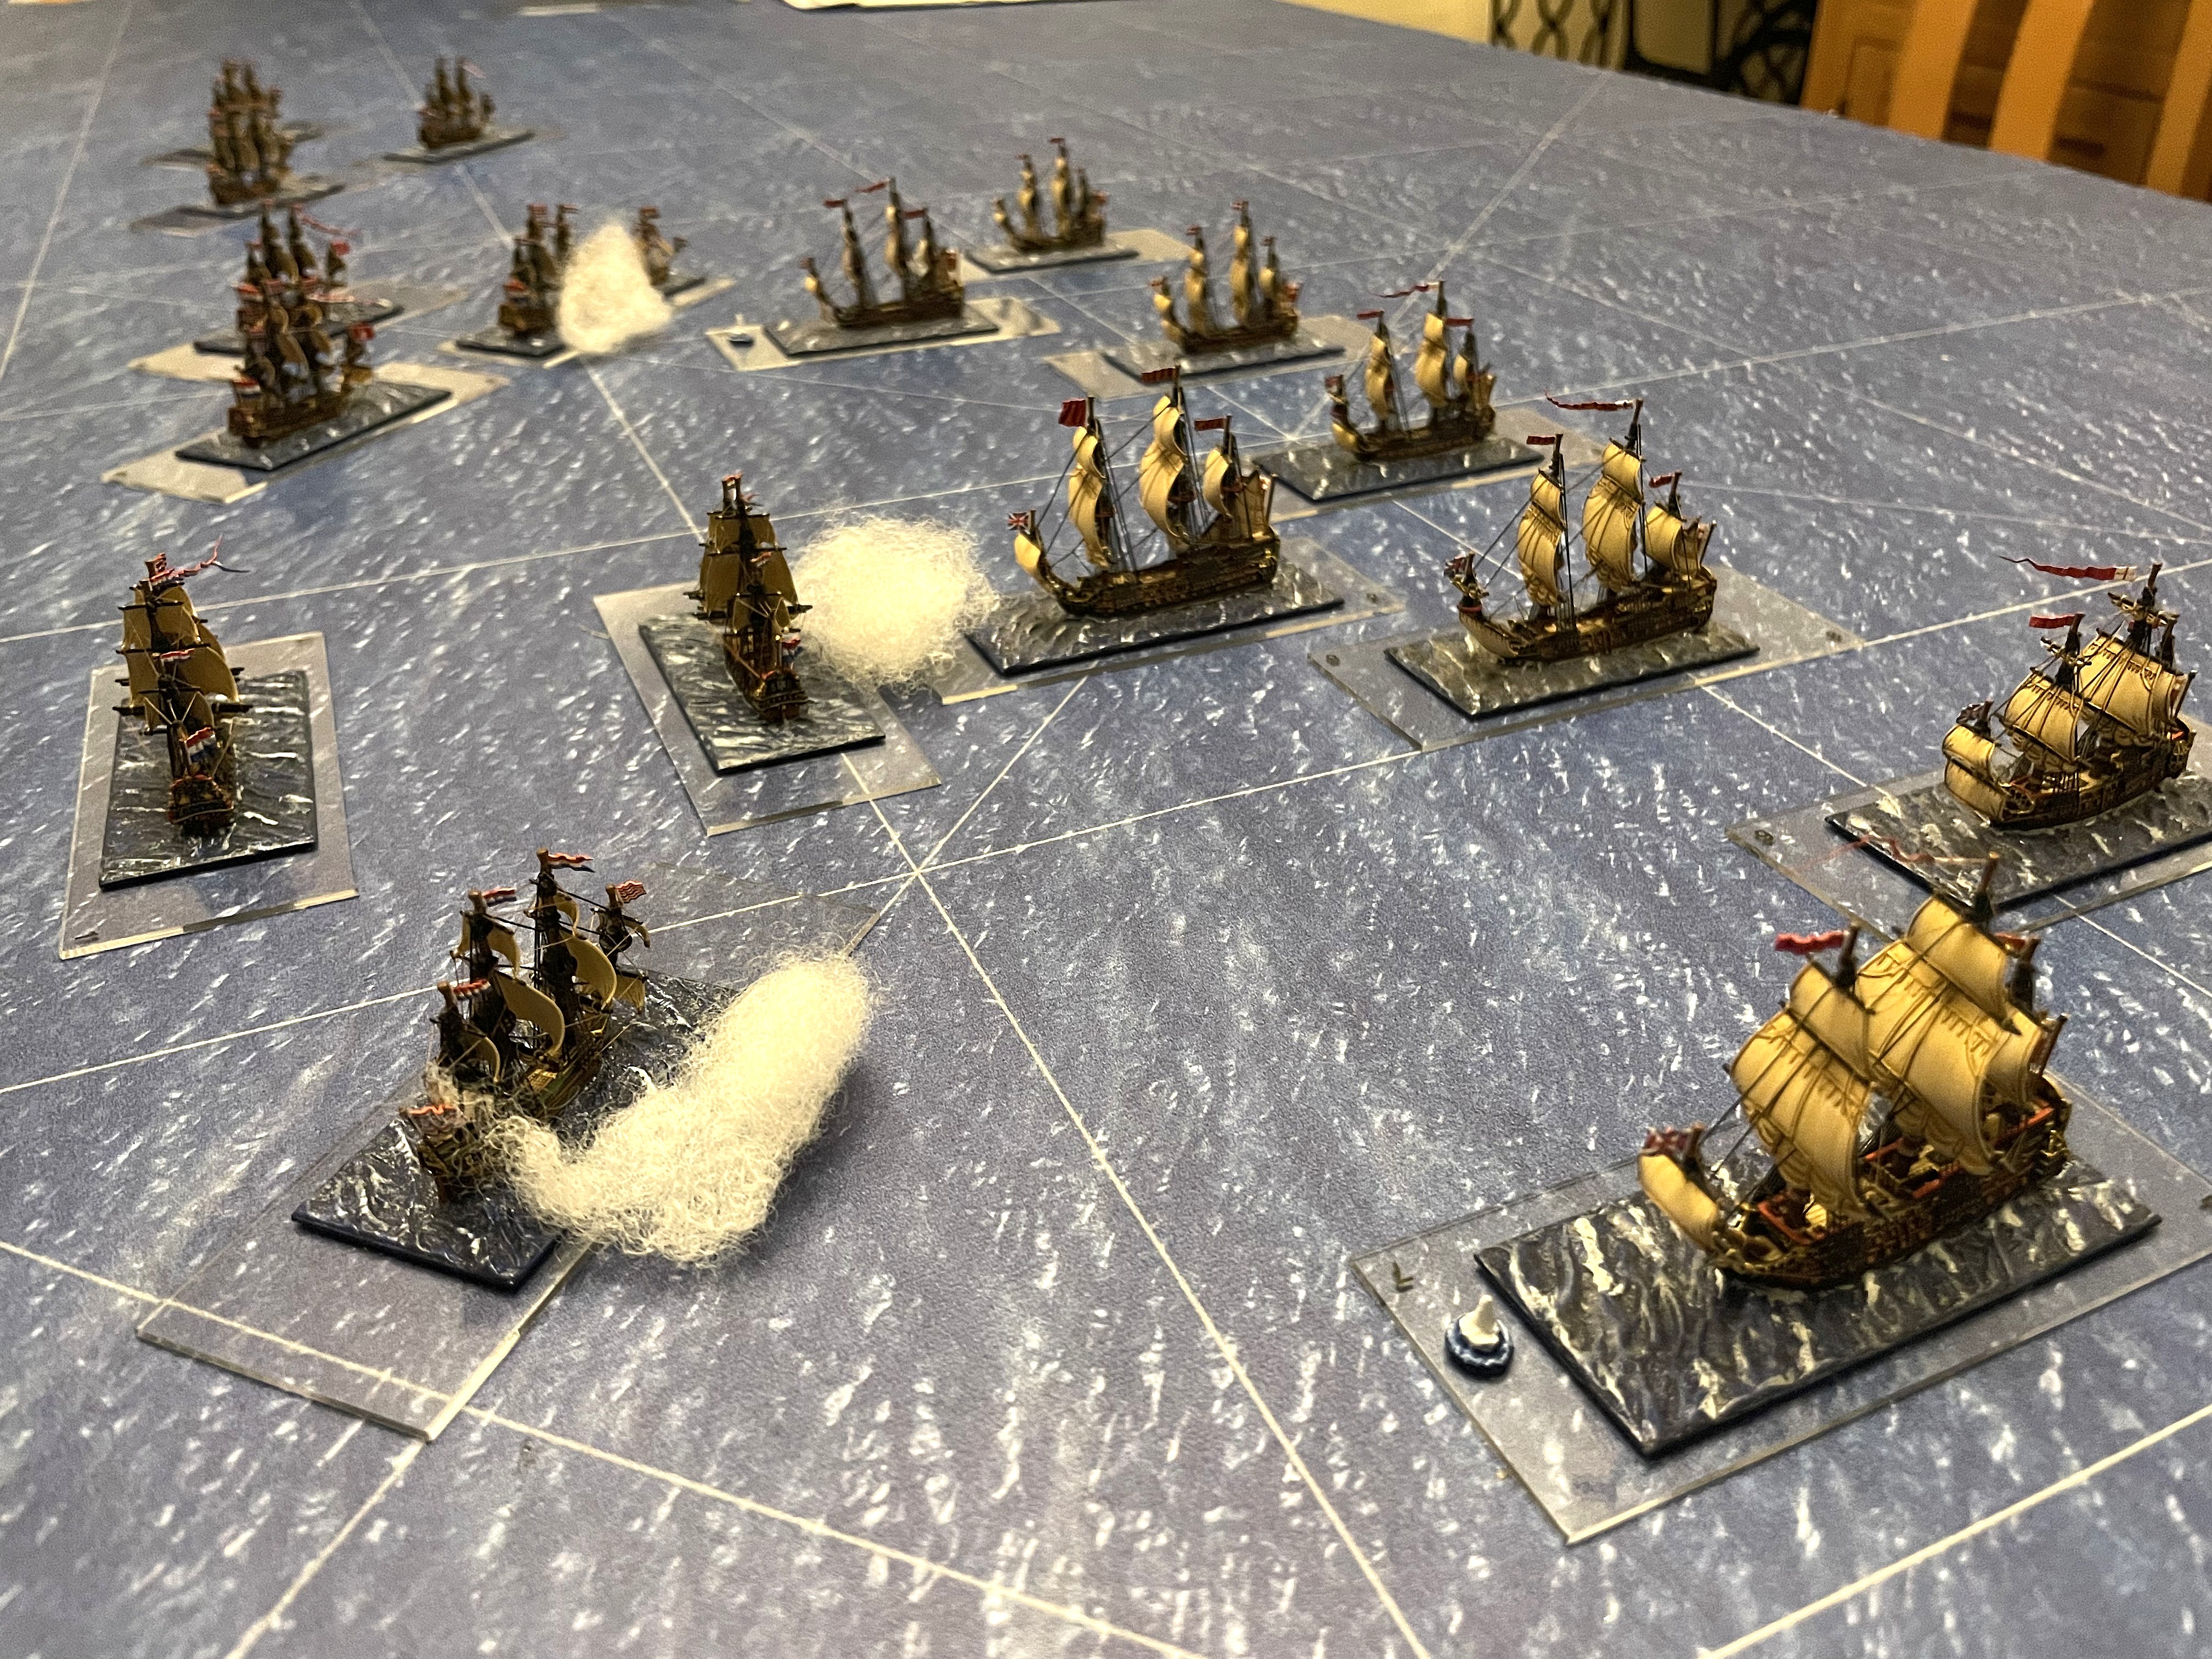
| Turn 1, The setup with the English (right) barrelling towards the enemy on a quarter wind. |
In the picture above Steve has arranged the two fleets as per the setup map that sees the English barrelling towards the enemy on a quarter wind with their leaders to the fore and the rest of the force following in their wake in no particular order, as was the practice of the time.
 |
| Turn 2, Ayscue has decided to concentrate on the Dutch centre and rear, leaving the van to have to tack back. |
 |
| Turn 3, and the Dutch rear turns to deliver bow rakes on Ayscue. |

 |
| Turn 4, and the Dutch van has turned, extreme right, ready to begin its tack. |
To the right of picture the English van under Haddock have passed behind the Dutch and began to turn.
 |
| Turn 4, The Dutch centre and rear are hard pressed by the English attack. |
By the end of turn 5 the Dutch van had successfully tacked, and De Ruyter has begun to turn in preparation to tack next turn, but heavy fighting is going on with the Dutch rear, that sees the English taking some damage that has left two stands Disrupted, but with the Dutch coming off worse with one stand Scattered and another Disrupted on a Damage Level 1, but managing to pass its Squadron Control Test.
 |
| Turn 5 and the Dutch van had successfully tacked, and De Ruyter has begun to turn in preparation to tack next turn, but heavy fighting is going on with the Dutch rear, nearest to camera. |
With De Ruyter successfully tacking the Scattered Dutch stand tried to escape towards their commander, with the Dutch centre following, but leaving the Dutch rear hard pressed and with the English commander, Vice-admiral Haddock having a clear path to the table edge to attack the Dutch convoy beyond, but he failing a Control Test is forced to delay such a move as he focusses on taking prizes amid the Dutch rear.

 |
| Turn 5 and the Dutch rear is under severe attack and the English commander Vice-admiral Haddock, extreme right, has a clear route ahead off table to attack the Dutch merchant convoy. |
The battle concluded on Turn 6, with Haddock having left the table to attack the Dutch convoy, and De Ruyter unable to intervene in time to save his rear squadron which suffered yet more damage seeing one more stand Scattered and the resulting Squadron Reaction Test, seeing the squadron as a whole scattering in response.
 |
| The battle concluded on Turn 6, with Haddock having left the table to attack the Dutch convoy, and De Ruyter unable to intervene in time to save his rear squadron. |
Steve's conclusion to this game:
'Both sides have lost a squadron - one to battle damage and the other to indiscipline. De Ruyter is in a position to attack with his two remaining commands but has failed in his main aim of protecting his convoy, so I decided to call it quits at this point with an English tactical victory.'

He also summarised some key learning points from the game:
1. Have the English arrive in three straggling lines, warships to the fore and slower hired merchantmen behind. Some accounts mention this. This means that the initial shock will be by three strong stands, which will give the Dutch a better chance of holding them off. If the English breakthrough - as they did in the action - the rest of their commands will be out of command range/line of sight creating headaches for Ayscue and his subordinates.
2. The Dutch should try to form a rough line with their centre and rear.
3. The Dutch van should stretch out as fast as they can to get into a point where they can tack and then head east.
4. Don’t put stands too close together in pre line of battle - it limits manoeuvrability and increases risk of friendly collisions.
5. Good Dutch morale plus an exceptional c-in-c does make a difference in holding them together.
6. The advanced combat system worked well. Lightly armed 28-gun Dutch escorts did little damage to heavy English second rates but hired merchantmen were more vulnerable.
Good fun game and shows how good de Ruyter was in fending off Ayscue - and then following him with intention of attacking him in Plymouth South - foiled only by unfavourable wind.
Steve
The naval warfare of the second half of the 17th Century makes for very interesting reading, and plenty of variety. The fleets could be huge, numerically. It is also replete with interesting characters: De Ruyter and van Tromp on the Dutch side, Duquesne of France, and for England, Robert Blake, Prince Rupert - and even the future king of England, James, Duke of York.
ReplyDeleteI do admire the ships used for the table top action!
Cheers,
Ion
I am with Ion! The squadrons look marvelous, and you present a very enjoyable battle report. Thank you!
DeleteLooked like a great game.
ReplyDeleteGreat looking game Steven, those Langton miniatures are really special. I think Ayscue got a bit lucky, as when I have played it de Ruyter has always won. Thanks for posting this, General at Sea was published in 2003 and I have a lot more material now, including the advanced combat system. This gives me the inspiration to work on getting 2nd Edition published.
ReplyDeleteHi chaps,
ReplyDeleteThank you for your comments, as an age of sail naval wargamer more familiar with the conflicts of the 18th and 19th century I am really enjoying posting Steve's AAR's as I am indulging myself with an historical education of my own, having a superficial awareness of the Anglo-Dutch Wars, more in relation to its influence on the developments in tactics and signalling that it led to in later conflicts.
Steve's wonderful collection of models are a delight to see which is why I thought others would enjoy seeing the games he has produced, so its great to get your feedback.
Iain - I am really pleased to hear from you and equally glad that you have plans to further develop your rules which I have enjoyed perusing over along with Steve's AAR's, and am looking forward to playing when Steve and I get a date together to have a go with them.
All the best
JJ