
 |
| The Battle of Leghorn, 1653 by Willem van Diest. |
In my previous post looking at the 17th century Battle of Livorno (Leghorn), fought in the Western Mediterranean during the first Anglo Dutch War, and being played through by my pal Steve using his marvellous collection of 1:1200 Anglo-Dutch models, I covered the background to the battle and Steve's first moves in a solo playthrough of the rules General at Sea - link below.
_march_14_1653_(Johannes_Lingelbach,_1660).jpg) |
| JJ's Wargames - The Battle of Livorno (Leghorn), 4th March 1653, Part One |
In the next set of pictures, it is now Turn 4, with no change in the weather.

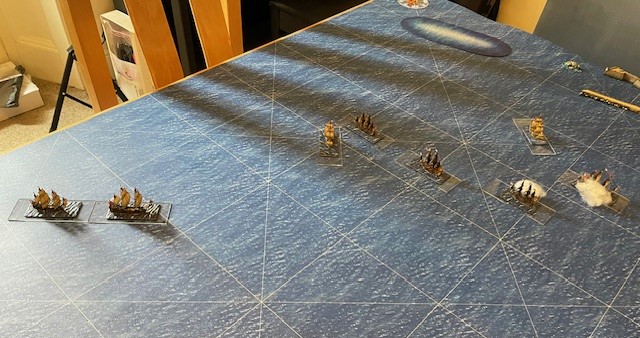
As can be seen below Captain Badiley continued to beat his passage towards the dangerous Meloria Shoal signalling his preparation to tack in the next turn.
 |
| Captain Badiley continued to beat his passage towards the dangerous Meloria Shoal. |
 |
| The Battle of Livorno (Leghorn) (c. 1659 - c. 1699) - Willem van de Velde the Elder (Dutch, 1610-1693) |
Steve's historical note records that as Appleton prepared to leave Livorno, the English ambassador to the Grand Duke of Tuscany was seen frantically running down the mole, imploring Appleton to turn back.
 |
| Captain Appleton's squadron makes sail and departs from the harbour. |
Appleton didn't perform any better with his command, leaving his squadron heading straight towards the Dutch guns. In fact Appleton would end up evading the Dutch rather than risking a poor command die roll and being forced to attempt to push through the Dutch line.
 |
| 'The Dutch in response, weighed anchor. . . ', with only three elements of the squadron obeying the order to 'heave to'. |
The weather changed in turn 5, with the wind increasing to 4 and seeing Badiley tacking successfully to avoid the Meloria Shoal, whilst his comrade Appleton managed to turn his squadron astern of the Dutch, and in the following turn exchanging long range fire with the Dutch rear to no effect.
In response to the English moves, Van Galen got underway and despite his command issues, used the command points he had to turn his squadron downwind towards Badiley moving to interpose himself between the two English squadrons.
 |
| . . . with the wind increasing to 4 and seeing Badiley tacking successfully to avoid the Meloria Shoal, whilst his comrade Appleton managed to turn his squadron astern of the Dutch. . . exchanging long range fire with the Dutch rear to no effect. Whilst Van Galen is . . . moving to interpose himself between the two English squadrons. |
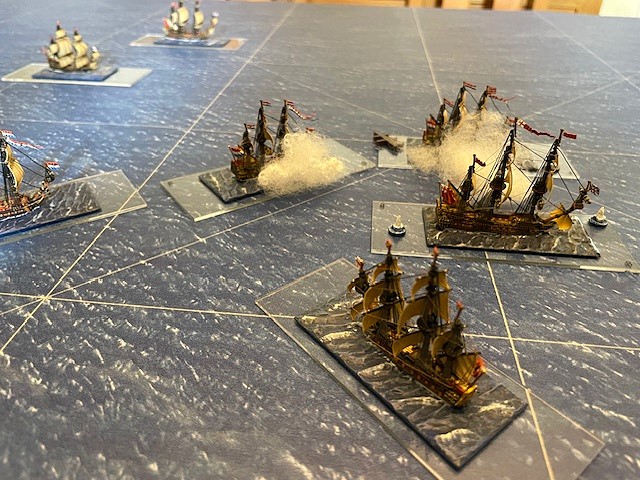
By turn 8, the Dutch had intercepted Badiley and opened fire at close range, with Badiley passing his control test to successfully avoid becoming disrupted, as his comrade Appleton continued to run before the wind, firing to no effect, and forced to evade, being out of command range from Badiley.
 |
| . . . the Dutch had intercepted Badiley and opened fire at close range. . . |
Turn 10
By turn 10 the lead elements of Badiley and Van Galen's squadrons were hotly engaged at close range, that left the lead Dutch stand at Level 2 Damage and seeing the English successfully pass two control tests, leaving both English squadrons able to break contact and join forces, and survive intact to fight another day.
 |
| . . . Badiley and Van Galen's squadrons were hotly engaged at close range. . . |
 |
| . . . that left the lead Dutch stand at Level 2 Damage and seeing the English successfully pass two control tests, leaving both English squadrons able to break contact and join forces . . . |
Steve sent me his AAR over the course of last weekend, and I enjoyed following along and the opportunity to research a naval action not as familiar to me as others, together whilst flicking through my copy of General at Sea; with his efforts prompting me to share the game here on the blog, and I hope you enjoy the read.
By my next post I will be enjoying some much looked forward to summer sunshine and new vistas, with rather more chillaxing than recent adventures have involved.
Lots to post about though, with the AWI collection continuing to grow apace, plus some fun with friends up in deep and darkest North Devon with a bit of Renaissance action to report on, and anything else that grabs my attention while I'm away from my desk.
As always, more anon.
JJ
No comments:
Post a Comment