Wednesday 29 April 2020

Far Distant Ships, The Royal Navy and the Blockade of Brest, 1793-1815 - Quintin Barry


So the latest book to get pulled from JJ's library shelf is another interesting title from Helion & Company publishers, 'Far Distant Ships' by Quintin Barry, recalling in its title a quote from A.T. Mahan, and the American naval historian's summing up of the contribution made by the Royal Navy in the ultimate defeat of Napoleon when he wrote;

'Those far distant, storm beaten ships, upon which the Grand Army never looked, stood between it and the domination of the world'.

The description of this title contained within the fold of the dust jacket, accurately sums up the content of the book when it describes it tracing;

'the development of British naval strategy, as well as describing the crucial encounters between the rival fleets and the single ship actions which provided the press with a constant flow of news stories for its readers.'

With my current wargaming focus very much on the French Revolutionary and Napoleonic naval war, my hobby reading is understandably equally aligned to feed the enthusiasm for that focus and to inform on the games that I intend to play; and this book proved an excellent encouragement to the work, concentrating as it does on the pivotal command of the Royal Navy during this long war, separated by a single year of peace 1802-03 as the struggle resumed against Napoleonic France and the shift to an existential threat posed by the Emperor of the French to the continued existence of a United Kingdom of Great Britain and Ireland at that time.

HMS Nymphe vs Cleopatre - Donald MacLeod
One of the first actions of the French Revolutionary War at sea was the dramatic clash between Nymphe and Cleopatre that demonstrated the capabilities of the new French naval force 

I stress that existential threat because the book, in its close look at the activities of the Admiralty and the different British administrations that came and went during this period, in relation to the command and direction of the Channel Fleet, really gets to the crux of the war between Great Britain and Revolutionary and later Napoleonic France, in that the latter, Napoleon, seems not, in his planning to invade Great Britain, to have fully understood the primary objective of the Channel Fleet or Western Squadron, namely the preventing of an invasion from the continent of the home island.

The control of the English Channel was paramount in that objective, so much so that its other missions of blockade, harassment of enemy trade and other shipping whilst protecting British and allied shipping and facilitating the defence or capture of overseas territories and associated military expeditions, were very much secondary, though important, and the somewhat complicated schemes Napoleon came up with to draw the Channel Fleet or large parts of it away from those vital home waters, and thus cause it to neglect its key objective seem to demonstrate his inability to fully grasp and master naval strategy.

Admiral of the Fleet, Lord Anson, developed the British strategy of close blockade of French ports during the Seven Years War
that would influence British practice into the late 18th and early 19th century - Thomas Hudson

The book logically starts its progress by looking at the position the British administration found itself in at the outbreak of war with Revolutionary France and the history of previous conflicts between the two nations that guided naval planning for it, principally the blockade strategy established by Admiral George Anson, later termed the 'Blue Water Policy', with the British fleet the main weapon with which Britain would wage war, maintaining a naval force to rival the combined strengths of its two main enemies Spain and France and to be able to conduct a close blockade of their principle bases.

This aggressive stance had worked well in the Seven Years War to gain control of the worlds oceans and pick off French colonies overseas, but was negated during the American War of Independence when the Royal Navy was stretched beyond its means, with the war to support in America as well as defending against multiple European enemies keen to take full advantage of British woes.

The victory at the Battle of the Saintes in 1782 by Admiral Rodney and his breaking of the French line had regained the Royal Navy's supremacy and helped secure the eventual peace settlement to end the war on more favourable terms than would otherwise have been the case, but with the French Revolution and its disastrous effects on the French navy coupled with tactical advances in British naval thinking, the opening of the French Revolutionary War suggested that the gap in naval effectiveness may well have widened yet further that only the coming conflict would reveal.

Thus in 1793 we see the Royal Navy feeling out the new reality of naval war against the new look revolutionary French navy as epitomised by the melodramatic Captain Jean Mullon commander of the frigate Cleopatre and his battle with Sir Edward Pellew's Nymphe with the French skipper rousing the revolutionary fervour of his crew with his shouts of 'Vive la Republique' and his attempt at eating his own signal book, to avoid its capture, after his being ripped apart by a round shot on his own quarterdeck. Revolutionary zeal would prove a poor substitute for professional ability when it came to war at sea, as time would continue to prove.

The Boardroom at the Admiralty circa 1810 with map scrolls on the wall and the wind gauge at the end of the room

Part of the scene setting then takes a look at the structure of the Admiralty and its key characters at the outbreak of war considering their responsibilities overseeing the fundamentals of strategy and resourcing of a Royal Navy that during the critical years 1804 to 1805 would see its budget increase from £12,350,600 to an eye-watering £18,864,000. The role of First Lord or Lord High Admiral and Board of Commissioners and the two Naval Secretaries is examined together with the politics and interestingly Royal patronage and influence from a King and later Prince Regent taking a close interest in the advancement of individuals within the corridors of power.

On the opposite side of the channel the French navy had suffered serious damage from the Revolution, with naval ports badly affected by the disruption, with ships crews displaying violent indiscipline and a National Assembly, seemingly intent on fueling the dissent by undermining the command of its officers for having the slightest hint of any nobility within their ranks, in-spite of any ability or patriotic zeal, with the November 1791 establishment at Brest showing it short of 30 captains and 160 lieutenants.

The loss of experienced officers was partly made up by the recruitment in 1792 of merchant marine officers of five years 'sea-time' to fill the gap with the inevitable effects on battle efficiency; then, to compound these ill-effects, a further decree abolished the corps of seaman gunners on the grounds that such a body created an aristocracy among seamen, thus, in the interests of equality, it was deemed that any artilleryman should be able to serve aboard ship!

By 1793 and the outbreak of war, the French navy had lost three quarters of its officer corps and many ships of the line were now commanded by former sub-lieutenants and squadrons by former lieutenants.

A contemporary view of the Port of Brest

Thus having set the organisational scene, Quintin Barry then takes a look at the port of Brest, the principle French naval base that would occupy the attention of the Admiralty and the British Channel Fleet throughout the Revolutionary and Napoleonic wars, with a clear description of its characteristics in terms of its excellent shipping capacity and sheltered harbour, its extremity from other French centres that would have to supply it, but also its excellent position for giving access to the wider sea lanes of the Atlantic and beyond as well as the English Channel and Irish home waters.


Of course one of its key features was its approaches facing out west, thus requiring an easterly wind to allow the French fleet to sail but with a westerly prevailing wind just as capable of keeping them in port. These aspects also affected the British Channel and Irish squadrons, with any squadron off Brest likely to be blown off station just as a French force would be looking to take advantage of such a wind.

As well as prevailing winds off a stormy North Atlantic coast, the approaches to Brest were also made more difficult for any blockading force by the many treacherous rocks, shoals and currents that characterised it; and these facts created a sincere debate among senior British naval commanders as to whether it was better to keep the French fleet as securely bottled up as best it could be by a close blockading force of frigates and ships of the line; or better still to keep British ships of the line at anchor in a sheltered home base on standby to intercept a French squadron attempting to sail, using frigates to warn of a sailing and thus bringing them to battle in open water, whilst in the meantime protecting the ships and crews from the ravages of the weather and extended time at sea.

This key disagreement stands out throughout the book as it tracks its way among the key personalities of the commanders at various times throughout the war as they struggled to counter the new French and later Franco-Spanish approaches to projecting their forces towards key objectives, be that invading Ireland, the British mainland, West Indian possessions or supporting offensives in the Mediterranean, whilst seeking to avoid action with the Royal Navy unless on favourable terms or when unavoidable.

The book then tracks these key engagements as well as the more minor naval actions that characterised the war waged by the Channel and Irish squadrons alongside the roving frigate squadrons of Sir Edward Pellew and Sir John Warren, whilst drawing excellent pictures of the key commanders and their decisions, their clashes with one another, together with an assessment of their overall contribution.

I really enjoyed this aspect of the book, showing, as always, the huge egos that are so characteristic of senior commanders from whatever service and era and the inevitable politics that come to the fore in support of or despite the military capabilities of the individuals involved.

Admiral Alexander Hood, 1st Viscount Bridport

Some of those characters seem to tower over others, such as Admiral Alexander Hood, Lord Bridport who took command of the Channel Squadron after the retirement of Lord Howe and fought the Battle of Groix off Brest in 1795. A brilliant commander if somewhat marred by his inability to recognise and encourage brilliance in others, and a keen proponent of Howe's distant blockade, with the Admiral keen to take plenty of time ashore enjoying the comforts of Bath, and having constantly to be 'encouraged' by George, 2nd Earl Spencer, perhaps a saint among First Lord's of the Admiralty for patient administration, to return to sea and command his fleet during the blockade.

Admiral John Jervis, 1st Earl of St Vincent

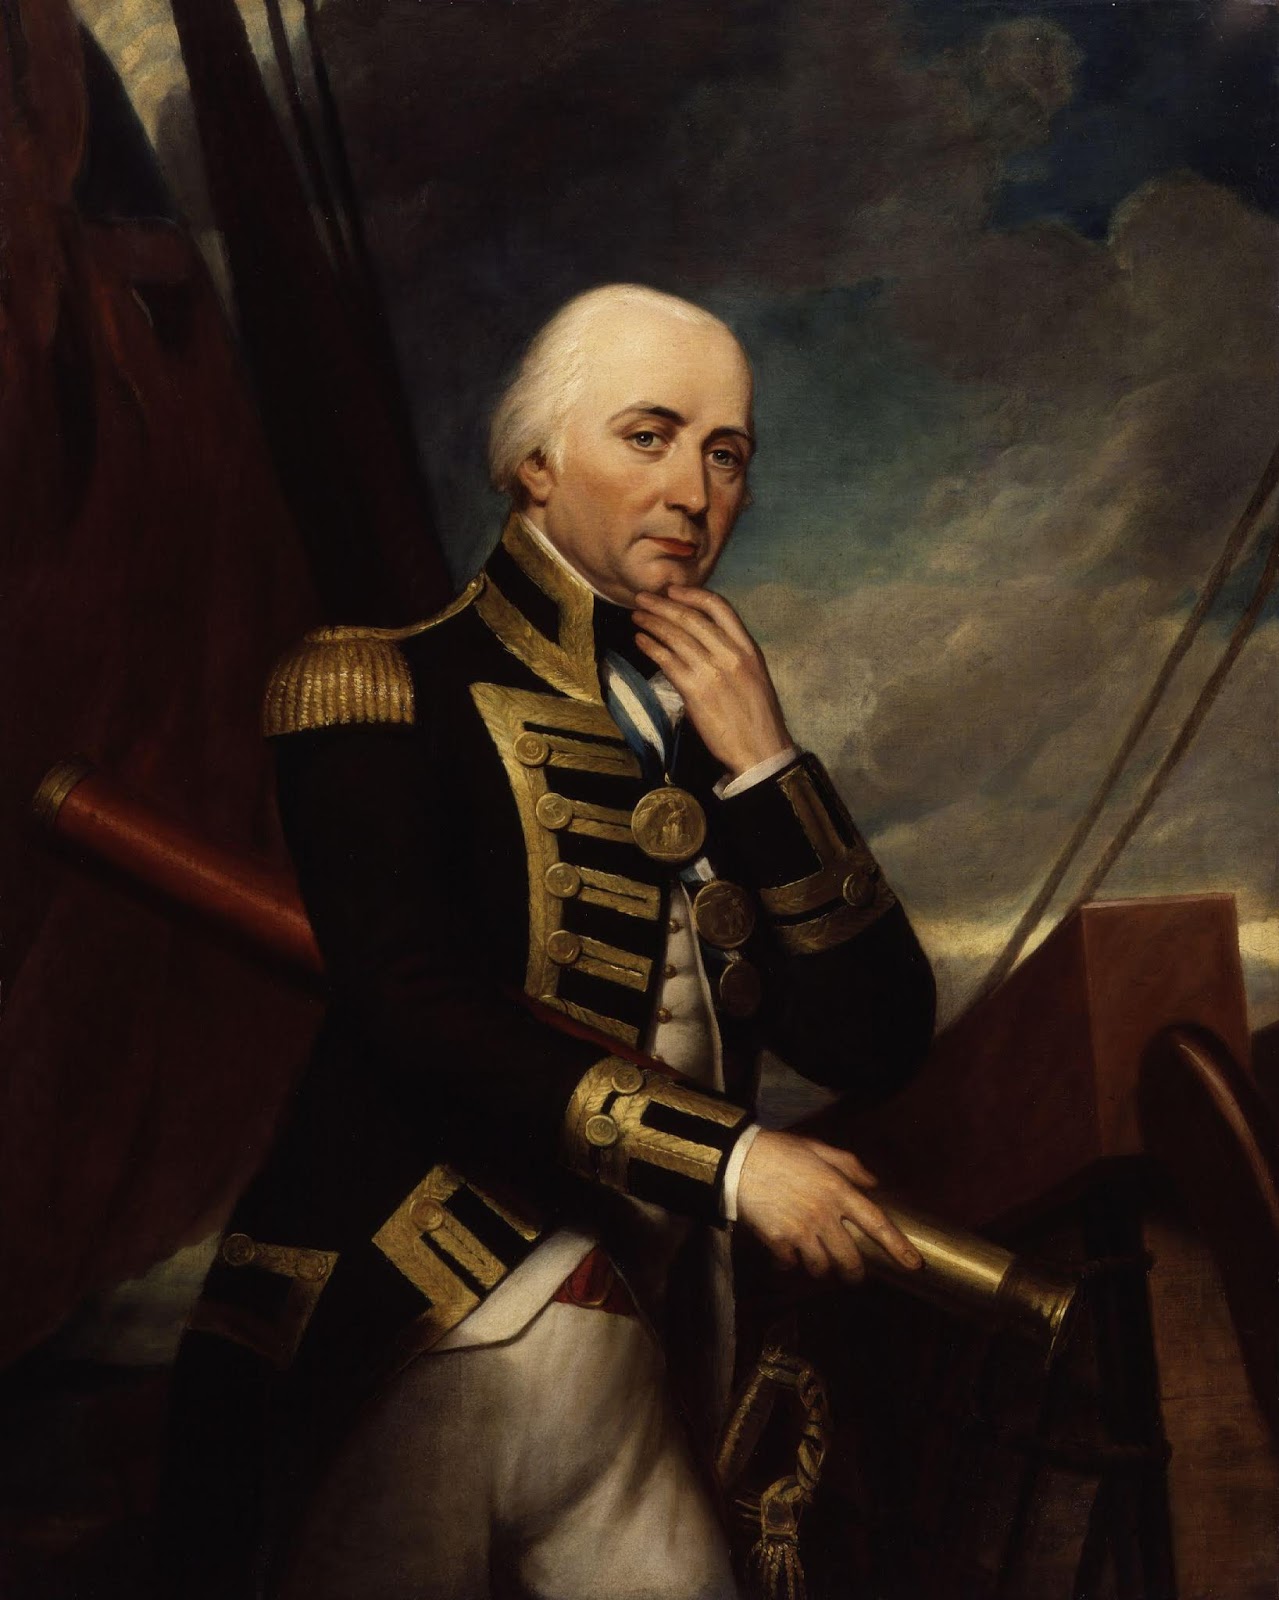
Likewise Admiral Sir John Jervis, Lord St Vincent, another brilliant naval commander, whose command in the Mediterranean squadron and victory over the Spanish in the Battle of Cape St Vincent in 1797 made him an obvious choice to command the Channel Squadron and later to become First Sea Lord at the Admiralty. I got the impression that Barry is not a fan of Sir John as much as I am, and for all his faults with a strong sense of discipline and probity that made him the scourge of lax captains and officers and profiteering naval contractors benefiting from friends in high places, Sir John was a leader of the highest abilities recognising those traits in others and encouraging and opening doors for them that might not have been the case. Names such as Nelson, Pellew, Warren, Cornwallis and Cochrane befitting from Jervis's high opinion which stands testimony to his talent for recognising such talent in others.

His appointment under the Addington administration after Pitt the Younger had resigned in the face of  opposition from the King to Catholic emancipation and the inclusion of Ireland in the Act of Union, designed to pacify Irish support for further French invasion attempts, was not without controversy. On his first meeting with the King he highlighted his support for Catholic emancipation, and the King gracefully accepted Jervis's candid honesty, agreeing to disagree but welcoming him to his new command, during which he changed the strategy to one of close blockade of Brest and the other Atlantic bases later to be taken up by his successor and friend Admiral Sir William Cornwallis.

Admiral Sir Williiam Cornwallis & Admiral Charles Middleton, Lord Barham

Perhaps the other two giants of the period that don't get half the recognition that they should, but are well described in Barry's account, are Lord Cornwallis and Lord Barham who, with all the attention focused on Nelson, are easily overlooked in their brilliant management of the strategy that put paid to Napoleon's attempted invasion and set up the crushing victory of Trafalgar.

Rather like Lord 'Stuffy' Dowding and his command of RAF Fighter Command in the Battle of Britain in 1940, another battle to resist an existential threat in another century, the quiet unassuming commands of Cornwallis and Barham and the masterful application of their response to the various moves by Napoleon and his Franco-Spanish fleets show through and help illustrate how Napoleon was completely out of his league versus these two naval commanders when trying to bring his undoubted talents as a land commander to command at sea.

Post Trafalgar the book continues with a look at the ongoing strategy of containment and Napoleon's attempts to rebuild and refocus his naval strategy, now with a navy that seemed to have lost the will to even put to sea, except for a few determined or reckless exceptions, but now with a naval commitment to support Wellington's Peninsular War and prevention of interference from the United States with the War of 1812 and minor attacks against British merchant shipping.

This book makes a welcome addition to my Age of Sail library focusing as it does on a particular command within the Royal Navy of that time, namely the Channel Squadron, with good coverage of the major and minor naval engagements that occurred in the area of this command, together with a comprehensive look at the commanders and the naval forces involved in the struggle.

The books contents consist of 351 pages with the following content:

List of illustrations, (19 of key battles and portraits of commanders)
List of Maps;
1. Brest and Environs
2. The Channel Ports
3. Biscay and Southern Ireland
4. The Glorious First of June 1794
5. Calder's Action, 22nd July 1805
6. Basque Roads: The Fireship Attack, 11th April 1809
7. Basque Roads: The Aftermath, 12th April 1809

Chapters
1. The Outbreak of War
2. The Admiralty
3. Brest and the French Navy
4. Ships
5. The Grain Convoy
6. The Glorious First of June
7. Cornwallis's Retreat
8. The Ille de Groix
9. Closer Blockade
10. Ireland
11. Bridport: Commander in Chief at Last
12. Mutiny
13. Frigates
14. Bompart
15. Bruix
16. Bridport Strikes his Flag
17. St Vincent
18. Cornwallis
19. Peace
20. The Blockade Resumed
21. Napoleon and the Admirals
22. Prelude to Trafalgar
23. Barham
24. Calder's Action
25. Trafalgar
26. The Return of St Vincent
27. Gambier
28. Keith
29. Health and Welfare
Conclusion

Bibliography
General Index
Index of Ships

As I said, I really enjoyed the read, and although not agreeing with all of Mr Barry's assessments of some of the key personalities, found it a very informative and interesting treatment of the subject.

If I were to mention two slight criticisms it would be to highlight an issue I have encountered with other publications from Helion, which is a number of type and spelling errors that are rather silly and are perhaps evidence of a cost saving on the proof reading side of publication, and the other would be with the maps that are good as they go but lack the detail contained in the text describing where certain capes, shoals and passages are, that are not on them. This was only sorted out with my finding other maps in other books to work out exactly where these positions mentioned are, such as the map of Brest from Mahan's history included in this review.

Other than that, if you are interested in this aspect of the naval war during the French Revolutionary and Napoleonic Wars, then you might find this book a jolly good read.

Far Distant Ships is shown with a list price of £25 from Helion but I have seen new copies available for under £8 at Amazon which frankly is a steal.

Saturday 25 April 2020

All at Sea - On the Stocks in JJ's Dockyard, New British Builds, Part Four


JJ's Royal Dockyard continues to play host to senior dignitaries from the Admiralty and repeat renditions of 'God Save the King' from the band of His Majesty's Royal Marines as two British first rates slip down into the water to await fitting out.

This week my British collection of models has been joined by two British three-deckers, one of historical renown in the history of the Royal Navy, the other, a generic model, representing the British preference for deploying first and second rates to act as their command ships and units of power throughout key points of their battle formations.

As in the previous three posts in the series, see the links below, I have pulled together some background history to tell the story of these ships and the role they played in the Royal Navy of their time.
All at Sea - On the Stocks in JJ's Dockyard, New British Builds, Part One
All at Sea - On the Stocks in JJ's Dockyard, New British Builds, Part Two
All at Sea - On the Stocks in JJ's Dockyard, Ne British Builds, Part Three

HMS Royal Sovereign

HMS Royal Sovereign of 100-guns flying Signal 16 from her mainmast repeating Nelson's final signal at the Battle of Trafalgar - 'Engage the enemy more closely'

HMS Royal Sovereign was designed by Sir Edward Hunt and built and launched in Plymouth, Devon on 11th September 1786 for a cost of £67,458 or just under £11.5 million pounds in today's money.

Hull plan of the 1786 Royal Sovereign -National Maritime Museum

The second HMS Royal Sovereign circa 1725 pictured as flagship at the Nore - L de Man

As a three deck, first rate ship of the line carrying 100 guns ranging from 32-pounder, 24-pounder and 12-pounder long guns, she was a powerful addition to the fleet and was at the time the third ship in the Royal Navy to carry the name, preceded by King Charles I's, Sovereign of the Seas 90-guns, later renamed Royal Sovereign launched in 1637 and the Royal Sovereign 100-guns launched in 1701 and flagship of the Channel Fleet in the Seven Years War.


Her first significant action was as part of Admiral Lord Howe's fleet at the Glorious First of June in 1794 under her commander, Captain Henry Nichols and being a 'fast sailing ship' the flagship of Howe's second in command, Vice Admiral Sir Thomas Graves, commanding the van division aboard which he would lose a leg in the battle

Vice Admiral Sir Thomas Graves c.1794 - Francesco Bartolozzi

Royal Sovereign was one of four ships in Howe's fleet to take significant casualties in the exchanges of fire between the two fleets on the 29th May with eight killed and twenty-two wounded, that saw the Channel Fleet as a whole suffer 67 killed and 128 wounded and left Royal Sovereign with material damage to her masts and rigging, however by 10.30 the next morning all ships except HMS Caesar reported to Admiral Howe that they were ready for action.

However the French had taken more heavy damage and suffered a corresponding casualty rate that left the fleet the worse off with Indomptable 80-guns, needing a dockyard refit, Tyrannicide 74-guns without any topmasts and having to use its lower sails whilst placed under tow and Terrible 110-guns and Eole 74-guns, with significant hull damage. In addition Admiral Villaret-Joyeuse had the disappointment of seeing his lead ship Montagnard 74-guns depart the fleet on the evening of the 29th without any explanation soon followed by the corvette Venus 28-guns, sent after the deserting vessel, but also not returning.

The 30th of May saw the two fleets maintain contact in poor visibility, but not engage, allowing French reinforcements of three ships of the line to arrive and allow Villaret-Joyeuse to send the Indomptable back to Brest for repairs.

The Glorious First of June 1794, painted c.1795 - Philip James de Loutherbourg

On the morning of the 1st June 1794, the day dawned clear with a smooth sea and a moderate wind of about sixteen knots from the south-east.

At 05.00 the British fleet turned towards the French on a north-west heading, before turning to the north at 06.15 and then on a westerly heading at 07.10 when Howe signaled 'the hands to breakfast'.

With the tradition of the Royal Navy fighting better on a full stomach met, Howe signaled at 07.16 for the fleet to engage the enemy closely followed by another signal at 07.25 for them to pass through the enemy line and attack to leeward.

Howe designed to breakthrough the French line and create a 'pell-mell battle' in which the superior British sailing and gunnery skills would prove superior to the French fleet; but sadly for his plans Admiral Graves lived up to his lack lustre performance during the American War and his indecisive engagement at the Battle of the Chesapeake, together with several of the captains in his van in turning away to engage in some traditional line to line bombardment.

The Glorious First of June 1794
At 07.16 Howe signaled his fleet to 'engage the enemy closely' followed at 07.25 to 'pass through the enemy line and attack to leeward'.
https://upload.wikimedia.org/wikipedia/commons/a/ab/June_1_1794_Order_of_Battle_Map_EN.svg

Fortunately for the British, Howe would not be denied his victory, and carrying on where Admiral Rodney concluded the American War with his breaking of the French line at the Battle of the Saintes in 1782, Howe's flagship, HMS Queen Charlotte 100-guns, carved her way through under the stern galleries of the French flagship Montagne 120-guns at 10.10 am, firing a full broadside the length of the enemy ship killing some 100 of its crew and wounding another 200 in the passing bombardment.

Closely following the Queen Charlotte and using similar tactics, were HMS Bellerophon 74-guns, Leviathan 74-guns, Marlborough 74-guns, Defense 74-guns, Invincible 74 guns, Brunswick 74-guns, Ramillies74-guns, Montagu 74-guns, Royal George 100-guns and Glory 90-guns, which left the French line broken and at the end of the day six enemy ships of the line captured as prizes.

As the flagship Vice Admiral of the Blue, Sir Cuthbert Collingwood at Trafalgar, I have HMS Royal Sovereign flying a blue pennant from her foremast

HMS Royal Sovereign would remain a key component of the Channel Squadron throughout the French Revolutionary War and in 1795 Vice Admiral William Cornwallis would raise his flag aboard her during which time she would see action in June of that year during what would become known as Cornwallis's Retreat, covered in the third post in this series and the section about HMS Mars 74-guns, that played a key role in the action.

HMS Royal Sovereign in the 'thick of it' during retreat of Admiral Cornwallis and his squadron off of Brest - Thomas Luny 

By mid afternoon HMS Mars had come under heavy attack from the leading four French ships that were chasing the British squadron and caused Cornwallis to turn the Royal Sovereign back to the aid of his hard pressed rear most ship.


The raking fire brought to bear on them by the Royal Sovereign proved to be instrumental in causing them to fall back and allowing the Mars to get away just before the French broke contact thinking a relief British squadron was over the horizon.

Admiral Cornwallis who raised his flag aboard HMS Royal Sovereign in 1795

Of course the most famous moment in the history of the ship would come on the 21st October 1805 when the Royal Sovereign took her place at the head of Vice Admiral Cuthbert Collingwood's Lee Column at the Battle of Trafalgar, being the first British ship to break the Franco-Spanish line, living up to her reputation as a fast sailer in the light winds that prevailed on the day..


Cuthbert Collingwood, first met Nelson in 1777 during the American War of Independence when they both served together aboard the frigate HMS Lowestoft 32-guns, that would mark the start of long and friendly relationship with both of their careers running in close parallel to one another right up until Trafalgar.

Vice Admiral Cuthbert Collingwood - Henry Howard

With the commencement of the Napoleonic War in 1803, Collingwood was appointed to Vice Admiral Cornwallis's Channel Squadron, and later promoted to Vice Admiral in 1804.


In August 1805 Admiral Collingwood in the Royal Sovereign was commanding a detached squadron of six ships tasked with watching the port of Cadiz and it was his small detachment that was chased away by Vice Admiral Villeneuve's combined fleet as it made its way down the coast from Ferrol and around Cape St Vincent into the Spanish port on the 20th of that month.

Collingwood later reported 'They are in the port like a forest' reckoning them 'now to be 36 sail of the line and plenty of frigates. What can I do with such a host? But I hope I shall get a reinforcement, suited to the occasion.'

Nelson joined Collingwood off Cadiz on the 28th of September relieving Admiral Calder who had arrived with 26 sail the previous month but was subsequently ordered to return home on Nelson's arrival to face court martial for his command of the Battle of Cape Finisterre in July, covered in my previous post.

HMS Royal Sovereign bears down on the Franco-Spanish at the Battle of Trafalgar shortly before the Forgueux fired the first broadside of the battle - Stuart Bolton

Nelson recalled the five ship inshore squadron blockading Cadiz established by Collingwood, writing at the time 'The enemy are still in port, but something must be immediately done to provoke or lure them to battle' and taking his battle fleet away from Cadiz, fifty miles to the west, leaving only frigates to watch the port.


On the 18th October 1805 against the advice of his subordinate commanders not to leave port, Villeneuve received intelligence that persuaded him otherwise. Firstly Vice Admiral Francois Rosily was in Madrid having been sent from Paris by Napoleon to replace him for his failure to enter the English Channel; secondly a British convoy was reported in the straits having sailed from Gibraltar with just four escorts offering an opportunity to order the fleet to sea before Rosily arrived and perhaps some salvaged honour. The Bucentaur hoisted the signal 'Prepare to weigh'.


Captain Sir Henry Blackwood aboard the frigate HMS Euryalus was tasked with alerting Nelson to the sailing of the combined fleet and soon news was on its way to the British admiral, with light winds causing the Franco-Spanish force to finally get clear of the port by noon on the 20th October, by which time Nelson had ordered his fleet on a parallel track towards the straits designed to intercept them the next day.

HMS Royal Sovereign after a refit and lying at anchor in Plymouth Sound - Stuart Bolton

At just before twelve noon on the 21st October, the Royal Sovereign at the head of the Lee Column came within gun range of the Forgueux 74-guns, as her commander Captain Baudoin gave the order to open fire, fine on her starboard bow, followed a minute later by one, fine of her port bow from the Spanish first rate Santa Ana 112-guns, flagship of Vice Admiral Don Ignatius de Alava.

Captain Edward Rotherham, commanded HMS Royal Sovereign at the Battle of Trafalgar

Royal Sovereign's commander Captain Edward Rotherham held the ship on a steady course, unperturbed, with officers and men standing patiently at their double-shotted guns, ordering the men and marines on the upper-deck to lie down for their safety and to hold their fire until ordered to do so just before crossing the bow of the Forgueux and stern quarters of the Santa Ana at 12.20pm.

On the Victory, Nelson watching the progress of Royal Sovereign through his telescope, observed to those close by his admiration, declaring "See how that noble fellow Collingwood takes his ship into action!"


The Spanish first rate of 112-guns Santa Ana, flagship of Vice Admiral Don Ignatius de Alava

As the Royal Sovereign passed through the enemy line, Collingwood remarked to Rotherham, "Oh Rotherham, what would Nelson give to be here", and with the order to commence firing given, the double-shotted broadside smashed the ornate woodwork on Santa Ana's stern galleries causing mass death and destruction as she passed by, whilst simultaneously delivering a similar treatment to the Forgueux's bow, receiving a broadside in response from the French ship, before the Royal Sovereign  swung round to fall broadside to broadside with the Santa Ana to engage in a two hour battering at about 400 yards range as Vice Admiral Alava ordered his gun crews across to the leeward guns to take on the British first rate.

The Santa Ana struck at 14.15 having taken fire from other British ships passing through the line as well as that in her battle with the Royal Sovereign, suffering 238 dead and wounded from her total strength of 1189 men at the start of battle.

Royal Marines on the forecastle of Royal Sovereign - Christa Hook, Osprey
Over one-hundred marines served aboard Royal Sovereign at the Battle of Trafalgar

The Royal Sovereign ended the battle without a mizzen or mainmast and a badly damaged foremast, with most of her rigging shot away and casualties numbering 141 dead and wounded from a starting strength of 826 men.

Hearing of the death of Nelson, Collingwood assumed command of the fleet at the close of the battle, transfering his flag to the frigate Euryalus whilst taking the Royal Sovereign under tow as he oversaw the securing of the British fleet and its prizes as the weather took a turn for the worse.

After Trafalgar the Royal Sovereign served with the Mediterranean squadron, blockading Toulon up to November 1811, returning afterwards to the Channel fleet through 1812-13.

Post war she was converted to a receiving ship in Plymouth, being renamed HMS Captain in 1825 until being broken up there the following year.


Typically HMS Royal Sovereign would have carried 28 x 32-pdr long guns on her lower deck, 28 x 24-pdrs on her middle deck and 30 x 12-pdrs on her upper deck with additionally 10 x 12-pdrs on her quarterdeck and 4 x 12-pdrs on her forecastle.

British Generic First/Second Rate


The generic British first rate contained within the Warlord British fleet box and now sold separately, allows the collector of these models to field these first (100 plus guns) and second rate (98 -90 guns) three deckers of 100 to 90-guns that were typical of the era with the typical strength of these ships in the Royal Navy through the French Revolutionary and Napoleonic Wars numbering between five to eight first rates and seven to sixteen second rates with an average strength in the early part of those wars at around sixteen ships on strength.


These three deckers formed a significant component of British fleets in the major engagements of the era;

Glorious First of June - 7 ships (3 First Rates)
Cape St Vincent - 6 ships (2 First Rates)
Cape Finisterre - 4 ships
Trafalgar - 7 ships (3 First Rates)


In 1793 when the Revolutionary War commenced the Royal Navy had five first rate ships of the line with two in commission all of 100-guns;

Victory
Britannia

In ordinary
Queen Charlotte
Royal Sovereign
Royal George

First rate ships invariably carried 32 pounders on the lower deck, 24 pounders on the middle deck and 18 pounders on the upper deck, with carronades mainly carried on the quaterdeck and forecastle.

HMS Queen Charlotte, first rate ship of the line, pictured at the Spithead Review, c.1790 - William Anderson
National Maritime Museum

Alongside the first rates, the Royal Navy could also deploy sixteen second rates of which seven were in commission;

Boyne - 98 guns
Duke - 98 guns
Princess Royal - 98 gun
Queen - 98 guns
St George - 98 guns
Windsor Castle - 98 guns
Sandwich - 98 guns

In Ordinary
Atlas - 98 guns
Glory - 98 guns
London - 98 guns
Prince George - 98 guns
Impregnable - 98 guns
Prince of Wales - 98 guns
Prince - 98 guns
Blenheim - 90 guns
Namur - 90 guns


The three decker second rate was first conceived of in the 1670's as a cheaper alternative to the first rate.

The 98 gun ship was created merely by adding 8 guns to the quarterdeck of the 90 gun variety, usually armed with 32 pounders on the lower deck, 18 pounders on the middle deck and 12 pounders on the upper deck.

HMS Namur - Jack Spurling
HMS Namur of 90 guns had perhaps a more illustrious history than the Victory serving from 1756 through the Seven Years War, French Revolutionary War and Napoleonic War that saw her eventually razeed to a 74-gun third rate in 1805, seeing action at the Siege of  Louisbourg 1758, Battle of  Lagos 1759, Havana 1762, Cape St Vincent 1797 and as a 74 gun razee, Cape Ortegal 1805, retiring to harbour service in 1807.


The Warlord model comes with three different figureheads and with a little bit of careful work others from other kits in the range could no doubt be affixed to provide plenty of variation to a British battle line.


HMS Temeraire - Geoff Hunt
HMS Temeraire 98 guns served throughout the French Revolutionary and Napoleonic Wars from her launch in 1798, gaining the nickname 'The Fighting Temeraire', and sailing astern of HMS Victory at Trafalgar, her only fleet action.


In time the second rate fell into decline, with some Admirals preferring to use the two deck 80-gun ships even when they had these three deckers available to them, given that the second rates were short and high making them poor sailors.

Quotes highlight the problems these ships had, noting that the Prince of 1788 'sailed worse than other ships'  and the London of 1766 'does not stand under her canvass particularly well' or that the Duke of 1777 'was neither weatherly nor for-reaches with other men of war' , and it was 'the opinion of many competent judges that the classes between that of 100 guns and the 80 gun ships of two decks are are very unnecessarily continued in the Royal Navy'.


HMS Victory races HMS Temeraire towards the Franco-Spanish line at Trafalgar - Geoff Hunt


No matter what the comments from those who were in the know at the time or of those who had to sail them, the British three decker makes an impressive addition to the look of your fleet when out on the table and this model captures the look quite nicely.


Typically a second rate 98-gun ship of the line would be armed with 28 x 32-pdr long guns on the lower deck, 30 x 18-pdr on the middle deck, 30 x 12-pdr on the upper deck , 8 x 12-pdr on thequarter deck and 2 x 12-pdr guns on the forecastle.

Next up in All at Sea the focus shifts to the Spanish Navy or Armada Espanola with my first model in the collection, the Santisima Trinidad.

Thursday 23 April 2020

Breakout Normandy on Vassal - D+4


A couple of weeks ago, Steve M and I started our first game of Breakout Normandy (BKN) using the Vassal system as an alternative to our normal get together on a Tuesday night for board-games.

The evening of D-Day with a solid Allied landing and all to play for on D+1

In the first part of recording how our game was progressing I showed how we left things;
Breakout Normandy on Vassal - End of D-Day
following the Allied landings on D-Day with a fairly solid landing, with a particularly good one on Omaha, which can be a bit tricky if things don't go well.

Well since then we have had two more nights play getting through two days of battle on each meeting and the Allies have had a bit of a torrid time ever since getting ashore.

Our D+1 next meeting got off to an interesting start as Steve started the German impulse with an attempted bridge blowing in front of Omaha at Trevieres and lulled me into a false sense of security by rolling a one!

The overall position at the end of D+1

It wasn't all bad for the Allies in that Omaha was cleared and extended into Grandcamp, but two attacks by the Big Red One to clear the gun emplacements in Port en Bessin were repulsed leaving the guns available to interdict both Omaha and Gold beaches which would prove a bit of a problem in later stages of the follow up landings.

D+1 Close Up illustrating the Bayeux and Pont l'Abbe areas of concern.

Likewise the British 50th Division and the 8th Armoured Brigade managed to deal with the 1st Flak Regiment and take control of Bayeux, but leaving the 50th in a sticky situation with a brigade disrupted and the 8th Armoured spent for the next day and with German artillery closing on the area together with elements of Panzer Lehr.

In addition to the Bayeux situation, supply requirements left the 82nd Airborne in Pont l'Abbe on their own and with a regiment spent as German elements moved down from Cherbourg.

D+2 was to reveal the exposed situation of the areas highlighted at the end of D+1 as an unfortunate Allied die roll caused the weather to become overcast and thus restricting Allied air-cover seeing a rapid advance of Panzer Lehr and the Cherbourg garrison as they closed in on the respective parts of the Allied front

End of play on D+2 with a combination of Steve making the best play to counterattack during overcast conditions coupled with some atrocious Allied die rolls on my part that made a bad situation that bit worse - c'est la guerre!!
As the close up map below reveals the 50th Division, previously in Bayeux, back where they started, disrupted and less the 8th Armoured Brigade having taken a pasting from German guns in Trevieres before the Americans could deal with them and then succumbing to an attack by the 352nd Infantry with an appalling die roll that left them no option but to soak up the hits by withdrawing.

End of D+2 close up showing the yellow disrupt markers littering Gold beach as 50th Division are ejected from Bayeux, that annoying coastal gun at Port en Bessin still popping away at Allied landings and not a trace of the 82nd in Pont l'Abbe. Oh dear how sad, never mind and bravo Steve.

To add yet more woe to the Allies, the Big Red One bounced off the gun positions in Port en Bassin for a third time and the 82nd Airborne got chased out of Pont l'Abbe as the Cherbourg garrison sped down the road from Cherbourg delighting in the cloud cover and making full use of their numbers to bully their way into the airborne forward area.

The only plus from D+2 from an Allied perspective was a solid landing by the Americans of their followup units and principally their artillery assets that were pushed forward at Omaha and Utah, together with British Corps artillery to stiffen the divisional batteries and keep the Allied perimeter secure, however not exactly the position you are looking for as an Allied commander trying to push inland in the first week.

End of D+3 with Panzer Lehr and 12th SS Panzer closing on the Allied front and with the Cherbourg garrison mustered in force around the Utah front supporting 6th FJD. The US 2nd and 4th Divisions failed to clear Isigny and Carentan as I had hoped with the Allies rolling a 18 vs 6 in the attack on the latter only to have Steve throw in the 'Advantage' to re-roll the result, leaving things as shown. Even 2nd Armoured CCA got pinged on the way in to landing at Omaha from those pesky guns at Port en Bessin.

With the Germans in a strong position after two days of battle and with them holding the advantage and only three out of the nine victory points held by the Allies, D+3 would have to be a cautious battle with the Allies trying to grab some extra victory points whilst keeping their position firm as 50th Division at Gold continued to rebuild.

Close up of the front at the close of D+3 The Americans are pressing to link up Utah and Omaha and capture some victory point areas, with a growing threat developing in front of 6th Airborne on the Orne in Merville.

In addition to the strong German position D+3 was also overcast, so no Allied airstrikes or interdiction on enemy movement, making the situation more problematic.

In the end I decided to content myself with minimal activity on the British sector, moving the Canadian Armour into Gold whilst the 50th reorganised for another day and hoping to clear out the gun battery in with 6th Airborne, now up against three batteries of German artillery in Holgate.

The main thrust was on the American sector with a drive to link up the beaches and pick up two victory points to boot.

Sadly my attacks weren't as successful as they could have been, but at least the areas ended up contested and the weather was set to change for D+4

End of play on D+4 with the situation looking a bit sticky from an Allied point of view with just two days left of the first week, an overcast day coming up only three VP in the bag and a strong cordon of Germans not looking to fall back any time soon!

With the overcast day of D+3 out of the way the Allies were looking to recover some lost ground, namely the two days to recover 50th Division now with added support from the landing of 51st Highland Division and 7th Armoured waiting to follow up.

Additionally 2nd and 4th Infantry were threatening now to join up the American beaches and to link up with Gold finally with the eradication of the Port en Bessin coastal gun position which should have been cleared two days previously.

Close up of the beach head D+4
In the end the D+4 was probably as good as could be expected for the Allies in the position they are in with the Merville area finally cleared and the Commandos from Sword pushed in to support the hard pressed 6th Airborne.

The 51st Highland Division landed but had their armour and one brigade go spent from the guns in Port en Bessin interdicting before being finally cleared by US 1st Infantry Division, linking up the British and American beaches

US troops cleared Isigny, but the 4th ID have a tough fight still around Carentan.

All in all with the next day overcast and only two days left it will be a big ask to get the required six victory points with the areas needed being a likely combination of Caen (4VP), Carentan (2VP), Bayeux (2VP) and Catz (1VP) and possibly including Foret de Cerisy (1VP) and St Lo (2VP).

The Germans are in a commanding position as Steve and I enter the final two days of our BKN game next week

D+5 will likely show the final situation and Steve has got the Germans into a very commanding position with the Allies having to make up a lot of ground.


Next up - All at Sea naval builds focuses on HMS Royal Sovereign and a generic British 1st/2nd rate three-decker and I have posts for Tonnage War and a book review to come.