Sunday 30 March 2014

Oporto Table - Update


This week has been taken up with a lot of pre-reading prior to starting a weeks training course for a new job. Consequently time to devote to the table has been a lot more limited but in addition to getting the Portuguese infantry finished I have managed to get the 1st French Hussars on to the paint desk and turn my attention to preparing the buildings that will represent the outskirts of Oporto, see the map for details of the extent of the town I am looking to model.


I am trying to capture the colour and roofscape of the town as pictured above. I think these two aspects are key to fooling the eye into seeing the town as a whole with relatively few buildings mixed in with open spaces and walled enclosures.


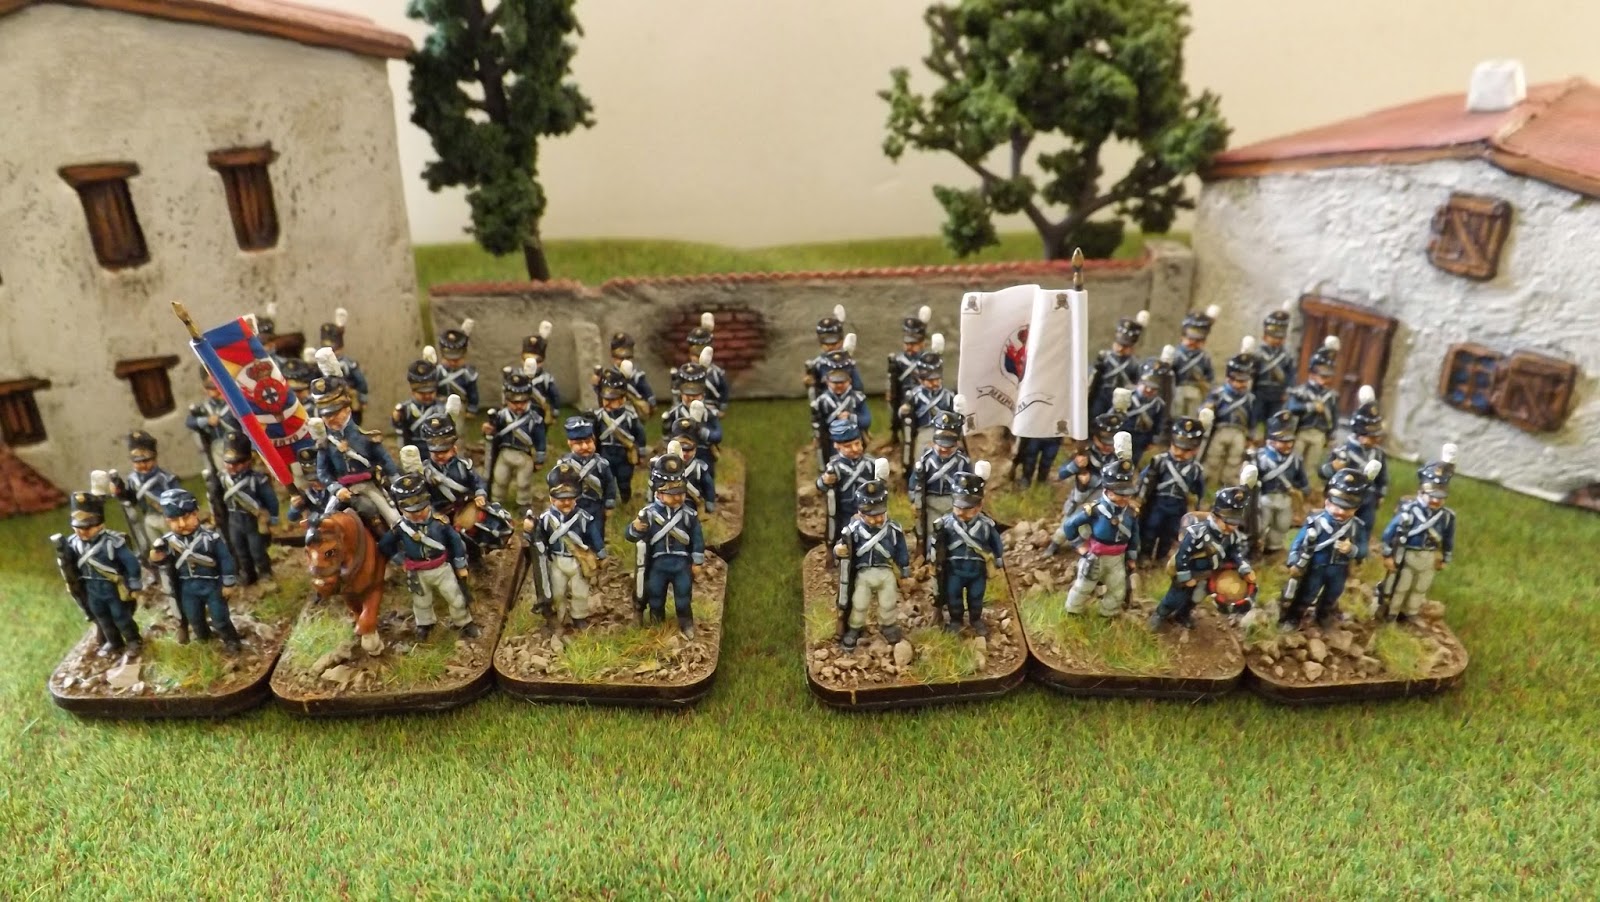
The buildings are mainly from the JR Miniatures range with a few Hovels mixed in for variability. I also have my rural buildings to bolster the collection when set up on the table. I have managed to get all the block painting and dry brushing done. I just need to do the detail work, but that will have to wait until after the training course.


I have also started to translate a bit more of the terrain from the map, to which you can see the principle road network, with the French escape route being the right fork leading to the back of the table. I decided to lay the bulk of the road over the seam of the mat and boards to help minimise the impact of said gap. In addition I have used the benefit of the mat by adding undulating ground getting steeper to the rear of the table


I intend to make a mat to imply the edge of the town together with some more wooded mats. In addition I will add a few walled enclosures and crop areas to add to the overall look. You will also see I have alluded to the small brooks than ran down to the river with the bits of broken ground markers that lead through the open woodland.

All this clutter helps to break up the ground and cause disorder and fatigue to troops marching through it, something that is easily captured in C&GII.


Anyway that's all for now, more anon.

Saturday 29 March 2014

16th Portuguese (Lisbon) Infantry Regiment


The completion of the 2nd battalion, 16th Portuguese Infantry sees all four battalions of Portuguese infantry present at Oporto done.

The information about the regiment can be seen on my previous post about the 1st battalion.

The 2nd battalion on the right is seen pictured with the white Regimental Colour.


All figures are from the AB range with the colours from GMB Flags.

There are now only two units remaining before I can bring the Oporto scenario to the table, namely the 14th Light Dragoons and the 1st French Hussars. In addition I am planning to have a purpose built Seminary building and have some houses for the town to finish off.


I am away next week training for a new job and then I am away in Rome on a tour of the classical sights so I will update on progress on the project on my return. Don't be surprised if the odd picture of the Colosseum appears in between time.

Monday 24 March 2014

Oporto Table Build - Day Eight and Done


That's it, no more flock, plaster, bark, ballast or floor tiles. The table is now ready for all the stuff that sits on it and distracts the eye away from all the little imperfections that might otherwise take the attention away from the actors that will grace this stage, namely the metal warriors of France, Britain and Portugal.


As you can see, the light olive flock is not an exact match but, I think, good enough to work once the table is set up for battle. This little exercise has got me thinking about another smaller battle fought over a river gorge, namely the River Coa and the Light Division's scrape with Marshal Ney. So when we get to 1811 I might have to get the cork bark out again!


Thank you to everyone who has joined me on this project and offered their encouragement. I really didn't know where this table design would end up in terms of the final look and the fact that all the comments I've had have been so positive really gives me a spur to press on with other ideas to depict key battles of the Peninsular War.


One thing that was highlighted was the little lines between the river tiles, that detracted slightly from the overall look. The answer was a small bead of PVA run along each seam and allowed to dry opaque. It really does seem to take the edge of the seams quite literally.


I was really keen to get this done within the week as I start training for a new job next week and then I'm off on a weeks classical tour of Rome which is an 18th birthday present for my younger son Will. We're all keen fans of ancient Rome in our family and I have another project lined up for "Hail Caesar", so I'll post a few pictures of the sights during that week. Then it's into the new job so time will be limited but I am aiming to play Oporto in May, allowing for the buildings to be painted and the two regiments of cavalry to get done.

The good news is that the Portuguese 2/16th Infantry are about halfway done so should be finished this week.


Once again thanks to everyone who got in touch and please drop me a message if there is something you want to know about this model that I didn't cover in the posts.

Sunday 23 March 2014

Oporto Table Build Day Seven


The temptation now is to rush the process to a close, but I am keen to take a bit of time with the build to consider the options. Just as when painting a figure, you get lots of ideas coming to mind about how to enhance various aspects and its worth it to just sleep on some ideas to get the right answer.

The colour selections of the flocks to go on the surfaces is going to be a learning process and whilst taking the ballast out to the river banks I decided I might as well paste up a bit of spare styrene to create a test bed for my colour options.


The test bed for the flocks
Ok so with a test bed set up for the flock and the river bank ballast in place, I went out for a quick six mile bike ride, a daily exercise designed to keep a man of my increasing age in some sort of shape. My bike riding is also where I tend to get my best thinking time as well.

Once I got back it was straight into finishing off  the river banks and testing the flock mix I picked up yesterday and I finally settled on a mix that was as good a match to the terrain mat that I could come up with.

The secret ingredient that came to me whilst out on the bike, chinchilla dust, a very fine sand that when added to the flock gives that slightly arid look to the pasture.


I only had enough flock to finish off one of the boards, but I'm quite pleased with the final effect. You will get a better idea when you see them all up on the table. In addition I intend to liberally apply various terrain pieces which will distract the eye and give an overall look, but bear naked I think this first board looks ok.

Let me know what you think.


Here is the other main board, just waiting for the flock treatment and with its river banks done.


As soon as the final work is done I'll post some shots of the boards up on the table so you can get a better impression. More anon.

Saturday 22 March 2014

Oporto Table Build - Days Five & Six

British troops landing in the town under fire, the battle for the seminary is in full swing atop the hill

So Day five of this project has seen the boards given a wash of watered down PVA to secure the ballast and then the black base coat was applied.


I decided to give the boards a full 24 hours to dry fully before commencing work on the primary top coats.


My intention is to do the rock work first followed by the ground colour, then fix the river sections and apply the flock as the last stage. The flock is the tricky bit as I want to try and achieve as close a match to my mat as possible but show a transition to the more broken ground as it nears the gorge.

Day 6:
Well from the response I've had to this post I thought I'd better get on with it and give everyone an update. So whilst spending today searching out more flocks to try and tie in with the mat, I've pressed on with the basic paint job and fixed the river.


I'm quite pleased with the floor tile effect and once the final bit of terrain work is done to the banks I think they will look quite good.


Just to give you an idea of the effect I am after, here are the boards back on the table with the boats on to illustrate what it should look like in time.


More updates later.

10th Portuguese (Lisbon) Infantry Regiment


With the completion of the second battalion, on the right, the 10th Portuguese Line Infantry Regiment is now complete. As you can see the second battalion carry the white Regimental Colour.

All figures are AB and the Colours are from GMB Flags.

For more information on the 10th Regiment, see my previous post on the first battalion.

These two battalions, together with the two battalions of the 16th Regiment will complete the Portuguese contingent for my upcoming Oporto scenario.


Next up, Oporto Table Build update.

Early Imperial Roman Cavalry - Based, Hail Caesar


As promised, a few shots of the Roman cavalry based up. These few figures were a test group for me to work out what could work when painting these figures and to get use to doing something new en mass, such as shield decals.


The next time I do 28mm Ancients I will be working with complete units. More to come.


Thursday 20 March 2014

Early Imperial Roman Auxiliary Cavalry - Hail Caesar


As promised, I said I'd put some pictures up of some Roman cavalry I started doing last weekend, amongst other things.

These will be part of a unit of twelve figures, but I just wanted to play with the colours and couldn't resist starting with a few figures. I really like these sculpts, with lots of character, especially the chap thrusting the spear overhand.


I'll get a couple of them based up and show you the final result. Needles to say, I am having to get my Russell Crowe impersonation ready for the first game.