Showing posts with label wargames Table. Show all posts

Saturday, 18 May 2013

New Table - The First Game

Tomorrow is a day of firsts. First play test of the Ventosa game using the Carnage & Glory scenario, and the first time a game will be played on the new table that Tom and I put together over Easter, which I posted about back in March.

I really enjoy the process of game construction and pulling together the components of a scenario. One of the key components is interpreting the terrain and scaling it to the level of play the game is set up to model.

With this game I was fortunate in having some great maps of the battlefield as a whole. This enabled a scale down to the area we will be playing over, namely the little hamlet of Ventosa at the end of the Eastern Ridge of Vimeiro

The whole position occupied by Wellesley's troops at Vimeiro 

The Ventosa position


My interpretation of the original map

Below are pictures of the table set up to play the scenario. The look is a little squarer than the map because my table is a nine foot by five foot layout and the map was planned for a six by four foot game. So the compromise below has a six by five foot table.

The table top interpretation of the map, with Ventosa top right
This is the first time I have laid out tiles underneath the mat to give a contour variation to the table. The ground level shots, hopefully show the sight line variations that were present on top of the Eastern Ridge that allowed the British to use their reverse slope tactics.

In the briefing tomorrow pointing out where the "military crest" is will be an important point, and I have positioned my terrain to make it easier for the players to identify where best to position their troops.

The view from the ground occupied by Colonel Trant and his Portuguese contingent

The ridge was characterised by having areas of disruptive terrain such as dried up stream courses and small groves of olive and cork trees.

The road from Vimiero to Ventosa

The route as Ferguson's brigades would view it, with the ridge at Ventosa just to the left of the village. Again note how the road past Ventosa drops out of sight

General Solignac's view of the road into Ventosa as it climbs the ridge to the right

The road into Ventosa that General Brennier was attempting to follow, note the sight is blocked beyond the Ventosa hill to the right.

With the terrain laid out I have put down "blind markers" to indicate the approximate set up positions for the troops when we play tomorrow.

The initial positions indicated with blinds

The nice thing about playing on a reduced area is I have room at the top of the table to put the troops out and set up the laptop and other play aids (note the range sticks).

The French troops under Brennier are flank marching and will appear on this table edge "eventually"!

The small hamlet of Ventosa Farm

The forces for tomorrows game

The French eager to follow up their success at the Legionary show

The 32nd "Cornwall" Foot representing the South West in this game
So with everything set up I can do some other stuff with the family on my Saturday, and look forward to welcoming Steve and Jack to game with Tom and myself tomorrow. A full report on the game will follow together with an updated scenario briefing with any lessons learned from our game.

Sunday, 31 March 2013

New Wargames Table Finished

So the last post had the table construction finished in two days of sawing, nailing, screwing and sanding. Next jobs were staining the woodwork and cutting the insulation boards to go under the cloth.

The side panel released ready for staining


Dust sheets down, table masked ready for the wood stain
The next two days were a repeated application of several layers of wood stain to bring the bleached bone look of the new timber down to the warmer tones of Rosewood.

Thomas hard at work
And then it was done, with the insulation boards cut and in place, with the terrain mat in place and the wood looking lovely. Just need a few friends round with some figures on the table to let the good times flow.


A 9' x 5' table gives you acres of space especially when, like me, you game in 15/18mm.


Just to give an impression of how things will look I grabbed a few pieces of terrain and some of my WWII stuff and quickly put a show on. Somewhere in Poland late 1944 perhaps.


So that's the table project done, and a very satisfying way to spend an Easter bank holiday. Now back to the figure painting, which has continued whilst this project was happening. I have just finished off my Blue Moon British Foot Artillery so will post some comparison shots with my AB gunners in the next few days. Stay tuned.

Thursday, 28 March 2013

New Wargames Table

Since deciding to move away from hex based terrain to using mats which are so easy to set up and take down, I have been thinking about altering my table to better suit this change. I am the owner of a perfectly good table tennis table, that performs a much better job as a 9' x 5' wargames table.

Imitation they say is the sincerest form of flattery, and I have long been an admirer of  Lord Ashram's set up and have studied his pictures of his table design that he built from scratch. I was particularly taken with his idea of using a fixed outer frame with a removable inner frame built around a base of insulation foam. The idea allows one to place hills on the foam, place the terrain mat over the top, and lock the mat in place taught over the hills by slotting the inner frame back into place.

Other terrain such as walls, trees and hedges can, with the clever use of pins attached to their base, be
used to pin other terrain such as road and fields into place through the mat into the foam below. For a clearer explanation check out the excellent reports on Lord Ashram's blog.


So with the decision to go with this idea, planning permission had to be obtained from Mrs JJ otherwise known as "She who must be obeyed", and a carpentry expert to head up the project as I know my limits. Fortunately my eldest son Thomas is very happy with a saw and drill in his hand and the opportunity to have some father/son man time on a joint project helped sell the idea to Mrs JJ.


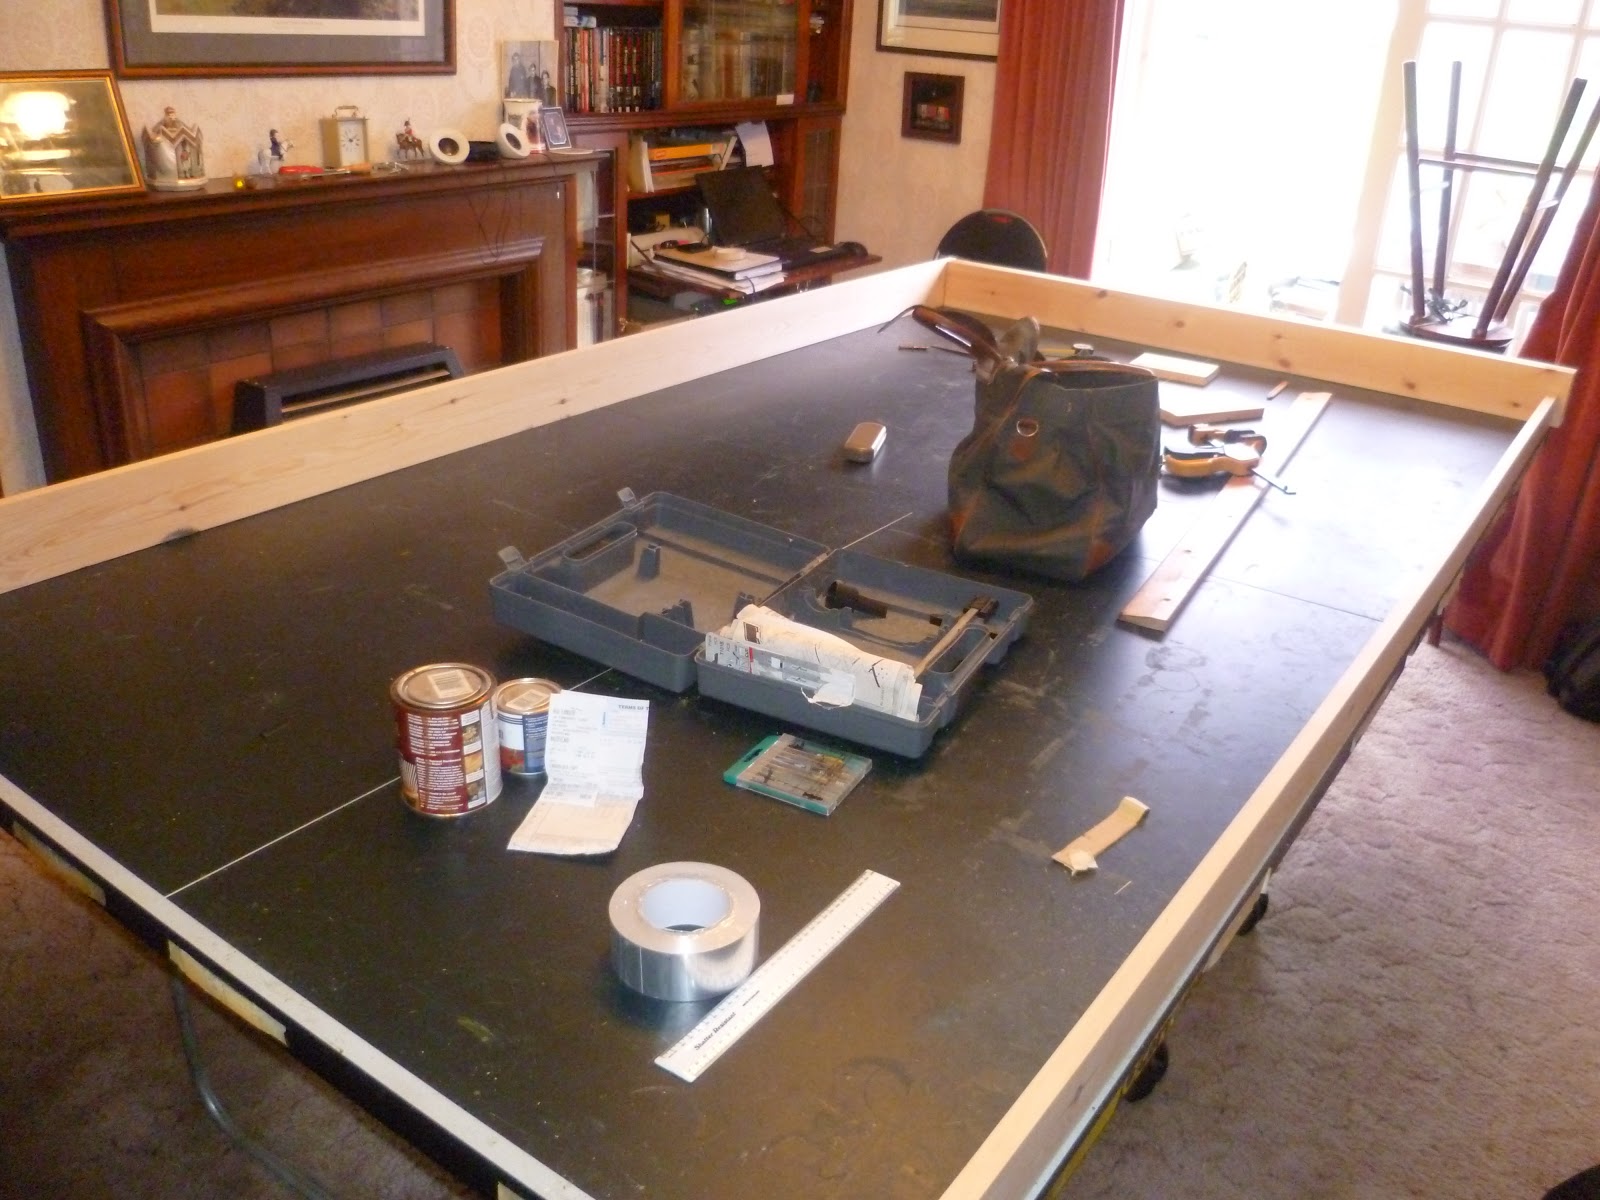
Work started yesterday, with the removal of the old frame and the fixing of the outer and inner frames. In addition several sheets of insulation board were purchased, one of which can be seen in the photos, used to gauge the depth of the frame.

The outer and inner frames in place

Those shelf batons will need fixing in place
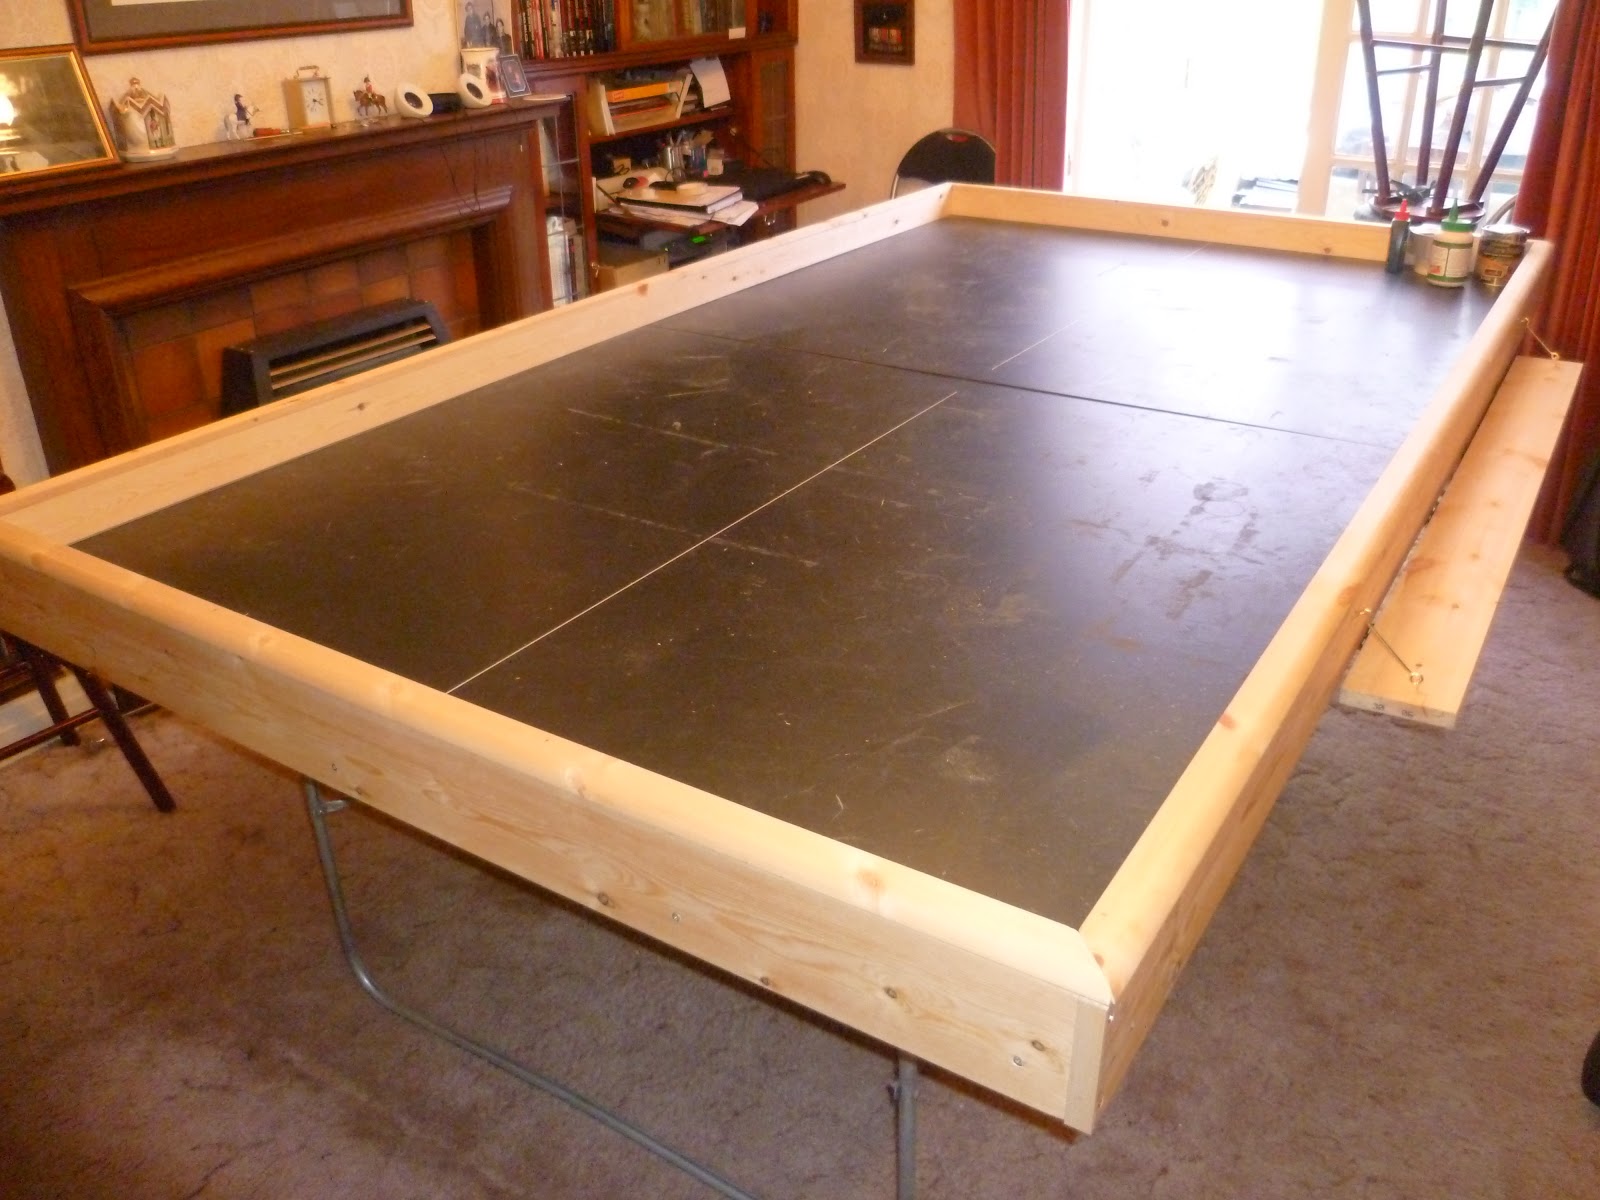
With day one and the two frames fixed it was on to the next stage. The inner frame carries a top beading that helps lock it together and gives a neat finish to the table. We also had some embarrassingly large pieces of lumber left over after sawing up the frame, so what to do with them?

The beading in place on the inner frame

Answer, down to B&Q for a set of brass hooks and hinges and hey presto, shelves for dice, range sticks, rules and beer glasses.

Really pleased with the fold away shelves, and the spirit level says they're level!

And while we were at it we might as well put one on the other side

Starting to look like the finished article

So here we are at the end of day two with the frame and shelves completed together with a sturdier set of under table storage shelves.


Day three will be painting on the Teak wood stain varnish to match the table with the figure and book cases more appropriate for a 1930's property.


My son, Thomas who, once he finishes at university, might well have a future selling designer wargames tables.


More updates later over Easter when we get the foam boards on and try out the terrain mat.

The table just crying out for a game