Friday 28 February 2020

All at Sea - On the Stocks in JJ's Dockyard, New French Builds


Following up from my last post tracking progression with my French fleet build, the Marine Nationale have had a boost to their numbers with two third rates and three fifth rates added to the fleet and now fitted out, with one already having had its debut game as featured in my post covering another of our War by Sail days gaming covering the Battle of Cape Ortegal in 1805

https://jjwargames.blogspot.com/2020/02/all-at-sea-on-stocks-in-jjs-dockyard.html

https://jjwargames.blogspot.com/2020/02/all-at-sea-cape-ortegal-4th-november.html

If you are interested in following the progression of this project you may be interested to see that I have created an 'All at Sea' tab at the top of the blog page where you will be able to scroll down through all the posts too date.

So the first two additions are two of the three named third rates contained in the Black Seas French Fleet box which I am currently working through, namely Bucentaure and L'Aigle.

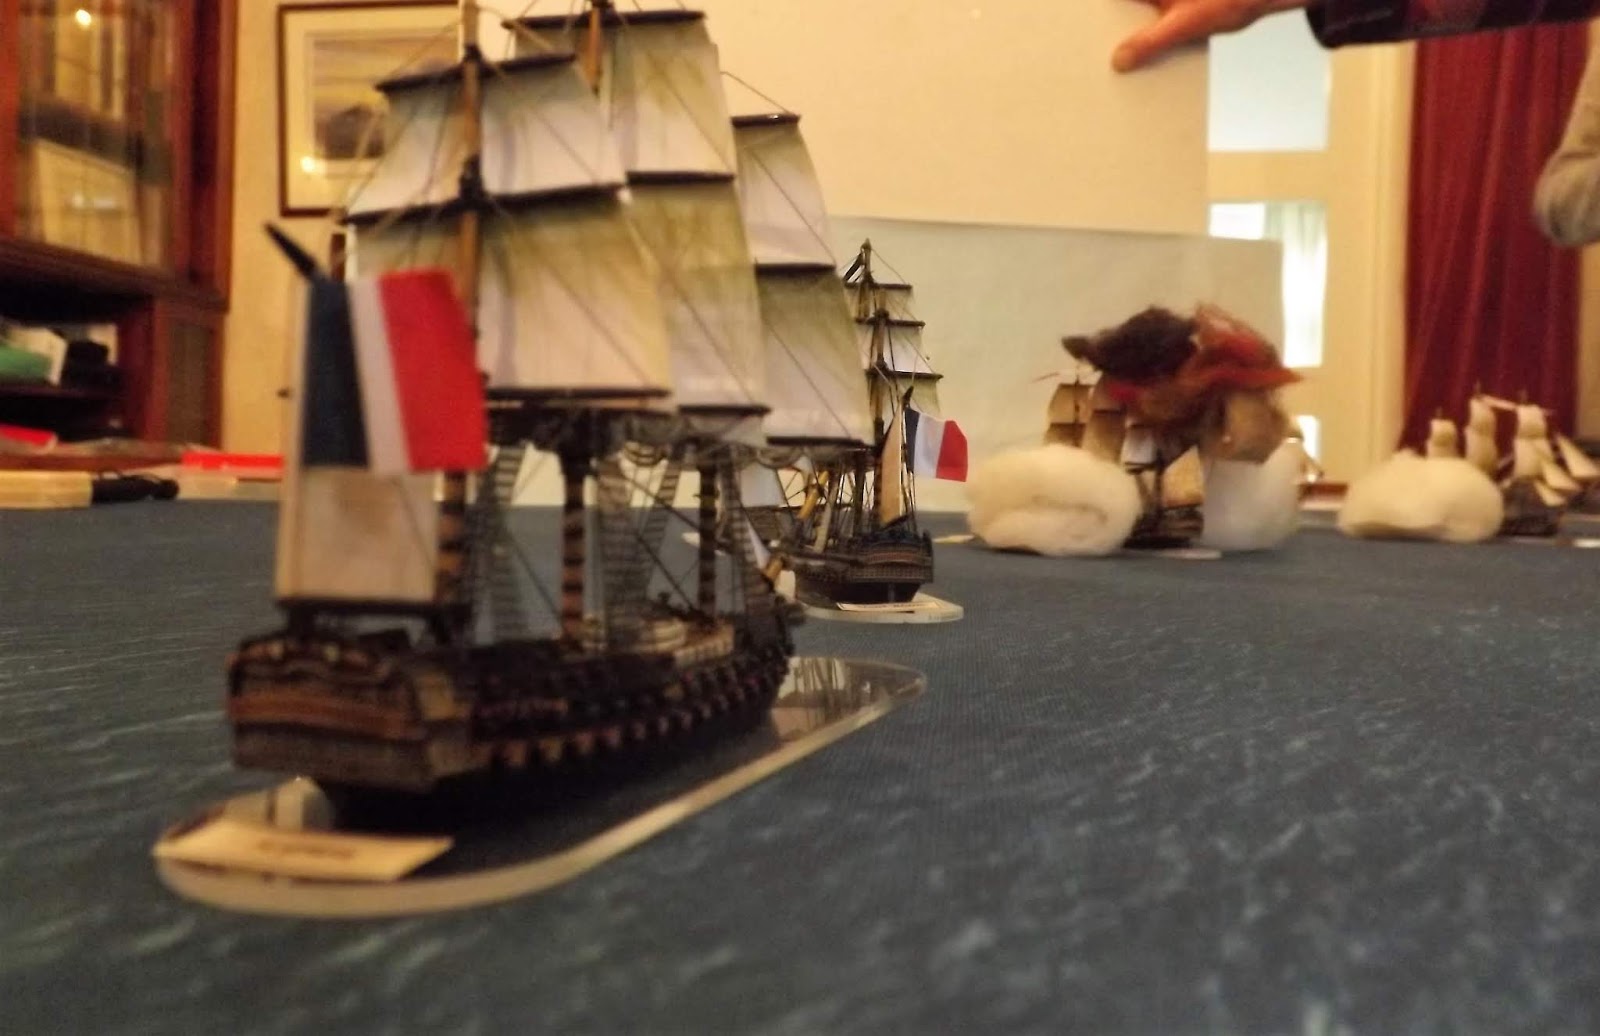
Bucentaure (left) and L'Aigle (right), the two recent additions to my French collection of third rates

Jacques Noel Sane, 1740 - 1831

The Bucentaure gave her name to the class of 80 gun ships designed by the French Naval engineer and shipwright Jacques Noel Sane and she was the first to launch out of a class of twenty-one, rolling down the stocks in Toulon on the 13th July 1803.


Named after the Venetian ship destroyed by Napoleon after the fall of the Venetian Republic in 1797, she became the flagship to two French Vice Admirals.

Vice Admiral Latouche Treville who commanded the fleet at Toulon after returning from the Franco-Spanish expedition to Saint Domingue 1801-1803 after having taken ill on the expedition, relapsed and died aboard the Bucentaure 18th August 1804.

The Robuste, the third ship of the class, launched in 1806 and sister to the Bucentaure.

Vice Admiral Villeneuve, commanding the Franco-Spanish fleet at Trafalgar

Perhaps more famously, her next senior commander was Treville's replacement to command the Toulon fleet, Vice Admiral Pierre Charles Silvestre de Villeneuve who hoisted his flag aboard her on the 6th November 1804 aboard which he led the Combined Fleet at the Battle of Trafalgar.

My first inclination was to keep Bucentaure looking as a generic 3rd Rate, but on consideration I will apend her later with a Vice Admiral's jack to her foremast.

The captain of the Bucentaure that day was Captain Jean Jacques Magendie, who saw his ship stern raked by HMS Victory as she passed between the Bucentaure and Redoutable, with his crew suffering 197 men killed and 85 wounded, including himself, out of a compliment of 888 men.

The battered hull of the Bucentaure at the Battle of Trafalgar as illustrated by Auguste Etienne Francois Mayer

Admiral Villeneuve was lucky to survive the pounding his flagship took that day and after three hours of fighting the ship was surrendered to Royal Marines Captain James Atcherly from HMS Conqueror.


However her fight was not over, as two days later her crew rose up and retook the ship but were unable to prevent her wrecking in the gale that followed the battle on the 25th October 1805.

Bucentaure would have typically been armed with 30 x 36-pdrs, 32 x 24-pdrs, 18 x 12-pdrs and 6 x 36-pdr Obusier (Carronades), which in War by Sail can really spoil your day.


The French 74 gun 3rd rate L'Aigle (Eagle) was one of eighteen ships of a total class of one-hundred and twenty of the Temeraire Class built for the French navy, also designed by the prolific architect Jaques Sane and was launched in 1800 at Rochefort.


Hercule was a sister ship of the L'Aigle, seen here in Royal Navy ownership as HMS Hercules

L'Aigle joined Villeneuve's fleet during his voyage to the West Indies and was with the Combned Fleet at Trafalgar.


Under the command of Captain Pierre-Paulin Gourrege, an experienced officer who was promoted to captain in 1796 after previous service in the Merchant Marine he was awarded Knight of the Legion of Honour, following service in the West Indies, where he took command of L'Aigle in November 1802.


Positioned in the rear of the Combined Fleet, the ships in her part of the line were contacted by Admiral Collingwood's leeward column and surrendered to one of his ships, HMS Defiance, which sent over a boarding party, but not before 70 of her crew, including Captain Gourrege had been killed and another 100 wounded.

Like her sister, Bucentaure, her crew would rise up and overpower her British prize crew, and like the Bucentaure, she to would be wrecked in the storm that followed the battle.

Typically L'Aigle would have carried 28 x 36-pdrs, 30 x 18-pdrs, 16 x 8-pdrs and 4 x 36-pdr Obusier.


As well as the two third rates, I now have an additional three French named frigates, Comete, Themis and L'Hermione.


Frigate Comete was one of nine frigates of the Romaine class designed in 1794 by Perre Alexandre Laurent Forfait originally conceived as 24 pounder 'bomb' frigates armed with a twelve inch mortar placed on a swivel mount in front of the mizzen mast, together with twenty 24-pounder guns and a shot furnace, presumably to fire red hot shot!

Eventually wiser heads prevailed and the Romaine class were fitted out as standard 24-pounder frigates with the Comete being launched in Le Havre in September 1794.

Immortalité and Fisgard go broadside to broadside

We ran a sister ship of Comete in our first set of scenarios using War by Sail with HMS Fisgard taking on Immortalite and their action in October 1798, see the link below.

https://jjwargames.blogspot.com/2020/01/all-at-sea-first-games-new-rules.html


Missing the Battle of Trafalgar, Comete was very much involved in the Atlantic Campaign that followed, conducted by the French navy in 1806 and culminating in the Battle of San Domingo during which Vice Admiral Sir John Duckworth captured or destroyed the five French ships of the line under French Contre-Amiral Corentin Urbain Leissegues.

After the battle only the frigates Comete and Felicite and the corvette Diligente escaped to return to France.

Romaine Class Frigate, Incorruptible, sister ship to Comete

The Comete finished her service in Bayonne from June 1808, used as a mast machine until broken up in 1810.

Typically Comete was armed with 24 x 24-pdrs and 14 x 8-pdr long guns and 4 x 36-pdr Obusier.

French 38-gun frigate Comete

French frigate Themis was one of five forty gun ships of the Coquille class designed by Raymond-Antoine Haran and launched in 1801 at Rochefort.


She was very much involved in the 1805 campaign, present at Cape Finisterre and Trafalgar under Captain Nicholas Joseph Pierre Jugan.

French frigate Themis (left) towing the Santa Ana after the Battle of Trafalgar

Themis is credited with towing the Spanish 112-gun Principe de Asturias, flagship of Admiral Gavina back to Cadiz following the Battle of Trafalgar.

In 1808 she was operating with the French 44 gun frigate Penelope, commerce raiding on a cruise from Bordeaux to Toulon, taking twelve British prizes on route, including the privateer Sirene.

From Toulon she then sailed to Corfu, ferrying supplies to the island and was later trapped there by the British when they finally occupied the island.

Typically Themis was armed with 28 x 18-pdrs and 12 x 8 pdr long guns.

French 40-gun frigate Themis

The French frigate Hermione has a famous predecessor that contributed to French efforts to support the American war effort during the American War of Independence, when she ferried General Lafayette and was the subject of a recent French built reconstruction which I think Warlord have designed their model's stern gallery around. 

I however have modelled the next Hermione launched in 1804 which replaced her illustrious predecessor after she ran aground and was wrecked in 1793.


Launched in Toulon in 1804, Hermione was one of eight forty gun frigates designed by, yes you've guessed it, Jacques Sane.

French frigate Hermione
By Rama, CC BY-SA 2.0 fr, https://commons.wikimedia.org/w/index.php?curid=18639647

Under her captain, Jean-Michel Mahe she participated in the capture of the 18-gun Brig/Sloop, HMS Cyane in May 1805 and was present at the Battle of Cape Finisterre when Admiral Villeneuve's fleet clashed inconclusively with Admiral Calder's fleet on the 23rd July 1805 and later at the Battle of Trafalgar in October that year.

In February 1806 she joined the other French frigates that survived Trafalgar to break out from Cadiz and return to Rochefort as part of Captain Delamarre de Lamellerie's squadron arriving there in the July after two of her squadron were taken by British blockaders.

In 1807 she took part in an operation to ferry troops to Martinique, finally being wrecked in August 1808 in the approaches to Brest harbour.

French 40-gun frigate L'Hermione

Typically L'Hermione would be armed with 28 x 18-pdrs and 12 x 8 pdr long guns.

Next up the French 74, Redoutable and my first French first rate, not to mention my HMS Victory.

Wednesday 26 February 2020

Target for Tonight, Op Six - Mannheim Ludwigshaven


The Target for Tonight, Berlin Campaign moves well into the second half of our series of eight games with game six, the operation to Mannheim-Ludwigshaven on the 23rd-24th September 1943.

The campaign is delicately balanced with the British victory point tally pegged back over the last two games with Bomber Command starting the series with three very successful ops leaving them looking at a Major Victory, slipping to a Victory at the halfway and now resting in that range with an average of 14 victory points but only two points away from slipping further back into a draw, defined as 'Mounting losses cancel out the effects of bombing'.

Op 1 - Berlin, 23rd-24th August 1943
Op 2 - Nuremberg, 27th-28th August 1943
Op 3 - Berlin, 31st August-1st September 1943
Op 4 - Mannheim, 5th-6th September 1943
Op 5 - Hannover, 22nd-23rd September 1943

The 'pegging back' has primarily been due to a gradual improvement in Nachtjagd tactical capability, recovering from the dismantling of their tactical set up with Bomber Command's deployment of Window in the June raids on Hamburg. This recovery most amply illustrated in Op 4 to Mannheim when severe losses especially among veteran and elite crews badly damaged the game result and the campaign situation as a whole, very much the 'Black Night' for Bomber Command in our series of games.

However with an improvement in the German defences has come the inevitable effects of poor Pathfinder marking and the difficulty in bombing deep into Germany during moonless nights in very bad or bad weather conditions and the effects on that marking if it goes astray.

Thus with three games to go the campaign is very nicely balanced and very interesting to see how things will look as we get to the stage where Bomber Harris would take stock and decide to commit his force to an all out attack on the German capital in November; with half the raids from then until March 1944 focused on the city until Bomber Command was ordered to support the build up to D-Day with Berlin left battered but certainly not destroyed.

The list of historic ops that cover the period of the Battle of Berlin, where we are selecting the first eight largest raids of that period.

The Bomber Command War Diary, describes the raid on Mannheim-Ludwigshaven on 23/24 September 1943 thus;

'The raid was intended to destroy the northern part of Mannheim, which had not been so severely hit in the successful raid earlier in the month. The Pathfinder plan worked well and concentrated bombing fell on the intended area, although later stages of the raid crept back across the northern edge of Ludwigshaven and out into open country ...'

As with our rendition of the earlier raid on Mannheim our bomber commanders achieved a similar bombing result as described above, all be it with damaging losses. Thus it would be interesting to see if a similar bombing pattern could be achieved more cost effectively and would the Pathfinder marking replicate the historical result?

The target map showing the weather over the target and home airfields and Mannheim, a deep target beyond the Rhur limiting fuel and bomb load

The weather briefing seen above together with the group rosters and individual plane load outs were issued to the players who set about deciding on the fuel/bomb lift plan for the raid that settled on a minimum fuel/maximum bomb lift arrangement seeing the Lancasters of 1 and 5 groups bombed up with a maximum lift of cookies, whilst the other groups would back up with the usual mixed load of HE/Incendiary.

The roster drawn up for the Mainforce Groups with a full turn out by 4 Group Halifaxes.

The route to the target showed a planned approach straight in and straight out but coming into the enemy airspace over Wilhelmshaven to suggest a possible approach on Berlin before turning south to run straight in to the target before running back to the coast south of Amsterdam and home.

Route plan for the Op, showing RAF and Luftwaffe Nightfighters operating in the various legs of the route. The number indicates the quality of the fighter, 2 to 5 being the number added to a D10 requiring 11 or more to cause a hit.

The forecast winds over the target were from the northwest and the broken cloud would permit the use of Newhaven target markers with less propensity to drift.

Our Group Commanders decided to mark the docks as the aiming point looking to keep their bombing well up to the marker to keep the concentration close to the centre of the city.

Target map with Newhaven target markers being used and yet to be planned, allowing for the northwest wind forecast for the raid

All the groups had a mix of experienced, novice and veteran crews with 3 Group Stirlings having one of the stronger crew line ups. However there was a high proportion of jumpy bomb aimers among all the groups which could only make things difficult when looking to bomb close up to the markers.

Aircraft Ops Sheet filled out for 3-Group Stirlings ready for the raid on Mannheim

Thus with all the raid preparation done, and the aircraft bombed up, the various squadrons lined up at their respective airfields and started to roll down the runway into the darkening skies over northern England.

Aircraft assemble after takeoff with two aircraft forced to abort with undercarriage failure

It was during the take-off and assembly that Op Six suffered its first casualties, although in this case all the crews involved survived the drama which saw 1 Group Lancaster, C-Charlie, with its veteran crew on its 21st op and later that evening 3 Group Stirling, F-Freddie, another veteran crew on its 21st op both abort due to undercarriage failure to retract, with both aircraft landing safely after dumping their loads.


From the assembly to the enemy coast there were no further alarms as the stream continued on gaining altitude, testing guns and preparing for the adrenaline rush of the announcement 'enemy coast ahead' as all eyes strained in the darkness for any potential threat.

Unfortunately the mark one eyeball served no help for 4 Group Halifax K-King, another veteran crew on its 25th op and looking forward to a well earned break from operations and with a pilot showing signs of that fatigue with a developing pattern of early turn backs over the enemy coast.

This time there would be no early turn back as a III/NJG3 Me110 experten equipped with Schrage Musik approached stealthily from below and delivered a raking fire from that quarter that took out the port inner engine starting an immediate fire, but then raked back to the closed bomb bay causing a massive explosion in the night sky over the German coast.

The crew had no chance to react and probably didn't know what had hit them, as the stream, disconcerted by the flash, reported enemy starshells being used as they pressed on.


The next target for the NJG3 experten was 1 Group Lancaster B-Beer another veteran crew on its 18th op who managed to spot the German fighter on its approach and start an immediate corkscrew manoeuvre suffering hits to the port wing fuel tank and tail plane during its manoeuvre and managing to keep flying and make good its escape, later suffering flak damage and limping home after bombing with four damage die, only to succumb to all the damage on the return leg over the enemy coast, with only the bomb-aimer and mid-upper gunner escaping to be captured.

This same Me110 pilot would go on to intercept 3 Group Stirling I-Ink who would manage to escape without damage and complete their 29th op.

Stirling I-Ink corkscrewing desperately to avoid the attentions of the NJG3 experten Me110 over the German coast

The next two casualties occurred close to Kassel as 5 Group Lancaster P-Popsie's veteran crew on their 23rd op spotted the I/NJG6 Me110 closing in on it and went into an immediate corkscrew, but a short burst from the German fighter saw the starboard outer engine burst into flames and the plane went into an uncontrollable dive, with just the bomb-aimer and rear gunner able to exit the aircraft before it hit the ground.

Not J-Jug, but I-Ink the one that got away!

The same Me110 pilot would go on to claim a second victim as the stream turned near Kassel for the run into the target when 4 Group Halifax L-Leather, with a novice crew, only on their fourth op whose aircraft was badly damaged whilst corkscrewing, hitting another bomber in the stream, losing the starboard inner engine and causing a fire that a very inexperienced pilot was unable to deal with, before losing control and crashing south of the city with no survivors.

3 Group Stirling I-Ink rears up us the bombs are released over Manheim

Thus with three aircraft shot down and two aborted on take-off, the stream turned in through the flak zone without any further loss and prepared to make the approach over the target.

3 Group Stirling H-Harry makes a good central approach as it begins its bomb run over Mannheim. The number of jumpy bomb-aimers was starting to make itself felt as indicated by three earlier drops close to the lower board edge.

Right from the get-go, the bombing run got off to a poor start with jumpy and even steadier bomb aimers dropping early with Jack, Queens and Kings seeming to be making up the complete deck of cards.

All aircraft completed their runs with no go-arounds and just one aircraft straffed by a lone FW190 Wild Boar fighter that caused a few holes in the fuselage, but otherwise no damage.

6 Group Halifax T-Tommy with its crew on their 30th op looking forward to a well earned leave begins its run up over Mannheim. The Group had a good night, with all aircraft bombing and with no losses.


As the bomber stream set course for home the final flash photo of the target showed a reasonable cluster of bombing around the blue target marker, but with nearly half the bomb load dropped short leaving a lot resting on the accuracy of the Pathfinders in the poor conditions coupled with any drift from the prevailing wind.

The run home went surprisingly well, with the Nachtjagd drawn away by a spoof raid over Schweinfurt that explained the lack of freejagd Wild Boar fighters over the target which had been very evident on the previous two raids and a quiet run back to the coast with just Lancaster B-Beer, finally succumbing to damage sustained on the flight to the target.

The landing proved equally uneventful all bar 6 Group Halifax that had a 'sticky' landing that was recovered well by the pilot avoiding a likely tyre blow out and subsequent crash and the surviving crews were bussed off for debriefing by the intelligence teams.

The final photo-flash over Mannheim reveals a disappointing creep back from the target markers 

The raid picture was quickly assessed and showed a poor bombing result with nearly half the crews bombing short with creepback falling into the open fields south of the city, which was made worse by Pathfinder inaccuracy and wind drift to pull the on target bombing into the southern outskirts, just causing two major fires in the residential areas of Ludwigshafen.

The bombing results showing the fields south of the city getting a plastering from the creep back

When the victory point calculation for the raid was done it showed two major fires added to the value of the target city producing just 14 victory points to which was offset by the Nachtjagd scoring four victories yielding 12 victory points for the quality of crews lost, netting just two points for Bomber Command for this op.

Once the results of drift and inaccurate Pathfinder marking, actually marking the rail yards in the south east outskirts, were added to the mix, it revealed that the cluster of bombing in the north had in fact fallen in the south causing just two major fires for the amount or ordnance dropped

Thus the situation at the end of Op Six sees Bomber Command with 72 victory points after losses which equates to an average of 12 victory points which places the campaign into a drawn situation with two ops to play and the commentary on the campaign reading,

'Mounting losses cancel out the effect of the bombing'

However Bomber Command have two close range targets, Hanover and Dusseldorf coming up which will offer them the opportunity to bomb up with very heavy load outs, to get in and get out on a relatively short flight, hoping to score big points with fewer losses.

This will require scoring another possible 56 victory points in the next two ops to gain a victory, with the two city targets yielding 7 victory points for their value leaving another 49 points to chase requiring 12 major fires or 6 major fires in industrial areas, split between the two targets, or a combination of the two, before losses - by no means impossible having scored 48 points in the first two ops, but certainly challenging.

Next up - New 1:700th ships for my growing French fleet roll down the slipway for my current project 'All at Sea'

Thursday 20 February 2020

All at Sea - Cape Ortegal, 4th November 1805, Dumenoir's Opportunity


Picking up where Jack and I left off from last month with our play-testing of War by Sail from Ostfront Publishing.

The rules are available through Wargames Vault, in the link below, on which you can see a short video showing the rules in action to get an idea of the basic mechanics. Our principle change has been to add a chit driven activation system, taken directly from Kiss Me Hardy rather than the dice driven activation as illustrated in the video, together with combining turning and sailing straight into one complete action.

https://www.wargamevault.com/product/290486/War-by-Sail

https://jjwargames.blogspot.com/2020/01/all-at-sea-first-games-new-rules.html

We continued adopting, adapting and improving, this time joined by Bob and David and playing a set-piece engagement where both parties were looking to fight for very different reasons.


As explained in the first post we were focused on developing some chase scenarios where one party could gain victory points by escaping and or causing damage to the pursuer equally as well as just damaging the pursuer enough to turn from the hunted into the hunter by finishing off the wounded opponent. I aim to do some more of these type of games to better hone the set up for them.

French commander at the Battle of Cape Ortegal,
Vice Admiral Count Pierre Dumanoir le Pelley

In this scenario we set out to play the game where both parties were offering battle and for this game I chose the action that occurred on the 4th of November off Cape Ortegal on the northwest corner of Spain that juts out into the Bay of Biscay, during which Sir Richard Strachan engaged four French survivors from the Battle of Trafalgar the month previous, under the command of Vice Admiral Pierre Dumanoir le Pelley, who had also commanded his squadron in the van at Trafalgar.


I say both parties offering a fight, which was not at first the case, as Dumanoir had at first considered returning home with his surviving squadron, then thought better of it by deciding to make a nuisance of himself in the Bay of Biscay, only to find himself challenged and pursued by Sir Richard Strachan's four third raters and three frigates, which gradually gained on the retreating French squadron.

Realising running was not an option, the French admiral was forced to offer battle, and by the time he made the decision to turn and fight, he had forgone the chance of turning to offer battle with a more favourable wind, which had now shifted against him.


The set up for our game

I know some gamers turn away from eras or periods where one side in a conflict greatly outperforms their enemy for one reason or another, declaring the engagements it offers as uninteresting games, because victory so often favours one side.

This has never been something that has bothered me for I have always thought that these games are more of an intellectual challenge in considering how the weaker side and its commander could have done better and by rewarding the player for identifying the ways to improve the outcome in the action over and above their historical predecessor.

Thus it comes down to how you decide to describe 'victory' in your scenario and thus weighting the objectives for both sides appropriately.

The set up sees both sides approach each other with a bow wind blowing left to right, with the British 36 gun, 18 pounder frigates Phoeinix and Santa Margarita out ahead of the British column, now with HMS Hero out of position and missing HMS Namur because of the chase it has been performing.

In the historical battle, the four French third rates were battered by their equivalent British opponents, easily allowing the accompanying British frigates and the remaining fightable British third rates to take command of the situation and complete the capture of all four French ships who seeing the situation they now faced struck rapidly.

Thus any British player should be expected to do a better job or match that of Sir Richard Strachan by taking all four French third rates.

For Dumanoir's performance it would seem reasonable that any outcome the other side of an outright British victory would seem like a good performance on the part of the French player.

The French squadron, to right is led by Duguay Trouin, followed by Dumanoir's flagship, Formidable, followed by Mont Blanc and Scipion, the British 74 HMS Hero is seen out of position after the chase, at the rear of the British column opposite, led by Strachan's flagship HMS Caesar.

To make the scenario more interesting, our set up differed from the historical event in that we assumed Dumanoir was more decisive in his decision making that he actually was, by assuming that the decision to turn on the British pursuit was taken earlier while the wind was still blowing ESE instead of from the SE to which it veered by the time he made the decision to turn.

This was an interesting component to our game as it meant both sides approached each other at half speed contending with a bow wind, and that during the course of our game the wind did indeed veer to the south east by the end of play, which allowed the French to keep the wind to their advantage.


The 1:700th models really lend themselves to the 'dolphin eye' view of the camera, over and above what you can do with the smaller scale models, allowing you to create pictures straight from the National Maritime Museum collection.

HMS Caesar, leads HMS Courageaux, with Dumanoir's squadron in sight ahead 

Having Bob and David join us allowed for two more minds to input on the changes Jack and I had made during our first play-throughs of the rules and the addition of more ships, activation chits to draw, instead of cards to shuffle and more players, would test the ability of the game to flow along and all of us still getting to grips with the mechanisms of play.

Thus Bob took command of the heavy British squadron, Strachan's ships of the line, and David took the two British frigates, whilst Jack assumed the role of Vice Admiral Dumenoir.

The view of the French squadron from the British 36 gun frigate HMS Santa Margarita

The latest addition to my collection is the Bucentaure, nearest to camera, standing in as the 80 gun Formidable, Dumenoir's flagship


The steady approach forced on both sides by the prevailing wind meant that the first opportunity to open fire with their long eighteen pounders was offered to David's two frigates as he closed on the French column.

We played the game to the code of the era, not allowing the French to open fire on the smaller fifth rates until fired upon, and David kept his powder dry as he continued to manoeuvre towards the rear of the French column as it advanced on the three British third rates.


Likewise, particularly given the French position of looking to disable their pursuers to make good their escape, we had the French firing on the uproll looking to shred their opposites rigging whilst Strachan's boys were doing their utmost to put as many holes in French hulls as they could in the shortest amount of time possible.


Both main columns looked to increase their speed of approach by turning with the wind, that saw the lead French ship pull slightly ahead of the column and draw close enough to Strachan's HMS Caesar to attempt a disabling broadside against the British flagships rigging.

The resulting barrage missed the upper area and crashed in among the top deck causing the first crew casualty marker, easily shrugged off by the British 80 gunner.

As the British column turned likewise with the wind, the return fire from the lead British third rates proved decisive and a resultant fire on the Duguay Trouin from the early exchanges brought a devastating end to the first contact as the French 74 was rent apart by a massive explosion as the fire got quickly out of control.

Jack opens fire at long range with the Duguay Trouin on HMS Caesar, aiming for the rigging with his lower deck 32-pounders, as David looks on

Duguay Trouin opens fire on HMS Caesar and HMS Phoenix, a British frigate out of camera , that has just fires at the French 74.

The exchange of fire at the front of the French column was quickly followed by an exchange of fire at the rear of it as the British frigate HMS Phoenix turned across the stern of the Scipion to deliver a crashing stern rake into the French 74, only to be replied to with an equally crashing return broadside as she crossed the rear of the French ship,taking down two masts on the frigate and effectively taking it out of the action.

HMS Santa Margarita, the remaining frigate, wisely kept its distance for the remaining parts of the game as the heavy ships set about each other in earnest.

The action commences as the opposing columns make contact and with British frigates feeling out the rear of the French column

Suddenly the Dugauy Trouin, with a fire amidships is torn apart by a massive explosion amid the smoke of gunfire

The French were keen to keep the wind and thus steered along the length of the table as the British not looking to tack so close to the enemy mirrored their move by wearing around to run a parallel course.

These few moves to get their respective columns into position for the next exchanges saw the wind gradually move towards the south east as the ten turn way point was reached, after which the game would end by a variable die roll, that would see an addition three turns added.

The French turn towards the British line as the wind veers to their advantage allowing a rapid approach to close range

The French now had the wind up their skirts and with Jack compelled to leave before the game end, David took over the final French manoeuvres as their ships bore down on the British line, in a very Nelsonesque approach to deliver their broadsides close in accompanied by exchanges of small arms fire from the opposing marines.

The new wind is indicted from the south east as the French column moves into the attack


As the two columns drew near, the opposing lines of ships opened fire as the targets presented, with the French needing to draw blood to offset the loss of the Duguay Trouin which held the scenario in the realms of an outright British victory with the fifteen points to nil it generated.


As expected the last two turns was close up and bloody with the British just as keen to maintain their fifteen point advantage by equally mauling the remaining French ships.

However it is difficult to control events when 32 and 24 pounder gun decks start pouring on the hurt at musket range and with the last round of play determined as turn thirteen it was not entirely clear who had come out on top amid the smoke and damage markers, not to mention two fires.

The exchanges of broadsides are now close up and personal as two of the French ships move into musket range and with ships on both sides showing fires braking out

Once all the morale checks and fire checks were concluded we set about totting up the final scores, which showed one French third rate sunk, one struck giving the British commander twenty-five victory points.

However two of the British third rates were now totally dismasted and drifting, one a bloodbath through lost casualties and one with heavy casualties awarding the French commander twenty-six victory points, resulting in an 'Indecisive' result.

The little marker tokens amid the smoke and flames denote the damage that is occurring from the multiple hits on both British and French alike, giving the appearance of the flotsam and jetsam that would litter the surface of the water in battles of this era as bits of rigging and hull was blasted overboard.

The French had improved their result over the historical outcome achieved by Dumenoir, even though the remaining two French third rates, now damaged but still able to fight would have to deal with HMS Namur 74 and three British frigates closing on the scene of battle, with the outcome of that encounter by no means certain to favour the French.

The game rattled along through the day, playing as we did thirteen turns from about 11am to 5.30pm and a hour for lunch.

The use of chits rather than card shuffling was much better and helped speed play and the inclusion of the KMH wind change mechanism worked like a dream producing an historical outcome.

The gem of the War by Sail rules is as commented previously, the gunnery mechanism that allows the players to use the guns that each ship carried with all the pros and cons that the different armament arrangements offered the historical captains.

Bringing Home the Prizes - Sir Richard Stachan's HMS Caesar 80, tows home the captured Formidable back from Ortegal

There is much more period feel when you grab fourteen d6 to roll for hitting with fourteen lower deck 32 pounders, then an equal number of mid deck 18 or 24 pounders, then finishing off with upper deck 8 or 9 pounders and hopefully a few 32 or 18 pounder carronades, range permitting, totting up the damage points and finding the result caused by all those hits or not as the case may be.

That period feel is not the same as with other age of sail games I have played where you are simply rolling a die generated factor based on those different gunnery load outs, and the points of damage totting up really captures the battering the target ship is taking during a particular combat - great fun.

Thank you to Bob, David and Jack for indulging me in a day of just playing with model ships, such fun to add to the pleasure of putting these models together.

I look forward to doing some more of these game reports as the collection grows and looking to further develop scenario set ups with War by Sail.