Page Tabs
Showing posts with label Sharp Practice II. Show all posts
Thursday, 14 November 2019
Bob's New Wargames Room - Peninsular War, Sharp Practice
Last week, I had fun over at Chez Bob who kindly invited me and a few other friends over to his new toy room to play a Peninsular War Sharp Practice set to.
As you can see Bob has put together a really nice set up with a permanent table, storage units that hold the figures and terrain plus a purpose built paint station set up in the window to provide plenty of light when turning out the figures.
Of course the room is one thing, then you need the collection of terrain and figures to compliment the facilities and Bob can field several nice collections including his 28mm Peninsular Napoleonic collection that graced the table on the day we all got together.
On the day we played, I took the role of one of the French commanders, tasked with capturing the village at the opposite end to our deployment.
Unfortunately for us we were up against a formidable group of British Light Infantry, Flank Companies and Riflemen, who after taking a few casualties from our voltigeurs on their approach march, soon got control of the situation and winded up breaking both French battle groups.
Much fun was had during the day, with battle joined morning and afternoon and with lunch included together with plenty of banter to boot.
The highlight unit for the French turned out to be the French dragoons who successfully mauled the British flank companies knocking over a couple of British leaders and holding up the British in the centre as the French columns struggled to get forward and deploy.
Thanks to Bob for a great day and inviting us to enjoy playing in his new room and to Si, Mark and Ian for making the game such fun.
Friday, 3 May 2019
Lard TV - Playing AWI with Sharp Practice
I really enjoyed watching some new stuff from the Lardies this week, AKA Nick Skinner and Richard Clarke, playing a full length game of Sharp Practice, Scenario 4, ' The Black Mingo', 28th September 1780, following the career of the Swamp Fox, Francis Marion in South Carolina and written by Chris Stoeson.
Lard TV - YouTube
Having now got my YouTube account plumbed into my main TV via our new Sky Q Box I am able, when time permits, to sit down and enjoy a bit of wargaming programing on the telly and this full length play through was highly entertaining and reminded me a bit of Gilder's Battleground series for ITV many years ago, but with more laughs and more detail about what the chaps were doing.
Both Richard and Nick were playing the game, or should I say the rules, in the main from memory, and I loved the way that Richard in particular ends up mis-remembering them a few times which I have to say makes this play through so enjoyable as the game is overlaid with comments off, following the play, illustrating what the rule was in that last frame and how it should have been played - great stuff.
It was very entertaining TV watching this run through of a complete scenario and the chaps really captured the swings of fortune wargaming can produce combined with the narrative play that Sharp Practice are designed for.
Well worth checking out if you haven't seen it and I look forward to the next one.
The Swamp Fox - Too Fat Lardies
Sharp Practice - Too Fat Lardies
Wednesday, 7 June 2017
Nathan's ACW "Sharp Practice" Stag
| The Stags - Left to Right, JJ, Steve M, Chas, Colin, Nathan, Panjo, Vince, Jason and Andy |
Jason was organiser and Gamemeister for the day and young Nathan was under the impression that he was off to Prickly Ball Farm, run by his sister, for a family breakfast only to find all the chaps in attendance for a big game of Sharp Practice. Total surprise achieved and one of the first objectives ticked off the list.
![]() |
| The table set up ready for the off Union forces on the right |
As you can see we had quite a large game set up with symmetrical forces from the American Civil War with each side, Union and Confederate having two infantry and two cavalry formations each with two leaders and three units, which were randomly divided up between the eight players.
The information about the units and the leaders were all prepared in separate envelopes and included an individualised mission that if achieved would contribute to a sides objective, namely to achieve more missions than the enemy.
So the example for my Union command read:
You are Lieutenant R.Guy, a junior officer in the 3rd Indiana Cavalry. A former ranker, your prowess and natural leadership saw you rise rapidly trough the ranks until you were recently commissioned. You are no looker but have a pleasant manner and try to behave with honour befitting an officer.
You have direct command of three units of eight cavalrymen, aided by Sergeant Case. One unit has been given the new breech loading carbines, the others have older muzzle loading carbines.
Your mission is to find and retrieve a cannon that was left behind yesterday. It is somewhere in this area but has been hidden in the barn on the small farm to try to stop the Confederates finding it. You have a limber and rider to retrieve the gun when you find it.
Your cavalry may dismount, becoming six man skirmish units armed with carbines if they do so. Please bear in mind that these are not shock cavalry.
Initially attempting to enter the table at the most appropriate point in relation to where you needed to get to became mission critical as time and space were limited and getting where you needed to be by the most direct route was the first priority.
Unfortunately, that table entry point was on the the throw of a d6. The good news was that my die result of two put me on the road directly towards the farm and its very important barn.
The Union forces came on in what looked like an organised set up with both cavalry forces out on the left and left-centre and the infantry over the other side of the river on the right. The Confederate deployment was much more of a mixed bag with cavalry and infantry alternating across their front.
This meant that the two Union cavalry forces were faced off by Confederate infantry and cavalry.
Of course given the nature of these individual mission encounter games, you couldn't assume that the forces opposite you would stay like that and sure enough the Reb cavalry in front of my units peeled off to their left and ran the gauntlet of my carbines from six of my chaps as they used a nearby bridge to cross the river to my right.
My skirmish line near the river was to cover my approach on the barn but if I could lend a hand to my fellow infantry commanders next door then why not if it didn't interfere with my primary mission.
The battle quickly developed as the Union infantry came out from the home edge tree line and formed a formidable looking line on top of a ridge over looking the Reb lines as they attempted to close in.
On the Union left my fellow cavalry commander swung out and fast on the extreme flank in an attempt to come in behind the Reb infantry closing on my farm and its barn.
I made it to the barn first and while searching it from top to bottom ordered my breech loading squad to lay it on thick and heavy towards that same Reb infantry.
With nothing found in the barn I decided to send a squad forward to the farm house and add yet more fire power on to the Reb line. They say fortune favours the brave and as Sergeant Case accompanied the squad to the house he rather fortuitously tripped over a rather large cannon en route.
That was where my fortune ended as the first round of firing from my forward squad heralded a special event check that saw my squad get carried away with their enthusiasm to take it to the enemy and leaving the nice cover of the farm I had ordered them into, promptly charged the Reb line opposite.
Needless to say the result was not pretty and my boys ended up legging it back down the road with half the number that went up it.
Just then a pause in our game was heralded by the overflight of some unidentified warbird attending the weekend Torbay air-show. The day previously I had photographed the Spitfire and Hurricane flying back from the show over my house.
http://jjwargames.blogspot.co.uk/2017/06/torbay-air-show-spitfire-hurricane.html
The noise attracted our attention and so grabbing the camera I headed outside to find out what was overhead and managed to grab the picture below of a lovely Catalina flying boat.
It was an aircraft like this that spotted the Bismark in mid Atlantic in May 1941 following the sinking of HMS Hood. The subsequent sighting report enabled HMS Ark Royal to vector in her Swordfish torpedo bombers that caused the fatal damage to the great German battleship's rudder. The damage sealed the fate of the raider causing her loss of speed to enable pursuing Royal Navy surface ships to close in and sink her a few days later.
Back to the table and suddenly it was looking like a bad day at the Union Office as Confederate infantry swept forward on to the Union ridge and around Prickly Ball House, supported by their cavalry that had managed to cross the river using a bridge that needed to be blown up by the Confederate infantry getting their support.
Meanwhile my fellow Union cavalry commander was taking severe casualties and shock as he closed in on the Reb left flank and my forward squad was running back having rashly attacked the Confederate infantry opposite the farm.
On the plus side, my breech-loader squad were shredding the Reb infantry near the farm and my limber team were moving up to secure the gun before the enemy got any closer.
As the gun was hitched up, the Union cavalry lines skirmished with the Reb infantry as they closed in on the farm. It was getting a little tense as each side hoped to get that activation necessary to thwart the foe directly opposite them.
![]() |
| The table seen from the Union right flank |
![]() |
| The opposing forces start to move on to table |
You are Lieutenant R.Guy, a junior officer in the 3rd Indiana Cavalry. A former ranker, your prowess and natural leadership saw you rise rapidly trough the ranks until you were recently commissioned. You are no looker but have a pleasant manner and try to behave with honour befitting an officer.
You have direct command of three units of eight cavalrymen, aided by Sergeant Case. One unit has been given the new breech loading carbines, the others have older muzzle loading carbines.
Your mission is to find and retrieve a cannon that was left behind yesterday. It is somewhere in this area but has been hidden in the barn on the small farm to try to stop the Confederates finding it. You have a limber and rider to retrieve the gun when you find it.
Your cavalry may dismount, becoming six man skirmish units armed with carbines if they do so. Please bear in mind that these are not shock cavalry.
![]() |
| My Union cavalry together with limber team move on to table |
![]() |
| Chas' Reb infantry together with explosives wagon move into the line |
![]() |
| A solid line of Union infantry form up on my right flank over the river |
This meant that the two Union cavalry forces were faced off by Confederate infantry and cavalry.
![]() |
| Reb cavalry units were spread out along their whole line |
My skirmish line near the river was to cover my approach on the barn but if I could lend a hand to my fellow infantry commanders next door then why not if it didn't interfere with my primary mission.
![]() |
| The fight starts to develop around Prickly Ball House |
![]() |
| The Union infantry moved up to get a position on the hills |
I made it to the barn first and while searching it from top to bottom ordered my breech loading squad to lay it on thick and heavy towards that same Reb infantry.
![]() |
| Union cavalry dismount to contest the Union left flank. The farm and its barn are held by my cavalry |
![]() |
| Reb cavalry cross the bridge to put pressure on the Union infantry over the river |
Needless to say the result was not pretty and my boys ended up legging it back down the road with half the number that went up it.
![]() |
| Some of my cavalry get carried away and rashly attack Reb infantry |
http://jjwargames.blogspot.co.uk/2017/06/torbay-air-show-spitfire-hurricane.html
The noise attracted our attention and so grabbing the camera I headed outside to find out what was overhead and managed to grab the picture below of a lovely Catalina flying boat.
It was an aircraft like this that spotted the Bismark in mid Atlantic in May 1941 following the sinking of HMS Hood. The subsequent sighting report enabled HMS Ark Royal to vector in her Swordfish torpedo bombers that caused the fatal damage to the great German battleship's rudder. The damage sealed the fate of the raider causing her loss of speed to enable pursuing Royal Navy surface ships to close in and sink her a few days later.
![]() |
| A nice surprise overhead during the Torbay air-show - Catalina Flying Boat |
![]() |
| Steve and Chas fighting hard for the rebs against Nathan and Vince's Union Infantry on the ridge at Prickly Ball House |
On the plus side, my breech-loader squad were shredding the Reb infantry near the farm and my limber team were moving up to secure the gun before the enemy got any closer.
![]() |
| A pause on the Union left flank as the action proceeds on their right |
![]() |
| The fighting around Prickly Ball House became a confused mass of close up musketry |
![]() |
| The Reb cavalry took a lot of casualties around the house |
![]() |
| The explosives wagon couldn't get on to the bridge to do their work |
![]() |
| My cavalry escort the recovered gun hitched up to my supporting limber team |
![]() |
| The Rebs fought hard and pushed in the Union line severely in several places |
![]() |
| The Union counter-attack on the right flank stabilises the line |
![]() |
| A fine looking cake to help celebrate the day |
Saturday, 23 July 2016
Sharp Practice II - First Date with a New Lady
Last night Tom and I spent a very pleasant Friday evening at chez Steve M.
I am very fortunate that Steve lives just four doors along from me and so as well as enjoying a long friendship, an evening of wargaming it is only a short walk home after all the fun.
Steve has been building a superb collection of 28mm French Indian Wars with which we have played many a game of Muskets and Tomahawks and more recently Donnybrook. Last night it was an opportunity to take the new lady, Sharp Practice II, out for a first date.
To give the game a simple test we set up a straight forward march and ambush scenario with Tom commanding two companies of British regulars, two companies of Rangers and a company of American volunteers tasked with escorting a VIP along the road to safety. Each troop type had a II level commander and to support his force he chose a sniper specialist, a physic and a musician.
![]() |
| Our game table with the French jump off markers indicated and the British march direction |
As we knew this game would take up time getting to grips with and interpreting the rules, Steve held the ring with rule book and markers to hand and a certain amount of time was spent thumbing through the rules to clarify and understand the process of play. I should at this point say, I do not intend to give a detailed breakdown of the rules and how they are played, as you can do no better for that by following the link to the Lardies You-Tube video play throughs for that level of detail.
https://www.youtube.com/watch?v=fwH6-2K9voc
| The British column enters the table along the road |
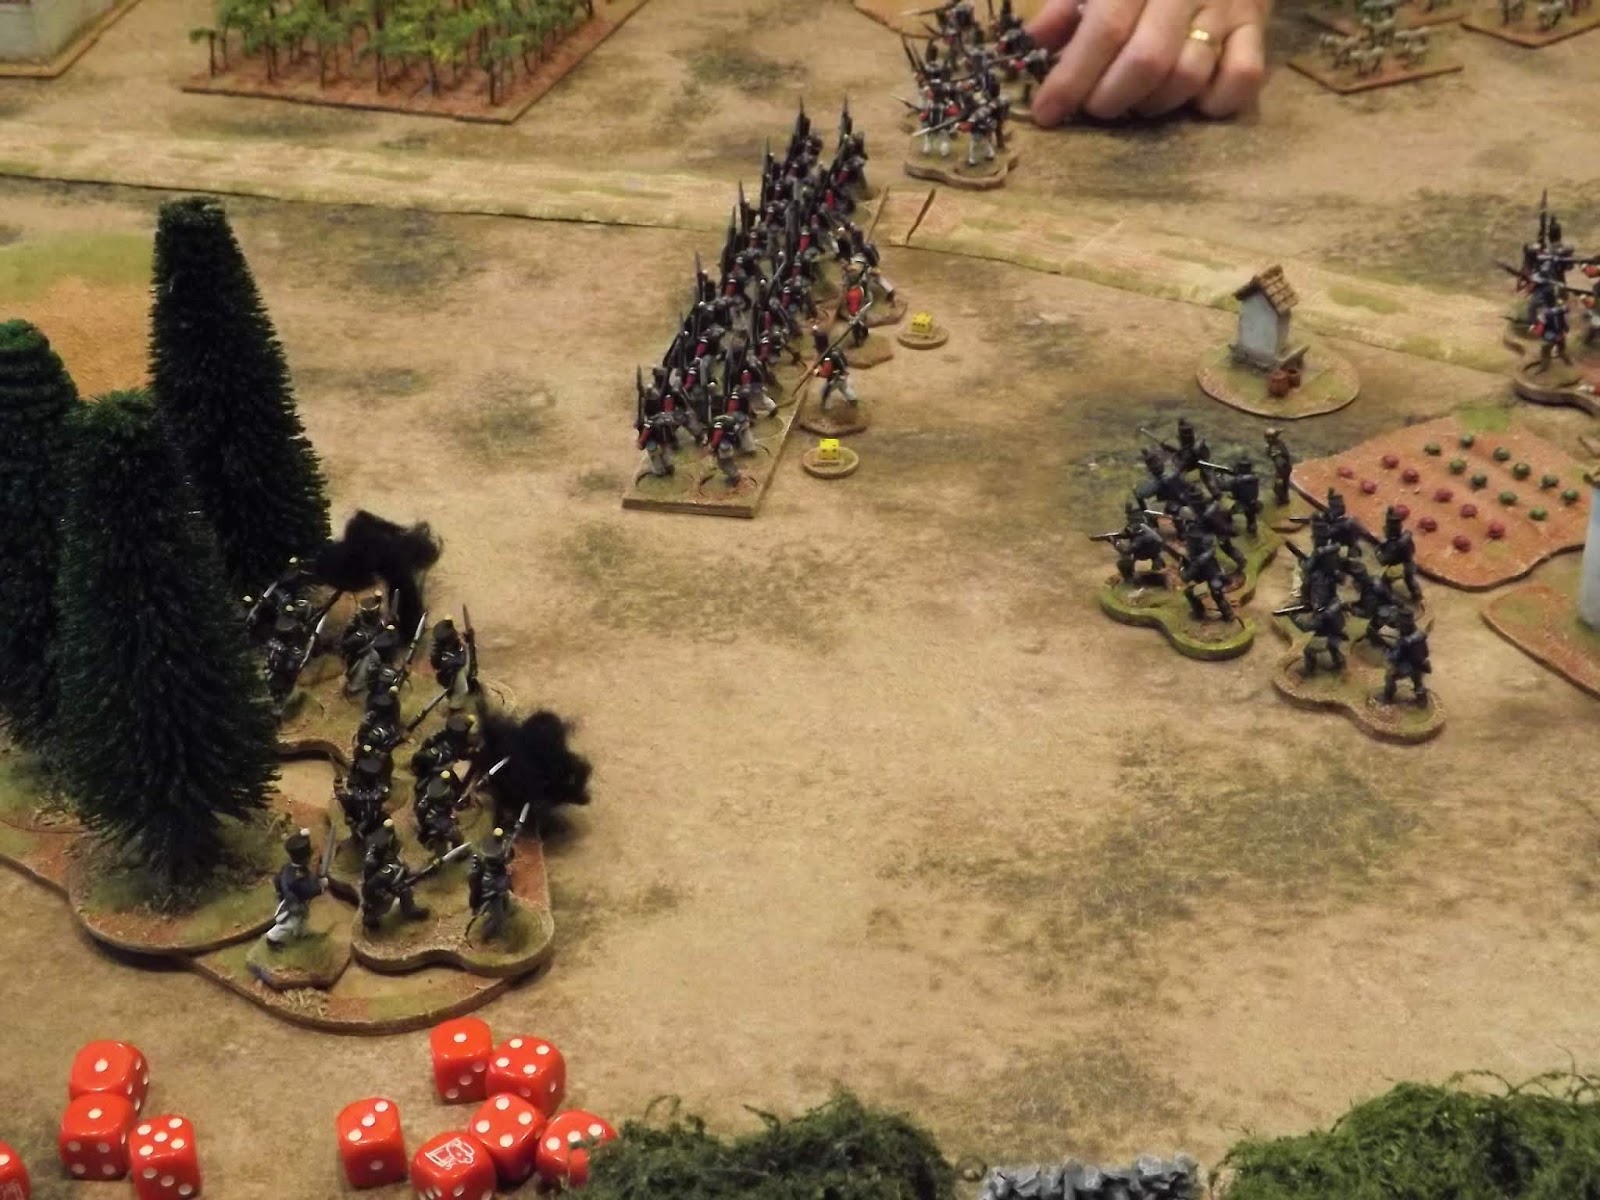
As the fight developed in the centre, the Indians and Rangers skirmished in the wood with honours even, whilst Tom brought the Americans through the farmstead garden to attempt to flank the French regulars.
However the British regulars were so hard hit with casualties and shock they were forced to fall back down the road, and the French regulars were able to wheel and decimate the Americans with volley fire that caused the remnants to rout back to the table edge.
At that point we ended the game.
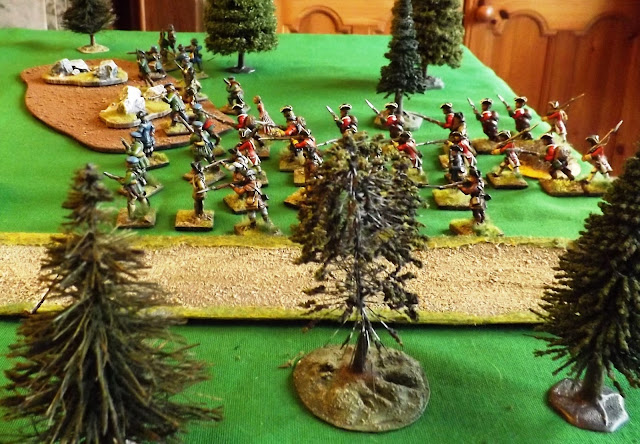
| The regulars guard the VIP (Tom's expertly painted young lady), with American volunteers and Rangers guarding the front and flanks of the column |
Well as a confirmed admirer and player of the Lardies rule sets Sharp Practice felt very familiar and well crafted.
We all realised that familiarity would bring out the full potential of these rules as the flexibility to command and react to situations that the command (flag) cards offers demands that appreciation to take advantage of that flexibility, something none of us had in our first game.
| The view from the French ambush point |
Springing the ambush for the French was very tricky and I found myself constantly tempted to attack and shoot prematurely which I found hard to resist as I waited for a better opportunity. When the right opportunity presented, the French regulars and the Coureur de Bois were able to practically coordinate their attacks that devastated the British line, with a fortuitous first draw Tiffin card that enabled the French regulars to reload ready for the next turn.
| As the ambush is sprung, Steve thumbs through the rules to check the process |
| Tom contemplates his next move as the French pour on the musketry |
| The firing was uncontrolled but at close range highly effective |
| As the French commander oversees his attack on the British regulars his eye is drawn to the sneaky Americans moving in on his right flank |
| The British regulars recoil in disorder from the surprise French barrage |
So how did our date go and what are the first impressions? I really like her. She has lots of potential to bridge the gap between skirmish and big battle type games.
The command and control rules are to me her greatest assets and the coyness of the way she suggests all the opportunities to display that control in a better understanding of the options with more playing and understanding of the rules only adds to her allure.
Sharp Practice bears all the hallmarks of her good family connections, always ready to show you a good time but with enough depth for the discerning simulation gamer. She was not designed to spend time with rule lawyers and will only be at her best in the company of gentlemen wargamers prepared to play the period and not the rules, so if like me you have been out with any of her sisters I am sure you will enjoy spending time with this young lady.
Subscribe to:
Posts (Atom)


