

The Beira Frontier on the border between Spain and Portugal was to feature significantly during the Peninsular War, as the Allied and French armies drew breath during the winters of 1809-10 and 1810-11.
The area played host to an Anglo-Portuguese army following the British army's pull back from its foray along the River Tagus and the Battle of Talavera in the summer of 1809 and the follow up of French troops under Marshal Massena's Army of Portugal and its build up to invasion in 1810.
Then with the expulsion of Massena and his army in the spring of 1810, the frontier would play host to a period of jousting between the two forces as the initiative gradually swung away from the French towards the Allies as Wellington devised plans for the retaking of Ciudad Rodrigo in the winter of 1812.

With two armies facing off across the frontier, fortified towns such as Ciudad Rodrigo and Almeida assumed a local significance as forward bases and magazines that acted to retard the progress of the army with the initiative and its plans to press on into the others territory.
Additionally in between these two key towns lay a small Vaubanesque fort that owed its construction to the struggle between Spain and Portugal in the 17th century, as the latter fought to maintain its independence from its larger neighbour.
With the fall of Ciudad Rodrigo to the French in July 1810 as covered in my previous post, the little star fort close to the village of Aldea del Obispo and the fortified town of Almeida, became the focus of French attention around which General Craufurd's Light Division manoeuvred under growing French pressure as the advance from Rodrigo commenced.
 |
| The Beira frontier and border between Spain and Portugal, with Ciudad Rodrigo, Fort Concepcion and Almeida highlighted |
Fort Concepcion

Fort Concepcion was built by the Spanish army under the command of the Duke of Osuna and was completed on the 20th January 1664 as part of plans to use it as a base for the Spanish army in its attempt to recover the break away Portugal and its nobility back under the rule of King Phillip III.
The work on the fortress started on the 8th December 1663, the Feast Day of the Immaculate Conception, hence its name.
Following the failure to recover Portugal to the Spanish Crown, and the defeat of Spanish forces at the Battle of Castelo Rodrigo, the fort was decommissioned later that same year with a partial demolition.

However with tensions between Portugal and Spain continuing during the 18th century, the fort was rebuilt over a period of years from 1736 to its completion in 1758 and became a garrison post for patrolling the border land with provision of stabling to facilitate mounted patrols.

In 1810, Wellington was focused on his plans to fulfill the first part of his mission, namely the occupation and defence of Portugal from the French armies now occupying northern and central Spain.
These plans were centred on the Lines of Torres Vedras, three lines of emplacements and barriers around and on the hills before Lisbon, designed to hold a French army before them with an Anglo-Portuguese army operating on internal lines to support the defences at any point, supplied by the Royal Navy.
In addition steps were in progress to prepare the likely advance routes of the invading French army by forced removal of the local population and any foodstuffs and materials useful to the invaders, together with work on the routes to impede French troops.
To bring these plans to fruition, the key commodity was time and at first Fort Concepcion was considered to be held by an Allied garrison as part of the plans to slow the French advance and buy yet more of that priceless commodity.
 |
| The entrance to Fort Concepcion now redesigned as a unique hotel |
However Wellington soon recognised that Concepcion was too small to likely impede the French forces in any great way and that the eventual loss of its garrison was not worth the insignificant gain, if any, it would accrue and so plans were put in place for its destruction in the face of a French advance, preventing its later use by the enemy.
 |
| Officer of Royal Engineers and private of the Royal Sappers & Miners c1813 |
During the preceding time, as the French lay siege to Ciudad Rodrigo the Fort acted as the headquarters for the Light Division until on the 19th July, Captain John Burgoyne, Royal Engineers was given orders to prepare the place for demolition
 |
| Captain Burgoyne ensured the walls were breached all around to undermine it use by French forces |
By the 20th July Burgoyne had successfully mined each ravelin and the detached redoubt with 90-100 barrels of gunpowder, with orders not to destroy the place until the French advanced on it in force.
 |
| The former gate house is now the offices for the hotel reception |
With the withdrawal of the British and Portuguese infantry only a few cavalry piquets of the 14th Light Dragoons and Captain Burgoyne remained ready to blow the place at any time.
 |
| An officer in the 14th Light Dragoons |
Captain Brotherton of the 14th Light Dragoons wrote:
"The blowing up and complete destruction of this important and beautiful little star fort which guarded the frontier of Spain was an operation of great delicacy, and of most critical and precarious execution, for Colonel (captain at the time) Burgoyne, the talented officer of Engineers selected for the task, had positive orders not to blow it up till the very last moment, so that we might make use of it till the last moment, but not leave a vestige of it for the enemy's use. These instructions were carried into effect with extraordinary precision and most thoroughly.
 |
| The main gateway now leads into the fort and its function rooms and accommodation |
I had some little share in the execution of this critical operation. I happened to be on piquet in front of the fort on the night it took place, or rather the morning, at daybreak.
As it was a matter of great importance to Massena to preserve the fort, if possible, and prevent its destruction, which he knew was planned, he thought he would best obtain this object by a sudden and rapid advance on our piquets, driving them back at a gallop, and arriving on the glacis of the fort as soon as we did, when he thought, the officer of Engineers would hesitate to blow it up for fear of destroying our people.
 |
| The restored covered way with access to a function room the bar and dining room |
The match was always kept ready in the fort for instantaneous explosion.
Knowing the state of the case, I had only just time to exclaim to an officer close to me, named Wainman, who was beautifully mounted on a thoroughbred horse, to go at speed to Burgoyne and apprise him that we were being driven back most rapidly, and that we had no time to lose.
He arrived at the fort only just in time to enable Burgoyne to explode his mine."
 |
| I was tempted to slip one of those in the boot of the car before leaving |
Lieutenant George Simmons, 1st Battalion, 95th Rifles recalled what happened next;
"July 21st: At daylight Fort Conception exploded and made a tremendous noise. I was lying under a tree in a sound sleep. I sprang up, thinking the French army had got into the camp, and seized my sword, which hung upon the bough of a tree, and proceeded to our alarm post.
I found the same effect produced by the noise upon the whole of us, and the only feeling we had was to sell our lives as dear a rate as possible. When the cause was known, and that the enemy had not driven in our outposts, we fell out and took our breakfast."
 |
| The upper walkway is open to guests offering great views over the fort and the surrounding countryside |
All four bastions and three demi-lunes were breached by the explosion and several men and horses of the 14th Light Dragoons were killed by flying masonry.
The French occupied the place shortly after and Marshal Massena used it as his headquarters during the siege of Almeida.
 |
| The former garrison quarters are now converted to self contained air conditioned rooms |
 |
| Above the hotel accommodation the former gun positions lay deserted |
The conversion of the fort into a hotel has been carefully done, preserving, as it does, the look of the place following its destruction in July 1810 with the evidence of that destruction all around the very comfortable accommodation.
 |
| The view of the walkway in from the gate house |
 |
| Where the wall of the ravelin has been blown out, the area has been converted to an outdoor breakfast area as part of the dining room within |
 |
| The reception building and the slope of the hill descending behind towards Aldea de Obispo, with the section of wall on the right of picture and its accommodation block blown out by the mines set in 1810 |
 |
| The remains of the detached redoubt and stable block |
 |
| The function room, had me thinking what a great room to run a wargame meeting in! |
 |
| The lounge suite in our room with the bedroom beyond |
 |
| All the mod cons within an eighteenth century fort - how cool. |

If you plan to do a similar expedition to Spain and Portugal I can readily recommend the inclusion of this unique hotel into the itinerary and Carolyn and I thoroughly enjoyed our stay.


Almeida
Our stay at Fort Concepcion gave time to explore several of the key engagements that occurred between the Light Division and French forces as Massena's army lay siege to Ciudad Rodrigo, which I plan to cover off in part two of this post.
In addition we also took time to head across the border into Portugal adjusting our clocks back an hour as we did so, to visit the key fortified town of Almeida and the famous battle site at the nearby bridge over the River Coa.
 |
| French troops in the siege lines before Almeida are stunned by the dramatic explosion of the main powder magazine under the town castle, ignited by a French shell landing in the castle courtyard and lighting a trail of powder to its main entrance, on the evening of the 26th August 1810 |
With Ciudad Rodrigo and now Fort Concepcion under French management, Marshal Massena was able to turn his attention to dealing with the last major block to his army moving into Portugal and expelling the British once and for all.
That last block was the Portuguese fortified town of Almeida, aptly named after the Arabic, 'al ma'ida' or plateau, atop, as it is, the high ground overlooking the valley of the River Coa.
 |
| The twelve pointed Vaubanesque design of the defences around Almeida are well shown in this satellite view of the town with some of the key parts of it we visited marked up. |
Wellington had high hopes that the town and its garrison would buy him yet more time as the French were forced yet again to halt their advance and bring forward their siege train to take out the place.
Massena was obliged to follow his strict orders from Napoleon to not advance deep into Portugal until his lines of communications were secure, thus ensuring the tempo of French operations remained slow and not helping the morale of his army, going nowhere fast and suffering from low rations and all the implications that meant for his soldiers and animals.
 |
| Almeida's forward gate with its walled causeway leading across the moat beyond and the main gate. |
Having driven off the Light Division behind the River Coa, the French were quick to reconnoitre the town and its defences, but were forced to blockade it until the losses of draught animals and ammunition could be made good to allow the siege batteries to come up from Rodrigo, slowing the tempo of operations still further.
The French now started to experience another part of Wellington's strategy to counter their invasion, as the pressure to find food for men and horses remained and the threat offered by the Light Division, whilst foraging in the local area, was replaced by that of the Portuguese Ordenencas or militia and ordinary Portuguese civilians resisting the invaders when the opportunity presented.
 |
| The Portuguese population resisted the French invasion in support of Allied forces and in defence of their homes. One of several colour pictures of reenactors displayed in the Almeida Military Museum |
As Simon's brigade started to invest the town, his commander General Loison summoned Colonel Cox the garrison commander to surrender the fortress causing him to order his guns to fire on French piquets, followed up by regular sallies by the garrison to drive the French outposts away from the walls.
 |
| The tunnel of the outer gate still open to modern traffic today. |
The defences of Almeida were in good shape to resist a French siege at the time with repairs and strengthening done in the preceding months by British Engineers in preparation, and armed with 100 guns, forty of which were 18 pounders or heavier; but the garrison was weak consisting of two poorly equipped and indifferent Portuguese battalions of the 24th Regiment that, having resisted all attempts to improve them, found their only real use as garrison troops, but perhaps would have been better used in a rear area rather than here, right at the front of Allied operations.
 |
| Replica uniform of a sergeant in the 23rd Portuguese Infantry, part of the garrison of Almeida in the 1810 siege. Part of the display in the Almeida Military Museum. |
In addition to the line troops there was three regiments of militia, three companies of Portuguese gunners and a squadron of Portuguese light cavalry, just under 4,700 men
 |
| The walled causeway over the outer moat leading to Almeida's main gate |
 |
| Plan of the French siege lines before Almeida |
Massena had planned to break ground on the 9th of August but the delays in refitting his siege train, that now included the heavier guns retrieved from Ciudad Rodrigo, delayed that to the 15th with both VI and VIII Corps concentrated around the town for what was hoped would be a short siege.
The first parallel was dug 500 yards out from the south wall in front of the San Pedro Bastion with work progressing apace to see the line extended around to the west and east of the fortress and positions created for eleven batteries in which over fifty guns opened fire at 0600 on the 26th August, damaging several Portuguese batteries and causing multiple fires within the town.
 |
| The main wall still bristles with a few guns, recalling its former purpose |
Despite the firing of over 6,000 rounds and the expenditure of 9 tons of powder, damage to the town was minimal and Colonel Cox remained confident that the town would continue to resist as the French settled into to continuing their fire into the night.

It was during this later period that a French howitzer shell landed in the courtyard of the castle where the main magazine was stored underneath the great building, where according to a Portuguese artillery officer, thirty artillerymen were working in the magazine to transfer barrels of powder to the expense magazines on the ramparts so the great doors of the castle were open.
 |
| The uniform of the members of the garrison supplying ammunition and powder from the magazine to the towns batteries as displayed in Almeida military museum |
The charged bomb rolled down the steps of the building into a subsidiary magazine and ignited 4,000 charged projectiles, which instantly ignited 150,000 pounds of gunpowder and over a million infantry cartridges.
 |
| The tunnel entrance at the main gate houses the Tourist Information Office |
French Colonel Sprunglin described the scene from the French siege lines:
"The earth trembled and we saw an immense whirlwind of fire and smoke rise from the middle of the place. It was like a bursting volcano - one of the things that I can never forget after twenty-six years.
Enormous blocks of stone were hurled into our trenches, where they killed and wounded some of our men. Guns of heavy calibre were lifted from the ramparts and hurled down far outside them.
When the smoke cleared off, a great part of Almeida had disappeared, and the rest was a heap of debris."
 |
| On leaving the main gate, the view left along the street behind the main wall with the former garrison barracks seen on the left of the street further along. Note the locals starting to gather around the Piri-Piri Chicken van along on the right - ah happy days! |
The confidence in the garrison was shattered with that single stroke of luck for the French, with six-hundred men killed in a moment including over half the gunners.
Colonel Cox determined to try and persuade his soldiers to hold out whilst he summoned Wellington to come and relieve them, but the morale of the soldiers like Almeida castle was utterly broken; and despite efforts by Cox to bluff the French during a later parley, Portuguese Major Barreiros deserted to the French making it clear to them that the garrison would offer no further resistance.
 |
| The town square with its memorial and bandstand made us feel very at home! |
Massena refused all further entreaties from Cox and at 1900 hours on the 27th August resumed the bombardment.
Portuguese officers informed Colonel Cox that if he did not formally surrender, the garrison would open the gates themselves and admit French troops and so the next morning Cox surrendered with the garrison marching out soon after.
 |
| The street looking right from the main gate along which we headed to do a circuit of the town and its defences |
 |
| Almeida is a pretty place with its houses grouped around narrow streets |
Under the terms of the surrender, the Ordenencas were allowed to return to their homes after giving their parole, whilst the regular Portuguese troops were given the option of being taken to France as prisoners or joining the Imperial forces; with most of them accepting the latter option only to desert back to their own army in the subsequent days.
 |
| The view from the main wall looking towards the French siege lines which would have been amid the modern housing beyond |

The siege had bought Wellington an extra month of delay to the French advance, much less than expected, but with the need to garrison both Ciudad Rodrigo and now Almeida, which was to hold the French siege train, Massena's army had shrunk to around 45,000 men, when casualties and men taken from the ranks due to sickness were included.
The fact that the original strength of the French army at 65,000 men was well under the 100,000 deemed necessary for the mission was now producing consequences and Massena would have been forgiven for being extremely worried with the prospect of advancing deeper into Portugal with more troops needing to be detached to guard an ever growing line of communication back to Ciudad Rodrigo and the border.
 |
| The classic Vauban style sentry box |

Almeida today is a very pretty town and both Carolyn and I thoroughly enjoyed our visit which saw us indulging one of our favourite examples of Portuguese cuisine, namely Pir-Piri Chicken, and I am not talking about the stuff served up by a certain UK restaurant chain, but the real deal which was being prepared in a van with charcoal grill warming up nearby and butterfly chicken carcasses daubed in the magic ingredient ready to be open-air grilled.
We immediately remembered the mouth watering smells emanating from down the street and returned after completing a circuit of the walls and a visit to the military museum to take a chicken with us on our way down to the River Coa where we parked up in front of the famous old bridge to enjoy a memorable open air lunch - I love Portugal!

 |
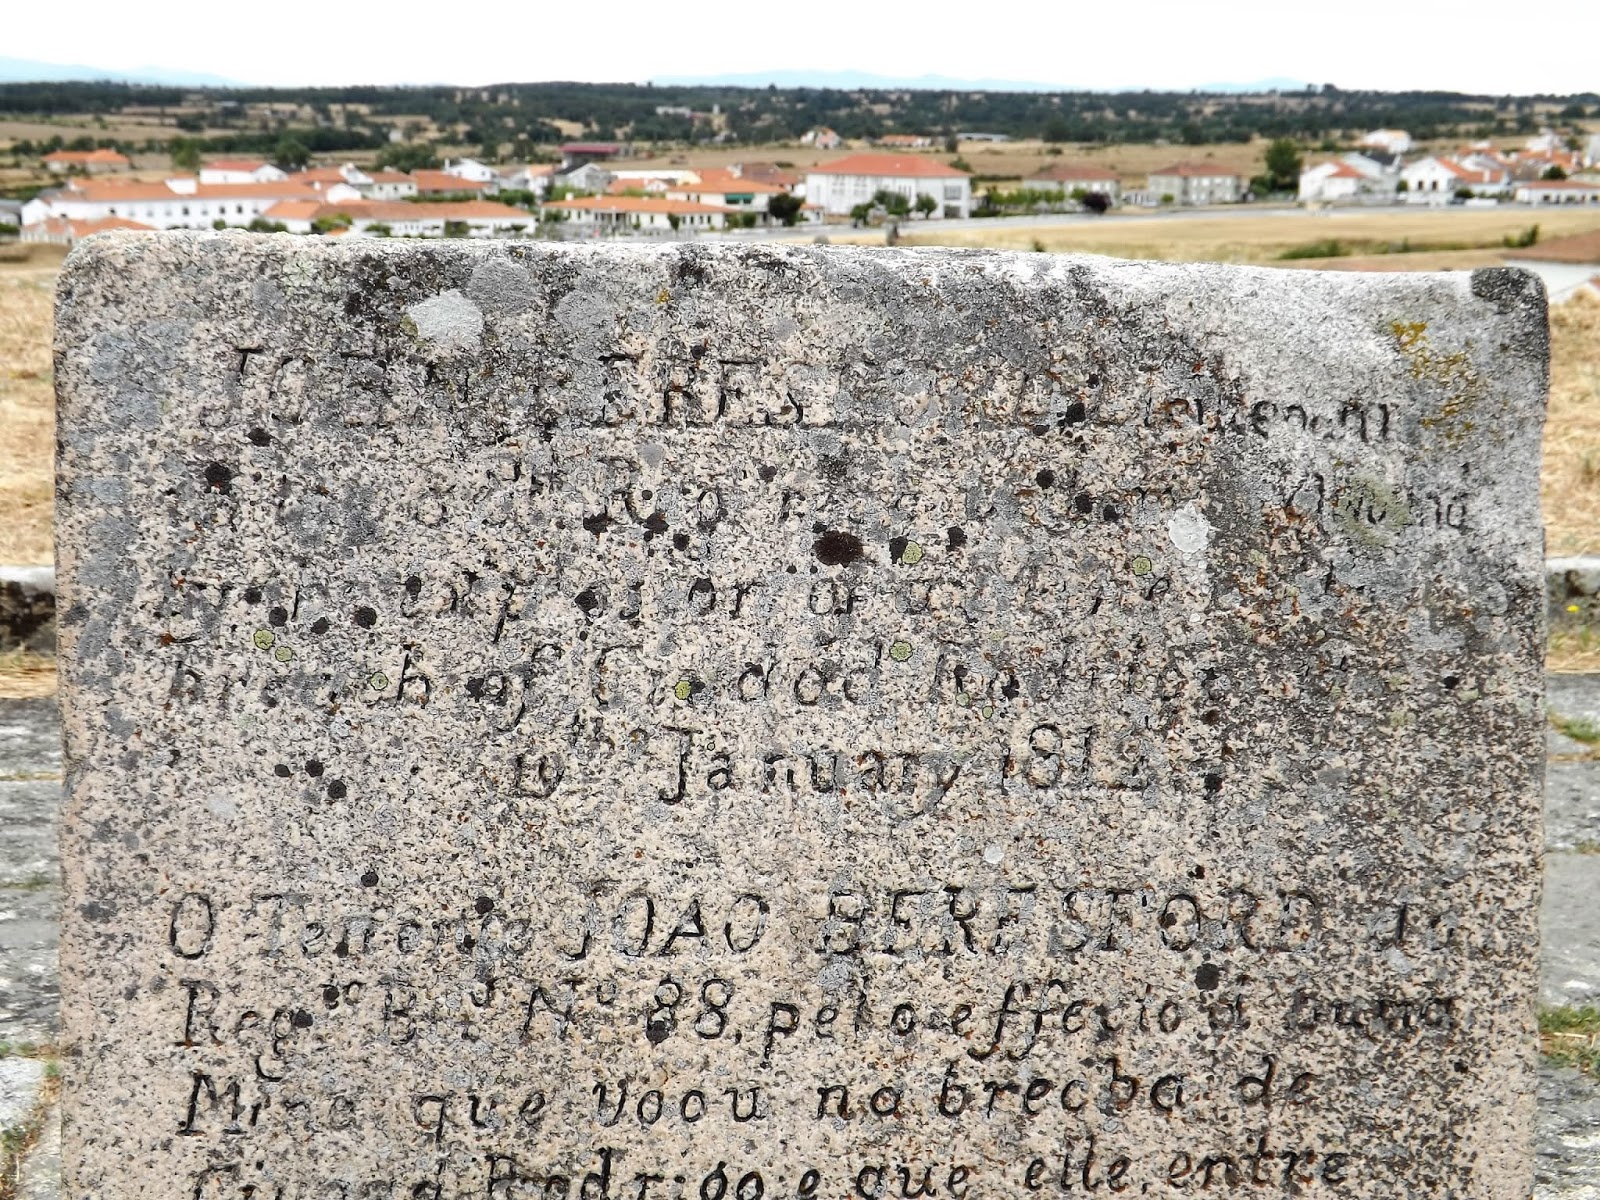
| The tomb of Lieutenant John Beresford, 88th Foot who was ADC to Brigadier Mackinnon and died of wounds sustained when he was blown up by a French mine in the main breach at Ciudad Rodrigo in 1812 |
 |
| As we rounded the wall at the back of the town, heaps of rubble piled on a nearby piece of higher ground confirmed the site of the castle destroyed in the magazine explosion in 1810 |
 |
| Only the lower stonework of the former castle remains from the building that was effectively leveled in the explosion |
 |
| These guns are lined up on the south facing wall of the San Antonio Bastion, facing the French lines of investment |
 |
| Looking out from the gun battery that would have seen Ney's Division swarm over the ground, beyond the houses, in pursuit of the Light Division as it pulled back to the Coa bridge |
 |
| The door to the expense magazine beneath the Sao Pedro Bastion next to the main gate. It was the process of delivering ammunition and powder to these magazines that indirectly lead to the explosion of the main magazine under the castle |
The military museum was just opening when we arrived and holds some really interesting items associated with the military history of the area extending from Roman times right up to the 19th century with some excellent examples of Portuguese military dress from across the intervening centuries together with weapons and other items.
 |
| Almeida has a very interesting military museum looking at the military history of this part of Portugal from Roman times to the 19th century |
 |
| A very nice display in the Napoleonic gallery of a Portuguese nine-pounder gun |
I have kept my focus very much on the Napoleonic theme and it was fascinating to see the collection of military pieces found in the town relating to the devastating explosion at the castle.

The sight of mangled and twisted brass musket fittings together with the flattened barrel of a mortar really brings home the force of the explosion and the overwhelming effect it had on the morale of the garrison.

 |
| The collection of twisted and shattered metal work retrieved from the site of the explosion. Along with a musket barrel, bayonet and locks most of the items are brass fittings badly distorted from the effects of the blast |

 |
| A brass musket butt plate grossly twisted and bent out of shape |
 |
| The flattened barrel of a mortar obviously badly damaged during the explosion on the 26th August 1810 |
 |
| A modern reproduction of the Portuguese barretina shako worn prior to the adoption of the British supplied stovepipe shakos |
 |
| The unique Portuguese style scale shoulder boards |
Action at the Coa
After our visit to Almeida and with our lunch in hand we set off to look at the area that saw one of the most famous battles fought by the Light Division during its time in the Peninsular Army and one that showed off the best and worst of its famous commander Major General Robert Craufurd.
 |
| French light cavalry close in on riflemen of the Light Division. One of the colour reenactment pictures from the Almeida Military Museum |
In the two days following the destruction of Fort Concepcion and its capture by the French, General Craufurd maintained his division on the east bank of the River Coa in close proximity to Almeida, with only a single bridge offering access to the opposite bank and support from the rest of the Allied army.
This was despite Wellington pointing out the obvious difficulties should Craufurd need to get his troops back over the river quickly, with the Duke spelling out his intentions in a letter to him on the 22nd July;
"...I am not desirous of engaging in an affair beyond the Coa. Under these circumstances, if you are not covered from the sun where you are, would it not be better that you should come to this side with your infantry at least?"
 |
| Sir Charles Oman's map of the Coa action with Craufurds dispositions shown as the French pressed forward and the precarious escape route leading back to the single bridge over the river |
The Light Division, although the weakest division in numbers of men in Wellington's allied army with its five battalions of infantry, two light cavalry regiments and a single horse artillery battery included some of its best units in terms of capability and morale, but the position Craufurd put them in clearly exposed the 4,200 infantry, 800 cavalry and six guns to extreme risk in direct violation of Wellington's wishes.
 |
| The old unsealed road that still leads down the hillside from Almeida to the River Coa and along which Craufurd withdrew his soldiers under fierce French attacks |
The French attack commenced before dawn on the 24th July 1810 with the French advance covered by a downpour of torrential rain that brought the River Coa up into full speight.
The divisions of Loison and Ferey, some 24,000 French troops advanced rapidly on the two mile long ridge occupied by the allied troops with French cavalry deployed on the allied left flank looking to get between them and the road leading down to the river.
Lieutenant George Simmons left an account of the French attack and was my guide on the day of our visit and so it seemed appropriate to quote much of his account of the battle;
"A little after daybreak the enemy advanced against our piquets and drove them in. The Division was put into position, the left upon Almeida and the right in rugged ground upon the Coa, which river was running furiously in its course ; several companies of Rifle Men and the 43rd Light Infantry were placed behind stone walls. The enemy now advanced in vast bodies. The whole plain in our front was covered with horse and foot advancing towards us.
The enemy's infantry formed line and, with an innumerable multitude of skirmishers, attacked us
fiercely; we repulsed them ; they came on again, yelling, with drums beating, frequently the drummers leading, often in front of the line, French officers like mountebanks running forward and placing their hats upon their swords, and capering about like madmen, saying, as they turned to their men, " Come on, children of our country. The first that advances. Napoleon will recompense him." Numbers returned to the attack. We kept up a very brisk fire."
 |
| The hillside leading down to the Coa over which the two armies manoeuvred illustrates the broken nature of the terrain that allowed the Anglo-Portuguese light troops to mount their rearguard withdrawal. |
In spite of the suddenness of the French attack, Craufurd had time to withdraw his soldiers under the cover of a strong screen of skirmishers, but instead chose to make a stand, flying in the face of sound military sense.
 |
| The beautiful old 18th century bridge now in retirement next to its modern replacement looks like the Light Division could have passed over it just recently. |
Craufurd's five battalions soon found themselves attacked by the thirteen battalions of Loison's division which they drove off with disciplined musket volleys only to see their flank turned as the French 3rd Hussars ignoring fire from Almeida rode over a company of 95th Rifles they caught in skirmish order.
Lieutenant Simmons account continues;
"Several guns began to play upon us, and as the force kept increasing every moment in our front, and columns of infantry were also moving upon our right flank, we were ordered to retire half the company. Captain O' Hare's retired, and the remainder, under Lieutenant Johnston, still remained fighting for a few moments longer. I was with this party. We moved from the field into the road, our men falling all round us, when a body of Hussars in bearskin caps and light-coloured pelisses got amongst the few remaining Rifle Men and began to sabre them. Several attempted to cut me down, but I avoided their kind intentions by stepping on one side. I had a large cloak rolled up and strapped across my body; my haversack was filled with little necessary articles for immediate use; thus I got clear off".
 |
| The bridge was built in 1745 and is just over one-hundred yards long |
A volley was now fired by a party of the 43rd under Captain Wells, which brought several of the Hussars to the ground. In the scuffle I took to my heels and ran to the 43rd, Wells calling out, " Mind the Rifle Man ! Do not hit him, for heaven's sake." As I was compelled to run into their fire to escape, he seized me by the hand and was delighted beyond measure at my escape. "

The whole allied line risked being 'rolled up' and now compromised by the French cavalry compelled Craufurd to order an immediate withdrawal forcing him to consider the difficulty of getting his guns, cavalry and baggage across the bridge before he could even consider extricating his rapidly hard-pressed infantry.
Lieutenant Simmons account continued;
"The road to a small bridge across the Coa, which the Division would have to retire over, was very bad and rocky. Our gallant fellows disputed manfully every inch of ground and retired towards the river. Every place we left was covered with the enemy's Light Infantry in ten times our number.
As we got near the river the enemy made several attempts to cut us off. General Craufurd ordered a number of Rifle Men who had occupied a place that prevented the French from stopping our retreat over the bridge to evacuate it before half the 52nd, who were on the right, had filed over. The enemy directly brought up their infantry to this hill, which commanded the bridge, and kept up a terrible fire. Colonel Beckwith, a most gallant and clever soldier, saw this frightful mistake and ordered us to retake the wall and hill instantly, which we did in good style, but suffered severely in men and officers."
 |
| If you remove the concrete pylons, this picture makes an great before and after comparison with the illustration above, showing the bridge from a 95th Rifleman's perspective. |
The 1st Cacadores followed the artillery and baggage down to the bridge as the 3rd Cacadores and the other three British battalions fought to keep the French infantry at bay, conducting one of the hardest military manoeuvres to pull of successfully, namely a withdrawal in the face of the enemy.
Fortunately the broken country that characterises the slopes leading down to the river helped keep the French cavalry away, with the allied troops able to make use of the walled enclosures to aid their defence but having to be wary of not getting trapped within as the French looked to move around the pockets of resistance as they pressed forward.
The crisis in the battle occurred when an artillery caisson become stuck on the tight turn in the road leading to the bridge threatening to block the route and impede the infantry who in the close battle upon the slopes were in constant danger of becoming disordered and overwhelmed.
 |
| The hill above the bridge mentioned by George Simmons and up which he and Major McLeod of the 43rd Light Infantry led their soldiers to come to the aid of an isolated group of soldiers from the 52nd Light Infantry and hold open the retreat route by driving off the rather surprised French troops. Simmons was wounded in the attack on this hill. |
Lieutenant Simmons was wounded in the attack to retake the hill overlooking the bridge;
"I was shot through the thigh close to the wall, which caused me to fall with great force. Being wounded in this way was quite a new thing to me. For a few moments I could not collect my ideas,
and was feeling about my arms and body for a wound, until my eye caught the stream of blood
rushing through the hole in my trousers, and my leg and thigh appeared so heavy that I could not move it.
Captain Napier took off his neckerchief and gave it to a sergeant, who put it round my thigh and twisted it tight with a ramrod, to stop the bleeding. The firing was so severe that the sergeant, on finishing the job for me, fell with a shot through the head. Captain Napier was also about the same time wounded in the side.
The Division had now nearly got over the bridge; some men put me into a blanket and carried me off. Our General had placed himself some distance from the fight to observe the enemy's movements. I passed him in the blanket. The General had still in his remembrance the loss of his light cart. He told the men this was no time to be taking away wounded officers, and ordered them back. They observed, " This is an officer of ours, and we must see him in safety before we leave him." The last party of our men retired over the bridge and occupied it.
As the Light Infantry crossed the bridge, they immediately occupied the rocks opposite it and along the walls of the bridge as the French prepared to force a crossing;

Simmons account concludes with this final French assault;
"The ground was very rugged and rocky close to the bridge, so that Rifle Men were placed behind every stone, and two companies of the 43rd hid themselves and were ready to support our men.
Several Frenchmen held up calabashes as much as to say, " Let us get some water to drink." Our men allowed some of the enemy to get water, and did not fire upon them, but the cunning rogues made lodgments between the stones, and when their party was ready to storm the bridge, they commenced firing upon our men.
 |
| The River Coa under the bridge leading up the rocky twisting valley. The French skirmishers feigning needing water were allowed to get in among the rocks before opening fire on the allied troops as their column tried to force the bridge |
A number of French officers and some drummers headed the storming party. Our fellows allowed
them to come close to the bridge. Some officers got over before they fell, but few went back to tell
the tale, either men or officers. They attempted to force the bridge several times before the evening, and finding it impossible to effect their purpose, they made a signal to cease firing. An officer came forward waving a white handkerchief and requested to be allowed to remove their wounded, as the bridge and its vicinity were covered with their killed and wounded. This request was granted. The officer said he had heard of the English fighting well, but he could not have supposed men would have fought against such fearful odds. He complimented our men much upon their gallantry, and observed what a pity it was we were enemies.
During this day it rained occasionally, and towards evening more so, which made the arms frequently miss fire. After dark the Light Division marched to Carvalha."
 |
| The old road to Carvalha on the west bank of the Coa leads away from the old bridge very much in the condition it was in over two hundred years ago. |
The Light Division lost over 330 unnecessary casualties in an action that its commander had been warned to avoid by withdrawing sooner rather than later, only partially compensated for the losses in French troops suffering a similar number of casualties particularly in their final attacks on the bridge, with Captain Harry Smith of the 95th Rifles writing that;
"The bridge was literally piled with their dead and they made breastworks of the bodies."
The whole affair caused criticism to be heaped upon Craufurd from all quarters, leading to questions about his continuing command of the Light Division.
The day after the action, Craufurd wrote his report to Wellington and one can't help remembering when reading it Wellington's later remark to a much more incompetent independent commander, General Beresford after his abysmal command of Allied forces at the Battle of Albuera, when he, becoming frustrated at the tone of Beresford's report on the battle, exclaimed "this will not do, write me up a victory!"
Well the least that can be said of Craufurd is that his report manages to put a positive spin on a not so positive situation brought about by his own error.
 |
| Major General Robert Craufurd, commander of the Light Division |
Carvalhal, July 25th
My Lord,
I have the honour to report to your lordship, that yesterday morning the enemy advanced to attack the light division, with between three and four thousand cavalry, a considerable number of guns, and a large body of infantry. On the first appearance of the heads of the columns, the cavalry and brigade of artillery attached to the division advanced to support the picquets; and Captain Ross, with four guns, was for some time engaged with those attached to the enemy's cavalry, which were of much larger calibre.
As the immense superiority of the enemy's force displayed itself, we fell back gradually towards the fortress (Almeida), upon the right of which the infantry of the division was posted, having its left in some enclosures near the windmill, about eight hundred yards from the place, and its right to the Coa, in a very broken and extensive position, which it was absolutely necessary to occupy, in order to cover the passage of the cavalry and artillery through the long defile leading to the bridge.
After this was effected, the infantry retired by degrees, and in as good order as it was possible for them in ground so extremely intricate. A position close in front of the bridge was maintained as long as was necessary to give time for the troops which had passed to take up one behind the river; and the bridge was afterwards defended with the greatest gallantry, though, I am sorry to say, with considerable loss, by the Forty-third and part of the Ninety-fifth regiments.
Towards the afternoon the firing ceased; and after it was dark, I withdrew the troops from the Coa and retired to this place.
The troops behaved with the greatest gallantry.
(Signed) R. Craufurd
To Lord Viscount Wellington &c. &c.


Wellington, to his credit, recognised the undoubted talents of his Light Division Commander, maintaining friendly relations with him after the event, but his frustration clearly shows in a letter about the affair to his younger brother Henry Wellesley;
"Although I shall be hanged for them, you may be very certain that not only I have had nothing to do with, but had positively forbidden the foolish affairs in which Craufurd involved his outposts. . . In respect to the last... I had positively desired him not to engage in any affair on the other side of the Coa... I had expressed my wish that he should withdraw his infantry to the left of the river. . . After all this he remained above two hours on his ground after the enemy appeared in his front... during which time he might have retired across the Coa twice over... You will say, if this be the case, why not accuse Craufurd? I answer, because if I am to be hanged for it, I cannot accuse a man who I believe has meant well, and whose error is one of judgement, and not of intention."

In part two of this post I will be looking at the actions conducted by General Craufurd and the Light Division whilst covering the allied army on the Beira frontier as the French army laid siege to Ciudad Rodrigo and illustrating how Craufurd had previously earned the respect he had from his commander.
Sources used in this post:
The Sieges of Ciudad Rodrigo 1810 & 1812 - Tim Saunders
A British Rifleman - George Simmons