Saturday 25 November 2023

The Frontier Sea, The Napoleonic Wars in the Adriatic - Dave Watson


My recent reading has included this interesting title, 'The Frontier Sea' written by Dave Watson (DW) looking at the warfare in and around the Adriatic Sea that formed a very specific theatre in the wider conflict in the Mediterranean during the Napoleonic Wars.

I can't say as a Napoleonic scholar that I am as well read enough on this very interesting but seemingly little covered theatre of the wider French Revolutionary and Napoleonic War, having, like many I guess, focussed more attention on the wider land war in mainland Europe, the Iberian Peninsular and the Western Mediterranean and the campaigns in Egypt and the Levant, thus leaving a poorer understanding of the role of the great powers bordering on the central and eastern Mediterranean such as Austria, the Ottomans and of course the Russians projecting power through the use of their Black Sea Fleet.

These key players were inevitably drawn into the back drop of the struggle between Great Britain and the French Empire in what developed into a sort of Mediterranean Great Game of power politics as the wider future of Europe was determined during the First Great War.

A small copy of the Johnson Map of the Austrian and Turkish Empire is used to illustrate the book and is available on Wikipedia to download which might be a good recommendation when following the text, to have a larger copy of it to hand as it will definitely help to provide a good sense of the territory in what can at times seem a complicated part of the world to understand with all the name changes that have occurred over the centuries.
Johnson Map of Austrian Empire

With my current focus on the naval conflicts that characterised this period, I am well aware of some of the naval actions that were a feature of the war that developed in the Adriatic, the Battle of Lissa fought in 1811 being perhaps the most famous, particularly in the latter part of the Napoleonic conflict and I was fortunate to listen to Gareth Glover wax lyrically about the theatre when he presented on his new book at the time 'The Forgotten War against Napoleon - Conflict in the Mediterranean 1793-1815', back in 2020, link below.

However books focussed specifically on the conflict fought in the Adriatic Sea and its coastal area are few and far between and with Glover's book acting as a prompt to know more, and having spent pleasant summer holidays in the area in places such as Pula, now in Croatia but was part of the former Yugoslavia when I visited, just after the death of Tito, the Greek Islands of Paxos and Corfu and of course Venice, several times, I was keen to develop my understanding, always with a wargaming interest underpinning the historical one.

The other interesting aspect to this particular book is that as well as being somewhat of a specialist in this specific theatre of the Napoleonic Wars, as the links to DW's blog and Balkan history platform will show, he is also a wargamer and takes an appendix to his detailed history to look specifically at wargaming the Adriatic conflicts, including details on rules, figures and scenarios that I found very useful, quoting as he does a hero of mine, the late Dr David Chandler;

'I have never underestimated the value of wargaming as an aid to serious study as well as a means of relaxation.'

A sentiment by the great man that I wholeheartedly concur with.

Interestingly my reading of this book coincided with my current diet of Audible listening whilst working on my current Camperdown project which is focussed on working my way through the Aubrey-Maturin series of books by Patrick O'Brian, and happened to be listening to one of the titles referenced, namely The Ionian Mission, which concludes with the dramatic action between Aubrey's 28-gun frigate Surprise and the Turkish frigate Torgud 32-guns, mounting 24-pounders and two mighty 42-pounders amidships supported by a corvette Kitabi 20-guns off the southern tip of Corfu.

Of course O'Brian was referencing an historical engagement for his fictional account covered in Watson's account, namely that between HMS Seahorse 38-guns and the Turkish 52-gun frigate Badere Zaffer and an accompanying corvette Alis Fezzan, on the 5th-6th July 1808, with the Turkish frigate similarly armed.

As I was reading DW's history I found myself thinking, hang on where have I heard of this action before, until I came to the next line explaining O'Brian's adaptation. Needless to say, another two scenarios have been added to the list, both the historical and fictional ones and if you are similarly interested you might find the links below useful.

HMS Seahorse capturing the Badiri-i-Zaffer 6th July 1808 - Thomas Butterworth (RMG)
https://en.wikipedia.org/wiki/HMS_Seahorse_(1794)
Ship Manoeuvres in Patrick O'Brian's Ionian Mission

As well as wargaming and fictional references, DW's account is very much about the actual history, looking at the theatre in the French Revolutionary War period prior to 1797 and from then up to the Treaty of Amiens in 1802, with specific sections looking at the Russian, Ottoman, Venician and Austrian interests that impacted on British and French involvement.

Albanian Soldier (New York Public Library) Turkey 1810-17
One of the illustrations in the book covering Ottoman uniforms

This involves looking at the forces involved, land and sea together with the key commanders such as Ali Pasha, Sultan Selim III, Admiral Fyodor Ushakov and Osman Pasvanoglu, to name a few, together with principal fortresses on the mainland and the islands that were main bases for the armies and fleets.

The Balkan region was a hotbed of small wars between the competing empires of Austria, Russia and the Ottomans where the light raiding forces of both sides were key to fighting in the rugged and broken terrain that characterises the region.

Battle of Lissa 13th March 1811 - Nicholas Pocock
https://en.wikipedia.org/wiki/Battle_of_Lissa_%281811%29

This, alongside the wider Napoleonic conflict that sees French expansion in the area between 1802-09, also includes an account of the Russo-Turkish War of 1806-09, and the 1st Serbian Revolt, before moving to the period of French declining fortunes from 1810-15 and a greater British presence in the Adriatic against a background of another Russo-Turkish War 1809-12 and another Serbian revolt, well illustrating the hotbed of activity and diplomatic minefields that the theatre was for the competing British and French commanders, seeking to extend alliances and sow discontent among those of the enemy.

Combat de la Pomone, 1811 - Pierre Julien Gilbert

The Frontier Sea - The Napoleonic Wars in the Adriatic, is in paperback and is published by Amazon with a cover design by Henry Hyde, featuring the battle between the French frigate Pomone 40-guns and the British frigates Alceste and Active each of 38-guns fought close to the island of Augusta (modern day Lastovo) in the Adriatic on 29th November 1811.

The book is consists of 175 pages that includes the following:

Prologue
Introduction

Chapter 1 - The Adriatic before 1797
Russia
Ottoman Empire
Austria
Naval Warfare

Chapter 2 - War comes to the Adriatic -1797 to 1802
Ionian Islands
The Russians enter the Mediterranean
Ali Pasha and the French
The War of the Second Coalition 1799-1801

Chapter 3 - Small War in the Balkans
The Military Border
The Ottoman Frontier
Border Conflicts
Ali Pasha

Chapter 4 - French Expansion 1802-09
Italy
Dalmatian Campaign of 1806
Naval Attack on Istanbul
Russo-Turkish War 1806-09
1st Serbian Revolt
Adriatic Manoeuvres

Chapter 5 - France on the Defensive 1810-15
Russo-Turkish War 1809-12
British Adriatic Offensive
Kingdom of Naples
Serbian Revolt Reignites

Chapter 6 - Armed Forces in the Adriatic
France
Russia
Britain
Ottoman Empire
Montenegro
Austria

Chapter 7 - Conclusion

Appendix 1 - Chronology
Appendix 2 - Wargaming the Adriatic Conflicts

Notes
Bibliography
Acknowledgements
End Notes
About the Author

At the time of writing, the book is available through Amazon for £8.99 and on Kindle for £8.90

I very much enjoyed this read about what for me was very much a superficial understanding of the events of this period in history for this very particular region and I now feel I have a much better understanding of them, so much so that it has informed my continued listening of Patrick O'Brian's 'Treason's Harbour' and has fired the imagination for the creation of some more single-ship and small squadron engagements that I have been compiling for my 1:700th collection of ships using the accounts from William James.

If you are interested in the theatre, I think this book would be a good one to have in the library and I'm sure I will be referencing from it in the future.

If I were to include two smallish criticisms it would include the age old one of more maps and bigger ones that are easy to consult for those of us unfamiliar with the places being referenced, and an index to aid search specific reference subjects more readily. The End Notes giving the sources is excellent but for most purposes I find a reference list at the back of my books often the most useful resource once I've read a book and discovered its worth.

Dave Watson includes his personal profile that mentions his role as Secretary of the Glasgow and District Wargames Society, amongst other things and as well as authoring several other books including 'Turkey and the Second World War' by Helion, is editor of the Balkan Military History Web Site and has his own blog, Balkan Wargamer (links above and below).
Next up on JJ's: Progress continues with the Camperdown collection as Powerful 74-guns, Agincourt 64-guns and Adamant 50-guns complete this weekend before transferring to the riggers yard next week to complete the line up of the ships in the British Leeward Division, and I have a post coming together continuing Carolyn's and my adventures on the north Queensland coast of Australia around Cairns, exploring the Great Barrier Reef and the amazing tropical rainforests in the area - more anon.

JJ

Friday 17 November 2023

Warfare 2023 - Wargames Association of Reading


Last weekend Steve M and myself made the drive up the A303 to attend Warfare 2023 hosted by the Wargames Association of Reading, and a show Steve and I have gone to over several years previous back in the days of desperate parking around the Reading Sports Centre, to our most recent trip which saw us at draughty Ascot in 2021 when the show relocated post Covid and all the doors were open to provide supposedly necessary fresh air for all concerned but leaving a lot of very cold traders next to the opened doors. I've attached a link below to my show report from that visit.

JJ's Wargames - Warfare 2021

At the time of the Ascot show, it was common knowledge that this was not to be a permanent new home for the show, and already Farnborough, famous for its air shows for the civil and military aviation industries, was the likely venue change, and I would have travelled up last year had it not been that I was off on my travels down under and so pencilled the date for 2023.

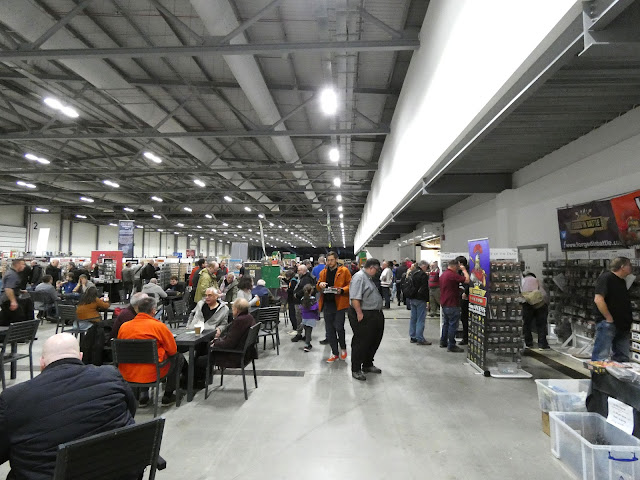
We had a very pleasant drive up on Saturday morning with very light traffic coming up from the south-west, some thing that can't always be guaranteed in summer months and arrived at the venue just after 11am and were immediately impressed with the ample parking arrangements, coupled, when we completed our walk from the car, with an equally impressive show space as seen below.

A busy show hall at this year's Warfare 2023

The Reading chaps have done a good job on the organising of the event from what I could see, with the opportunity to pre-purchase e-tickets online, which I availed myself of, Steve preferring the old fashioned cash in hand mode of entry, and our arrival and entry was very smooth, us banking on the disappearance, within the hour of doors opening at 10am, of a large number of the usual crowd that seem to arrive at shows, pick their pre-ordered stuff up from traders and then leave before midday.

As you know, I like to get a full show experience that not only means picking up stuff from traders and supporting the hobby industry, but also checking out the games and talking rubbish with fellow enthusiasts of our great hobby, and this year I figured the latter aspect would be prominent as there wasn't any pressing items to be bought on this visit, so I went around the traders with that pleasant serendipitous approach of 'if I see anything I need I'll get it, and if not I wont' .

Whilst taking time out for a lunch break, Steve and I also got time to meet up with pals from Penarth who were also at this year's show, with chat naturally turning to thoughts of some joint games to play next year and Simon S. from the NWS with thoughts about future naval games at Yeovilton.

In the afternoon, I set off, camera in hand, to take some extra time to look at games that appealed to me and chat with the chaps involved, and so in no particular order, I present this year's games that caught my attention for various reasons to cause my camera to linger and with all the games displaying a passion for the subject that is obvious to see.

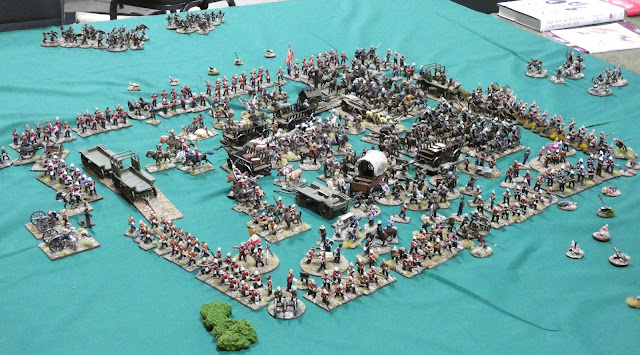
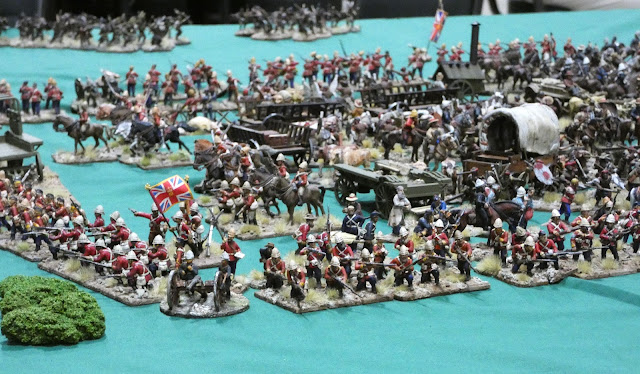
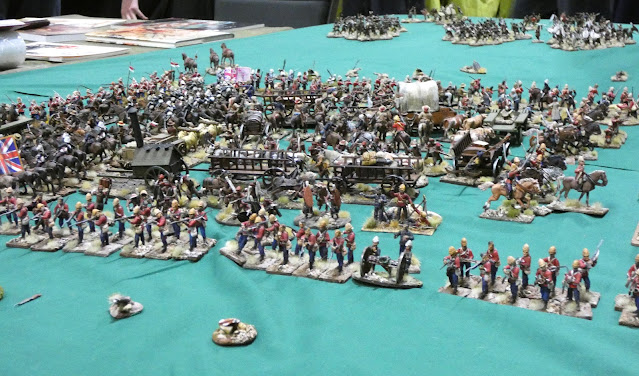
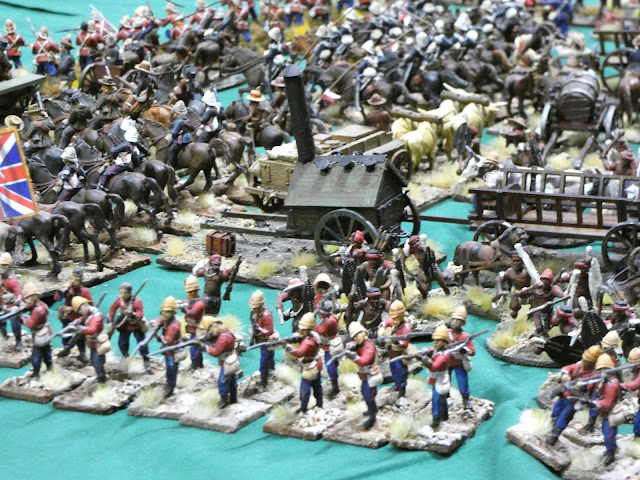
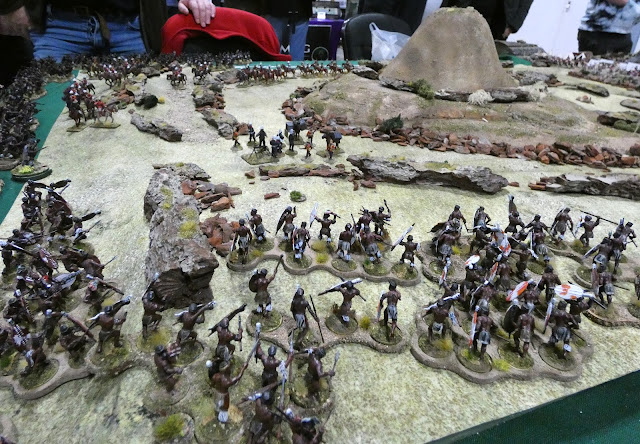
Battle of Ulundi 4th July 1879, 28mm Anglo-Zulu War - Jeremy R Fowler
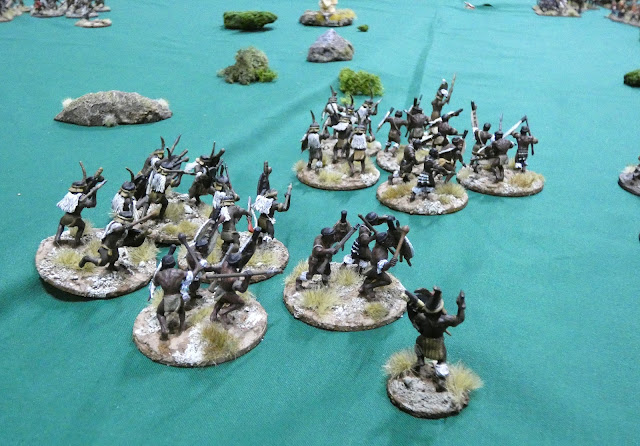
I love the Anglo-Zulu War as a period to play and the spectacle of the games it produces with the filmic drama that was captured in the films Zulu and Zulu Dawn brought to the table, just lacking the thunder of guns, and the chanting of Zulu warriors accompanied by the thumping drumming of assegais on leather shields.

When you see a large square of British redcoats surrounded by Zulu impis you immediately think of Ulundi and Mr Jeremy Fowler really captured the feel of this dramatic battle with this collection of figures, beautifully arranged with an attention to detail that had me captivated with each British unit in the square represented and arranged as they were on the day; to the scratch built field oven at its centre that has an amazing back story of its own, to the modelling of the Zulu shield store, on stilts to protect the leather shields from rats, complete with a young Zulu handing out new shields from its interior.

It was great to chat with Jeremy about this collection and enjoy hearing about the research that went into its creation, a man after my own heart.


Each unit indicated on the plan of the square below is modelled accordingly.


Zulu shield store complete with Zulu quartermaster.

The plan for the Imperial square that informed the position of the units represented on the table - you've got to love this attention to detail.


The field kitchen present at the battle and wonderfully rendered here in the game

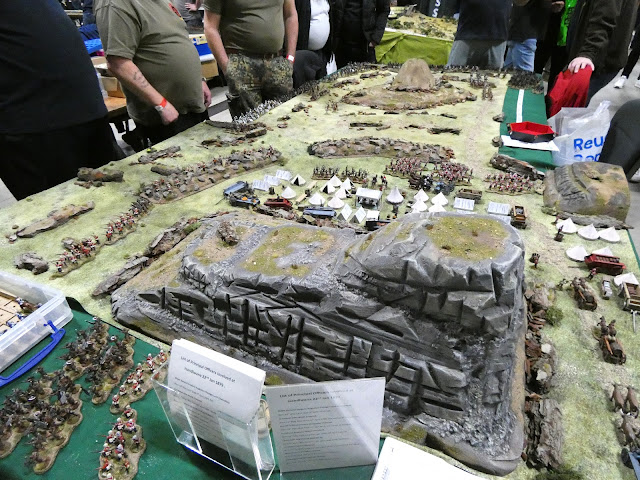
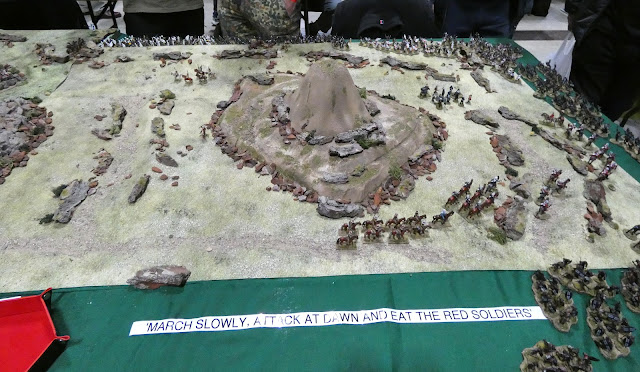
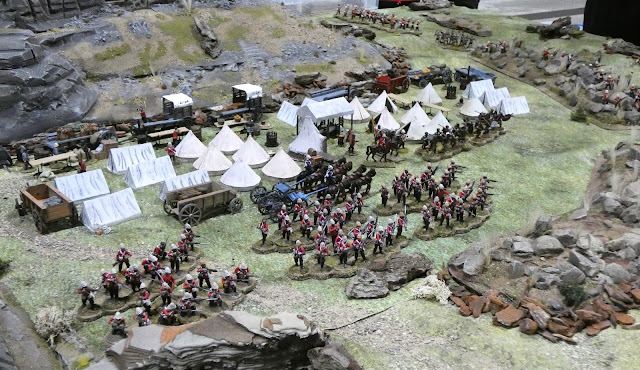
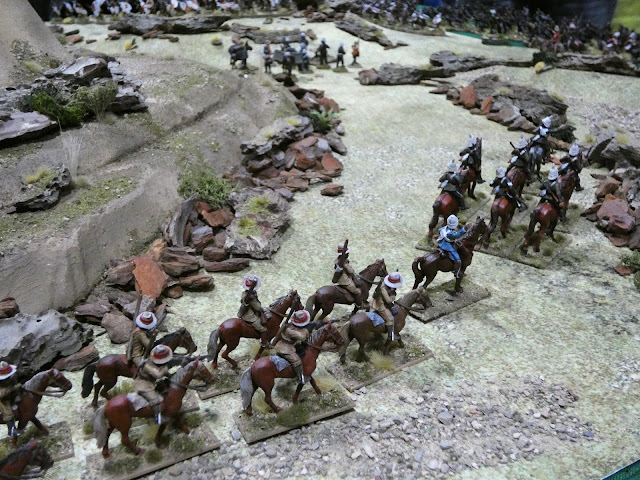
Isandlwana 22nd Jan 1879, 28mm Anglo-Zulu War - Combined Oppo's Wargames Group
The Anglo-Zulu war theme was well represented this year with the chaps from the Combined Oppo's Wargames Group up from my home town and regular participants at Warfare, I having regularly featured their games previously, which are always a feast for the eye, and this year's Isandlwana game was equally impressive, with plenty of cameo groups on the table to feast the eye upon.

Nicely done chaps.


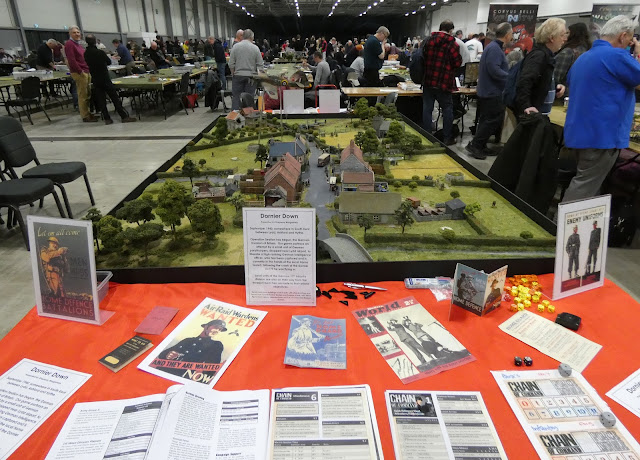
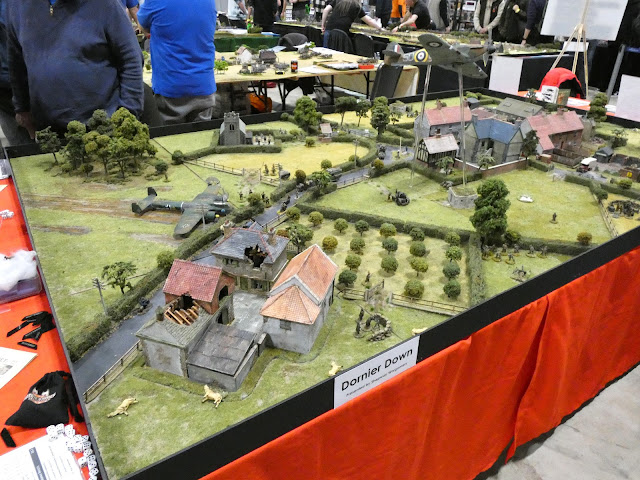
Dornier Down, Chain of Command - Shepway Wargamers
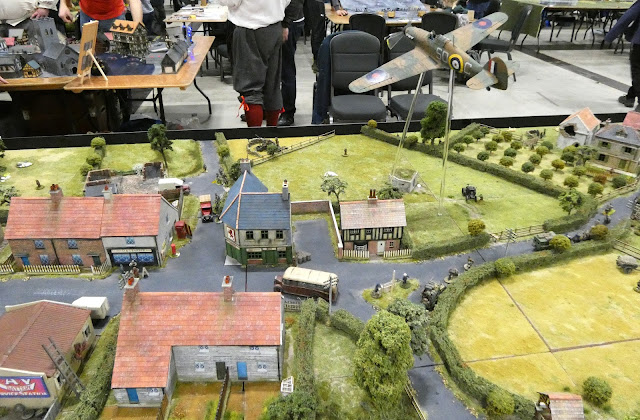
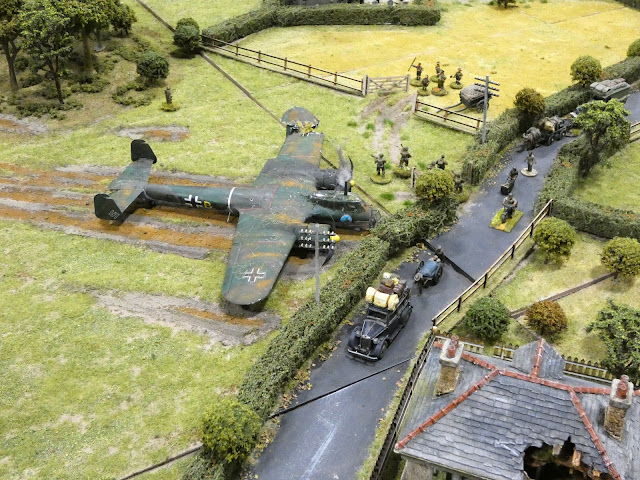
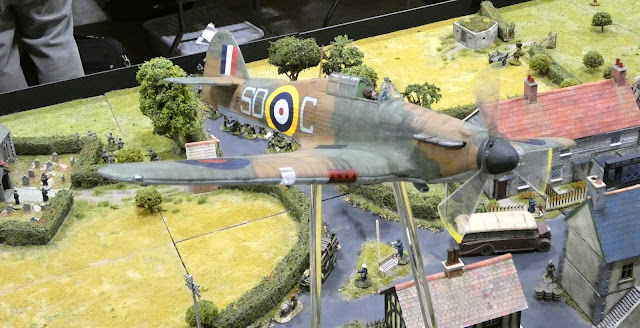
Before delving into the dark arts of historical wargaming, I stumbled my way into the hobby from the world of model making, which probably goes a long way to explain my love of detail that visually captures the theme portrayed; and the sight of a large model Hurricane wheeling away from a crash landed Dornier Do17Z bomber recreating a very well known picture of a well documented incident during the Battle of Britain that saw the interception of these low level specialist German bombers.

What I really enjoyed seeing, was this very famous cameo moment from the Battle of Britain linked into a game of Chain of Command, recreating a 'what if' Operation Sealion invasion game, with shades of 'Dad's Army - don't tell him Pike', combined with some lovely terrain creation and figure modelling.

As well as showing the overall table space for 'Dornier Down' by the Shepway Wargamers you get a really good impression of the overall show space at Warfare, with the competition games towards the back of the hall.

The briefing for the game explains;

September 1940, somewhere in South Kent between Lydd, Ashford and Hythe.

Operation Sealion has begun, the German invasion of Britain. Our game portrays an attempt by a small unit of German paratroopers, dropped near Lydd airport to liberate a high-ranking German intelligence office, who has been captured and is currently in the hands of the local Home Guard, following the crash of the Dornier Do17Z he was flying in.

Lead units of the German 17th Infantry Division are also on their way from the invasion beaches, on route to their inland objectives.


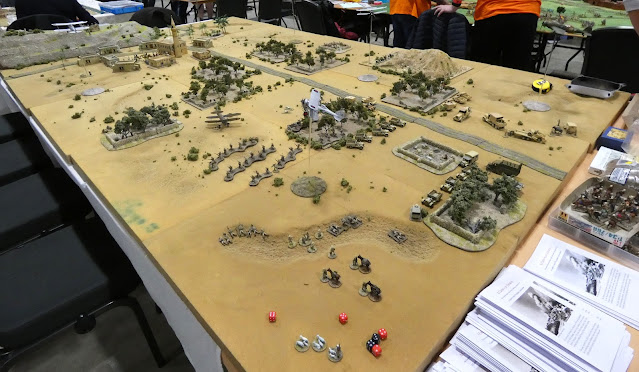
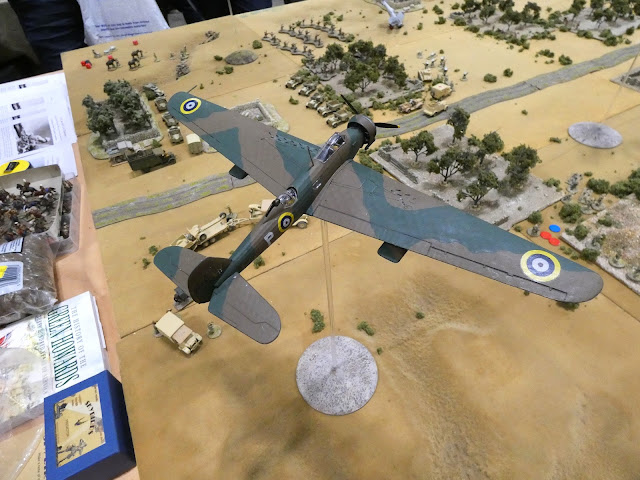
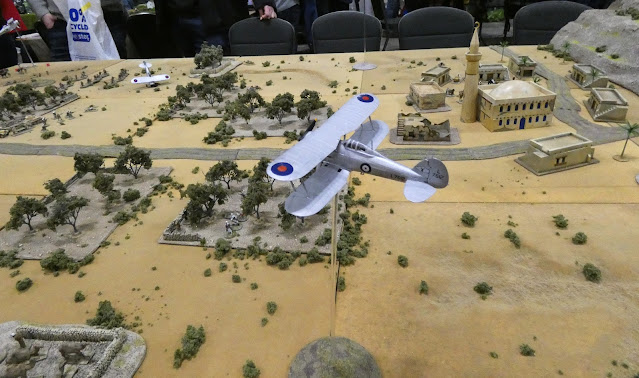
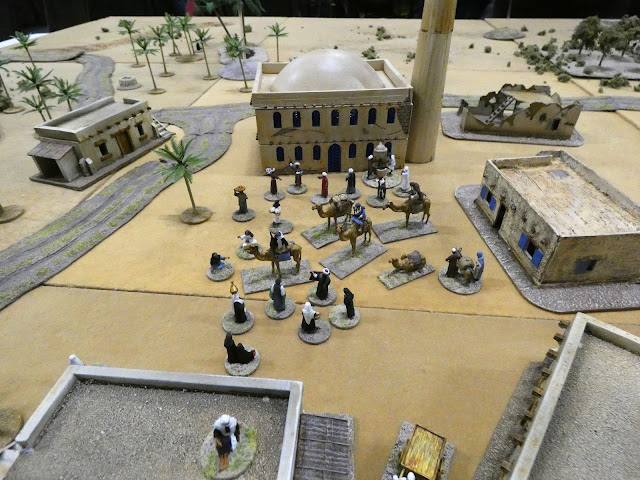
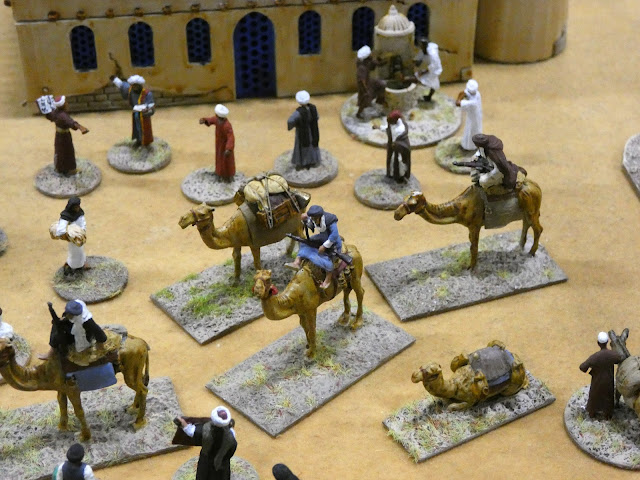
Palestine 1938 (The Green Howards in Beit Faruk, October 1938) - Deal Wargames Society
An area of the world that is very much in the headlines was a feature of this particular game, capturing as it did Britain's previous role of world policing that thankfully is something the nation is less involved in these days, but capturing the endless nature of the asymmetric warfare that has become a common feature of most modern conflicts prior to the war in Ukraine.

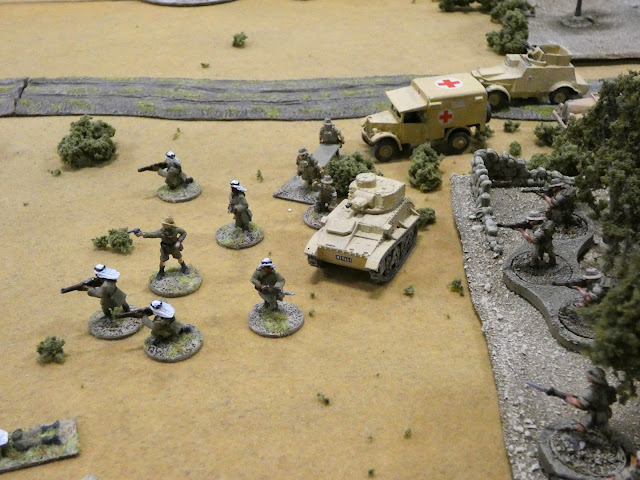
The theme of the game from the Deal chaps was the Arab revolt in Palestine in 1936 against the British Mandate, with Arab insurgents attacking British garrisons in the countryside and then slipping away, enjoying widespread support from the locals.

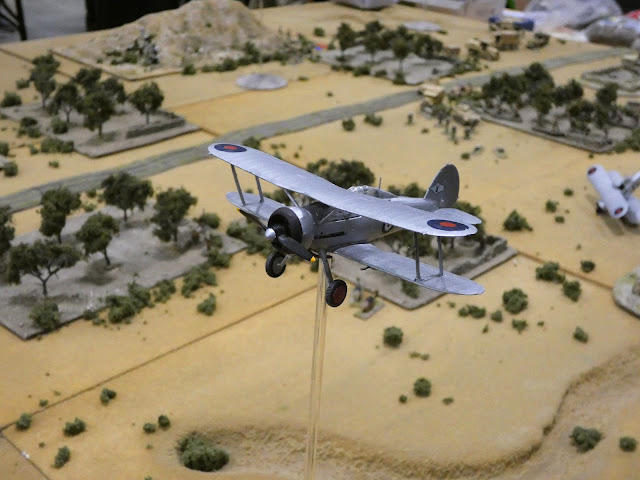
The game displayed was based on the Official History of the Green Howards during which they launched an attack on Arab positions supported by light mechanised forces, artillery and air power, wonderfully represented by an assortment of figures and vehicles and Gloster Gladiator fighters and a Vickers Wellesley light bomber.

In a three hour battle with rebels, one Green Howard was slightly wounded, twelve rebels killed and the pilot of a shot down Gladiator rescued (note the crashed Gladiator), but later dying of his wounds.


The marvellous Matchbox rendition of the Vickers Wellesley, forerunner to the Wellington medium bomber of WWII, this kit displaying the geodetic wing and tail plane structure, if you look closely. 

An Airfix Gladiator wheels over the battle below

The Arab miniatures were a mixture of Airfix, Early War Miniatures, Strelets and Nikolai figures


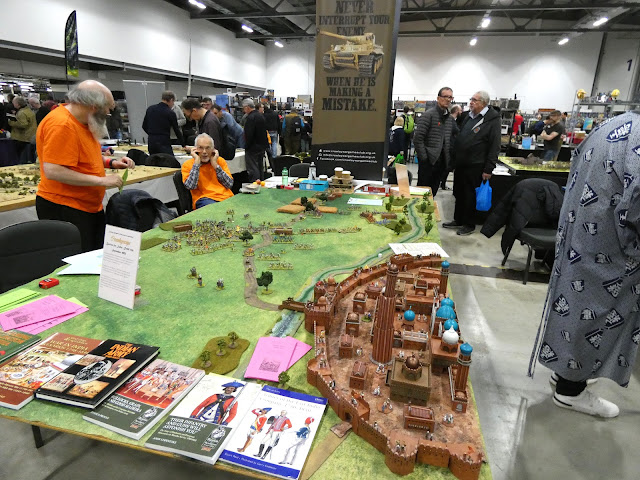
Battle of Delhi, 11th September 1803 - Crawley Wargames Club
Together with a recipe from the Crawley Curry Club, the Crawley Wargames Club served up a 15mm recreation of the Battle of Delhi pitting General Gerard Lake's Bombay Army of some 5,000 men against French General Louis Bourquin leading a large Mahratta army of some 15,000 men;

'Delhi Dal Mahani - A rich mixture of kidney beans, black lentils, tomato and buttered cream. Served with a refreshment of red porter ale from Limerick. Originally served on 11th September 1803.'

Lake would deploy his cavalry ahead of his infantry before the Mahratta guns, withdrawing them as his infantry closed up out of sight in very tall grass, before withdrawing his cavalry and feigning an army withdrawal seeking to draw the Mahratta's out from their strong position on a ridge with swamps on either side.

The plan succeeded and when the Bombay and British infantry attacked, the surprise was complete breaking the enemy who quit the field leaving behind 3,000 casualties and 60 guns, with the British suffering some 500 casualties mainly among the European infantry.


The rules in use were Age of Eagles 19th Century, since renamed by the club, Age of Tigers and the figures on show were like a trip down memory lane for yours truly with figures from Fighting 15's, Lancashire, Irregular, Two Dragons, Minifigs and QRF/Freikorps.

I must admit to painful memories of using the old brittle Freikorps figures back in the day and losing a large collection of AWI troops to broken ankles that somewhat hastened my move to 18mm and AB, but that is another story, and I did enjoy getting a close look at this lovely presentation.


A splendid rendition of part of the city walls of Delhi


So another Warfare and another year of wargame shows fast approaching a conclusion, and a rather sparse one compared with my usual calendar, with just Partizan in May and now Warfare, mainly explained by my extended time away on my travels and the need to catch up on my own wargaming projects in the remaining time once I was home that has seen a reduced calendar of other events.

Hopefully I can get back to a more normal year as we go into 2024, and it was nice to see the Reading chaps seem to have sorted themselves a much more serviceable venue for their show and thanks to them for organising it and to Steve, Glyn, Andy, Andy T and Simon for their company on the day.

More anon 
JJ
Friday 10 November 2023

All at Sea, Battle of Camperdown - Project Build, Part Three, British 74's of the Leeward Division

The Battle of Camperdown - Derek Gardner
The Leeward Division carried the red ensign of Vice Admiral Richard Onslow led into action by his flagship HMS Monarch 74-guns.

Work has progressed with the Camperdown project and the current phase to complete Vice Admiral Richard Onslow's Leeward Division of the British fleet under the overall command of Admiral of the Blue, Adam Duncan.

The eight ships of the line that would form the Leeward Division at Camperdown, to this would be added the fourth rate Adamant 50-guns with, as shown here, the attached fifth-rate frigate HMS Beaulieu 40-guns.

The previous two posts can be followed in the links below.


As per my last post I've included my battle layout below with the models built to date and added to the collection, which now includes three of the four 74-gun ships of the line that were part of Admiral Onslow's division, HMS Montagu, Onslow's flagship HMS Monarch and HMS Russell, that together with the three 64's featured in Post Two formed the spearhead of the Leeward Division's assault on the Dutch Rear


In the next post I will complete the Division with a look at the other three ships to come under Onslow's command, the 64-gun Agincourt, Powerful 74-guns and the fourth-rate, Adamant 50-guns, that ended up joining the rear of the division in the haste to press the attack.

Vice Admiral of the Red, Sir Richard Onslow - Thomas Philips (National Maritime Museum)
Born 23rd June 1741 - Died 27th December 1817 aged 76

The command of the Leeward Division and Admiral Duncan's second in command was Richard Onslow, who joined the navy circa 1758, and with his father being a Lieutenant General with considerable interest, saw his rapid rise from fourth lieutenant on the Sunderland 60-guns in 1758 to Commander of the 14-gun ship-sloop Martin, at the tender age of 19on the 11th February 1761, four days after her launch at Rotherhithe in London.

Captain Richard Onslow, seen here as a young man, perhaps about
the time when he took command of HMS Humber 44-guns . 

In April 1762 he took command of the fifth rate HMS Humber 44-guns, operating in the Baltic, but he was court-martialled following her floundering and wrecking off Flamborough Head on the 16th September 1762, and, acquitted for her loss, with the blame placed on the local pilot, he took command of the fifth-rate Phoenix 44-guns in November 1762, until May the following year when he would find himself ashore on half pay.

Lord Howe's Fleet sailing for Sandy Hook, July 1777 - Irwin John Bevan.
Onslow at HMS St Albans would join Howe's Squadron in time for the action at Sandy Hook

Captain Oslow, would take command of the 64-gun St Albans, on 31st October 1776, as part of the naval build up for the American War of Independence, escorting a convoy to New York in April 1777, and joining Lord Howe's fleet on the American Station that would see him in action with D'Estang's French squadron at Sandy Hook 22nd July 1777, before sailing to the West Indies in November of that year with Commodore Hotham, seeing action at the capture of St Lucia in December 1778 before returning home in 1779 escorting a convoy from St Kitts.

Bellona and Courageux off Spithead - Geoff Hunt
Onslow would command this famous British 74 from 21st February 1780 to 7th June 1783

The return home saw him appointed to command the Bellona 74-guns on 21st February 1780 as part of the Channel Fleet, seeing him capture the Dutch Prinses Carolina 52-guns in the Channel on the 30th December 1780, later taking part in the two relief convoys for Gibraltar in April 1781 and October 1782, but by June 1783 was ashore and back on half-pay with the end of the American War.

On the 31st March 1789, Onslow was back in command with his appointment to HMS Magnificent 74-guns on the 31st March 1789 but was back ashore by the 5th September 1791, later receiving his promotion to flag rank as Rear-Admiral of the White on the 1st February 1793, with the commencement of war with Revolutionary France.

On the 4th July 1794 he was promoted to Vice-Admiral, later taking command at Portsmouth as Port-Admiral in 1796 before joining the North Sea Fleet under Admiral Duncan in November of that year aboard his then flagship HMS Nassau 64-guns.

HMS Leopard, depicted here was a Portland Class 50-gun fourth-rate, sister ship to the Adamant that Onslow transferred his flag to during the Nore Mutiny

Onslow was to play a key role in the Nore Mutiny, suppressing a rising aboard the Nassau and quelling similar efforts aboard the Adamant, transferring his flag to her when the Nassau refused orders to sail, and together with Admiral Duncan, maintaining the appearance of a blockade off the Texel, with false signals to a non-existent fleet.

By the 13th of June 1797 the mutiny was over and all the ships involved had surrendered and on the 25th July Onslow had transferred his flag again to the Monarch, with his flag-captain Edward O'Bryen in time for the Battle of Camperdown.

Onslow would be honoured with a baronetcy and the Freedom of the City of London for his role in the mutiny and the victory at Camperdown retiring in December 1798 as Commander-in-Chief, Plymouth, and being promoted Admiral of the Red on the 9th November 1805 and awarded the Order of the Bath in 1815, dying at the age of 76 on the 27th December 1817.

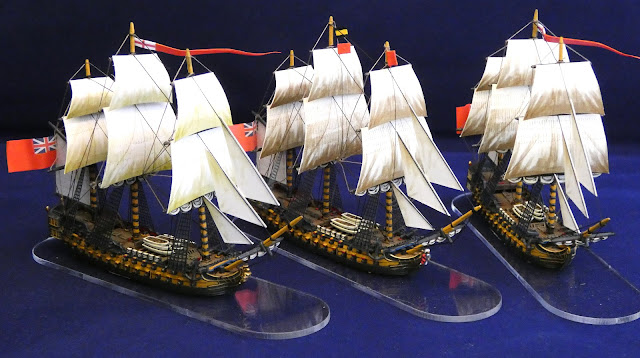
From left to right, my new additions, Russell, Monarch and Montagu

So with an overview of Vice-Admiral Onslow's career, I can turn my focus on the models I have put together to represent these first three 74-gun ships under his command, starting with his flagship HMS Monarch, and as with the preceding post I thought it would be interesting to look at the ship's logs from the battle together with a brief history and look at the individual ship statistics.

HMS Monarch
Nelson Forcing the Passage of the Sound, 30th March 1801, Prior to the Battle of Copenhagen - Robert Dodd (RMG)
HMS Monarch 74-guns seen here leading the Elephant 74-guns with Nelson's flag flying as a Vice-Admiral of the Blue.

HMS Monarch was a Ramilles Class 74-gun ship of the line built and launched in 1765 in Deptford, London, the class being a Thomas Slade design.

Her general characteristics were:
Tons burthen 1612 (bm)
Length of gundeck 168 feet, 6 inches 
Beam 46 feet, 9 inches
Depth of hold 19 feet, 9 inches

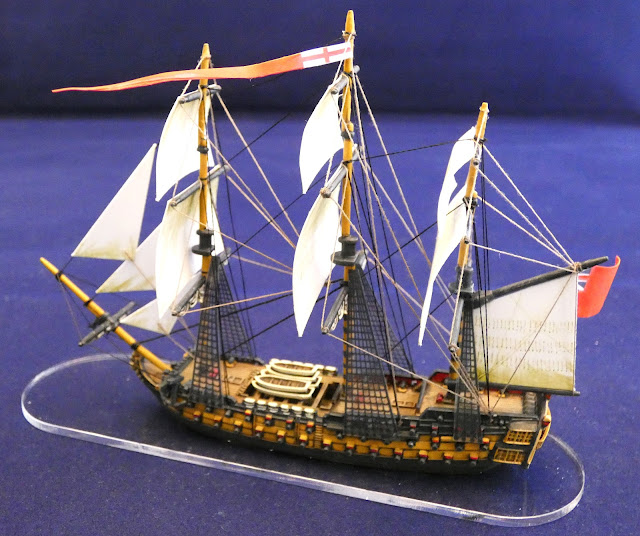
My interpretation of HMS Monarch 74-guns, flagship of Vice-Admiral of the Red Sir Richard Onslow, carrying his red flag on the foremast and flying Signal 41- 'Engage enemy's rear', at the mainmast made to HMS Montagu at 13.46 at the Battle of Camperdown. My efforts to capture the look of her figurehead, seen above is a conversion job on one of those supplied in the Warlord model.

Her armament consisted of:
Gundeck: 28 x 32-pounder long guns
Upper gundeck: 28 x 18-pounders long guns
Quarterdeck: 14 x 9-pounder long guns
Forecastle: 4 x 9-pounder long guns

Commissioned in October 1776 at Portsmouth, initially as a guardship, Monarch would join the Channel Fleet, taking her place in the line at the Battle of Ushant on 27th July 1778 under Admiral Kepple, suffering 3 killed and 26 wounded.

Second Battle of the Virginia Capes - V. Zveg (Hampton Roads Naval Museum)

In 1780, newly coppered in May she was with Admiral Graves' fleet in action in the van at the Battle of Chesapeake, 5th September 1781.

In the following year she would be heavily involved in Admiral Rodney's Caribbean campaign seeing action at the capture of the Dutch island of St. Eustatius in  February 1781, and managing to catch a Dutch convoy of thirty ships carrying contraband on the 4th of that month escorted by a 32-gun Dutch frigate, Mars, which resulted in their capture after a short engagement with the Mars resulting in the death of Dutch Rear-Admiral Willem Krull.

Battle of Frigate Bay 25th - 26th January 1782 - Thomas Maynard

Monarch would go on to see action at the Battle of St Kitts or Battle of Frigate Bay 25th - 26th January 1782 only losing 2 killed and 2 wounded and Rodney's crowning victory at the Battle of the Saintes, 12th April 1782, suffering 16 killed and 33 wounded.

Battle of the Saintes, 12th April 1782 - Thomas Whitcombe

The Monarch would finish the American War with another battle honour and victory to her name with the Battle of the Mona Passage, 19th April 1782, when a British squadron of ten ships overtook a small French squadron of two 64s, two frigates and a corvette capturing four of them including the two third-rates.

The Capture of the French 64-gun Caton and Jason by the Valiant 74-guns at the Battle of the Mona Passage 9th April 1782 - Dominic Serres

In 1787 Monarch was in the repair yard at Chatham undergoing a three year overhaul until January 1790, joining the Channel squadron in July 1790 but being paid off in September 1791, only to be recommissioned in December 1792, later fitted out again as a guardship in January 1793, before sailing to the Leeward Islands where from the 5th of February to the 24th March 1794 she was involved in the attack on Martinique.


In April 1795 she became the flagship of Rear-Admiral Sir George Elphinstone deployed with a small fleet to capture the Dutch colony of the Cape of Good Hope, with the Dutch finally forced to capitulate on the 15th September, this following the capture of a small Dutch squadron in Saldanha Bay consisting of 3 ships of the line, 4 frigates, 1 sloop and 6 merchant ships.

Captain Edward O'Bryen

Sailing for home, Monarch was refitted at Portsmouth in August 1797, coming under the command of Captain Edward O'Bryen and as mentioned in the look at Admiral Onslow's career record would become his flagship just prior to the Battle of Camperdown.

As HMS Monarch was a flagship at Camperdown, and as with previous battle fleet projects, I like to add the odd signal flag alongside my admirals flags to indicate these important command ships.


With the British this is somewhat easier with the copious works looking at British naval signals and with the ultimate tome available and certainly in my own library, Naval Warfare in the Age of Sail, The Evolution of Fighting Tactics 1650 to 1815 by Brian Tunstall, a must have in any Age of Sail enthusiasts collection of books.

In it Tunstall states;
'Tactically, Camperdown (11 October 1797) was a Howe battle in the sense that on the British side it was fought with Howe's signal book and accompanying instructions. On the Dutch side it was fought with a numerical signal book containing 795 signals and of unrivalled simplicity in arrangement - unrivalled even by Howe's.

It was based on ten flags, numbered 1-10, with pendants for the hundreds, but the book was thumb-indexed so that the relevant pendant, together with the ten flags, could be seen on each page, with the signal opposite the flags, the flags for the tens being shown along the top.'

Tunstall then gives some examples of these very specific signal instructions;

Dutch Battle Signals of 1797
No. 715  Attack the enemy's van to windward with a superior force of the heaviest ships in the line of battle; light ships to support the attack in lozenge formation on perpendicular  of the wind.


Sadly I don't as yet have examples of these Dutch signal flags, but please point me in the direction of where I can find them if you know, as I would love to add them to my Dutch flagships.

Fortunately Howe's Signal book is readily available, together with the signals made by the two British flagships in the battle, and I decided to select one specific example that will fly from my HMS Monarch, namely signal 41, made to HMS Montagu at 1.46pm to 'Engage enemy's rear'.

Instructions for the use of Lord Howe's Signal Book, used for the Battle of Camperdown.
Monarch to Montagu at 1.46, Signal 41 - Engage enemy's rear

As in the previous post I decided to use the logs of the ships portrayed to look more closely at their involvement in the battle.

The following note appears in the account from HMS Monarch.
[The log of the Monarch, though greatly superior to that of the Commander-in-Chiefs flag-ship, does not give a good account of the action. More details are to be gathered from the very complete signal log which follows.]


Extracts from the log of HMS Monarch at the Battle of Camperdown
Log. THOMAS WHIDDON, Master. Official No. 2799.

October 11th. 
A.M. - Fresh breezes. Admiral N by W. 1/2 past one, tacked ship per signal. Fleet in company. Squally with rain. 1/2 past 6, tacked per signal. At 1/2 past 7, discovered the Russell, Adamant and Beaulieu to leeward with the signal for the enemy on the SSW. Answered it and bore up. 

At 9, discovered the enemy's fleet bearing as above. Do. prepared ship for battle and made all sail for them, they being formed in a line of battle. 16 ships of two-decks, 4 frigates and 5 brigs. At noon, passed the enemy's line and began to engage the Vice-Admiral's ship to leeward.

'At noon, passed the enemy's line and began to engage the Vice-Admiral's ship to leeward.'

P.M. Moderate breezes and cloudy weather. In close action with the Vice-Admiral. Returned the fire of a Dutch brig, who sunk. At 1/2 past 1 , the Dutch Vice-Admiral struck. At 3/4 past 1, sent Lieut. Rider on board to take possession of the prize. The boat returned with the Dutch Admiral. She proves to be the Jupiter of 76 guns. 

'The boat returned with the Dutch Admiral. She proves to be the Jupiter of 76 guns.' 

All the Dutch ships in our rear had struck their colours. Employed in sending men on board the prize and receiving prisoners. At 1/4 past 2, observed a Dutch line-of-battle ship to windward on fire. 


At 1/2 past 2, the Dutch Commander-in-Chief dismasted, but still firing. At 3/4 past 2, the Montagu lying to to windward. At 3, the Dutch Admiral struck to the Venerable, when all firing ceased. Observed that 9 or 10 of the enemy's ships had struck their colours, the rest of their fleet made sail for the 

'Carpenters employed stopping of shot holes and other necessary jobs.'

Do. Wore ship. The Dutch land in sight all the action, distance 3 leagues. Employed knotting and splicing. Bent a new main topsail, the old one shot to pieces. Carpenters employed stopping of shot holes and other necessary jobs.

'The Dutch land in sight all the action, distance 3 leagues.' - HMS Monarch closes to engage the Dutch flagship Jupiter

October 12th.
A.M. At 6, wore and stood towards the Admiral. At 1/4 past 8, wore under the Admiral's stern and cheered him. Do. hove to in company with the fleet and prizes. Variously employed in securing the mast, rigging, &c. &c. Mustered ship's company. Found 35 to be killed and 95 wounded.

HMS Russell
Naval Battle of Copenhagen 1801 - Peltro William Tomkins, after John Thomas Serres (Rijksmuseum)
HMS Russell 74 guns is depicted, right of picture stern galleries in view

HMS Russell was a Ramilles Class 74-gun ship of the line built and launched in 1764 at Deptford, London, the class being a Thomas Slade design.

Her general characteristics were:
Tons burthen 1642 (bm)
Length of gundeck 168 feet, 6 inches 
Beam 46 feet, 11 inches
Depth of hold 19 feet, 9 inches


Her armament consisted of:
Gundeck: 28 x 32-pounder long guns
Upper gundeck: 28 x 18-pounders long guns
Quarterdeck: 14 x 9-pounder long guns
Forecastle: 4 x 9-pounder long guns

Completed on the 6th January 1765, the Russell's progress into front line service with the fleet was somewhat retarded with a year taken out from 1772-73 for a 'small repair' at Chatham prior to her eventual commissioning in September 1777 with the build up of the fleet to fight the American War of Independence with her being coppered and fitted out at Portsmouth from January to April 1779.


Her brief contribution to the war with the American colonies saw her sail under the command of Captain James Saumarez at the Battle of the Saintes, 9th April 1782 in the eleven ships of the Rear Squadron, suffering 10 killed and 29 wounded, and being paid off in the following month returning home for repairs at Chatham from November 1782 to the end of 1783.

A sailors silver token, dated 1793 with Russell 74
https://petercameronantiquesilver.com/product/a-sailors-silver-token/

Following yet another round of repairs in 1791, Russell, was eventually recommissioned in March 1793 with the commencement of war with Revolutionary France.

Battle plan of the British and French fleets at the Glorious First of June 1794

On the 1st June 1794 Russell was in the van of Howe's fleet at the Battle of the Glorious First of June under the command of Captain John Willett Payne where she escaped with no casualties.

HMS Russell was heavily engaged in the fight with the French centre at the Battle of Groix (Bridport's Action) 23rd June 1795

The following year she fought at the Battle of Groix on the 23rd June during which Admiral Lord Bridport's fourteen ships of the line chased the twelve ships of the French fleet under Vice-Admiral Villaret de Joyeuse into Lorient, capturing three of them in a running battle that saw Russell join with Colossus 74-guns, London 98-guns and Queen 98-gunsin attacking Admiral Villaret and the French centre suffering losses of 3 killed and 10 wounded.

Captain Sir Henry Trollope, circa 1800's

Her next battle honour would see Russell as part of the Leeward Division of the British fleet at Camperdown under the command of the doughty Captain Sir Henry Trollope, who during the Nore Mutiny was in command of the fourth-rate HMS Glatton, a former 56-gun East Indiaman that he under his own initiative rearmed entirely with carronades, with a total of 28 x 68-pounder carronades on her main gundeck and 28 x 32-pounder carronades on her upper deck, demonstrating his handiness with them by attacking a French squadron of one 50-gun razee, five frigates, a brig and a cutter, so badly damaging the enemy that they were forced to run for the port of Flushing to escape his audacious attack.


He kept the crew of the Glatton from mutinying and, by threatening to turn his guns on the 40-gun Beaulieu, convinced them to return to duty, and with the collapse of the mutiny in June was appointed captain of the Russell.

At Camperdown the following appears in the log of HMS Russell;

RUSSELL
Log. THOMAS TROUGHTON, Master. Official No. 2896.

. . . At 12, Admiral Duncan hailed us and ordered us to engage the sternmost of the enemy.
(If this is correct it shows how completely Duncan's signals were misunderstood. The Russell's station in the line should have placed her about a mile and a half from the flagship. But it is probable that the name Duncan is a mistake. The Russell was undoubtedly hailed from the Monarch to this effect.)
 
'37 minutes past 12, began the action and engaged the enemy's ship Delft . . .'

P.M. - 23 minutes past 12, the Admiral made the Belliqueux's signal to alter to port. Do. the Adamant. 


37 minutes past 12, began the action and engaged the enemy's ship Delft, but seeing the Monmouth coming up astern left her, and came up alongside another ship and engaged her till she struck. 

' . . . she said, 'Sir, you have the honour,' and hauled down his flag from the fore topgallant masthead and hauled down his colours.'

Made sail. The Admiral made the signal for the whole fleet to engage closer, which we repeated. 


At 1, came up alongside the Dutch Vice-Admiral's ship Jupiter and engaged her until 1/4 past 1, when we were hailed by her, and she said, 'Sir, you have the honour,' and hauled down his flag from the fore topgallant masthead and hauled down his colours. Hove to and boarded an enemy's ship. Received prisoners. 

'At 3, discontinued the engagement. Employed repairing the running rigging,
which was much shattered by the enemy's shot.'

At 3, discontinued the engagement. Employed repairing the running rigging, which was much shattered by the enemy's shot. Took the Delft, a prize, in tow.

HMS Montagu
HMS Montagu forcing the Enemy to move from Betheaume Bay, 22nd August 1800 - John Jeffrey Raigersfeld

HMS Montagu was an Alfred Class 74-gun ship of the line built and launched on the 28th August 1779 at Chatham, the class being designed by Sir John Williams.

My picture of a model by Clive Knight, the Royal Navy Museum, Portsmouth showing the launch of HMS Warrior 18th November 1781 in Portsmouth. Warrior was sister ship to Montagu, the second built of the four Alfred Class 74's
JJ's Wargames - Portsmouth Historic Dockyard 2016

Her general characteristics were:
Tons burthen 1631 (bm)
Length of gundeck 169 feet
Beam 47 feet, 1 inch
Depth of hold 19 feet, 11 inches


Her armament consisted of:
Gundeck: 28 x 32-pounder long guns
Upper gundeck: 28 x 18-pounders long guns
Quarterdeck: 14 x 9-pounder long guns
Forecastle: 4 x 9-pounder long guns

Battle of Cape St Vincent, 16th January 1780 - Francis Holman

Commissioned in August 1779, she would see action the following year at the Battle of Cape St Vincent, 16th January 1780, otherwise known as 'The Moonlight Battle of Cape St Vincent, under the command of Captain John Houlton in a battle demonstrating the worth of the new British invention of copper sheathing their warships, enabling them to easily catch their slower opponents in a night time running battle.

During the battle she, together with HMS Prince George 90-guns delivered a passing broadside to the Real Fenix 80-guns, flagship of the Spanish admiral, Don Juan de Langara, that would see Langara wounded in the battle and his ship striking to Bienfaisant 64-guns after she had brought down the Fenix's mainmast.


She would then engage the Diligente 68-guns at 21.15, the Spaniard striking after her main topmast was shot away.

The British under Admiral Rodney would complete their victory taking six of the eleven Spanish ships of the line and causing another the Santo Domingo to blow up, as illustrated in Holman's picture above, and rather amazingly, the Montagu escaped the battle with no loss.

HMS Egmont 74-guns, dismasted and caught in the same hurricane as Montagu, on the 11th October 1780 similarly off St Lucia. The Great Hurricane of 1780 was the deadliest Atlantic hurricane on record, killing an estimated 22,000 people as it passed through the Leeward Islands between October 10th to the 16th.

Returning to the Caribbean with Rodney's fleet, Montagu narrowly avoided destruction when she was driven ashore and damaged at St Lucia during the Great Hurricane of 1780, but was successfully recovered.

In 1782, with the American War drawing to a close, the Montagu was paid off, undergoing repairs at Portsmouth between November 1782 to June 1783 and not being recommissioned until the start of the French Revolutionary War in February 1793, under Captain James Montagu and joining Admiral Howe's Channel Fleet.

HMS Defence at the Battle of the Glorious First of June 1794 - Nicholas Pocock (NMM)

She took part in the Battle of the Glorious First of June the following year in the Rear of Admiral Howe's fleet engaging in a long range gunnery dual with the Neptune 74-guns, with neither ship causing much damage to the other but that would see the Montagu suffer, 4 killed, including her captain, and 13 wounded.


Later in 1794 she sailed for the Leeward Islands on the 25th October and on the 30th, ninety miles west of Cape Finisterre would, in company with HMS Ganges 74-guns, capture the French corvette La Jacobine 24-guns, nine days out of Brest, with the French ship commissioned into the Royal Navy in July 1795 as HMS Matilda, sixth rate ship-sloop.

Captain John Knight

In November 1795 Montagu was paid off whilst having minor repair work completed to be recommissioned in August 1796, under Captain John Knight under whose command she would fight at the Battle of Camperdown.

At Camperdown the following appears in the log of HMS Russell;

MONTAGU
[The following log is nearly illegible, but the matter is better than the writing and spelling.]
Log. JAMES BLACK, Acting Master. Official No. 2805.

October 11th.
A.M. - Between Camperdown and Egmond 4-5 miles from the shore. 

At 9, the signal was made for seeing the Dutch fleet. The Admiral made the signal in general to make sail. At 10, our signal to steer for the second ship in the van. At 1/2 past do., our signal to engage the rear. 


At 11, Captain Bright spoke Captain Trollope, of his Majesty's ship Russell, and told him his station in the line of battle. The Admiral made the general signal to shorten sail and prepare for battle. 

At noon, the nearest ship in the rear to us SW distant 1 1/2 mile. At noon, Gravesend steeple S by E per compass 6 or 7 leagues.

P.M. - The first part squally with rain. 


At 1, an enemy's ship hove all in the wind close by us. Bore up upon her larboard bow and just cleared him, when near her she fired into us. When close alongside gave her a broadside from the lower gun deck. She fell out of the line. Seeing she had not struck, tacked and stood towards her, but seeing us do so, she struck to us; one of our frigates being near us, tacked and stood in to the action and left her to the frigate to take possession of her. 


Stood along the enemy's line and gave them our fire. Passed two ships that had struck. 


Spoke the Admiral-in-Chief. Orders us to go to the Admiral de Winter's ship, as there was several of the enemy ships moving to cut him off although she struck. Sent a lieutenant on board another ship that had struck close by to take possession of her. A frigate in tow the Admiral's ship. 


At 9, got the frigate in tow with the prize. The fleet and our Admiral out of sight. Five sail of the enemy's ships close by.


So work now progresses to the next three ships in the Leeward Division, before moving on to complete the rear squadron of the Dutch fleet under the command of Rear-Admiral Reijntjes aboard the Dutch 74-gun Jupiter showcased in Post One of this series.

This post is going up slightly earlier than usual this weekend as I have an early start Saturday morning to head up to Warfare 2023 at Farnborough, a show I would have been at last year had it not for me being on the other side of the globe.

So as well as putting together a post covering that visit, I aim to get to work on a book review, before looking at another leg on the trip to Australia, by which time I will no doubt have the next phase of the Camperdown project to showcase.

More anon

JJ