Friday, 13 March 2015

Casa de Salinas - Talavera, Game Three

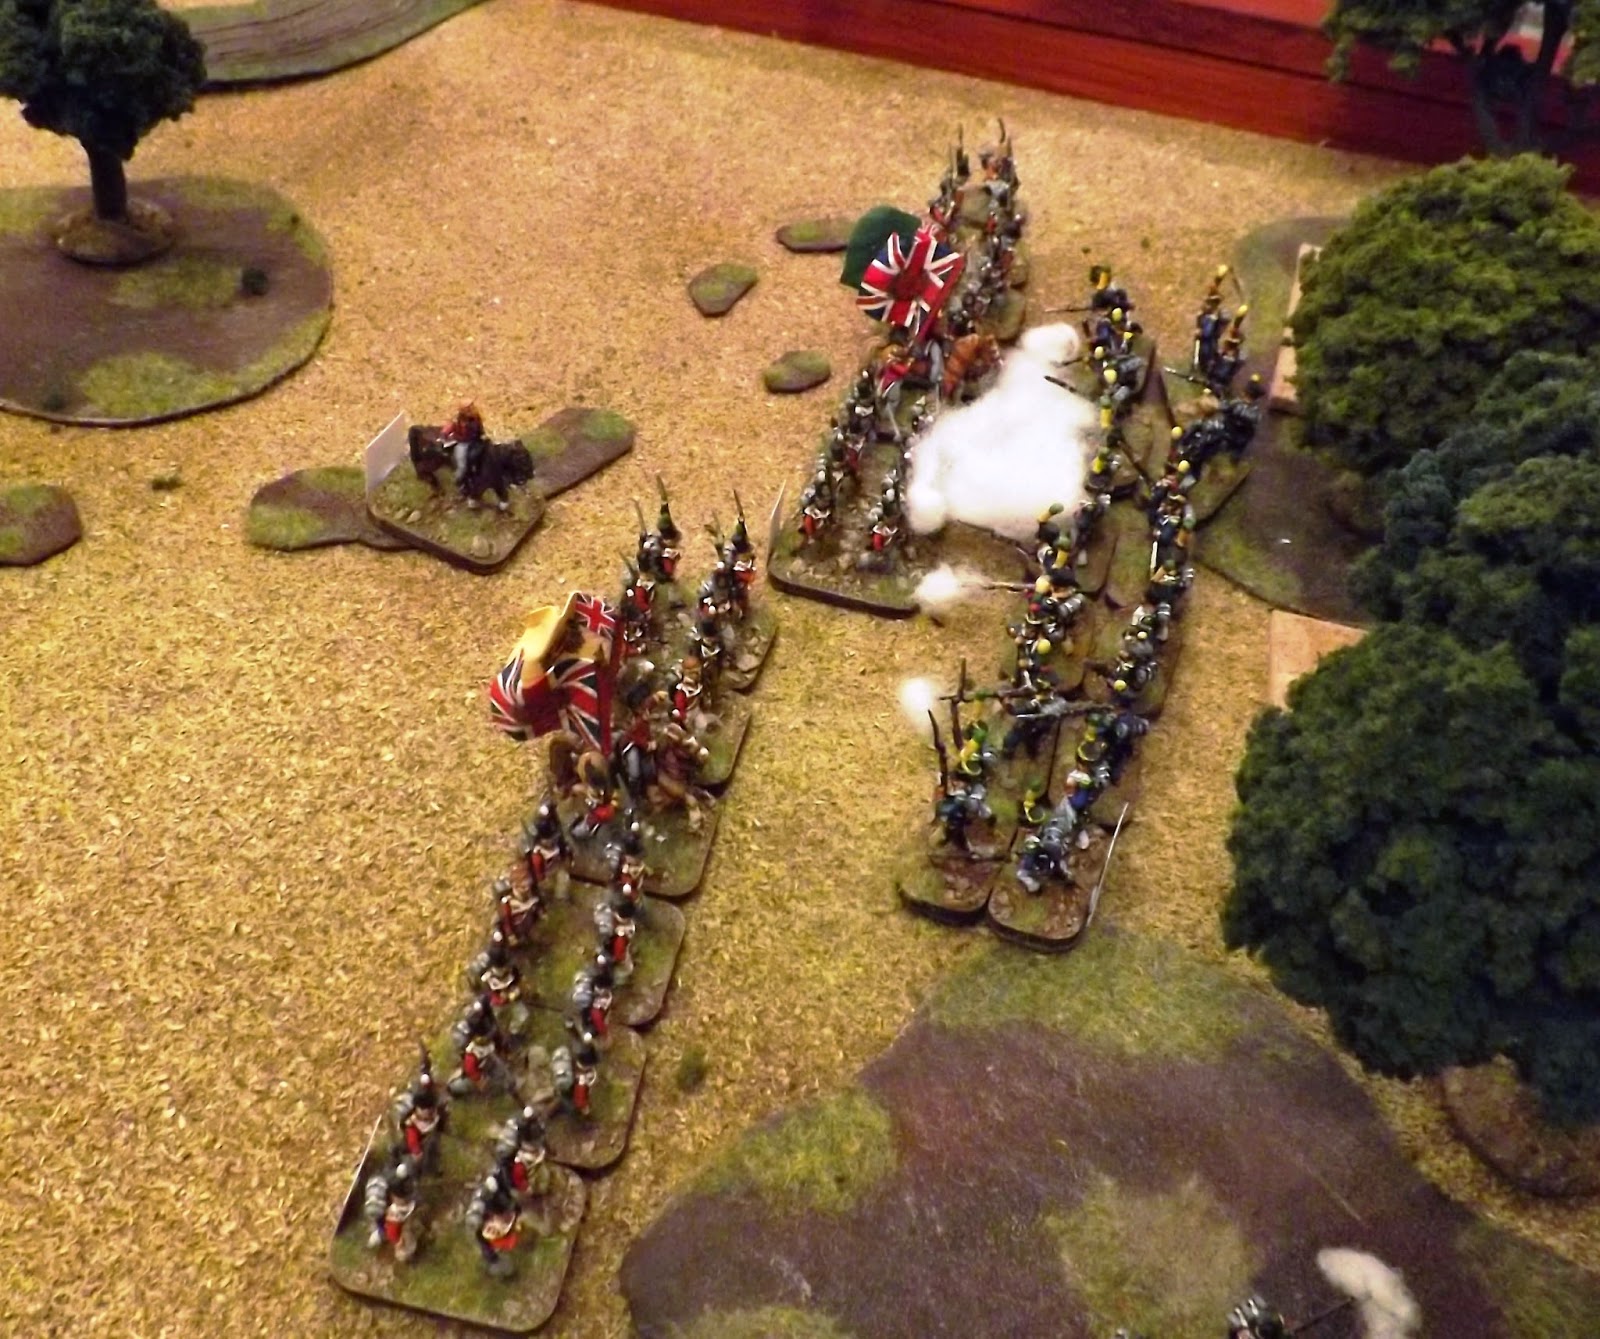
The 16me Legere fight their way forward at Casa de Salinas
Last night Tom and I ran our third and final play test of Casa de Salinas with a few changes to the set up and playing that produced a dramatically different result and has helped define the parameters of the game proper.


Before describing the game, I thought it might be helpful to summaries some of the "givens" in this scenario that need to be modelled to give it any semblance to the historical clash.

First, the British 3rd Division of two infantry brigades supported by a light cavalry brigade are halted at the Casa de Salinas road junction acting as a road block to the first elements of King Joseph's French army. The men in the battalions are lazing at ease on the ground, unaware that their brigade light battalion pickets have not been posted properly and those that are forward are too few and not enough to secure the front. Therefore the British, on "defend" orders, are not moving until forced to by French action, when they will retire gradually into the open terrain supported by their cavalry as they fall back on the Talavera position.
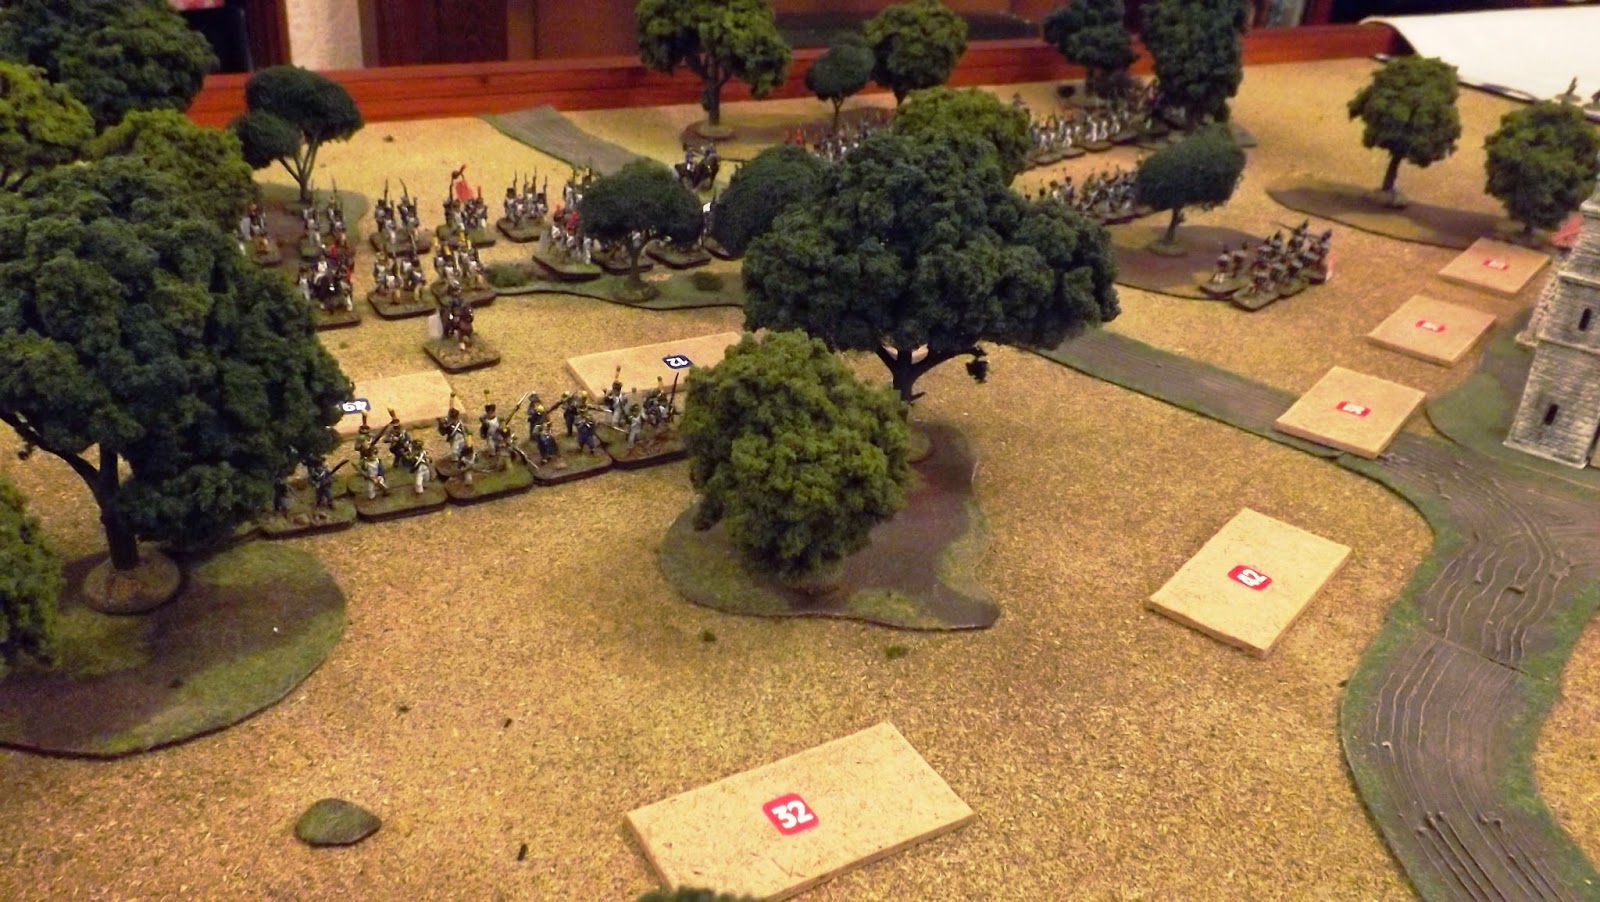
The French position at the end of four turns of advancing through the thick undergrowth. Note only Mackenzie's "light bobs" are forward, top right in the picture
Secondly, the French approach has been undetected and coming from an unsuspected direction; looking at the map, they arrive north of the road in squares 6 and 12, when they would have been expected to be moving along  and south of the road in 12, and from the Rivers Tagus/Alberche crossings into 18 and 24.

The surprise of the attack finds the British disorganised and unable to fire off their "trademark" volley fire before several battalions have been broken in disorder leaving two to three less affected battalions to take up the fight and slow the French advance, before falling back themselves.

The British, therefore, will withdrawal, due to pressure on their position, the challenge of the scenario is in what condition they will be in when that withdrawal has finished.

Finally, the close nature of the wooded terrain around the Casa means that movement is halved and visibility is reduced to 75 paces, just short of 60 yards, so all musketry and spotting will occur very close up and personal. The terrain is ideal for skirmishers.

Both French brigades are preceded by their voltigeur battalions. All troops are in open order. 
To model the surprise attack we only have one of the three light battalions forward of the British line, which given the historical situation should only be Mackenzie's light battalion; we have randomised it in our games to provide more uncertainty, however it has been Mackenzie's men in all the tests so far.

In addition, the first volleys, delivered by British infantry, were ineffective in stopping the French attacks and we model that by randomising down the amount of fire they are able to use.

Moving through the close woods around the Casa would normally be fatiguing to formed infantry and clearly had little or no effect on the French in the actual battle. Veteran French infantry, line and light, were at this period quite capable of operating in open order, so to avoid the fatigue effects in the four moves to contact, when we had our battalions form line, the French advance in open order. The preceding pictures show the bases slightly separated to indicate this.

The voltigeur battalion of General Laplanne, seen behind is closely supported by the spearhead unit, the 16eme Legere on blinds.
To soften up the British line and adopting French tactical doctrine, the formed infantry is preceded by open order voltigeur combined battalions who will skirmish over 200+ paces beyond their unit (musket range at 200 paces and beyond is deemed where the skirmishers will operate). The picture above shows one of these combined battalions approaching the British line, unimpeded by their British opposite numbers. The skirmish attack also forces the British units to declare their positions.

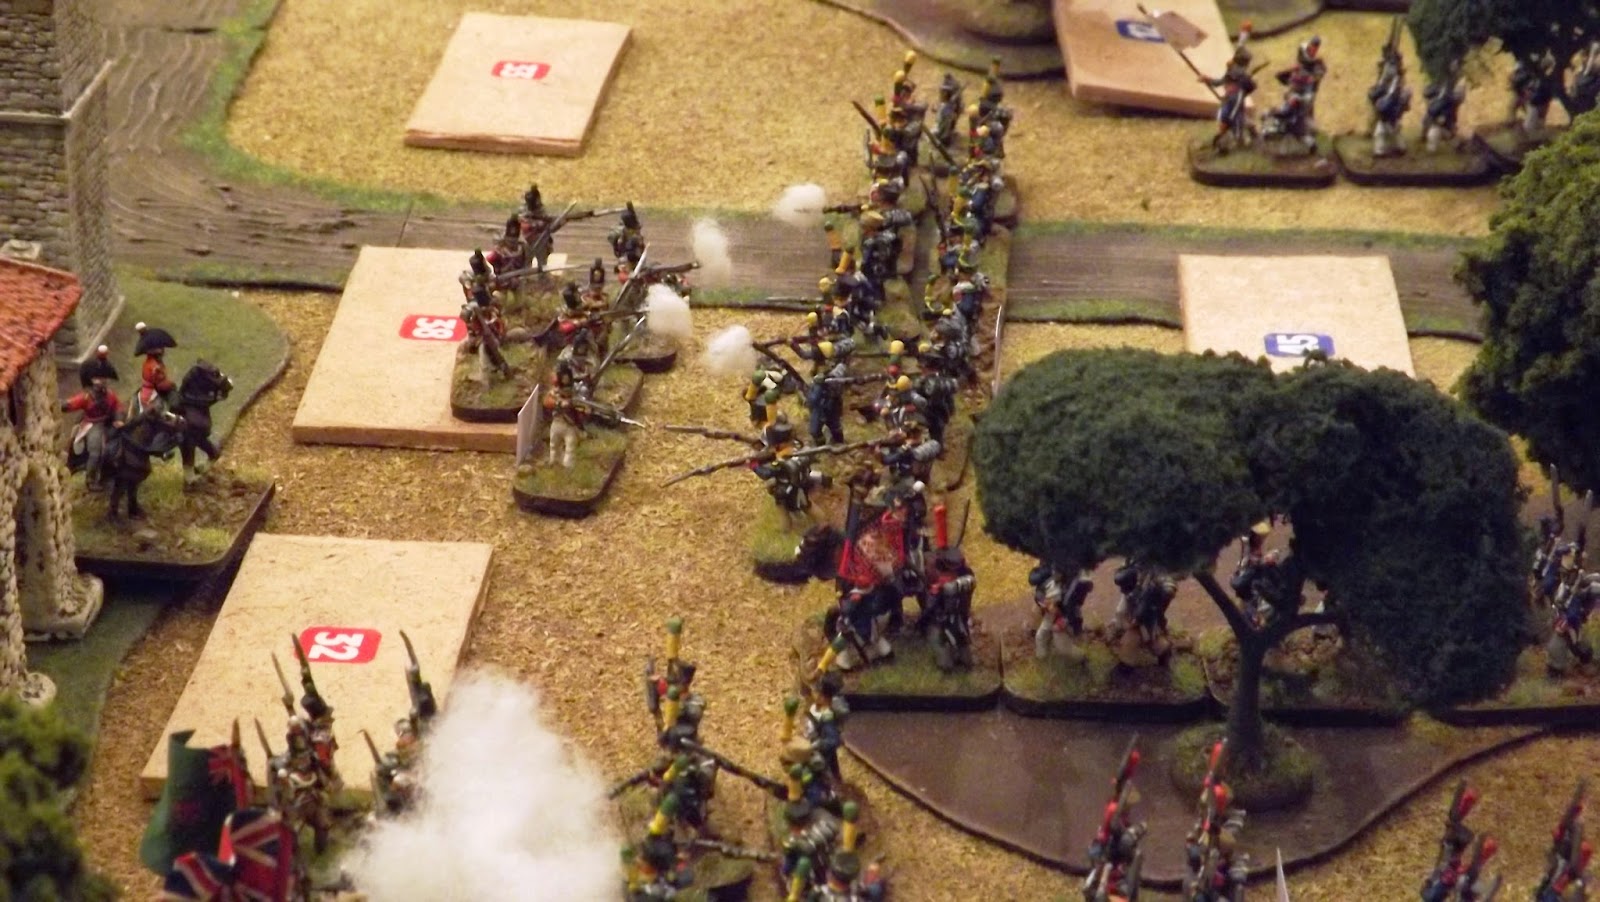
The picture below shows the skirmish attack well under way with British officers and nco's being picked off by the French skirmishers making use of the cover provided by the tress, whilst the British infantry reply with poor musket volleys attempting to drive the voltigeurs off. Meanwhile the French blinds beyond show the 16me Legere getting into position preparing to advance through the voltigeurs, fire a volley and charge the British line.

Donkin directs his brigade as the 2/87th take on the French skirmishers
The picture below, shows the voltigeurs roughing up the British line, for very little cost to themselves. Note units on defend orders can only charge with an officer attached, but the British commander is just trying to hold initially, hence General Donkin is close by, should any of his units fall back.

There are no other British Generals to aid Donkin, as his boss, General Mackenzie, is busy with his own brigade as well as being divisional CO and Wellesley has only just become aware of the firing to his left whilst searching for the French on his right.


The French left presents a different problem. Eager to stop the British brigade on this flank simply retiring unhindered or moving to support Donkin's brigade, French troops under General Solignac have moved into the woods on this side of the road to pin these units.

General Mackenzie's "light bobs" are doing their job and contesting the advance of the French voltigeurs, whilst protecting their brigade from sniping. Note Solignac's follow up line battalions are in open order.


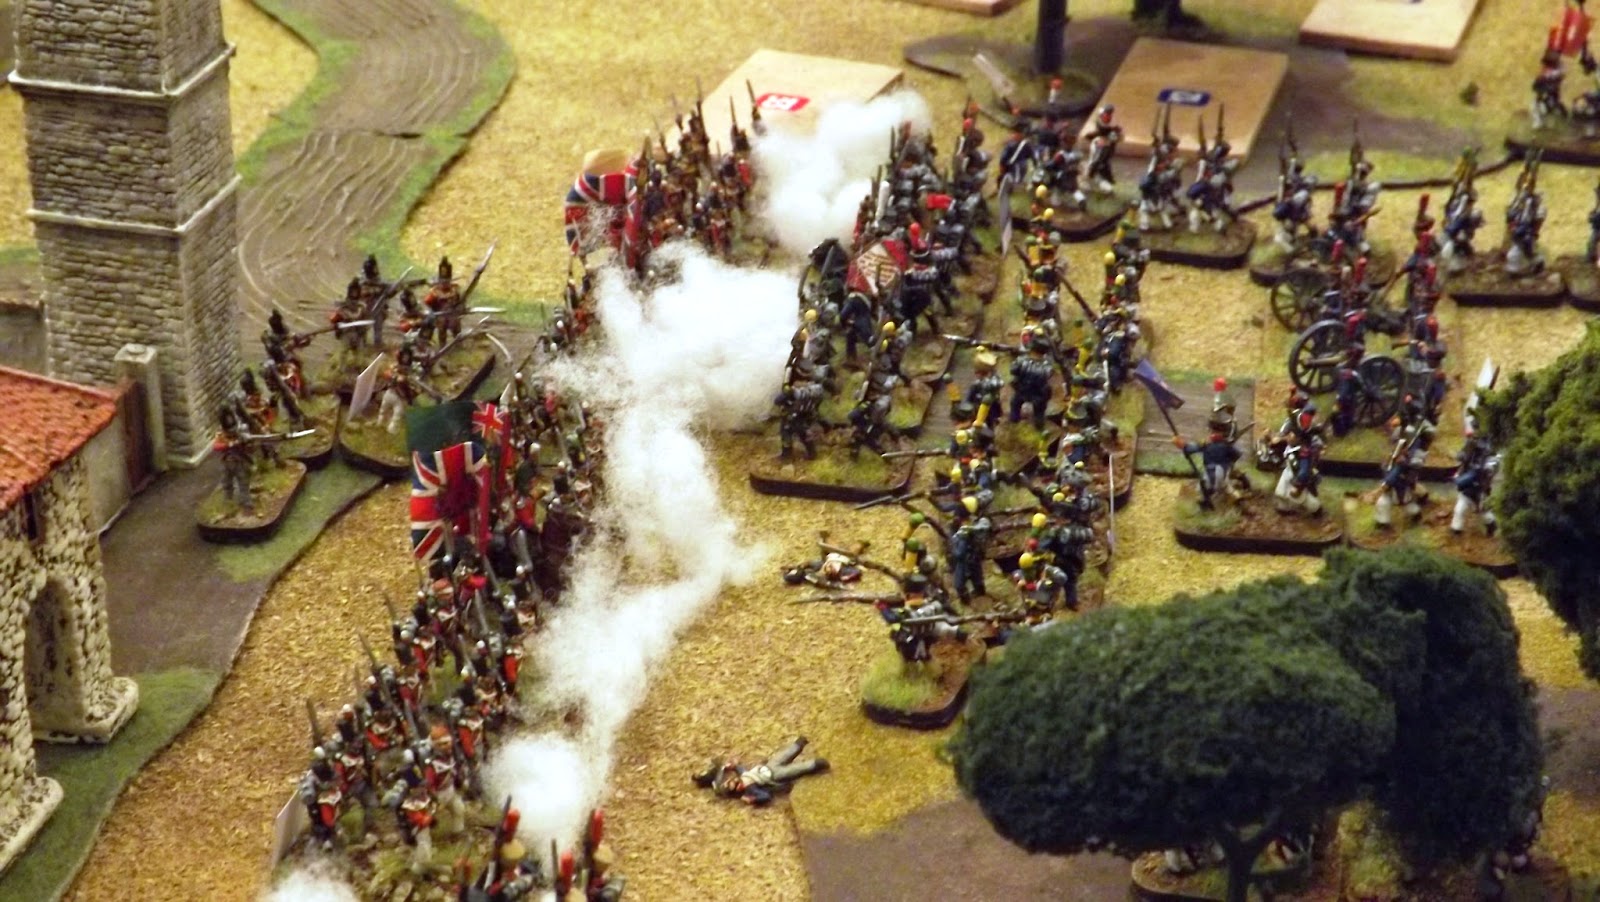
Up to this stage, the new French tactics were working like a dream. and then I, as French commander, got carried away. The picture below shows the table, when I made my mistake. Top centre, shows the French legere and voltigeurs have driven off Donkin's two line battalions in disarray, following a volley and charge by the legere. Only Donkin's light battalion and the 60th Rifles are in good order and able to cover the brigades retreat.

Nearest to camera shows my error in trying to force the issue with Mackenzie's brigade by advancing through his light battalion to get at the line infantry behind. The British are now aware they are under attack and are able to fire very effectively. Because their light troops have kept my voltigeurs busy, I have not been able to soften up the British line infantry prior to my line infantry forming up and advancing on them. Thus, as the 2/8me and 2/45me form line and advance through the voltigeurs forcing Mackenzie's light infantry to retire to the right of the British line, the two French battalions are decimated by volley fire from the 2/24th and 2/31st, causing them to rout back into the woods and stopping my attack. The two routing French line can be seen facing away nearest the French table edge, right of picture.

The French attack nearest to camera is stopped, just as the French break through, centre top of picture
My frustration knew no bounds as I cursed my own stupidity. The British light infantry were only one move away from pulling back any way as they had been severely handled by my voltigeurs; the order of battle at the end of this post shows their state of exhaustion. I had forgotten that Solignac's role was to pin Mackenzie, whilst Donkin was being dealt with on the other flank.

General Laplanne has broken through with the 16me Legere. Wellesley is busy rallying the 1/88th, whilst the 2/87th with Donkin are in full retreat.
If I had resisted the rush of blood, Mackenzie's brigade would have fallen back to realign with Donkin and get into the open ground and the cover of Anson's cavalry, now moving to their support.

Wellesley gets the 1/88th under control as the 60th Rifles cover the retreat of Mackenzie's brigade
I should have been content to stand my infantry down, as both brigades were tiring after two and a half hours of combat, and bring up my horse guns to pepper the British as they fell back.

General Laplanne and his victorious but very tired brigade. The line of fallen mark the area of heaviest fighting
Instead I was now forced to move my generals towards shaky units, following the two routs, just to stabilise my own force. Tom had made best use of the British blinds by setting up in such a way that facilitated his battalions forming column of companies and heading off up the road away from the action.

The 2/87th retreat shaken with General Donkin close at hand
So ended a frustrating but excellent learning session with lots of "how to" and how not to" tips gathered by both sides.

The game presents management challenges for both commanders. The likelihood is is that the British will end up firefighting on one of their flanks, depending on where their skirmish line sets up. Provided the French attack areas (unlike in my example) selectively and keep their force in being in others, they should be able to force a positive result. The French approach in open order and the better reduction in British volley fire proved decisive in getting the scenario closer to the historical outcome, and it was pleasing to see those adjustments have the effect intended. I have a few further "tweaks" in mind for future replays, but am happy with my notes from last night's game to move on to the "Night Attack" scenario.

Anson brings forward the cavalry. These should have been targets for French horse gunners
The final casualty list at end of turn 10 showed how costly the rash attack by Solignac's brigade had been. Of the 257 British casualties 168 were inflicted on Donkin's Brigade, at a cost to Laplanne's brigade of just 84, excluding the 2/45me Ligne which went forward in support of Solignac's attack.
The result would have been quite different if the French had contented themselves with taking potshots at Mackenzie's men from the safety of cover as they were manoeuvred back down the road. Instead the 400 casualties suffered in the French attack swung the result back to a minor victory for the British. At best, at least a proportion of the 553 French missing will reappear once a search of the woods are made by French light cavalry!

The last desultory firing as the French attack falters.
[D] denotes Dispersed and removed from the field
[W] denotes No Advance
[R] denotes Halt or Retire

As of Game Turn: 10

French Division Pierre- Bellon Lapisse - Attack
[ 108] General de Division Pierre- Bellon Lapisse - Active C- [725 paces]
[ 102] 2/6me Artillerie a Cheval 0/ 156 [ 6] B- Ex'lent Fresh

Brigade Jean Bartholomew R Laplanne - Attack
[ 109] General de Brigade Jean Bartholomew R Laplanne - Active C [350 paces]
[ 111] 1/16me Regiment de Legere 17/ 572 C [sk] Good Fresh
[ 112] 2/16me Regiment de Legere 35/ 563 C [sk] Average Tired
[ 113] 3/16me Regiment de Legere 29/ 441 C- [sk] Ex'lent Tired
[ 114] 1/45me Regiment de Ligne 0/ 455 C [sk] Good Fresh
[D] [ 115] 2/45me Regiment de Ligne 196/ 286 C [sk] Broken Tired
[ 116] 3/45me Regiment de Ligne 0/ 459 C- [sk] Good Fresh
[ 117] Laplanne's Voltigeur Bn. 3/ 566 C [sk] Good Fresh

Brigade Jean Baptiste Solignac - Attack
[ 110] General de Brigade Jean Baptiste Solignac - Active C- [350 paces]
[W] [ 104] 1/8me Regiment de Ligne 16/ 480 C [sk] Good Tiring
[D] [ 105] 2/8me Regiment de Ligne 204/ 267 C [sk] Broken Tiring
[ 106] 3/8me Regiment de Ligne 0/ 460 C- [sk] Good Fresh
[ 107] 1/54me Regiment de Ligne 0/ 474 C [sk] Good Fresh
[ 108] 2/54me Regiment de Ligne 0/ 486 C [sk] Good Fresh
[ 109] 3/54me Regiment de Ligne 0/ 489 C- [sk] Good Fresh
[ 110] Solignac's Voltigeur Bn. 12/ 569 C [sk] Average Tired

Strengths:
losses/active
512/ 6567 Bayonets
0/ 156 Artillerists
0/ 6 Cannon
512/ 6723 Total of all arms
4 Standards present
--------------------------------------------------------------------------------------------------------------------------

British Army - Sir Arthur Wellesley
[ 501] Lieutenant General Sir Arthur Wellesley - Active A [1500 paces]

Brigade George Anson - Defend
[ 506] Brigadier General George Anson - Active B- [400 paces]
[ 509] 23rd Light Dragoons A 0/ 229 C [sk] Good Fresh
[ 510] 23rd Light Dragoons B 0/ 224 C [sk] Good Fresh
[ 511] 1st Light Dragoons KGL A 0/ 220 C+ [sk] Good Fresh
[ 512] 1st Light Dragoons KGL B 0/ 228 C+ [sk] Good Fresh

Division Alexander Randoll Mackenzie - Defend
[ 515] Major General Alexander Randoll Mackenzie - Active C [800 paces]
[ 533] 2/24th Foot 26/ 682 C [sk] Good Fresh
[ 534] 2/31st Foot 21/ 639 C [sk] Good Fresh
[ 535] 1/45th Foot 0/ 680 C+ [sk] Ex'lent Fresh
[R] [ 536] Mackenzie's Bde. Light Bn. 42/ 186 C [sk] Average Exhausted

Brigade Rufane Donkin - Defend [No Advance]
[ 516] Colonel Rufane Donkin - Active B- [350 paces]
[R] [ 537] 2/87th Foot 96/ 443 C [sk] Poor Exhausted
[ 538] 1/88th Foot 47/ 492 C+ [sk] Poor Tiring
[ 539] 5/60th Rifles 9/ 211 B- [sk] Good Acceptable
[ 540] Donkin's Bde. Light Bn. 16/ 159 C+ [sk] Good Acceptable

Strengths:
losses/active
257/ 3492 Bayonets
0/ 901 Sabres
257/ 4393 Total of all arms
10 Standards present
--------------------------------------------------------------------------------------------------------------------------

Minor victory for the British Army
As of Game Turn: 10

The British Army has suffered losses of:
[ 5%] 257 men of all arms
including:
[ 5%] 244 dead and wounded
[ 0%] 13 prisoners
[ 6%] 257 bayonets
[ 0%] 0 sabres
Honours: [ 537] 2/87th Foot

The French Army has suffered losses of:
[ 14%] 1065 men of all arms
including:
[ 5%] 434 dead and wounded
[ 7%] 553 missing
[ 1%] 78 prisoners
[ 15%] 1065 bayonets
[ 0%] 0 artillerists
Honours: [ 113] 3/16me Regiment de Legere

Thanks to Tom for being the British guinea pig on this test and for bringing all his skill and guile to bear in snatching victory from defeat. His Dad is very grateful for the lesson that was administered.

Next up, the Badajoz Militia

Wednesday, 11 March 2015

The British Light Infantry Arm c 1790-1815, David Gates


I have finished reading The British Light Infantry Arm by David Gates and I thought I would share my thoughts and give you a review of the contents.

This book, like the earlier title written by Gates, "The Spanish Ulcer", that I reviewed last month, was published back in the late 80's and my copy was a second hand one published by Batsford in 1987.

As the preface explains, the book is an examination of the creation, training and combat role of the light infantry regiments that were added to the British land forces during the period of the French Revolutionary and Napoleonic Wars.

What follows is a series of seven chapters that looks at the evolution of light infantry forces among the European powers during the period 1740 to 1815, turning to consider in detail the specifics of the development of the various British units and their battle record.

The chapters follow a very logical format, looking at the development of light infantry forces prior to the French Revolutionary Wars, with the adoption by European powers, such as Austria and Prussia, of irregular troops to provide forces capable of operating in more broken terrain that prohibited the deployment of the linear tactics that prevailed. This use of foreign irregulars extended to the British who tended to regard all skirmish warfare or "petite guerre" skills to be the expertise of Germans in particular, and it was to these formations of jagers that Britain turned to with its wars in the American War of Independence. Interestingly, the skills learnt in the Seven Years War in North America quickly having been forgotten and lost with the disbandment of the Rangers and Light Infantry units formed during that conflict.

Prince Frederick, Duke of York in 1795
http://en.wikipedia.org/wiki/Prince_Frederick,_Duke_of_York_and_Albany

Peace time always seems to fossilise military developments and the time between the end of the American War of Independence to the beginning of the French Revolutionary Wars was another one of stagnation in military thinking across the Ancien Regimes of Europe. The skills of the light infantry, so painfully learned in America, had again been quickly forgotten, and the only saving grace for the army was the reforms brought in by the Duke of York who became commander in chief on the 3rd April 1795.

The principle reform he introduced was a common drill book, "Principles of Military Movements" for the whole of British land forces published by Sir David Dundas in 1788. The book explains that the dispersion of British infantry battalions around the UK often used as police formations by civilian authorities in peacetime meant that little opportunity was available for bringing units together as brigades to practice a common drill. This lack of group training left battalion drill to the whim of each colonel and soon units could not perform the same movements together. Alongside the common drill, came reforms to the Officer Corps with major changes to the purchasing of commissions. A new Military College was set up, to improve the education and professional knowledge of Officers, at High Wycombe which would develop into the Staff College of later years. Its first commandant was General Francois Jarry, a Frenchman and former head of the Prussian Army's Military School in Berlin.

Formed in 1798, the 60th Rifles were the first of the British Light Units,
even if they were made up of mostly Germans

However, the Duke's introduction of the Dundas drills, whilst bringing order to the line infantry was detrimental to light infantry developments; as "Pivot" Dundas, an advocate of Prussian methods, paid scant attention to the requirements of providing drills for light infantry and reinforced the attitudes of many conservatives in the Army that they were forces that were unmilitary and lacking in discipline. Indeed Dundas is quoted,

"The {heavy} battalions...have been taught to undervalue themselves, almost to forget, that on their steadiness and efforts the decisions of events depends; and the light infantry - yagers, marksmen, riflemen etc., vanish before the solid movements of the line."

The Duke's experiences in the Flanders campaign of 1793 and the bitter encounters with massed French sharpshooters taking the neatly dressed ranks of redcoats apart whilst using cover and avoiding close combat with the British lines convinced him of the need to redress these inadequacies. The Duke set the agenda by becoming the Colonel of the first unit to be established as a British Light Battalion, the 5/60th rifles composed initially of those Germans recruited from the emigres units that had served the British forces previously.

The scourge of the ancien regimes of Europe, French infantry
able to skirmish at will in large numbers

The British military establishment were forced to re-examine the experience and ideas of men such as Maj Gen John Money a veteran of the AWI and former major of the 62nd Foot who had experienced the tough "petit guerre" with the fighting at Freeman's Farm in 1777. He recalled,

"In the action at Freeman's Farm, the 62nd regiment charged four times . . . quitting their position each time: the conflict was grievous to behold; the contest was unequal; the rebels fled at every charge deeper still into the woods; but when the British troops returned to their position, they were slowly followed, and those who had been the most forward in the pursuit were the first to fall"

To men like Money, the requirement to oppose French skirmishers with troops of their own description was self evident.

With the fear of invasion by French troops under their new Emperor Napoleon, the need for change only accelerated and the need to furnish the military forces with more specialist light infantry units became a more urgent issue as tensions rose with the recommencement of hostilities following the Peace of Amiens. The south coast of England offered ideal close terrain for light troops to operate in and with the supply of German troops cut off by the advance of the French revolutionary armies, the need to train home grown forces became more obvious.

General Jarry observed that:
"If the French attempt a landing in this country, they will, no doubt, endeavour to disembark a considerable body of troops (active and skillful light infantry) and, indeed all their troops are accustomed to fight en tirailleur . Their army will be constantly covered by sharpshooters, concealed behind enclosures, hedges, trees, bushes, walls, houses, inequalities of the ground; they must be dislodged by a chain of English sharpshooters advancing under the same sort of cover." 

Gates then charts the rise of the key leaders that came forward to challenge Dundas and the more conservative elements and their role in the development of British recruited and trained light infantry. The model for these units having been established with the creation of the 5/60th Rifles, leading to the setting up of a fully British battalion, the 95th Rifles. Rifle battalions faced their own opposition in that the rifle was not considered as a weapon that, because of its slowness in loading and its requirement of careful maintenance and fine powder, could be used on a large scale as easily and successfully as musket armed soldiers. Those against the adoption pointed to European forces such as the French relying wholly on musket armed troops.

Major General Coote Manningham

Despite initial objections, the Duke of York proposed the setting up of an experimental rifle battalion on January 7th 1800 appointing Colonel Coote Manningham to oversee the training. Starting with Manningham, David Gates takes the reader though the pantheon of great names that populate any history of the development of British Light Infantry forces and the establishment of their new home, Shornecliffe in Kent.

95th Rifles
With the development of the experimental rifle battalion into what would become the 95th Rifles, we see the new training and ethos behind the new light infantry battalions. The recruiting of intelligent, more self reliant soldiers, to be disciplined with encouragement to achieve and maintain high standards of performance, instead of reliance on the lash. The 95th Rifles issued merit badges worn on the uniforms for levels of marksmanship, at 100, 200 and 300 yards. All these new developments in training would become the model for the development of the all round soldier, rather than the line trained automatons of the Prussian school.

Lieutenant General Sir John Moore
The establishment of the Shornecliffe Camp in 1802 for Light Infantry is described as being very much under the oversight and patronage of the then military commander for the Southern District of England, General Sir John Moore, who carries much of the credit for the creation of the light brigade (95th Rifles, 52nd & 43rd Light Infantry). However the text makes clear that Sir John's greater responsibilities, meant that his influence could not be "hands on" in the basic training and developments implemented in the new school. The real talent he displayed was in getting the right man for this very important role, and the credit for that work is rightly attributed to the then Colonel Kenneth Mackenzie.

http://en.wikipedia.org/wiki/Sir_Kenneth_Douglas,_1st_Baronet

It is Mackenzie who was responsible for producing what became known as the Shornecliffe battalions, with the addition to the 95th Rifles of two former line battalions, the 52nd and 43rd Foot, rid of their inappropriate soldiers, officers and men, and molded by Mackenzie into the best, elite force in the British army.

43rd Light Infantry

As well as developing all the skills needed for operating as skirmishers and as standard line infantry, the men of the Light Brigade were instructed in aimed shooting. This was a requirement with the Rifles, making full use of the weapons range and accuracy, but was unique among musket armed troops. The difficulties associated with looking along the barrel of a smooth bore musket and taking deliberate aim are well covered. The men of the 43rd and 52nd, were instructed to squeeze the trigger firmly and as the lock fired to count mentally one to two whilst holding their aim.

Officer of the first new Shornecliff trained Light Infantry Battalions
Moore's own 52nd

Perhaps the most interesting part of the book is chapter VI which focuses on the British light infantry at war between the years 1809-15. The chapter describes General "Black Bob" Craufurd's masterful campaign of observation and raiding conducted by his Light Division on the Portuguese Biera frontier and along the River Azava in the spring and summer of 1810 as Marshal Massena's army and, in particular, Marshal Ney's VI Corps laid siege to Cuidad Rodrigo prior to the third invasion of Portugal.

Major General Robert "Black Bob" Craufurd

The descriptions of the small scale warfare conducted in those months is a mine of information for the designer of skirmish scenarios,(I have my notes made) together with the description of Craufurd's mathematical attention to detail in planning out how to use his small force to cover such a large area. This is the best description I have read so far of this very interesting little campaign of "petite guerre".

The final chapter really dates the book with Gates considering the role of light infantry and light forces in the era of the Cold War, when tensions were very high in the mid to late 80's. His comments about elite trained, rapidly deployable light units, hold true today. The rise of Islamist fundamentalist forces and the threats posed by Russian destabilisation tactics in eastern Europe make these kind of forces as important as ever.

I really enjoyed this book and it makes a welcome addition to the reference library in JJ's mancave. If I were to fault it at all, it would be in his description of the KGL and Portuguese light infantry battalions as being wholly rifle armed. This as far as I know is not correct. Both the KGL Light and Line Infantry battalions were musket armed in the main with the light or sharpshooter companies armed with rifles. The KGL light battalions had a higher proportion of rifles, but were, despite being dressed similarly to the 95th Rifles, in the main, musket armed light infantry.

Like wise, his description of the Portuguese Cacadores battalions as being rifle armed is incorrect. They too were predominantly musket armed with a Tiradore (Hunter) company, composed of the best marksmen, armed with rifles. Two little points that I had to check when I was reading his analysis of skirmish numbers between Anglo-Portuguese and French forces.

Another good read from David Gates and well worth picking up a copy if you haven't seen it.

Source consulted for this post


Monday, 9 March 2015

2nd Antequera Volunteer Light Infantry Regiment

The Barcelona Light Infantry as depicted by the Suhr brothers in 1807
The next unit completed as part of General Portago's 3rd Spanish Division is the 2nd Antequera Infantry Regiment of Volunteer Light Infantry (Cazadores).


Map to show areas of interest in the story of the 2nd Antequera
The city of Antequera is located in the heart of Andalusia and can trace its origins back to Roman times. Even today it is an area popular with hunters of small game and wild boar, so perhaps it unsurprising that a unit representing the city in the Spanish order of battle should be a cazadore (light infantry) regiment.

Map C - The city of Antequera, nestling in the mountains between Seville & Granada
Antequera

Spanish Army of Estremadura
3rd Division: Major-General Marquis de Portago
1st Battalion Badajoz Infantry Regiment - Volunteer Line Infantry
2nd Battalion Badajoz Infantry Regiment - Volunteer Line Infantry
2nd Antequera Infantry Regiment  - Volunteer Light Infantry in Shakos
Imperial de Toledo - Volunteer Line Infantry in Shako
Provincial de Badajoz  - Militia Infantry
Provincial de Guadix - Militia Infantry

Rey Cavalry Regiment - Regular Line


The Cazadores de Antequera Regiment, consisting of two battalions were formed in September 1808, according to Esdaile and were still on the lists of the Spanish regular forces in 1814, although their first battalion was lost with the surrender of the Figueras garrison in July 1811.

*(Note see the comments on the post about the Imperial de Toledo, link below, where Teodoro Reding points to their origins being based on the 6th Volunteers of Granada where they were in action at Mengibar and Bailen in 1808).

The 1200 strong Antequera Regiment appear in the order of battle for the Battle of Valls 25th February 1809 as part of Marti's division under the command of General Reding with a force of 11,800 men.

Map A showing where the Battle of Valls, Feb 25th 1809, occurred
Battle of Valls


On 28th March they are shown as part of General Henestrosa's vanguard division at the Battle of Medellin where Oman shows the Antequerans with 893 men. On the 12th of April 1809 the 1200 strong regiment is recorded as detached from the Army of Granada and under orders to reinforce the Army of Estremadura joining its 3rd Division and presumably falling back on Badajoz with the rest of Cuesta's badly mauled army.

Map B, Brings the story up to and including Medellin and Talavera, showing their locations in relation to each


Thus by the spring of 1809 the regiment had seen a lot of action with the French, all be it with little success to show for it and it would seem that they would have had a cadre of experienced troops mixed in with a larger cohort of new conscripts.


The look of the Antequerans is unclear to say the least and thus the wargamer is forced to make choices when modelling them. I have gone with producing a unit using the new look light infantry uniform that has the men in shakos with the light infantry green plumes. I doubt they were this uniform in appearance and I would again point you towards Teodoro Reding's points about the likely supplies of uniform stocks available to the unit during its formation as being bell topped shakos and top hats.


In the end it comes down to a choice and as I am wanting to give my army a look of the Spanish forces as a whole as much as one based on the limited references available for the Estremadurans in 1809, I have, for the time being, decided to refer to this battalion as my tribute to the Cazadores de Antequera. The greatest tribute to pay the unit is that all the battle experience they gained allowed them to stay formed as a regiment on the Spanish order of battle right to the end of the war in spite of the defeats suffered by the various armies they were part of.


My regiment is formed using figures from the AB range, with scratch built skirmishers with head transplants and the Colour is from GMB Flags.

Sources referred to in this post include
The Peninsular War Atlas - Osprey, Colonel Nick Liscombe
The Nafziger and Oman orders of battle
The Spanish Army of the Peninsular War - Charles Esdaile
The Spanish Army of the Peninsular War Series - Osprey, Rene Chartrand, Bill Younghusband
http://www.twcenter.net/forums/showthread.php?460616-Spanish-regimental-names-1805-14
And thank you to Brian (Teodoro Reding) for sharing his research and notes.

Next up, Casa de Salinas game 3, Provincial de Badajoz  - Militia Infantry and British Light Infantry Arm - Book Review.

Saturday, 7 March 2015

Casa de Salinas - Talavera, Game Two


Last night we played the second test game of Casa de Salinas, with Tom taking the French and Mike the British. With Mike being new to C&G we took time to share insights on how the game models the action, and as is always the way, after a few moves we were soon into the flow of the game.

The scenario set up with all forces on "blinds" for hidden deployment
Play tests are really important when you are trying to model an historical action and rarely do you feel it is right the first time you play. I certainly felt that this was the case in the first run through we played last month.

Laplanne's brigade advance on the British position
In our action in this game, Tom moved the weight of the French assault towards the left of the road and used minimal forces to pin Donkin's brigade whilst bringing his full effort against the Casa and Mackenzie's brigade.

Laplanne's voltigeur battalion comb the woods ahead in open order
Keen to try different tactics, especially with the very strong voltiguer battalions of both French brigades, these French light troops moved in in force against the British line. In an attempt to force the weaker British light bobs out of the fight, the voltigeurs formed line from open order and advanced on the British battalions.

skirmishers forward
The effect was to force the British lights back only to bump the 2/24th and 2/31st battalions who mustered over half their men in their first volleys. The effect on the voltigeurs caused rapid disorder and whilst halted and trying to reform, Tom pushed through their ranks with his formed battalions behind, eager to keep the pressure on the British line.

First contact! Mackenzies light battalion challenge Laplanne's voltigeurs
The British fire was the more telling and when the veteran 1/45th added their volleys to the battle the French battalions started to waver. In desperation, as much as anything, the French line charged the 2/24th and although winning the combat only managed to force the "Warwickshire's" to retire 150 paces facing their enemy with casualties on both in the low twenties. A similar charge against the 2/31st produced a similar result.

The voltigeurs form line to force the issue with the light bobs
The 1/45th were steady as a rock and facing off against their French opposite battalion, the 1/45eme Ligne quickly sent them packing with two well directed volleys.

The army moral levels were starting to separate quite noticeably as the first French brigade reached a cautionary status and Tom sensing the wheels were starting to come off his assault, threw caution to the wind and brought forward his final line of steady battalions to try and force the issue. With all hands to the pumps, even the horse guns were manhandled to within 75 paces of the 2/31st to fire off a round of canister.

Solignac's voltigeurs form line and "bump" the 2/24th
Meanwhile Mike remained cool and held his line by attaching Mackenzie, to steady the 2/31st and Wellesley to the 2/24th who gave three cheers at his arrival and reformed their ranks to face the final attack. As they did, they took heart to see the leading squadrons of Anson's 1st KGL Hussars arrive on their right flank in the open ground beyond the tree line.

With all French effort direct towards breaking Mackenzie's line around the Casa, Mike took the opportunity to break contact with Donkin's brigade, sending the 1/88th and 2/87th off in company column whilst covering their withdrawal with the brigade light battalion and the 60th Rifles forming a solid screen of open order light bobs.

Volley fire breaks out and the game is afoot
The final exchanges between the two forces were from tired, and in the French case, dispirited units, causing minimal casualties, but enough to tip both French brigades into serious morale failure, and forcing the action to a close, with the British happy to break contact and retire towards Talavera.

As the 16e Legere move through the voltigeurs driving in the light bobs, they are met by the 2/31st
The casualty record for both forces tells the tale of the action described with four French battalions dispersed and broken and even the French horse gunners having 24 less troopers after firing off their canister and getting a telling volley back from the 2/31st, if a somewhat tired one.

The 1/45th bring their volleys into the fight as the 2/24th are forced back
 Army Sir Arthur Wellesley
[ 501] Lieutenant General Sir Arthur Wellesley - Active A [1500 paces]

Brigade George Anson - Defend
[ 506] Brigadier General George Anson - Active B- [400 paces]
[ 509] 23rd Light Dragoons A 0/ 229 C [sk] Formed Good Fresh
[ 510] 23rd Light Dragoons B 0/ 224 C [sk] Formed Good Fresh
[ 511] 1st Light Dragoons KGL A 0/ 220 C+ [sk] Formed Good Fresh
[ 512] 1st Light Dragoons KGL B 0/ 228 C+ [sk] Formed Good Fresh

Division Alexander Randoll Mackenzie - Defend
[ 515] Major General Alexander Randoll Mackenzie - Active C [800 paces]
[ 533] 2/24th Foot 78/ 630 C [sk] Formed Good Tired
[R] [ 534] 2/31st Foot 102/ 558 C [sk] Disorder Average Tired
[ 535] 1/45th Foot 51/ 629 C+ [sk] Formed Average Exhausted
[ 536] Mackenzie's Bde. Light Bn. 35/ 193 C [sk] Disorder Average Fresh

Brigade Rufane Donkin - Defend
[ 516] Colonel Rufane Donkin - Active B- [350 paces]
[ 537] 2/87th Foot 0/ 539 C [sk] Formed Good Fresh
[ 538] 1/88th Foot 0/ 539 C+ [sk] Formed Good Fresh
[ 539] 5/60th Rifles 0/ 220 B- [sk] Formed Ex'lent Fresh
[ 540] Donkin's Bde. Light Bn. 0/ 175 C+ [sk] Formed Good Fresh

Strengths:
losses/active
266/ 3483 Bayonets
0/ 901 Sabres
266/ 4384 Total of all arms
10 Standards present

The volley fire starts to tell
 Division Pierre- Bellon Lapisse - Attack
[ 108] General de Division Pierre- Bellon Lapisse - Active C- [725 paces]
[ 102] 2/6me Artillerie a Cheval 24/ 132 [ 6] B- Formed Good Fresh

Brigade Jean Bartholomew R Laplanne - Attack [No Advance]
[ 109] General de Brigade Jean Bartholomew R Laplanne - Active C [350 paces]
[D] [ 111] 1/16me Regiment de Legere 246/ 343 C [sk] D'persed Broken Exhausted
[D] [ 112] 2/16me Regiment de Legere 238/ 360 C [sk] D'persed Broken Tiring
[ 113] 3/16me Regiment de Legere 11/ 459 C- [sk] Formed Good Fresh
[D] [ 114] 1/45me Regiment de Ligne 171/ 284 C [sk] D'persed Broken Tired
[ 115] 2/45me Regiment de Ligne 0/ 482 C [sk] Formed Good Fresh
[ 116] 3/45me Regiment de Ligne 0/ 459 C- [sk] Formed Average Tiring
[R] [ 117] Laplanne's Voltigeur Bn. 77/ 492 C [sk] Shaken Broken Acceptable

Brigade Jean Baptiste Solignac - Attack [No Advance]
[ 110] General de Brigade Jean Baptiste Solignac - Active C- [350 paces]
[D] [ 104] 1/8me Regiment de Ligne 140/ 356 C [sk] D'persed Broken Tired
[ 105] 2/8me Regiment de Ligne 17/ 454 C [sk] Formed Poor Tiring
[ 106] 3/8me Regiment de Ligne 0/ 460 C- [sk] Formed Average Tiring
[ 107] 1/54me Regiment de Ligne 0/ 474 C [sk] Formed Good Fresh
[ 108] 2/54me Regiment de Ligne 24/ 462 C [sk] Formed Good Fresh
[Y] [ 109] 3/54me Regiment de Ligne 189/ 300 C- [sk] Rout Broken Exhausted
[ 110] Solignac's Voltigeur Bn. 120/ 461 C [sk] Formed Average Fresh

Strengths:
losses/active
1233/ 5846 Bayonets
24/ 132 Artillerists
0/ 6 Cannon
1257/ 5978 Total of all arms
4 Standards present

High Tide - French units have broken to the rear, but Mackenzie's men are feeling the strain

Major victory for the British Army
As of Game Turn: 10

The British Army has suffered losses of:
[ 5%] 266 men of all arms

including:
[ 5%] 266 dead and wounded
[ 7%] 266 bayonets
[ 0%] 0 sabres
Honours: [ 533] 2/24th Foot

The French Army has suffered losses of:
[ 40%] 2900 men of all arms

including:
[ 13%] 986 dead and wounded
[ 22%] 1643 missing
[ 3%] 271 prisoners
[ 40%] 2876 bayonets
[ 15%] 24 artillerists
Honours: [ 105] 2/8me Regiment de Ligne

The game was great fun and at the turning point quite tense, as Mike described it, as the British line seemed to waver slightly under the weight of the French attack. The fatigue caused to the French having to traverse the woods and the volley fire from the British on the first exchanges is still not right when looking at the original battle, and our third play through will look to remedy that before we move on to the Night Attack scenario.

Thanks to Mike, in his first game of C&G and a welcome return to Napoleonics, and Tom, a veteran C&G player, for a very entertaining evening.