Monday, 4 January 2016

Eager for Glory, The Untold Story of Drusus the Elder - Lindsay Powell


As part of my build up to putting the Roman collection together I am getting a bit of additional reading done to give me a better feel for and understanding of the army I am trying to create on the table.

This Xmas, as well as completing the buy in of my Dacian host, I also got my four heavy pieces of Roman artillery and two fantastic hard back tomes, "The Complete Roman Legions" by Nigel Pollard and Joanne Berry and"The Complete Roman Army" by Adrian Goldsworthy, so you can see the mobilisation is well under way.

As mentioned in recent posts I also have an eye towards the Germania frontier and I have been picking my way through "Eager for Glory" by Lindsay Powell over the last month, a birthday present from Will, and I thought I would share my thoughts after reading it.

This book is heralded as the first book since ancient times to document the life and achievements of this ultimate Roman war leader and all round "damn fine chap" as the Romans would certainly have seen him. Unfortunately all the contemporary ancient written records of his campaigns and life are lost to modern researchers and thus Mr Powell has pulled together what remains of the written texts together with the latest research from the archaeological record to put together this, what I thought, excellent read.

I have to say that before reading this book my knowledge of the Roman contacts with the German tribes pre Varus and Germanicus was rather sketchy other than the activities of Caesar and his contacts with the tribes during and after his conquest of Gaul.

Having read this book I can now understand the relationship that this early contact with the Romans created with the Germans and it really puts into context what followed in the time after Drusus.

Lindsay Powell has structured his book in a chronological format around seven chapters followed by the authors assessment of his life.

In Chapter One - Drusus the Youth we start with the young Drusus (38 - 18 BC) and his family relationships with his mother Livia, brother Tiberius and step father Augustus, which was a time heavily influenced by the civil war and the struggle between Augustus and Marcus Antonius. The chapter goes on to look at his early career into public life and his marriage to Antonia Minor, the daughter of Marcus Antonius and Octavia, Augustus' sister. As a young girl Antonia would have been known to the young Drusus and who would, unusually, form a life long bond with her husband and never re-marry after his early death; a Roman marriage for love it seems rather than one of political convenience.

Chapter Two looks at the life of Drusus the young soldier covering the years 17-15 BC with his first command in Raetia and Noricum in what became known as the Alpine war as Augustus sought to extend control over the Celtic tribes that bordered the narrow link between Italy and Gaul and was subject to constant raids primarily from the Raetians. This chapter also includes a look at the Roman and Celtic troop types together with their arms and equipment.

Chapter Three is titled Drusus the Builder and the years 14-13 BC which covers the time that Drusus, now a young father was appointed governor of Tres Galliae with his palace at Lugdunum, modern day Lyon in France. From here he oversaw the build up of troops and fortifications along the Rhine, in preparation for the German War; including the building of the famous canal designed to give sheltered acesss to the North Sea by linking up the River Rhine to the Zuider Zee and thence along the coast. The Drusus canal or fosse Drusiana required the agreement by the allied tribe, the Batavi, who after their discussions with Drusus also permitted the building of a forward base in their territory to accommodate two legions.

Chapter Four, Drusus the Explorer, covers the year 12 BC when as well as launching the German War, into what was at that time uncharted territory with an amphibious borne land campaign, combined with diplomacy and treaties with the Frisii and Chauci tribes, Drusus also had to deal with an attempted rebellion in Tres Galliae.

Chapter Five , Drusus the Commander covers the year 11-10 BC and looks at the Germanic tribes and, with emphasis on the Chatti, Cherusci and Sugambri, their fighting techniques. This time was also one of near disaster for Drusus as he was nearly badly defeated at the Battle of Arbalo.

Drusus in his eagerness for glory, nearly spoilt the record when ambushed at Arbalo by the Cherusci.
Chapter Six, Drusus the Consul, looks at 9 BC when Drusus attains the highest political office, but returns to the front to lead his army to the edge of the Roman known world and the River Elbe, only to turn back under extraordinary circumstances that are referred to in the sources that predicted his untimely death. The author then works through the likely scenarios that might have caused the death together with the complications that may have occurred from the suspected injury.

Chapter Seven, Drusus the Hero, describes the journey his body took back from Germania to Rome. the reaction to his death and the exploitation by Augustus and his successors to exploit his subsequent legendary status as a Roman role model and 'Conqueror of Germania'.

The book then has a summary and assessment of the life of Drusus and events in Germania that followed his death, with the disaster under Varus and the follow up campaign launched by Drusus' son Germanicus that was practically a carbon copy of his father's invasion plan.

Each chapter carries an extensive list of the references and sources quoted or referred to in what was a really good read. The final assessment makes a really interesting comparison between Drusus and his accomplishments and that of Alexander the Great, with both men dying somewhat prematurely at 29 for Drusus and 33 for Alexander. The one shining example both commanders exemplified was that charismatic leadership that convinced their men to press on in the face of extreme difficulty and a willingness to lead by example with, in Drusus' case, an almost rash determination to challenge German tribal leaders to personal combat in his pursuit of glory and an eagerness to inspire his men to victory.

Lindsay Powell also looks at what might have been had Drusus survived the passing of Augustus, given the professed leanings expressed by him to the Princeps of a return to a Republic. The devotion of his troops, his military record and his personal reputation as man of high integrity, combined with charm may well have enabled him to have turned the political clock back whilst the Principate was still in relative infancy.

The text is accompanied by twelve really good maps and plans that helped to follow the progress of the story, together with sixteen pages of full colour photos of family busts, relevant archaeology, re-enactors displaying the dress and weapons of the Roman and Celtic/German warriors and modern day views of the terrain discussed.

Given the somewhat limited material to work with, this made an excellent read and I really felt I had learnt a lot about a great, but somewhat forgotten Roman hero and has me ready to read the other book in the series on his son Germanicus. In addition I can see a trip to Holland and Germany with Will to have a look at some of the great museums and Roman displays that capture the events of this period of Roman expansion.

Friday, 1 January 2016

Look Back on 2015 and New Year Plans for 2016

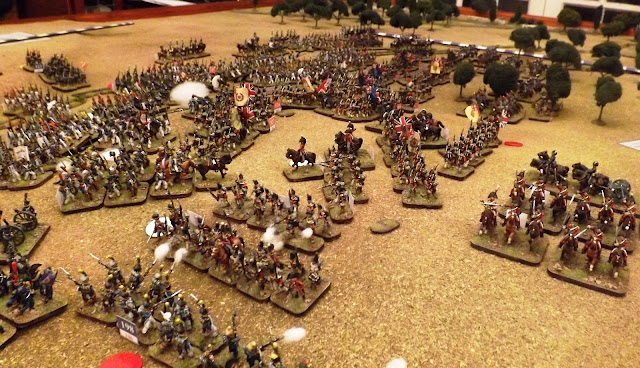
This year culminated with the biggest Talavera game staged so far with the full "Dawn Attack" scenario played in November
As regular followers of the blog know, I am a bit of structures and planning kind of chap and have always worked on the basis of  "begin with the end in mind" and thus move forward saying what I will do and then doing what I have said.

Last year on January 1st I took the time to post my thoughts on progress in 2015 with the blog and the projects outlined in the previous year which seemed to generate a lot of interest and I hope allows regular followers of activities at JJ to see why things happen in the time and way they do with items of pure serendipity on my part thrown in throughout the year to add a bit of spice and variety.

Look Back on 2014 and New Year Plans

So in that spirit of sharing my ideas for 2016 and inviting your comments and questions should you be inclined I thought I would start, as last year, with a review of what the plan was for 2015 and progress against it together with the interest in the blog. Then I will look at what I want to achieve in 2016 with a look at the plans put in place to make it happen. It feels a bit like an appraisal at work except much more fun.

So what did I naively and rashly commit to doing last January?

The plan outlined in 2015
Well as I outlined last year, I would take the Peninsular War career of Sir Arthur Wellesley and his army on to Talavera with a series of scenarios that focus on that battle that will allow me to game the battle in small chunks as we build up to doing the full battle. This project is BIG with 24 battalions of French infantry to be done plus a dozen odd Spanish units.

The progress is well under way though with the completion of the German Division last year, and you will have seen progress towards completing the British units for Casa de Salinas which requires just two more British battalions.

I am planning to carry on with the posts about the units and their back story as they are added to the collection. The feedback on those done too date has been really positive, so to keep it interesting I plan to alternate between French and Allied units interspersed with battle reports on the planned scenarios.

So with regard to the Talavera project I hope you will agree that good progress has been made with this BIG project with a series of posts throughout the year that has looked at the building of some really key additions to the two orders of battle; and the playing as we have gone of the battle broken down into bite size scenarios that looks to model the battle that was fought over two days between the 27th and 28th July 1809.

Mackenzie's British 3rd Division
The year got going with the completion of Mackenzie's British 3rd Division in anticipation in playing the first scenario "Casa de Salinas"
British Units at Casa de Salinas-1809

Battle Royal around the farm enclosure of the Casa de Salinas back in March 2015
Soon followed by three play tests of the scenario to work out play balance and test out special rules which finished in March.
Casa de Salinas - Talavera Game Three

General Portago heads up his Spanish 3rd Division needed to play the last of the scenarios planned for this year,
Attack on the Pajar de Vergara
Whilst the Casa de Salinas play tests were happening work moved on in between play tests to complete General Portago's Spanish 3rd Division from General Cuesta's Army of Estremadura with this work completed in April.
Spanish 3rd Division-Talavera

The final clash in the Night Attack Scenario that produced a thrilling last round of combat to decide matters
Play testing then moved on to three scenario plays of Talavera - Night Attack which culminated in the final game in Mid-May
Talavera Night Attack Game Three

General Fane heads up the brigade of "British Heavies" at Talavera, completed in May
By the end of May work was finished putting together the final British Cavalry brigade, that of General Fane's Heavy Dragoons, needed for the next series of scenario play-tests for the Dawn Attack.
3rd Prince of Wales Regiment of Dragoons

Another 2015 highlight - My purchase of musket balls and clay pipe relics from the military museum in Ligny. These were found on the battlefield during the construction of the museum and have now found a new and caring home
The month of June caused a slightly prolonged pause in progress as JJ's Wargames took time to pay tribute to one of the most influential battles of modern times that ended major warfare in Europe up to WWI and put the final laurel on the glittering career of the finest British General Officer since Marlborough - the two hundredth anniversary of Waterloo.

The panorama of Waterloo, with the Lion Mound top right against the skyline and the bell tower of Plancenoit church poking up from the valley top left at the end of the track. I could picture Blucher's triumphant smile as he realised he had Napoleon exactly where he wanted him and there was no coming back from this.
My series of posts completed on the day in question two hundred years previously culminated in a family trip to Belgium in July that allowed us to tour the campaign area and produced some memories for life. I remember particularly the view of Waterloo as Blucher would have seen it, mid afternoon of June 18th 1815, as we parked up on the "Green Route" that his troops would have recognised instantly, little changed in two hundred years.

Wavre and the Prussian march to Waterloo

A clash of Titans as the French and British go at it full tilt on the Cerro de Medellin in November 2015
The Talavera Dawn Attack play tests began in July and culminated in the biggest game so far in November with the final pay test and produced a really exciting and hard fought battle with the narrowest of victory condition on casualties to the French.
Talavera Dawn Attack Game Three

The 3/54e Regiment de Ligne finished in October 2015 and marking the half way point on the French Line Infantry painted
Since July the work has focused on the biggest part of the project and a step by step completion of the eight regiments, or twenty four battalions of French Line infantry required to field Marshal Victor's I Corps d'Armee for the final afternoon attack scenario that will be the ultimate end point for the project as a whole.
3/54e Regiment de Ligne

At the time of writing I am working on the 3/45e Ligne which will complete the fifth regiment in the corps.

The 2/83rd Regiment of Foot "Fitch's Grenadiers" completed in November, finishing the British order of battle for Talavera
In addition to finishing off the French forces I completed the last British brigade and final two battalions with the completion of the 1/61st and 2/83rd Foot Regiments in General Alan Cameron's brigade in November, completing the British order of battle.

Attack on the Pajar de Vergara with the sweeping attack of the Hesse Darmstadt regiment about to meet the Provincial de Badajoz Militia!!
With work set to continue on finishing off the French and then the Spanish orders of battle we have started a new series of scenario tests only this week with the first run through of "The Attack on the Pajar de Vergara. The game produced a really exciting battle with a new and unlikely set of heroes to finish the year off with, namely the Provincial de Badajoz Militia Regiment who turned the result of the battle completely with one last irresistible counter-attack.

The plan outlined in 2015
Alongside the Napoleonics, Tom and I plan to carry on the progress with the Roman collection, with plans discussed to build, in time, sufficient units to look at gaming scenarios from the Year of the Four Emperors as well as Dacian and German barbarian units.

I am really chuffed with Tom's enthusiasm towards the ancients and his love of painting 28mm so I am looking forward to showcasing more of his work this year.


As well as the wargames projects, we have a family trip to the Waterloo battlefields this June as part of our pilgrimage to commemorate the bicentenary of one of the most important events in world history. I am really looking forward to our week in Belgium and to share the highlights of it here on JJ's.


Alongside the trip to Belgium touched on in the comments above, it was great fun to watch Tom develop his skills as a very accomplished painter, much better than his Dad, whilst completing his studies this year for a well earned BSc in Ocean Science this year.

A memory to savour on a lovely sunny day in Plymouth for Tom's graduation
The post on the plans for the Ancients collection outline the work, mostly done by Tom before he left for Australia. My focus on bringing Talavera to a successful conclusion has limited my contribution to the Dacian Wars project but that is set to change in 2016.

A sample of Tom's other work in the summer that produced equally excellent results
2015 will be a year of consolidating the progress too date and the figures added to both the Peninsular War and Roman collections will set things up to look at bigger projects in 2016 and beyond. In addition I am thinking about another period to look at in 28mm, but am holding off until this years work is complete.

As well as the painting, playing and battle anniversary celebrations other work has helped to consolidate progress in other areas. I am keen to broaden my writing into other fields and so it was fun and a real thrill to be invited to follow up the series of articles in Miniature Wargames in 2014 with an article in the May edition of Wargames Bloggers Quarterly, which is a brilliant free, full colour, PDF publication that I think really helps to promote what is really great in our fantastic hobby, with the work of some very talented people who do this stuff for fun.
Wargame Bloggers Quarterly

As well as that, based on feedback from comments left to previous posts, I was prompted to put together two painting tutorials summarised in PDF downloads for painting French and British infantry and will look to complete a trio with one covering Spanish infantry later this year.

In addition I was really pleased to include material from another contributor other than myself to cover a period that I would not normally look at, but of great interest to other gamers. Having been playing wargames for over forty years I have been lucky to build some very special long lasting friendships through this, rather strange to many, past time and these friends bring a knowledge and a reading of periods and eras that I frankly do not feel qualified to cover, but would like to.

So it was great to include a book review form my old friend "Mr Steve" last month and to collaborate on a board-game play-through of Alfred the Great - The Great Heathen Army 871AD last month. Steve has large collections of Ancient, Dark Ages, ACW and Seven Years War figures and is well read on many periods and brings a witty insightful view to subjects
Gettysburg The Last Invasion-Allen C Guelzo
Alfred the Great and the Great Heathen Army-871AD

Finally I am really looking forward to the release of the much anticipated campaign module from Carnage & Glory. I am really pleased that the coverage of the Oporto game in Miniature Wargames has generated a lot of discussion  about the merits of computer moderated gaming. The addition of a campaign module will only add to that and, with the growing Peninsula collection, I am keen to try out some campaign modules that I would love to play and will demonstrate further the advantages of these kind of games.

So there we are, 2015 here we come.

I think in Carnage & Glory I have found my preferred set of rules when playing Napoleonics and horse and musket games in general, and I have really tried to illustrate, in the games we have played over the last two years, what the rules have to offer. I often find myself playing other paper based rules comparing how easy and seamlessly C&G covers the basic gaming concepts of movement, firing, combat and morale compared with the other way of doing it! I can't say too much about the Campaign system, as I like others have been closely following developments, but through the focus on current projects have not really been able to contribute. I do though look forward to this and other improvements to the system that I have had the privilege of previews of and am really looking forward to sharing them with potential new players going forward.

So what to look forward to in 2016

The immediate work is set focused on completing the remaining ten battalions of French line infantry whilst developing and testing the Pajar Vergara scenario as we go. Then it will be on to the remaining Spanish units, namely the seven battalions of infantry in General Bassecourt's division and the five regiments of Spanish cavalry in General Albuquerque's division, both of which took post at the end of the northern valley during the afternoon attack. These three groups of figures plus a few supernumeraries in the form of general officers and artillery limbers will take the best part of the year to complete.

Once done we will stage the big battle using Carnage & Glory to fight the afternoon action with about fifty battalions of infantry on each side going at it. I think we will play several games with different sets of players to fully explore the potential of this, one of the most interesting Peninsular War battles.

On completion, I am planning to put the information gathered from this and the previous years work into a scenario book and guide that will be tailored for both players of  Carnage & Glory and other battalion level rule sets, that the unit strength C&G orders of battle easily facilitate.


Once the Talavera project is complete and written up I will be shifting some of the focus on to the Dacian War collection and it is the aim to be in a position to be playing or close to playing the first games by the end of the year.

The last boxes of Dacian war-bands showed up between Xmas and New Year, so now it's just a case of painting and basing them ready to play. In addition I will be putting together a collection of 28mm terrain and buildings to compliment the figures on my table. As the Dacians and remaining Roman forces are built I will be putting together the German War-bands for the next phase as we move into 2017 and thoughts of moving the Duke of Wellington back to the valley of the River Coa and a meeting with Marshal Massena Duc de Rivoli, Prince d'Essling.


As well as the project work I plan to continue the work to make JJ's Wargames a magazine style blog with a variety of subject matter and hopefully additional contributors to add to that variety and keep the blog fresh and interesting.

Thank you to everyone who has commented and joined in the conversation and to all those who regularly look by to see what is happening. Last year I reported that the blog had doubled its traffic in 2014, since it started on December 2012, to seven-thousand hits a month; well you guys have doubled that in a year to fifteen-thousand a month and the blog reached its first major landmark of 250,000 hits in October this year, so you must be interested in something that is going on here. I would be doing this stuff anyway, but it is a privilege to be able to record and share it with other people who also get fired up by this kind of nonsense.

The last year has been very focused on breaking the back of probably the biggest wargaming project I have so far taken on and with the end in sight I am keen to take more time to enjoy the journey this year.

Oh and in case you were wondering about the secret 28mm project in addition to the ones discussed. There are plans to start purchasing that collection in 2016, but it is so so secret I am going to save news about that project until later in the year.

Another highlight of 2015. The addition of a family heirloom to "JJ's mancave" with the restored
1845 Pattern Infantry Officers Sword
I hope you like the look of the blog at present with the recent addition of tab subjects at the top to capture the key projects that are the focus of JJ's Wargames. I am rather keen on keeping all the activities together on one site rather than set up separate subject lead blogs as others have done. I rather like the Too Fat Lardies approach of keeping all their game themes under the one banner and exposing visitors to all the delights that different themes have to offer.

Here's looking forward to another exciting year and wishing everyone in the hobby good gaming for 2016.

Thursday, 31 December 2015

Talavera - Attack on the Pajar de Vergara


The Attack on the Pajar Vergara is a battle within a battle that shouldn't have happened in the way it did. This was supposed to have been a holding action to pin the allied flank and potentially draw in reserves whilst a much larger powerful force punched through the British line in the centre.

To emphasise the support role of this attack the German Division under General Leval was supposed to advance after the main attack had gone in and thus, echeloned back, prevent the forces in this area going to the support of their hard pressed and soon to be beaten comrades in the centre. 

This plan was soon upset as Leval's men lost from sight in the enveloping olive groves became disorientated in terms of their position in relation to the other attacking formations and found themselves in the lead on the French flank as they left the cover of the trees and, thus committed, attacked first ahead of the main attack.

This account reveals the difficulty faced by any modern day General Laval trying to navigate their division through this difficult terrain that, whilst providing cover from artillery fire on the approach, causes fatigue and disruption to formed troops whilst crossing it.

For our New Year's Eve re-fight of this very interesting battle within a battle we have two veteran C&G commanders eager to pick up matters where they left off in the Dawn Attack scenario where Will snatched a hard fought victory for the French by forcing his division onto the summit of the Cerro de Medellin and driving Steve's British troops off their commanding position

                   
           Brigadier General Alexander Campbell        General de Division Baron Jean-Francois Leval
                               AKA Steve M                                                                AKA Will            
The map below illustrates the approximate set up of the various units and brigades with a six gun battery of British three pounder guns and a half battery of four Spanish twelve pounder guns occupying the half finished redoubt atop the small knoll called the Pajar de Vergara.

Pajar Vergara Scenario Map
The scenario is set up to reflect the attack conducted by General Leval in that his attack seemed to suggest that his main objective was to secure the Pajar position as a means of anchoring the flank of the French main attack to his right.

Thus if the German Division is able to take and secure the gun redoubt they would shift the C&G casualty result one victory level higher in their favour.

In addition if the French commander chose to include the Poles in his plan of attack it would shift the victory condition in favour of the allies to reflect the fact that the Poles were kept in reserve by Joseph throughout the day and were not intended to support this minor attack.

Finally if the German troops on first contact with the British chose, they could use subterfuge to get closer to their enemy by pretending to be Spanish troops lost in the olive groves. If the British fell for the ruse it would limit the fire they could issue in their first volley to simulate the confusion caused, The Nassau troops used this tactic to good effect in the actual battle.

As with the historical action we commenced our game at 14.00 as the French artillery along the line opened up a tremendous barrage that presaged their attack. Leval ordered his troops to advance en colonne serree, columns that would keep their companies closed up on the ones in front. This kept them easier to control and keep in order but more difficult to deploy should the need arise.

As you will see in the picture below our attack followed a similar profile with the Voltigeur battalions the first to exit the tree line to start the softening up process with their will directed skirmish fire.

Birds eye view of the German columns picking their way through the olives as they approach the allied line, with the first skirmish shots being exchanged
As the German skirmish lines began to work their way forward the next arrivals on the tree line were the three batteries of light artillery attached to the three infantry brigades. By using the two approach roads and by skirting the olive groves on the right flank the three batteries were able to ply artillery fire across the Anglo-Spanish line to thicken the fire from the Voltigeurs.

Baden gun limber, Nassau infantry, Dutch and Hesse Darmstadt skirmishers
are the first troops to get to the edge of the tree-line and open ground
With the bulk of the fire from the lead German units directed at harassing the allied gunners on the Pajar it was soon being answered with canister from the redoubt backed up by British and Spanish skirmish fire, the latter provided by the Antequeran Light Infantry on the Spanish left who were soon engaged in pot shotting gunners from the Hesse Darmstadt battery deployed on the road to their front.

The skirmish battle well under way
The bigger guns add their fire in support of the skirmishers as both sides try to soften each other up
As the allied artillery pours on the hurt, the infantry lines move forward to support the gunners
The German columns took a move or two in the shelter of the trees to shake off  their fatigue from crossing the olive groves and time to dress the ranks prior to advancing
The German skirmishers close the range prior to their supporting columns moving forward
The British move forward on the allied left in preparation  for the impending attack
The skirmishing and artillery fire lasted a good half hour before the German columns had had time to re-order and recover their fatigue following the difficult march through the olive trees.

Suddenly the skirmish lines moved forward to be joined by nine infantry column emerging from the tree line.

Two battalions from the Hesse Gross und Erbprinz Regiment and two from the Baden Regiment made directly for the redoubt screened by Grandjean's and Porbeck's Voltigeur battalions.

One effect of the preceding skirmishing had been to fatigue the allied gunners and whilst the twelve pounder canister fire was still a potent threat it became noticeably less so as the gunners fatigue levels rose with no respite from them labour in sight.

Suddenly the German columns breach the tree-line and head for the Pajar in force
As if recognising the looming threat to the redoubt, General Portago moved the second battalion of the Badajoz Regiment closer to the gun line, but then was drawn away to deal with the Antequeran Cazadors becoming shaken by fire from the Hesse gunners and the attention of the Franfurt battalion.

The shaky Spanish light infantry only held firm when joined by General Campbell himself who steadied them at the wall to their front and returned fire on the two German units to good effect.

The firing across both fronts reaches a crescendo as the two lines close
The British commander was wary of placing to much reliance on the Spanish holding firm and brought forward Brigadier Kemmis at the head of the 40th Foot and the 2nd Battalion of Detachments to form line on the Badajoz Regiment.

The Baden gunners supported by Nassau troops closest to camera attempt to pin the British as their comrades close on the Pajar
The climax of the action was approaching as Generals Grandjean, Porbeck and Leval attached themselves to the lead battalions and charged the redoubt, barely making it to the line of gabions as they were met by a weary discharge of canister.

The encouragement from the attached officers made the difference and three of the German battalions swept into the redoubt in hot pursuit of the gunners leaving from the back and also leaving most of their guns.

Generals Porbeck and Grandjean launch the Hesse and Baden infantry at the redoubt forcing the allied gunners to relinquish their defences and some of their guns as the German troops move onto the position to mop up. General Leval (118) can be seen at the centre of the attack
The distraction of the Antequeran Cazadores had caused two of the allied generals to be out of place when the attack struck, with only the second battalion of the Baden Regiment caused to pull up in the redoubt after the fire it received on the way in.

The German battalions keep the pressure on as they charge in over the redoubt striking the first of the Badajoz battalions.
The Baden battalion (162) is about to meet its nemesis in the form of HM 40th Foot to their front
The fighting was taking a toll on both armies as by 15.30 (turn 6) both army morale levels were at 86% and with failure deemed at 75% the next few moves would soon determine which would brake first. This distress became obvious as the first German brigade commander was advised his command was on a cautionary rating meaning that the fatigue was building fast.

The moment of crisis as the first Spanish battalions meet the onrushing German battalions
With both sides sensing that the tipping point was approaching for either force given one more significant blow, the opposing infantry prepared to charge and to open fire in one last attempt to wrest the initiative.

The three good order German battalions charged again with the two Hesse battalions taking on the lead Badajoz Infantry battalion whilst the second battalion of Baden infantry shook out into line to take on the 40th Foot.
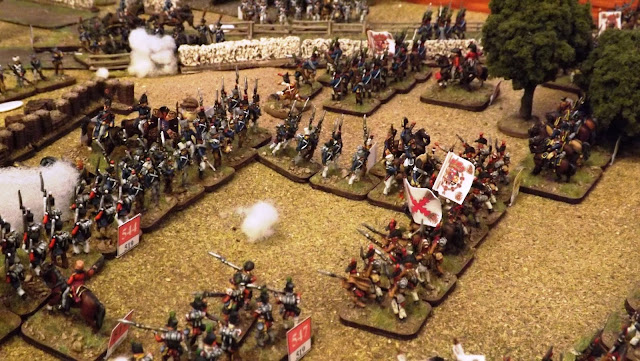
"Cometh the hour" - The Provincial de Badajoz Militia step up and take the fight back to the Hesse battalions amazing everyone involved. Ahead to their left can be seen the 1/40th Foot (544) sorting out the Badeners. General Campbell can be seen top right steadying the Antequeran Cazadores
Up to this point the fire from the weaker British battalions of the 7th Fusiliers and 53rd Foot had seemed rather desultory compared with what you would expect from a British battalion and their lack of numbers couldn't have helped. The 40th Foot on the other hand were one of Wellesley's stronger battalions and so we shouldn't have been that surprised to see them pour forth a devastating volley in to the Badeners before them that staggered the battalion backwards.

The heroes of the day, the Provincial de Badajoz Militia launching their own bayonet counter attack following their two devastating volleys that retook the Pajar redoubt and reclaimed the allied guns. The smoke is from the volley from the 40th Foot.
With what looked liked the turning point as the British volley enveloped the Baden unit in smoke, the Hesse battalions charged forward at the II/Badajoz, who immediately turned tail and fled without firing a shot.

With their tails up the two Hesse battalions charged on into the I/Badajoz and like their regimental comrades they too turned tail and broke before contact leaving the third and last Spanish unit in line facing the oncoming victorious German battalions.

Turning point as the lead German battalion are about to break back off the Pajar
It looked like game set and match as the Spanish infantry seemed to collapse under the attack as the two German battalions charged at the Provincial de Badajoz Militia. Then something happened.

The Spanish militia battalion stood the first charge and with half the battalion coolly presented arms and let fly a column staggering volley that stopped the Hesse battalion dead in its tracks horrified to see General Grandjean fall mortally wounded from the saddle.

It seemed we were all holding our breath as the second Hesse battalion charged in keen on avenging this lucky shot when the other half of the Spanish militia battalion followed the example of their brothers in arms and coolly shot the second Hesse battalion to a standstill.

The field of battle as the German Division breaks contact leaving the field of battle to the victorious allies.
As the smoke cleared the Spanish battalion lowered their bayonets and charged in to finish things, catching one of the German battalions as they both turned tail and fled. Two of the German battalions were in full rout and the other retired shaken with General Grandjean dead and General Leval carried from the field with a serious wound following his meeting with the Spanish militia battalion.

Not only that but our game was over with the German Division at 75% army morale failure and the astonishing performance of the Provincial de Badajoz Militia to savour as an incredible game turning event.

The butchers bill and game statistics illustrate what a convincing victory the allied infantry achieved but doesn't do justice to how things looked in the final turn as two Spanish battalions broke and fled without firing a shot.

You have to feel for Will commanding the Germans after his careful approach and full bloodied assault seemed to have paid dividends especially with the Nassau battalions and Baden artillery able to successfully tie down the other British brigade. Then with victory in his grasp to have a Spanish militia battalion, pull a bit of an "Albuera" on him was hard to watch, but was a fantastic end to a very close well fought battle. We are looking forward to playing this scenario again and Carnage & Glory is the rule set that just keeps on giving!

Talavera - Pajar Vergara       
Major victory for the Allied Army as of Game Turn: 9 

The Allied Army has suffered losses of: 
[ 4%]    354 men of all arms   incl.
[ 1%]    122 prisoners of all arms
[ 4%]    327 bayonets 
[ 0%]      0 sabres 
[ 9%]     27 artillerists                   
11 cannon[s] lost 
Honours: [547] Kemmis' Bde. Light Bn.

The French Army has suffered losses of: 
[15%]    984 men of all arms   incl.
[ 1%]    109 prisoners of all arms
[15%]    936 bayonets 
[11%]     48 artillerists                    
6 cannon[s] lost 
Honours: [160] III Fuss Batterien Steinmetz
Losses include 2 General[s]:        
[118] Baron Jean-Francois Leval - Dressing wound        
[121] Balthazard-Grandjean - Mortally wounded

-----------------------------------------------------------------------------------------------------------------------
Talavera - Pajar Vergara      As of Game Turn: 9 
Division Alexander Campbell - Defend  
[ 517] Brigadier General Alexander Campbell - Active C [875 paces]    
[R] [ 548] Lawson's Brigade                  10/ 135      C          Shaken                 
[R] [ 621] 1st Battery                             17/ 131 [ 1] D+      Shaken             

Brigade William Myers - Defend    
[ 518] Lieutenant Colonel William Myers - Active C [450 paces] 
[ 541] 2/7th Foot                                     19/ 369      C- [sk] Formed    
[ 542] 2/53rd Foot                                     0/ 483      C- [sk] Formed            
[ 543] A. Campbell's Bde. Light Bn.      17/ 144      C  [sk] Formed   
    
Brigade James Kemmis - Defend    
[ 519] Colonel James Kemmis - Active C [450 paces] 
[ 544] 1/40th Foot                                   26/ 644      C+ [sk] Formed    
[ 545] 97th Foot                                        0/ 452      C+ [sk] Formed            
[ 546] 2nd Battalion of Detachments        5/ 557      C- [sk] Formed              
[ 547] Kemmis' Bde. Light Bn.                 8/ 236      C+ [sk] Formed    
  
Division Marques de Portago - Defend  
[ 528] Major General Marques de Portago - Active C [725 paces] 
[ 553] El Rey A                                               0/ 229      D        Formed              
[ 554] El Rey B                                                0/ 231     D        Formed                 
[R] [ 600] 1st Bn. Badajoz Regiment            72/ 499      D-      Shaken               
[ 601] 2nd Bn. Badajoz Regiment                 50/ 507      D-      Formed           
[R] [ 602] 2nd Cazadores de Antequera      120/ 437      D- [sk] Disorder          
[ 603] Imperial de Toledo                                0/ 792      D-      Formed             
[ 604] Provincial de Badajoz Militia               8/ 569      D        Formed        
[ 605] Provincial de Guadix Militia                2/ 560      D        Formed              

Strengths: losses/active   
327/6249 Bayonets     
0/460 Sabres    
27/266 Artillerists    
11/1 Cannon
   
354/  6975 Total of all arms           
13 Standards present 

Legend:    
[D] Denotes dispersed    
[Y] Denotes In rout    
[R] Denotes halted in disorder, in retirement or retreat    
[W] Denotes no advance unless accompanied by officer

-----------------------------------------------------------------------------------------------------------------------
Talavera - Pajar Vergara      As of Game Turn: 9 
Division Baron Jean-Francois Leval - Attack  
[ 118] General de Division Baron Jean-Francois Leval - Dressing wound B- [875 paces]
    
Brigade Heinrich Freiherr von Porbeck - Attack    
[ 119] Oberst Heinrich Freiherr von Porbeck - Active B [450 paces] 
[ 160] III Fuss Batterien Steinmetz                  7/ 183       C       Formed    
[W] [ 161] I.von Harrant Nr.4 (Baden)          17/ 359       C- [sk] Formed     
[Y] [ 162] II.von Harrant Nr.4 (Baden)       107/ 260        C- [sk] Rout          
[ 163] I.Nassau IR Nr.2                                   0/ 360        C- [sk] Formed        
[ 164] II.Nassau IR Nr.2                                  0/ 386        C- [sk] Formed    
[ 165] Porbeck's Voltigeur Bn.                      25/ 292        C- [sk] Disorder      
    
Brigade David-Hendrik Chasse - Attack [No Advance]    
[ 120] Generalmajor David-Hendrik Chasse - Active C [350 paces]    
[R] [ 166] 3m3 Artillerie a Cheval Trip        26/ 121         C       Shaken        
[ 167] I/2me Regiment Linie                           7/ 386         C- [sk] Formed        
[ 168] 2/4me Regiment Linie                         14/ 364        C- [sk] Disorder          
[R] [ 169] Chasse's Voltigeur Bn.                  36/ 118        C- [sk] Shaken        
    
Brigade Balthazard-Grandjean - Attack [Retire]   
[ 121] General de Brigade Balthazard-Grandjean - Mortally wounded B [450 paces]    
[R] [ 170] III. Fuss. Batterien Venator           15/  81          C       Disorder          
[R] [ 171] 1/Gross und Erbprinz Nr 4             91/ 307        C- [sk] Shaken            
[Y] [ 172] 2/Gross und Erbprinz Nr 4           154/ 217        C- [sk] Rout          
[ 173] Rheinbund Bttn von Frankfort               0/ 391         C- [sk] Formed    
[ 174] Grandjean's Voltigeur Bn.                      8/ 217         C- [sk] Formed        
    
Brigade Feliks Potocki - Attack    [ 122] Oberst Feliks Potocki - Active C [350 paces] 
[ 175] I. IR Nr 4 (Polish)                                  0/ 761          C  [sk] Disorder      
[ 176] II. IR Nr 4 (Polish)                                 0/ 782          C         Disorder      
[ 177] Potocki's Voltigeur Bn.                          0/ 260          C  [sk] Disorder      

Strengths: losses/active   
459/5460 Bayonets    
48/385 Artillerists     
6/12 Cannon
507/5845 Total of all arms           
11 Standards present 
Legend:    
[D] Denotes dispersed    
[Y] Denotes In rout    
[R] Denotes halted in disorder, in retirement or retreat    
[W] Denotes no advance unless accompanied by officer

A great game to finish 2015 with more to come on JJ's with a review of the year and a look forward at plans for 2016.

Thank you to everyone that has joined in the fun here on the blog, I really appreciate the comments and discussion generated and would like to wish everyone a Happy and Peaceful New Year.

JJ

Tuesday, 29 December 2015

Deepest Darkest Africa with Donnybrook


Whenever I plan to go up to North Devon for our annual post Xmas pre New Year game at Chez Chas I am never really sure quite what to expect.

Last year we were battling in the American Civil War and recreating events surrounding Stoneman's Raid  at the Danbury Iron Foundry in 1865. This year would prove to be quite something different.

ACW Skirmish Stoneman's Raid 1865

This year our game was set in late 19th century Colonial Africa, deep in the Congo jungle at a tributary of the River Uele.

At this crossroads of narrow trails crossing one of the many small rivers that wind their way through the thick jungle foliage an unholy alliance of Arab Slave Traders, River Pirates and a tribal group from the native Azande people that had been disturbing the peace in their own way had been driven by military columns sent into the forest from the various Colonial Powers that had been subjected to the depredations of these three groups in recent months.


The rules we were using for the day were the recently new set of skirmish rules by Barry Hilton and Clarence Hamilton "Donnybrook" which was my first play through, so I was keen to see how they worked.


The set up below with my annotations should help you picture the scene. The scenario simply had the three alliance players in the centre each with three units of different size and abilities, based on groups of four (excellent), eight (bulk standard regular) and twelve (cannon fodder) figures supported by two to three characters such as principle leaders and in my case as the River Pirate leader, a witch doctor and second warrior leader as well.

The basic idea is that combat from shooting and melee will cause hits on a 6 or more with the better quality, but fewer figured units rolling D10's per figure to hit, the regulars getting D8's and the cannon fodder on straight D6's. Saving throws are similarly structured and the leaders were generally fighting with a D12.


To make things interesting, we had some boxes of contraband and booty in the camp, next to the tent in the centre of the table which we all would have been happy to keep with fewer people to share with, thus an alliance of convenience rather than one of goodwill.

The four roads leading into our camp area were the approach routes of the separate but cooperating Colonial troop columns similarly structured with differing ability units but with much different weaponry, some including heavy machine-gun teams.

In preparation for the arrival of the regular troops we set up some road barricades and positioned some troops outside of the camp perimeter. I chose to put my four man mercenary section on the road barricade to slow the approach of the British-Indian army column, whilst my men manoeuvred for a better position to attack from.

Will making some last minute adjustments to his slave traders set up prior to the arrival of the German column on his road
My four man mercenary team cover the road barricade with the pirate riflemen lining the hedgerow behind
Will's Arab slave trader riflemen together with a light cannon cover the road barricade on the route of the British Naval brigade
Once the perimeter forces were set up the four colonial troop columns edged their way down their respective roads.

The movement and combat is card driven so no Igo-Ugo here and the anticipation and often frustration experienced just willing the right card to come out at the right time just added to the fun of the game.

View of the camp perimeter with the River Pirates nearest camera and their allied band of native club-men centre, by the tent
My best unit and one of the more successful units to still be standing at the game end was my eight man squad of pirate riflemen who regularly fired off five D8's worth of shots at various targets through the game and succeeded in taking out the Indian HMG team and shooting up both British rifle squads as they approached the camp aided by the club-men skulking about in the undergrowth and charging out at the survivors from the shooting, taking out the British commander in one attack.

British -Indian army patrols covered by Vickers HMG placed on the road
German Askaris covered by an HMG team as they approach the camp
All the Colonial Troop columns were badly shot up at game end but the Royal Navy more through luck, I suspect, than planning had managed to keep their Naval squad away from the worst of the carnage. Their card had failed to show up for several moves during which time the two sides had dealt mortal blows to each other.

As the Jack Tars moved  into the camp the Pirate leader could only shout defiance as he leapt over the hedge to join his men as they retreated leaving their ill-gotten gains behind them.

The British Naval brigade column, with Jolly Jack Tars top left
My Pirate Mercenary squad try to ambush the Indian HMG team but whilst getting badly shot up only kill one of the enemy 
Arab slave traders and Azande tribesmen man the perimeter
The River Pirates with their ranks thinned in the fighting pull back observed by Captain "Bunny" Chivers MC, Royal Engineers (centre top), last man standing in the British column and carrying his trusty croquet mallet that he used to dispatch several of my men!
The rules played seamlessly and we were soon able to roll our dice with the basic mechanisms memorised, and I really appreciate rules that work in that way. It is clear that "Donnybrook" have plenty of scope in them to allow you to tailor them as required and I really liked the way they played.

We were using characters like my witch doctor who had the ability to terrorise the enemy on first meeting him thus reducing their to hit potential as they were temporarily memorised by his carrying on.

The Royal Navy in force move into the camp ready to seize the contraband
The German Askari HMG team cover the camp perimeter whilst the British Naval infantry move in to mop up
Personally, I am on the lookout for a turn too skirmish set of rules, mainly for horse and musket eras, and these are now firmly in the frame, possibly alongside Sharp Practice by the Lardies as another option.

Not much left of the Congolese Republic troops as they go through the roll call for the third time
We all had a great day messing about in the Congo jungle with lots of laughs and chat which just made the game play even better. If you haven't played Donnybrook, I would certainly recommend giving them a go.

We played from about 10.30 am to about 15.00 with a stop for lunch with, as you can see, plenty of figures on the table and got a clear result in the time, so these should make a very usable set for smaller games with less time to get a result, very useful for those of us who are often time poor and need a quick game system.

The rulebook is in full colour and like the "Republic to Empire" rules from Barry Hilton that I have are full of "eye candy" alongside a well structured layout.

A deserted camp at the end of the days fighting. The River Pirate Chief is the last man to leave defiantly overseeing his surviving pirates away down the road to regroup and fight another day
The River Pirate Chief shouts defiance (top centre behind the native hut) as the Royal Navy move in from the right
Thanks to our host Chas, and to Nick, Mike, Steve, Vince, and Will for a great day of wargaming.