Friday, 11 March 2022

Mohawk Valley Collection - Albany and Tryon County Militia


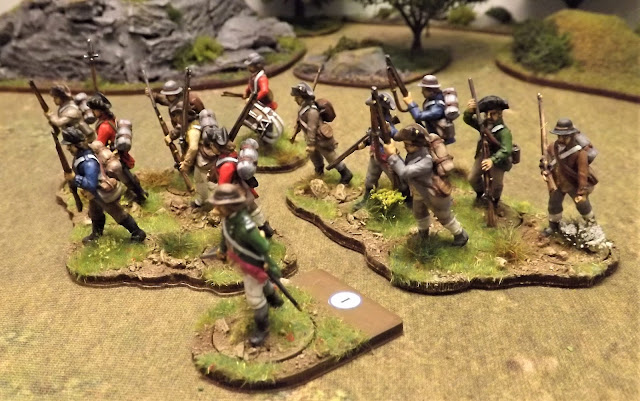
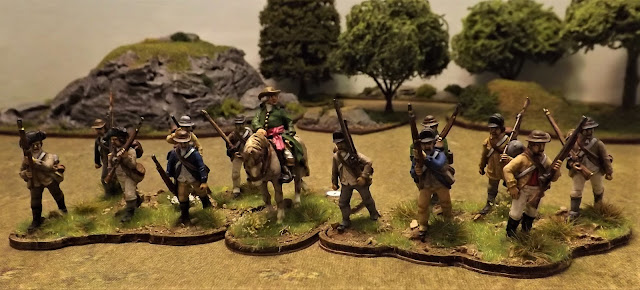
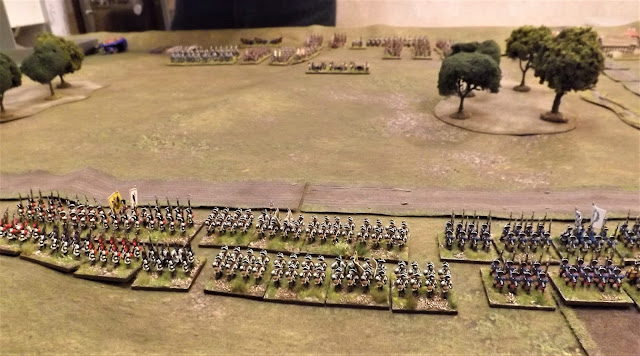
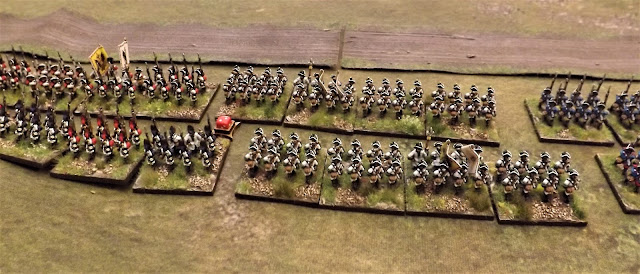
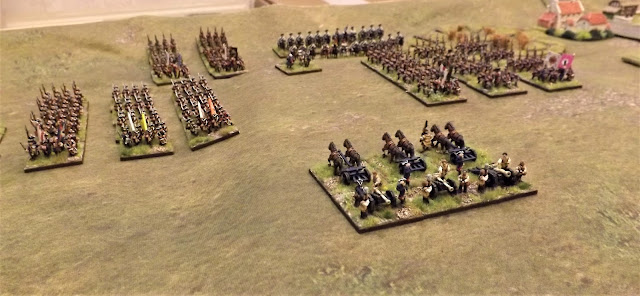
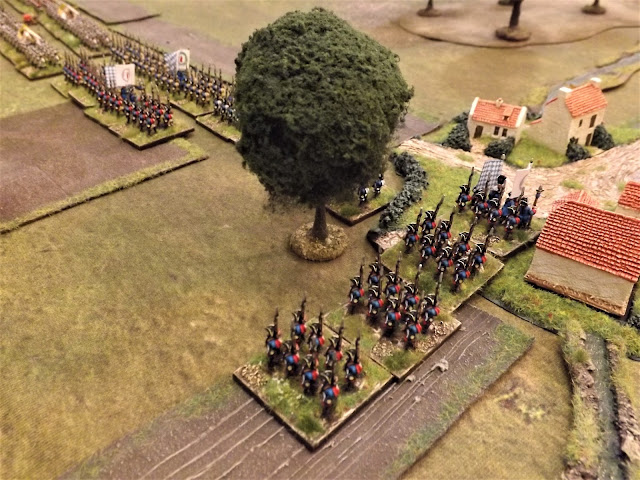
The work on the paint bench this month and part of February has been focussed on completing my first tranche of the Albany and Tryon County Militia that will form the core of my Rebel American army to oppose the Crown forces in my Mohawk Valley collection of AWI figures.

With a solid core of Crown forces completed, that has seen the build of the Kings Royal Regiment of New York, Butlers Rangers, British regulars and light infantry, Jaegers and the allied Mohawk Indian forces, I decided to shift the focus on to the American troops so that I could have a start to the collection that would allow some practice games, prior to doing something big with a much larger collection.

That work started last year with a few trial builds of some plastic and metal Perry options for American militia, but more thought was needed, together with some scratch building to complete the force I was looking to build.

With a lot of work put into the Age of Sail collection of model ships brought to a conclusion with the completion of the first part of the collection at the end of last year, I found myself with time to start work on my planned militia build that would see me constructing a force of some one hundred and forty four militiamen, to allow an eventual fighting of Klock's Field, perhaps one of the most significant engagements in this bloody conflict on the northern frontier of New York state in the AWI.

Obviously with this number of troops I was looking for the most cost effective and attractive option to build a militia army with character that would capture the look and spirit of the Rebel forces that formed the frontline defence in the Mohawk Valley in the 1780's and the idea of the Perry's to adapt their plastic Continentals for this option had a strong appeal, with plenty of scratch building options on offer, as covered in my post over Xmas and linked below.

JJ's Wargames - Mohawk Valley Collection American Militia Scratch Build

The Xmas work schedule also saw the completion of my Jaegers together with some metal militiamen to add even more variety to my plastics build, link below.

JJ's Wargames - Mohawk Valley Collection, Jaegers & Militia

In addition, if you are interested in seeing some of the other units built prior to this work, I did a summary post capturing the key build with a link also below.


So, back to the militia, and introducing the first twenty five percent of my militia army for the Mohawk Valley ready to take on my Crown troops and Indian allies.


On March 8th 1772 the Province of New York passed a bill for the establishment of organised militia in each county in the colony, and four years later with the start of the American War of Independence, the Tryon County militia had become an army of rebellion under the control of the Tryon County Committee of Safety, fighting in the Saratoga Campaign of 1777 at the Battle of Oriskany.

The Battle of Oriskany, August 6th 1777

The battle would herald the ongoing struggle between the rebels and loyalists of the Mohawk River valley in New York state, as the 800 strong Tryon County militia column of Brigadier General Nicholas Herkimer found itself ambushed by a loyalist force of some 400 Iroquois Indians and 100 men of the King's Royal Regiment of New York led by Colonel Sir John Johnson, with the former marching to the relief of Fort Stanwix under siege by a British force under the command of Lt. Col. Barry St Leger, supporting operations by General Burgoyne, marching down the Hudson Valley.

The ensuing battle was a disaster for the Tryon County men losing some 465 casualties to just 28 on the loyalist side, with the survivors forced to flee under the pursuit of the vengeful Mohawks.

The Saratoga Campaign of 1777 - Map courtesy of Wikimedia
https://commons.wikimedia.org/wiki/File:Burgoyne%27s_March_on_Albany,_1777.svg

Burgoyne's campaign ended in failure and his subsequent surrender in September brought France into the war and would see a change in leadership in British Canada as the forces there went over to the defence, until a lack of direct French involvement in the region prompted a more aggressive response in 1780 as the Mohawk Indians and Crown forces returned to the Mohawk Valley and beyond, leaving a trail of destruction in their wake.

The Champlain and Mohawk valleys would be the access routes of the loyalist columns and with the Continental Army otherwise engaged in operations around New York, Philadelphia and having to commit forces to defend the south, the defence of the New York, Northern Department fell on the shoulders of local leaders and local forces in the form of the five regiments of New York and two regiments of Massachusetts State Levies and the five regiment of Tryon and sixteen regiments of Albany County militia.


The Battle of Oriskany gave the militiamen an early inoculation to the shock of battle and the battles to come and I wanted my representation of these men to reflect their experience and better preparedness for the actions that followed in 1780 and 1781, with these men kitted out for the marches they had to conduct often in pursuit of enemy raiding columns.


Thus these soldiers carry the blanket rolls and packs more often seen on the regulars as part of that preparedness and in amongst the soldiers I have sprinkled a few rifle armed volunteers who can readily stand in as my Militia Ranger options, clad in hunting shirts and able to form into small skirmish groups.


In 1779 the Tryon County militia was combined with the Albany County militia and on March 20th 1780, Brigadier General Robert Van Rensselaer was given command of the second brigade and in 1781 Marinus Willett was appointed in overall command of New York militia.

Colonel Marinus Willett - Ralph Earl

By the time Willett was appointed to command the militia, the Mohawk Valley had been ravaged as part of Sir John Johnson's 'Great Raid' in September and October 1780, with supporting operations the previous May along the Champlain Valley; during which the militia had been given the run around suffering defeats at Stone Arabia and Klock's Field and failing to intercept and decisively defeat the invading columns, and leaving the Tryon County militia reduced from about 2,500 men to just over a thousand men at arms but with very low morale.

The state of affairs prompted Willett to remark on assuming command that 

"I don't think I shall give a very wild report if I say, that one third have been killed, or carried captive by the enemy; one third removed to the interior places of the county; and one third deserted to the enemy."


However in June 1781 the combative style of Willett took immediate effect with his leading an attack against Lieutenant John Doxstader of the Indian Department, himself leading a mixed force of seventy rangers and Indians on a raid up the Schoharie Creek, skirmishing with rebel militia on the march, and attacking property and livestock close to Corrystown.

After removing 120 cattle and horses, the raiders set fire to twenty homes in the area and the smoke from the attack alerted Colonel Willett at his headquarters in Canajoharie, who immediately set forth with 170 odd militiamen and getting in front of Doxstader laid an ambush.

However Doxstader was warned of his peril by a scout and he ordered his men to disperse and attack the ambush site, but recognising he was outnumbered called a retreat, getting his men clear and taking six prisoners but being forced to abandon the livestock captured earlier.
 

The autumn of 1781 was dominated by another large raid into the Mohawk Valley, this time to be lead by Major John Ross commanding the second battalion of the KRRNY and, with Sir John Johnson on leave in England to settle financial matters, commander of the expedition of 734 troops and Indians.

4 Companies, 2nd Battalion KRRNY             - 198 (Major John Ross)
8th Regiment                                                   - 36   (Lt. Thomas Coote)
34th Regiment                                                 - 76 (Capt. William Ancrum)
84th Regiment, Royal Highland Emigrants    - 36
German Jaegers                                               - 12
3 Companies Butlers Rangers                         - 167 (Capt. Walter Butler)
Indians, mixed tribes                                       - 109 (Capt. Gilbert Tice)
Indians from the Genesee River Country        - 100


Ross, a Seven Years War veteran, would lead his force on a similar route to that chosen a year earlier by Johnson but was destined to meet stiffer opposition and to find less to destroy than Johnson, with many people having left and those few remaining able to take refuge in nearby strong posts, with twenty four such places in the sixty-three miles between Schnectady and German Flatts.

Colonel Marinius Willett was in command of the defenders, himself based at Canajoharie, having abandoned Fort Stanwix and he had on call some 1,200 regulars and 800 militiamen.


The raiding force marched swiftly to enter Corrystown on October 24th but did not burn it this time to avoid alerting Willett and his defence forces and making use of the surprise to enter the Mohawk Valley before the rebels could organise a large enough force to meet them. 

Suspecting that the rebels may well guess his force would exit yet again along the Mohawk to Oneida Creek and discover his hidden cache of food and munitions ahead of his force, Ross decided to change his plans with a more direct withdrawal to Carleton Island via the Black River and making best use of his surprise crossed the Mohawk at one o'clock on the 25th October, with rain teeming down and rebel militia already gathering on the opposite bank, his troops and Indians skirmishing with the militia and attacking and burning property on their march to Johnstown.


However it became clear to Ross that he would not be able to outmarch the rebel pursuit column organised by Willett, and entering the woods east of Johnstown, he determined to make a stand.

Colonel Willett's advance party appeared and retreated when fired at, but with the main body close behind them Willett led the advance across an open field supported by a single piece of artillery.

Ross's men stood their ground and as the rebels wavered, Ross ordered an advance causing a running fight as Willett's men broke and fled abandoning their gun.

Ross later wrote of the action,

'I lamented the want of a good Body of Indians, (few of those present venturing to engage), in which Had I been so fortunate, it would in all probability have crushed the Spirit of Rebellion on the Mohawk River, on our left the Rebels had planted a Field Piece with another Body of men, and in our following the enemy out of the Woods they kept up a brisk fire, the Troops advanced to attack, the very countenance of which made the rebels give way.'


It seems Ross's advance was brought short as his right flank was attacked by another 'body' of the enemy, and Ross ordered his own 3-pounder turned on them as the afternoon closed out to evening with this last rebel attack driven off and Willett able to disengage, whist Ross's men sheltered in the wood, destroying abandoned enemy ammunition before resuming their march north.

Ross reported that his men acquitted themselves well stating more than 1,200 rebels had pursued them, 400 of them Continentals, and his casualties as negligible whilst the enemy lost many officers and at least twenty men.


Willett pressed his pursuit of the Crown force and caught up with their rear-guard at West Canada Creek, with Ross having just got his column across at 2pm on the 30th October. He went on to report;

'Just as the Troops had all got over, the Rebels made their appearance, and fired upon our Rear, the fire was returned. Captain Butler who commanded the Rangers covering the Line of March was unfortunately killed, several men were also killed and wounded. The Enemy had greatly the advantage of Ground and their favourite object of firing at a distance, wherefore I ordered the Troops to move forward in order to take possession of the first favourable Spot that offered which was accordingly done, the sick and wounded were sent on.'


The Battle of Johnstown would be one of the last battles of the war in the north as news spread of the British surrender at Yorktown effectively seeing the running down of major operations, as the peace negotiations moved into full swing.


With a stiffening of regulars among their ranks the Albany and Tryon County militia proved they were a force to be reckoned with under the right leadership and with them not being asked to do more than their capabilities offered.

In time I plan to create a large force of these chaps, stiffened with the odd gun or two, some state levies and occasionally the odd group of Continentals with a refighting of Klock's Field a key objective.

I am really pleased with the way these plastics have turned out and I think readily provide a very cost effective and attractive alternative to building a large fore of rebel militia.


Sources referred to:
The Burning of the Valleys - Gavin K. Watt
King's Men, the Soldier Founders of Ontario - Mary Beacock Fryer
Lot's more to come on JJ's as I'm off to club today to play in the follow up game of Maurice featured in my previous post, before setting off tomorrow for a short break in Yorkshire, where I am planning to visit HMS Trincomalee in Hartlepool, the last surviving British Napoleonic Wars type frigate of the Leda Class and sister ship to HMS Shannon, and the second oldest warship afloat.

More anon
JJ

Saturday, 5 March 2022

Maurice - In the Seven Years War

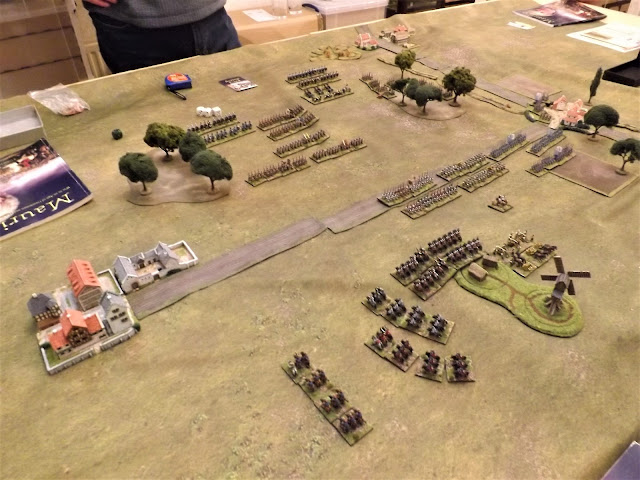
This week Steve and I had a change from our usual Monday night Vassal meet up and were joined by Martin who offered to run a Maurice Seven Years War warm-up game in JJ's HQ with is glorious 10mm Pendraken collection of figures.

Pendraken - Seven Years War

I can't say I'm that familiar with the ranges Pendraken do as my eyes are long past anything much under 18mm and even that's now a bit of a struggle, but I have to say that once I got my really close up detail spectacles on I was very impressed with these little sculpts, enhanced of course by Martin's brushwork

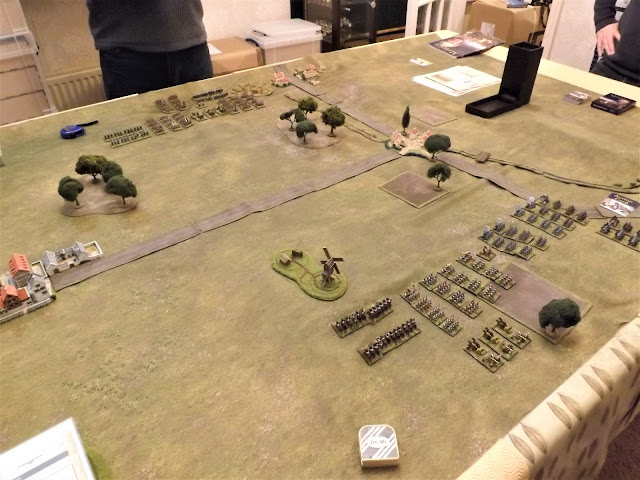
Our table set up with control of the central road the objective and with me running the Austro-Bavarians nearest to camera, with the classic set up of infantry and guns to the centre and cavalry on both wings, with Steve's Prussians a lot more compact in readiness for advancing through the gap between the woods on his table edge. My plan - get to the road quick, anchor on the right hand village, and hold fast!

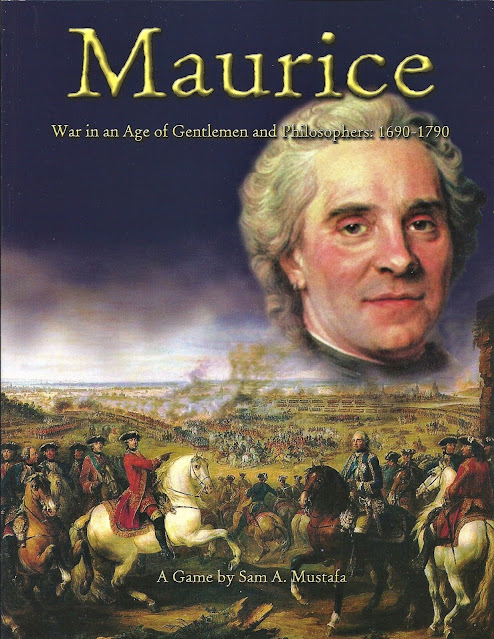
Of course the other aspect of Martin's invitation that immediately fired both Steve's and my enthusiasm is that we are confirmed admirers of a lot of the work Sam Mustafa produces and Maurice in particular, but that we have not played them for quite a while and so with Martin offering to run a full on game at the next March meeting at the Devon Wargames Group this seemed like a good opportunity for us all to get back up to speed with this very clever set of rules.

Massed lines of Austrian and Bavarian infantry have advanced to the road and shaken out into line

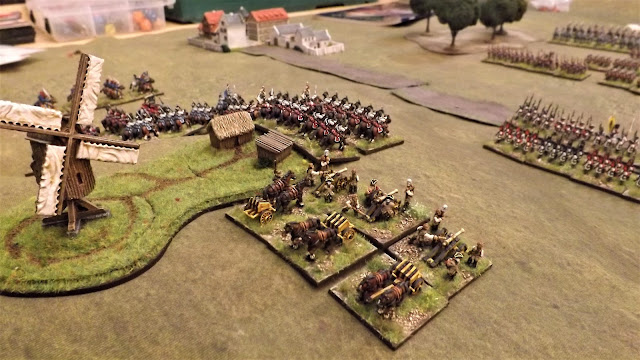
I don't posses any 10mm terrain and so we had to make do with some of my 15mm trees and roads mixed in with Martin's buildings which included a superb model windmill that I gather is 'de rigeur' on any self respecting Seven Years War table these days and a very fine landmark it was.

The first disruptions appear on my line as Steve plays my men with his cannon as his troops start their advance

As far as sides were concerned we rolled for command of Prussians vs an Austro-Bavarian army with me commanding the latter and just to keep things simple we left out the national characteristics concentrating on getting back up to speed with basic card play using the 'vanilla' forces for both sides.

I am a bit more of a Napoleonic man, but I have to say there is something quite compelling with the massed linear armies of the pre-conscription age and these little minis really do look very fine on mass.

Prussian artillery start the softening up process

My Bavarians move a garrison unit into the village to anchor my right flank

Having thrown some terrain down and arranged our armies we were quickly into the card play and I opted to get their 'fastest with the mostest' by burning my hand of cards bar one in rapid marching, moving my forces up to the road ready to go firm and hold the line.

This was a good reminder on the demands of play with Maurice, reminding myself of the requirements of keeping my army as compact in its deployments as possible, with groups being able to activate based on type, formation and the terrain occupied and with the range from the commander determining the cost in card expenditure.
 
With the Bavarian garrison in place, Prussian fusiliers advance through the wood to their front.

However once on the position, pass moves are an excellent way to gather in a new hand of cards, provided the enemy are busy doing other things like manoeuvring themselves rather than bothering you with, oh I don't know, combat or such like.

The Prussians in the wood had to accept the inevitable disruptions as the difficult terrain interfered with the march

Anyway my plan was working fine and I had a good hand of cards that even allowed me to swing the balance of my right flank cavalry across my rear to join those on my left and as Steve gingerly approached the road, I got the urge to change the plan and start getting adventurous with the rules, of course forgetting the hazzards they present to any such venture in my anticipation of trying out for the first time wielding massed cavalry in a charge.

Steve's serried ranks advance into the valley

Steve and I have traditionally played Maurice for the AWI and so having any cavalry in numbers and certainly cuirassiers was a whole new experience and with Priussian columns shaking out into line as they trudged up to the road got me thinking that it was about time to try them out and see what Maurice could do.

The picture below gives you an idea of my thinking as my cavalry wheel into position ready to take full advantage of supporting my infantry attack with a cavalry attack in that wide open gap to their left, forgetting of course that I did not have the guides card to make sure I knew that ground was what I thought it was and that Steve might just have the card that would inform me that that ground was in reality, broken marshy terrain, absolutely hopeless for pressing cavalry over in a charge.

There in a nutshell is another of the compelling reasons why I love Maurice, even when on the receiving end of its play. How many times do you read in a given narrative of such inevitable military planning cockups, and having just written a post about another favourite set of rules, Kiss Me Hardy extolling the virtues of Clausewitzien friction, here I was presented with yet more of the stuff to deal with and I love those aspects in a set of rules.

My cunning plan of suddenly massing my cavalry on my left flank about to be foiled as Steve plays the unreconnoitered ground card and will put a large unforgiving marsh on the other side of the road.

So in the good old tradition of 'the plan changes on first contact with the enemy' I pressed ahead with the new plan which saw my infantry clear their disruptions received from the Prussian guns completely with a timely laid card and, sticking to my Wellingtonian principles, greeting the enemy with a few well directed volleys by grabbing the first fire initiative, and following them up with a cheer and a bayonet charge.

Not bad for a rapid change of plan, especially when the first of the fusilier battalions, just deployed out of the woods, and the Prussian musketeer unit on the Prussian right dissolved under my assault, which was to prove the highwater mark of the whole attack.

Everything set up for a perfect defence and then I threw caution to the wind and attacked! See what I mean about the figures and the windmill? With Austrian cuirassiers parked up ready to go.

Sadly without the support of my impotent cavalry forced to sit and watch the infantry contest, impatiently waiting for a gap to open up in both respective lines, my infantry got decidedly the worst of the follow up fights, that left both our armies tottering under the morale losses to our respective armies, but with the Prussians ahead on points and me not looking to change that lead anytime soon.

Eventually the Austrian cuirassiers perceived a wide enough gap to join in and lend a hand, braving the fire on their charge in, and even coming out on top in the follow up melee, but having not dispersed the Prussian unit to their front having to ignominiously drop back and suffer the indignity of being popped at by wounded but not knocked out Prussian Musketeers.

With my army tottering on about four morale points left out of its original eighteen we called the game there deciding that my cavalry was in a strong enough position to allow my remaining infantry and the guns to vacate the field of battle, leaving it to the Prussians who had enough of their own wounds to lick. 

Very Albuera looking to an old Peninsular hand, and loud voices heard from the Prussian camp as we withdrew.


'this will not do, write me up a victory!'

Thank you to Martin for reacquainting us with another old friend, Maurice is always welcome at the table, and for bringing along his fine collection of figures to grace the table with and to Steve for a good game and paying me back in buckets for the time I played a similar card on his attacking British grenadiers, marching gaily towards my American militia, until they weren't, and being shot to pieces in a bog.

We will be having a proper go with Maurice at this month's first meeting of the DWG and Martin will be weaving in the flavour cards to the scenario to spice things up in our next set to. 

If you've ever toyed with the idea of giving these rules a go and you love card play and the friction it can create, with the ever present challenge of dealing with the situation you face rather than the one you would choose, then I would highly recommend giving Maurice a go, and if you have the eyesight to cope, ten millimetre is a handy choice, budget wise and for providing the extra space to manoeuvre. For me it will be 28mm from now on and I'm looking forward to show casing my Albany and Tryon County Militia for my Mohawk collection which are fast nearing completion. 

More Anon 

JJ

Wednesday, 2 March 2022

Kiss Me Hardy/To Covet Glory - JJ's Game Specific Items

 
Whilst posting about recent games played using Kiss Me Hardy and To Covet Glory, I've had a few questions about the kit I tend to use with my games and recently I've added some new materials, so I thought I would highlight my preferred way of playing these rules and some of the ideas I've come up with to streamline play and make things as easy as possible for the players to just concentrate on moving the models and rolling bones.

Of course these are just rules of play, the old fashioned kind, with none of the fancy tokens and other components you get with some more modern offerings, but I guess 'just rules' understates the fact that they more than make up for that lack of modern day presentation, but they do, in my humble opinion, need a little preparation, which to my eye means personalisation.

All the kit in use during our Cape St Vincent Anniversary Game - On the table is the Wind Compass Rose, extra wind arrow, turning circles, wind gauge acetates, broadside gauge, activation chits and ship record sheets. plus rules quick reference sheets.

This preparation is important, whether you intend to play small, single ship actions and definitely larger ones, as a game is easily spoilt by a lack of items to make the play seamless and flowing and allow the players to simply get on with play, easily able to record damage, indicate that which would be observed by the enemy and all done in a timely way that gets as many turns of play into your game as possible, whilst keeping the granularity, context and story telling that KMH generates in buckets.

Carl von Clausewitz
The Philosopher of Lard and inventor of Wargaming Marmite
https://en.wikipedia.org/wiki/Carl_von_Clausewitz

For example the principle method of deciding who gets to do what and the order of when events happen in the game is card driven, harking back to dear old Carl von Clausewitz' description of war being the closest thing to a game of cards, in terms of its unpredictability, and all the associated 'friction', the marmite of wargaming, you either love or it seems in some cases hate.

The most basic requirement for a game of Kiss Me Hardy, generic activation chits, order tokens used in single ship actions and TCG games and sail/mast damage markers, to which I would also add strike test and struck markers. I have modified still further the sail/mast damage markers by indicating on it which mast has been lost (bowsprit, fore, main, mizzen and all/dismasted). These appear on the model rather than debris and show all players the damage carried and can be used to show which broadside is masked for firing (dismasted ship firing -1 modifier).

I love friction, and the problems it creates to a well laid plan, but I don't like shuffling cards, probably down to having small perfectly formed hands, definitely designed by Devine providence for painting and detailing small models and figures but sadly useless for playing cricket and especially shuffling cards. 

My Ship Record Sheets are designed to tie in with my markers, with two sets of broadside gun boxes shown bottom left, starboard and port, when hit on either side requiring multiples of two or more guns being lost, we mark off the same number of boxes with one less on the other broadside to indicate accumulated damage. Likewise should a mast go down the mast damage markers can be placed to show which broadside gets the -1 firing modifier to represent rigging covering gun ports.

The answer is chits or tokens, drawn from a bag. No need to shuffle anything, because at the end of blindly drawing the game tokens from said bag, you simply gather them all in and draw blindly again, creating a fast play turn around of game turns, so important when administering large fleet actions with multiple commanders and ships.

Mast Damage and Strike Test counters placed on the ship bases during play, to remind players which ships require to take a strike test and should they fail it, simply flip it over to reveal a struck marker, and sail damage, now refined to show which mast is down, and can be placed on the base side to indicate which broadside suffers a negative fire effect when firing, as I now record damage to both broadsides separately on my Ship Record Sheets. These have gone through a few incarnations and I back to back my strike counters, fiddly I know, but it saves time and messing about during a game and once done is done. The markers are deliberately small and discreet. The game is about featuring those lovely model ships from Warlord, not the markers. Aesthetics dear boy Aesthetics!

To compliment my chits, I have created a basic generic set of counters on a pdf, designed to fit and simply stuck on a 32mm diameter by 2mm mdf laser cut disc, which I paint with acrylic green (general events), blue (others fire and move) or red (British fire and move), creating the set seen above, and used to create battle specific sets seen in the picture below that require additional named commanders on the chits plus other additions, such as 'England Expects' and Admiral chits for activating signals.

The rest of the kit includes stuff common to other Age of Sail rule sets. The Wind Compass Rose and Acrylic Turn Circles, bottom right are available from Warbases and make a nice touch to any game. The Wind Attitude Diagram, bottom left, has been copied to acetate and is simply placed over the foremast of a model, lining the forward bow/quarter line with it with the wind arrow, above it, placed alongside the model in line with the Wind Compass to check attitude to wind, if in doubt. At some stage I will get an acrylic version of this from one of the mdf folks. At top are my battle specific chits all bagged up and my broadside gauge, see below.

With the chits and markers came the need to produce a simple Ship Record Sheet, see the example above from our recent game of the Action off Start Point in 1793, that is generic in layout, easily stored in Excel, but that can turn out the stats for any ship using KMH or TCG and with all the factors that that ship will use when firing, testing morale and moving all brought together from the rules and on it for ease of use when playing.

Warbases - Kiss Me Hardy Turning Templates
Warbases - Compass Rose

Nymphe and Cléopâtre slugging it out in a recent game, with the former shown here bow raking the
latter and seeing a 'strike test' counter placed on Cléopâtre's base to remind us that she needs to test when the Strike chit is drawn, which if passed, as she did in this case, you remove it, if failed, you turn it over to reveal the enemy ship has struck her colours. Note the Warbase turning template in the background.
 
One aspect I was keen to alter slightly in my adaptation of KMH was the Firing Solution calculation for judging a full, partial or raking broadside, as I wasn't entirely happy with the idea in the original rules of using the body of the model, bow and stern to measure out the 15 degree angle of fire, or the raking assessment of a full on ninety degree plus or minus two degrees either side of the firing ship to stern of a target ship.

Arc of fire illustration - British Frigate vs French Frigate, Mark Lardas, Peter Dennis (Osprey)

This is all subjective I know, as we need a contrivance to allow for gun captains angling their cannons as shown above, that provides a common method of assessing a fire solution that is easy for the players to calculate at a glance but with an easy check to confirm should that be necessary.

My Broadside Gauge adopted and adapted from the old rule set
Form Line of Battle by Stephen Harrison and Robin Peck

I used to play a very simple but fun set of fast play age of sail game, Form Line of Battle, by Stephen Harrison and Robin Peck, which I still have my original copy of, published in 1987. 

It came with a set of simple items on card that you could cut out for use with the game that included the Broadside Gauge you see above, and which I have used in countless other games over the years to decide broadside and raking solutions, purely for its simplicity and to me seemingly reasonable representation of this kind of naval firing.

The Broadside Gauge in use in our Cape St Vincent game, seen top centre placed alongside HMS Culloden as the British assess an early broadside opportunity. If in doubt the laser is used to extend the line out to the potential target.

So the two angles measured out from a single point represent the arc of fire for a broadside to broadside 30 degree fire solution and a broadside to stern or bow rake, 20 degree solution with the centre point placed alongside the mainmast for broadside to broadside looking to have the mainmast of the target in the 30 degree angle for a potential broadside shot and with the stern or bow within the 20 degree angle for a rake.

My Target Lock laser pen, Mr Steve picked up for me at Firestorm Games in Cardiff. This is a really useful piece of kit for any naval game where firing can be quite often at long ranges and the need to check the angle over distance.

Having the full length of the target's base within the broadside arc determines whether it is a full broadside, with just the mainmast but only part of the ships base in angle determining a partial one.

For deciding the range to the target, I take mainmast to mainmast as the measure for a broadside and mainmast to the centre of the stern or bow of the model, with the whole length of the model in the arc for a rake with the additional requirement that rakes can only be delivered at short or point-blank range.

Close up, the fire solution assessment is very easily judged by looking, but for a ranged shot where the angle is in doubt the use of the old laser 'Target Lock' comes in really handy, by running the line out from the gauge held over the firing ship's mainmast to the target and is another piece of important kit that is always in my bag for these games.

Finally I come to my most recent addition to my kit and by no means less important, my brand spanking new range sticks, that will make tape measures being used to assess the range to the target redundant.

My new range sticks for Kiss Me Hardy

When running my Talavera project a few years ago using the fantastic Napoleonic computer moderated rules Carnage & Glory, I very much appreciated the range sticks we used using pdf markers produced by the rules author Mr Nigel Marsh affixed to pine wood strips, that saved so much time calling out gun and musket ranges to be input on the computer during combat calculations.

Ok so KMH doesn't need a computer to run things, but hey Nigel, if you're reading this, what about Carnage & Glory at Sea?

Anyway, the beauty of KMH is its simplicity of design in that gunnery is a case of find the range to determine the die score needed to hit, which remains a constant. The only thing that modifies the chance to hit is the number of dice you roll, based on number of guns, crew quality, first fire and other such factors.

So I now have my range sticks delineated into range bands with the die score required indicated, point blank 2 or more, short 3 or more etc.


The great  thing is that KMH ranges extend to forty centimetres and the pine wood finishing strips I picked up from my hardware store come in 240mm long x 16mm wide x 5mm thick, lengths that perfectly facilitated the production of six sticks, spray panted black and then sticking on my prepared range bandwidths, on both sides, as there is nothing more annoying than picking up a range stick only to find you are looking at the blank side and wasting time, twiddling it over.

Kiss Me Hardy - Facebook Page

If you like the ideas I've come up with to create my KMH kit then you can download the PDFs of my chit designs, markers and range stick graduations in the pdfs I've put together which I will post here and on the Kiss Me Hardy Facebook page, and feel free to grab the jpeg of the Broadside Gauge if you so wish.

JJ's Kiss Me Hardy PDFs - Chits, Markers & Range Sticks

Above all, I hope these ideas will help improve your Kiss Me Hardy games and get more ships out on the table.

JJ