Friday, 23 July 2021

All at Sea - Let's Build a Sloop!

 
If you decide to start making model 1:700th age of sail ships from the Warlord Game collection of models you are likely to end up with quite a few model brigs which you can decide to simply put together as per the instructions, or if you would prefer a little more variety to your small-ship collection, decide to convert a few of them to a flush-deck ship-rigged sloop, sloop-of-war or corvette depending on your preferred terminology.

As a 'Brit', 'Pom', 'Limey' or 'Rosbif', I will tend to use the Royal Navy terminology of the period referring to a sloop or ship-sloop as opposed to the model instructions seen below referring to a brig-sloop, just so we are clear, or as the song goes: 

'you say Tomarto, I say Tomayto, let's call the whole thing off!'

The instruction sheet that comes with the lovely Warlord model brig, showing the sprue that allows the construction of two such models and illustrating why you can end up having a lot of these little ships.

Of course you could choose to wait for Warlord to release their announced new model of a sloop as recently shown on Facebook with a look at the computer designs for the upcoming model.

Two of the planned, eagerly awaited new models from Warlord illustrated recently showing left to right the new 6th rate 20-gun sloop, the 5th rate 36-38-gun frigate, currently available in the plastic range and shown for comparison, the planned 4th rate 50-gun and the 3rd rate 74-gun also available in the plastic range and shown for comparison

However even with the eventual release of this model sloop, this conversion will still allow the collector to field a flush deck variant with a complete single open deck of guns, versus the new model with quarterdeck and forecastle, quite useful if you are building a collection around the US Navy and American and British ship-sloops on the Great Lakes, that tended to have this single gun-deck layout.

This model design for the USS Wasp shows clearly the layout of a typical flush deck sloop that this conversion looks to imitate.
https://scherbakshipmodels.tripod.com/id156.html

Having turned my attention to working on the excess of small ships I have accumulated during the work to build my larger fleets of ships of the line, I decided to add to the sloop conversions I have built previously to allow enough of these useful little ships to model specific historical encounters and cater for some of the other smaller nations such as the Dutch or to have some Early Revolutionary War French versions.

All at Sea - Early Revolutionary War French Frigate & Brig


All at Sea - Revolutionary War Batavian Dutch Frigates & Brig


My first sloop conversions

Since building those first conversions I have had queries posted to me here on the blog and other forums about precisely how these models were built and how to go about it and even the colour schemes I select for them, and so I thought I would attempt to cover off these points as I go through the process of building six sloops which will add to the models I have as outlined above.


Based on the principle that a picture is worth a thousand words, and very often a video only helps the process I have put together a short video tutorial that shows my build process for constructing the sloop from two brig hulls, adding a new mainmast and associated channels and rigging anchor points before finishing with a coat of primer.

The Bonne Citoyenne (captured 1796), a captured French corvette, as taken off at Portsmouth Dockyard prior to being fitted as a 20-gun sixth rate. 
https://collections.rmg.co.uk/collections/objects/83820.html

In the second post on this build I will showcase the painted and rigged models and discuss how I decide on the look of the models and my colour selection choices, with of course the usual invitation for comment and questions either here on the blog or other forums to help clarify the process and make it as easy for those who want to, to have a go.

For checking out my original basic colour choices you can follow the link to this video clip from when I first reviewed these models and my ideas for using them.

Bases & Paint Colours Used


For Rigging these models just follow the links to my three video tutorials covering standing rigging, British and American running rigging and Other (French, Spanish, other Navies) running rigging.

Standing Rigging


British Running Rigging


French/Spanish Rigging


Apologies for some shaky camera work during the preparation of the hulls and I hope you find the video useful.

Let's Build a Sloop


I have had problems linking the YouTube Video clips from the channel, and can't find a solution as yet.

If you can't see the video links then please follow the link to the JJ's Wargames YouTube Channel where 'Let's Build a Sloop' and all the rigging tutorials can be followed.

More anon 
JJ

Tuesday, 20 July 2021

8th Army: Operation Crusader, The Winter Battles for Tobruk 1941, Game Designers’ Workshop on Vassal

 
You have to be of a certain age to remember first encountering a new game that was published in 1984, but I have an original copy of this game in hard copy format and both Steve and I were captivated by the novel blind play that the game offers by using two copies of the same map, one for each player, when we first had a go playing Operation Crusader from GDW back last century!

The Empire Map set up with the British armoured brigades out on the left flank and Indian, South African and New Zealand infantry brigades linking them to coast in front of Bardia on the Egypt-Libya border. The Tobruk garrison is waiting to be relieved ready to launch a breakout to link up and behind the line of German crosses lurks Rommel and his Italo-German Afrika Korps.

Needless to say, when I saw there was a Vassal module for the game I was really keen to see how well it translates to the age of computer moderation, ideally suited for facilitating blind play; and so about six weeks ago Steve and I brought our computers together in the same room as lockdown restrictions started to ease and set about seeing if it was as good as remembered.

The 'nerve centre' of the game, seen here at the conclusion of the second turn, with a record of time gone, supply consumption, reinforcements, replacements and rebuilt units, air support availability and combat resolution, when units in a battle hex on the map are set up on the combat display, the only time enemy units are visible to the opposing player. Note the supply situation at the start of the offensive with the Empire forces seen here with 17 points in reserve and a replenishment point every day for the first eight days of the offensive, reducing to one every other day and compare that to the Axis tracker.

The premise behind the game Operation Crusader is to recreate the eighteen day battle that started on November 19th 1941 when in the real attack, that came after months of build up by 8th Army as Rommel was focused on the problem of removing the garrison of Tobruk sat on his lines of communication (LOC), the British 4th, 7th and 22nd Armoured brigades supported by two Army Tank Brigades in support of Empire Infantry began the offensive, catching the 'Desert Fox' unprepared and definitely unconvinced that such an offensive was happening.

The game map at turn 2 with arrows indicating my (Empire) plan of attack aiming to knock out German airfields at Sidi Rezegh and Sidi Azeiz, thus reducing Axis air support, whilst 'crumbling attacks' by Empire Infantry and Army Tank Brigades push the enemy back along the coast, cutting off any defenders in Bardia (Note that the display shows my units faded out letting me know that they are hidden to Steve. When at full resolution they are visible to both players.)

Thus the victory conditions for the game are relatively straight forward in that both commanders are comparing their result with that achieved by their historical predecessors, with the Empire commander looking to have a link with a held Tobruk perimeter by Turn 18,  and for a decisive victory, six Axis units destroyed, twice the combat strength in Empire armoured units to Axis and three times the strength of Empire infantry to Axis, or for a tactical victory, the historical outcome, Tobruk relieved but a failure to achieve the other conditions, with any other result leading to a drawn game.

The 'actual situation' map for turn 2 with all forces 'uncloaked' and revealing the Axis defenders, with a thin screen of Italian infantry (light grey) surrounding Tobruk, Panzers opposing my armoured brigades in front of Sidi Rezegh, and no Axis garrison in Bardia and thin line of Italians on the coast in retreat before my South African (blue) and New Zealand (dark brown) infantry brigades. Note Steve's placement of Axis supply units across his line within five hexes of his forward units, allowing him to launch counter assaults as required.

Our game pretty much followed the historical offensive and both Steve and I revelled in the hidden display that for us really captured the vast nature of war in the Western Desert in WWII with units seemingly appearing out of 'the blue' and just as quickly disappearing back into it.

A very straight forward terrain effects table, easily memorised for fast game play

The nature of the fighting is beautifully captured with supply units (the box truck on wheels counter) within five hexes needed to support a full out assault in any one hex, where defenders can either retreat to lessen combat hits but where assaulters take all hits recieved and probing attacks that don't require supply but allow a hex to be investigated by the probing unit and for the both sides units to withdraw if it takes casualties, thus reducing them by one level,  but to press the probe into a reconnaissance in force should the defender prove to be weak and fail to cause any casualties with defensive fire.


As supply is used up the little truck counters are first revealed to the enemy player so that he can confirm it is range of where the assault is taking place, then removed and put in the 'Supply Units' box on the game tracker; available to come back on to the map as a supply point from the pool is spent, thus allowing it to drive up a road track or open desert from its friendly map edge using its five movement point allowance to get it to where it needs to be to support future assaults.

A likewise straight forward Combat Results Table, with ratio between attacker and defender strength points establishing the basic column to be modified by aspects such as terrain or air support, but with infantry generally halving their attack factor vs armour unless anti-tank capable. Note the effects are generous with even 1:1 assaults only missing on a 1 allowing infantry to prepare the crumbling attacks favoured by Monty.

The Turn Record Track shows on which days new supply points are received and the appropriate player records his total reserve supply accordingly, from which he replenishes his used truck counters.

A very simple but clever system that restricts the players freedom to throw in assaults here, there and everywhere without a thought for the days ahead in a very long eighteen day offensive operation.

Supporting operations on the ground are the respective air forces which can be prepositioned over a hex to offer offensive or defensive air support, effectively shifting the combat result column left or right, with opposing air units generally cancelling each other out and the opportunity for ground forces to use the anti-aircraft defences to drive off supporting enemy air, before the combat resolution.


The ‘Honey’ equipped 4th Armoured Brigade composed of the 8th Hussars, 5th Royal Tanks Regt. and 3rd Royal Tank Regiment, with an anti-tank capable red dot, top left and factors along the bottom (attack-defence-movement) 

Pressing forward with my armoured brigades at the start of the offensive I managed to make rapid progress advancing on Sidi Rezgh, with Steve throwing in occasional counter attacks but, as he later recounted, making the mistake of not hitting back harder with more powerful groups and thus burning valuable supply and losing units for little tangible gain 

Turn 4 - 22nd November 1941 and 4th and 22nd Armoured brigades have punched their way into Axis lines and are sitting astride the airfield at Sidi Rezegh among wrecked Luftwaffe and Italian aircraft and only four hexes (sixteen miles) from Tobruk, but the armoured brigades need to halt having consumed a lot of supply in their offensive and with the cruiser tanks of 2nd Hussars, 22nd Armoured brigade written off in the fighting (British tank unit bottom left forming my 'dead stack') supported by the 4th Indian Infantry Division (white counters) to their right.

However my early armoured offensive burned up a lot of Empire supply points and the loss of the 7th Hussars cruiser tanks and most of the Panzers had still not been encountered in battle leaving me rather concerned that Steve was preparing a counter attack to drive me back to my start line.

The Panzer Regiments 8th and 5th in two battalion groups forming the punch in the 15th and 21st Panzer Divisions of Afrika Korps (Note the attack and defence factors compared to the British 4th Armoured Brigade above)

As I feared, Steve had been conserving his supply and armour after his infantry and antitank gun screen had absorbed the brunt of my armoured assault by conducting a pincer offensive to cut off the head of my attack at Sidi Rezegh setting up the rather tragic and historical battle by Brigadier General Jock Campbell and his 7th Support Group on the airfield in the historical battle.

Knocked out tanks litter the airfield at Sidi Rezegh in the Crusader battles of 1941

Thus by turn seven, November 25th the situation had changed on the armoured sector of the battlefield as the Panzers rolled on to Sidi Rezegh airfield and pushed back Empire armour and infantry as they surrounded the defenders and crushed the last remaining units of honey tanks bravely resisting to the last.

Turn 7 - 25th November and the British armoured assault to Sidi Rezegh has been halted and cut off with the battered 5th Royal Tank Regt. soon to join their comrades, written off the Empire order of battle as I prepare to shift the weight of the Empire offensive to the coast and send in the infantry.

The desert war is all about supply and the game really captures the importance of it to enable assaults to take place, the most effective way of taking ground. My armoured thrust had left me needing to hold the ground taken, with my air force put on to patrolling defensively over forward ground units as I spent the next few days rearranging my line and husbanding supply ready to initiate the infantry battle to come.

Veterans from the Battle of Crete in May 1941, the three brigades (4th 5th and 6th New Zealand Infantry) and the 28th Maori battalion that composed my 2nd New Zealand assault division. Empire infantry have powerful attack and, importantly for holding ground, defensive factors, and the New Zealanders are the best, great for making probing attacks as well as offensives with army tank Matildas and Valentines in support.

However the respite of the next few days where both sides drew breath was not a quiet period at all as I was quite keen to launch probing attacks along the front line to keep a clear picture of Axis units opposing my forward line and to expose areas vacated by retreating Italian infantry near the coast and the possibility of inflicting casualties that would eat in to the much limited Axis replacement pool, referred to as 'dominating the ground' in British training manuals.

Turn 11 - November 29th and the Axis have destroyed any remaining resistance around Sidi Rezegh as the Empire rebuild their supply base but conduct aggressive combat patrols on the right front with the New Zealand and South African infantry supported by army tank brigades and armoured care regiments cutting of Bardia and driving along the metalled coast road as they turn the Axis flank as I prepare to drive on to Gambut airfield which would allow a possible breakout offensive by the Tobruk garrison.

The next big push by the Empire forces would likely decide the game as, with the need for a breakthrough using the last remains of Empire supply and a small reserve to press a link up with Tobruk, faced by Steve's clever but stingy use of Axis supply to allow any required last ditch counterattacks to break any such link up, I set myself the goal of reaching Gambut airfield in force by turn fourteen, December 2nd and then to reassess my chances from there.

Luftwaffe air support with the deadly Stukas and their +2 column combat shift only countered by Empire antiaircraft fire hitting on 4+ which really made a difference in the later combats.

Well as the saying goes 'time spent on reconnaissance is not wasted time' and as the game reached its closing stages on turn eleven, November 29th, my South African and New Zealand Infantry had elbowed their way forward past Bardia and set up a jumping off point to press on to Gambut; through a series of probing attacks that revealed a hotchpotch of Italian and Germain infantry and reconnaissance battalions, thinly spread and trying desperately to hold key nodes to block rapid approach to either the airfield or Tobruk, along the main coast road.

Boston medium bombers of 12th and 21st South African squadrons part of
the Empire air support, that defended gains and supported attacks.

With my supply restored, my remaining armour replenished and my infantry set up on their jump off points before Bardia and Sidi Azeiz airfield the big push kicked off with mixed results with the New Zealanders encountering stiff resistance and dogged attacks from the Luftwaffe that kept them pinned back around Sidi Azeiz but the South African 1st and 2nd Infantry Divisions able to turn the Axis flank through the rough terrain between the coast and the coast road with armoured car patrols pushing the line up to just north of Gambut airfield.

Turn 14 - December 2nd and the Empire high water mark has been reached with a stolid Axis defence of the coast road preventing the New Zealand and South African Infantry closing on Gambut Airfield and no realistic chance of linking up with Tobruk and holding a link up until Turn 18, December 6th. 

However just to get to that position had burnt up the last offensive reserve of Empire supply leaving just a small amount to cover emergency counter-attacks and with the Axis very unlikely to be able to break the Tobruk perimeter we called our game a draw but effectively a win for Steve as he had out generalled Rommel who faced with an Empire tactical victory withdrew from Tobruk, setting up his successful offensive in May 1942 at Gazala.

This game is a hidden gem in the catalogue of Desert Campaign games, and the unique double-blind map moving only made easier with computer moderation is amazing at capturing the uncertainty that the real life generals had to contend with whilst gazing at their situation maps trying to assess their chances by pressing forward in any particular area.

Turn 14 - December 2nd and with the cloaking removed, the real situation is revealed at the end of the game with a solid line of Axis resistance blocking any further Empire advance along the coast road, backed up by both Panzer Divisions ready to deal with any break through and plenty of Axis supply to allow counterattacks.  The South African armoured car patrols were pushed back from Gambut in the last Axis move. Note the stacks of destroyed Empire (extreme bottom left) and destroyed Axis units (top right, in the sea).

The final map above revealed the truth of the situation and confirmed my decision to concede early with a solid Axis blocking line between Tobruk and Bardia with the likelihood of significant losses in Empire infantry had I persisted in pressing the offensive to the point of no supply in reserve.

The empty areas marked by each others national symbol shows the bluffing ability the game offers with areas we both suspected to be vacant but never checked out thoroughly, based on the fact that surrounded areas cut off from supply could not conduct assaults, only probes, and time spent mopping up distracted from the offensive operations that had moved past such areas.

The game chart display at the close of our game with both sides carrying multiple units in their 'Remnants Boxes' , top and bottom right and with Steve sitting on six supply points (Supply and Replacement Track) to just two Empire with just another two to come (two supply markers on the Empire Turn Record Track).

In addition the Empire left flank is hanging out 'in the blue' based on the fact that I was content for the Axis to throw units out there, away from where I wanted to attack, and supply them if he wished, but Steve was too canny for that, and as can be seen both forces contracted their line closer to the sea as units were written off the order of battle and remaining forces had to focus on control of key roads and tracks.

The only downside with this game is that the Vassal module is an old one and given the relatively low rating (6.8) given to the game on Boardgame Geek (BGG) probably explains why it hasn't been updated to remove a few glitches on units wandering to different areas of the map occasionally. Not a huge problem and it didn't affect our play or enjoyment.


The other aspect, more to do with our play rostering, is that leaving the game each week to play the next, often meant that the picture of the enemy front line garnered from previous play had dimmed, requiring further probing to re-establish it, but again seemed to add to the 'fog of war' and further embellish the situation.

We still rate Rommel in the Desert as our favourite Desert Campaign Game, but the unique hidden movement in 8th Army puts the game up there with it as a 'Very Happy to Play' game, and more than repaid our six week investment to play it, so don't always follow what the folks on BGG think, this is a much better game than the rating portrays and it is well worth checking out.


Next up; Let's Build a Sloop, a post on exactly how to construct the flush-deck, ship-rigged sloop from an excess of Warlord 1:700th Brig models and with a video tutorial to help illustrate the process

Saturday, 17 July 2021

All at Sea - Early Revolutionary War French Frigate & Brig

HMS Nymphe vs Cleopatre 18th June 1793 - Donald MacLeaod
 
The war at sea in the French Revolutionary War got started rather unofficially as a lot of wars tend to do, not with an exchange of memorandums between opposing groups of ambassadors in Paris and London, but following a salute of gunfire from shore batteries guarding the entrance to the main French naval base at Brest at His Majesty's Brig-Sloop Childers, when the later was fired upon whilst 'taking a look' at the entrance to the harbour on January 2nd 1793, bringing home to the Admiralty French cannon balls lodged in her timbers as proof of French aggression.


A more formal declaration of hostilities soon followed with France declaring war on Great Britain on February 1st 1793 and a war lasting some twenty one years with a year's break following the Peace of Amiens commenced and the first engagement between Britain and France's naval forces took place close to the Isles of Silly on the 13th March 1793 between the French privateer brig, le Sans Culottes 12-guns and the British brig Scourge 16-guns as covered in a video presentation of a game I ran back in January.

The Scourge and le Sans Culottes do battle of the Isles of Silly in March 1793 - Thomas Yates
Note the French privateer shown flying her 1793-94 French Revolutionary ensign, a combination of the former Bourbon model white ensign with the cantoned republican tricolour. 
All at Sea - Scourge vs le Sans Culottes

Whilst really enjoying exploring how to better replicate these single ship actions at sea with all the issues of identification and the different actions that could follow, namely a duel or chase type of engagement, principally differentiated by the willingness to fight between both parties, see my post below;  

All at Sea -To Covet Glory in Narrow Seas

I made a mental note at the time that having my French sporting colours that weren't official until 1795 would not do and so when the opportunity presented I would sit down and create a more appropriate looking light squadron to better model these little actions.
 
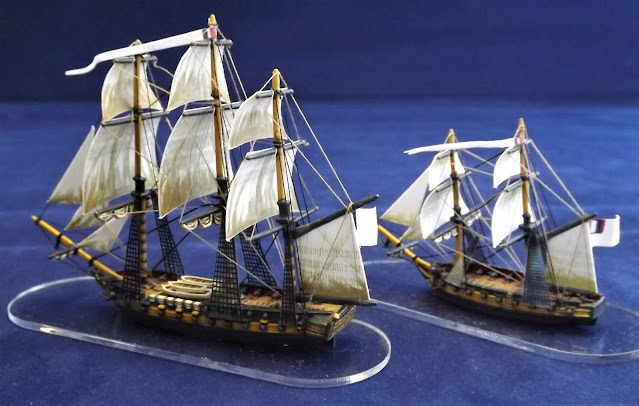
The start of my 1793-94 French Light Squadron with a frigate and brig to get the collection started

As with my previous post looking at my Batavian Dutch Light Squadron, I modelled these first ships around a series of sixteen historical engagements, including Scourge and San Culottes, that these models are designed to suit the look of for the French vessels involved, between the 13th March 1793 and 22nd October 1794 in waters ranging from the Channel and Western Approaches, the Caribbean, Indian Ocean and the Mediterranean, with two involving a 50-gun British 4th rate and one an ex-French Indiaman, which will require some extra models to be constructed when the opportunity presents - great fun!
  
My new Revolutionary War brig means I can now portray le Sans Culottes nearer to her appearance the next time we play.

These early-war engagements reveal French naval forces reeling under the effects of the Revolution following the cull of politically unsuitable naval officers, and the flight into exile of others, together with the breakdown in discipline in a force that could only operate under such a system.

French Naval Ensigns (22) Early 17th century to 1790, (23) Naval Ensign 1790-4, (24) Naval Jack 1790-4 and (25) Tricolour , modern form as used at sea - Flags at Sea, Tim Wilson
I created my own 1:700th scale French Revolutionary Ensigns and pennants for brigs to first rate ships, with a link below to the pdf
French Flags at Sea 1793-94 pdf

Perhaps the light forces were less affected than the fleet units in that 'motivated by profit' privateers with better access to able volunteers helped to supplement the frigate and corvette commanders and crews, the latter with commanding officers having aspirations to rapid promotion in the wake of a successful cruise and with their smaller crews better able to impose discipline and retain the revolutionary zeal to take the fight the royalist lackies.

Thus the early actions produce some hard fought scraps, such as that the Scourge encountered, mixed with rather more tame meetings followed by an attempt to run or simply strike after a few desultory shots, meaning that Royal Navy captains could be sure of their likely superiority in sailing and gunnery but not about the robustness of opposition they might encounter.


Another typical classic example of the more robust encounter occurred on the 18th June 1793, eighteen miles south-west of Start Point, on the South Devon coast, between the British frigate Nymphe 36-guns and the French frigate Cléopâtre 32-guns, captured in the excellent painting by Donald MacLeaod seen in the header above.

William James in the Naval History of Great Britain Volume I, records the drama of the action;

'On the 17th of June the British 12-pounder 36-gun frigate Nymphe, Captain Edward Pellew, sailed from Falmouth on a cruise. Having, in his way up the Channel, arrived nearly abreast of the Start point. Captain Pellew ran out to the southward in the hope of falling in with one of the two French frigates which, a week or two before, the Nymphe and Venus had chased into Cherbourg, and which were known to be the Cleopatre and Semillante, already noticed in the action between the latter and the Venus. 

Captain Sir Edward Pellew c 1797 - Thomas Lawrence (Royal Museums Greenwich)
https://commons.wikimedia.org/wiki/File:Sir_Edward_Pellew.JPG

On the next day, the 18th, at 3h. 30m, A.M., the Start point bearing east by north, distant five or six leagues, a sail was discovered in the south-east quarter. At 4 A.M. the Nymphe bore up in chase under all sail; the stranger, which, by a singular coincidence, was the French frigate Cleopatre, carrying a press of canvas, either to get away or to prepare for action.


At 5 A.M., finding that the Nymphe had the advantage in sailing, the Cleopatre hauled up her foresail and lowered her topgallant sails, bravely awaiting the coming up of her opponent.

Captain Mullon, upon this, came to the gangway, and,
waving his hat, exclaimed, " Vive la nation !"

At about 6 A.M., the Nymphe approaching near, the Cleopatre hailed her; but Captain Pellew, not hearing distinctly what was said, replied only by the usual "Hoa! hoa!" an exclamation instantaneously followed by three cheers from the crew of the Nymphe. Captain Mullon, upon this, came to the gangway, and, waving his hat, exclaimed, " Vive la nation !" and the crew of the Cleopatre, at the same time, put forth a sound which was meant for an imitation of the cheers of the British.

Captain Pellew (the first Lord Exmouth), gives the following account of this extraordinary rencontre: 

"At six o'clock the ships were so near that the captains mutually hailed. Not a shot had yet been fired. The crew of the Nymphe now shouted 'Long live King George,' and gave three hearty cheers. Captain Mullon was seen to address his crew briefly, holding a cap of liberty, which he waved before them. They answered with acclamation, shouting, ' Vive la republique.' The cap of liberty was then given to a sailor, who ran up the main rigging and screwed it on the mast' head."


At 6h. 15 m. A.M., the Nymphe having reached a position from which her foremost guns would bear on the starboard quarter of the Cleopatre, Captain Pellew, whose hat, like that of the French captain, was still in his hand, raised it to his head, the preconcerted signal for the Nymphe's artillery to open.

furious action now commenced, the two frigates still running before the wind, within rather less than hailing distance of each other. At about 6h. 30 m. the Cleopatre suddenly hauled up eight points from the wind; and, before 7 a.m., her mizenmast (about 12 feet above the deck) and her wheel were shot away.

Tracks of the Nymphe and Cléopâtre taken from James.

In consequence of this double disaster the French frigate, at about 7 A.M., paid round off, and shortly afterwards fell on board of her antagonist, her jib-boom passing between the Nymphe's fore and main masts, and pressing so hard against the head of the already wounded mainmast, that it was expected every instant to fall; especially as the main and spring stays had both been shot away. Fortunately, however, for the Nymphe, the jib-boom of her adversary was carried away and her own mainmast preserved.

After this, the two frigates fell alongside, head and stern, but were still held fast, the Cleopatre's larboard maintop mast-studdingsail boom-iron having hooked the larboard leech-rope of the Nymphe's maintopsail. Here again was danger to the mainmast. In an instant a maintopman named Burgess sprang aloft and cut away the leech-rope from the end of the mainyard; and, as an additional means of getting the ships apart, Lieutenant Pellowe, by Captain Pellew's orders, cut away the best bower anchor.

Nymphe v Cléopâtre - Derek Gardner

During these important operations no relaxation had occurred on the part of the British at least, in the main purpose for which the two ships had met. Soon after they had come in contact in the manner we have related, the Cleopatre was gallantly boarded by a portion of the Nymphe's crew; one man of whom, at 7h. 10m. A.M., hauled down the republican colours, after the action had continued 50 minutes.

The firing now ceased, and it was just as the last of 150 prisoners had been removed into the Nymphe that the two ships separated.

The Nymphe mounted … 26 x 12-pounder main-deck guns . . . with two long 6-pounders and eight carronades, 24-pounders, on the quarter-deck and forecastle; total, 40 guns. 
(26 x 12-pounder long guns main deck, 4 x 32-pdr carronades, 6 x 24-pdr carronades on the quarterdeck and 2 x 6pdr, 2 x 24-pdr carronades on the forecastle).

Capture of La Cléopâtre by HMS Nymphe off Start Point- Nicholas Pocock (National Maritime Museum)

The loss on board the Nymphe was tolerably severe. Out of a crew of 240, men and boys, she had her boatswain (Tobias James), one master's mate (Richard Pearse), three midshipmen (George Boyd, John Davie, and Samuel Edfall), 14 seamen, and four private marines killed, her second-lieutenant (George Luke), two midshipmen (John A. Norway and John Plaine), one lieutenant of marines (John Whittaker), 17 seamen, and 6 private marines wounded ; total, 23 killed and 27 wounded.

The loss on board the Cleopatre, in killed and wounded together, out of a crew, as certified by her surviving officers, of 320, men and boys, amounted to 63. Among the wounded were included the ship's three lieutenants, and among her killed was the truly gallant Captain Mullon. A round shot had torn open his back and carried away the greater part of his left hip. It is related that, having the list of coast-signals adopted by the French in one of his pockets, Captain Mullon, during his short agonies, drew forth a paper, which he imagined was the right one (but which really was not), and died biting it to pieces. Here was a trait of heroism and yet no French writer, as far as we can discover, has recorded the fact.

The Cleopatre was armed with 28 instead of 26 long 12s, and eight instead of ten long 6 -pounders.
(28 x 12-pounder long guns main deck, 4 x 36-pdr carronades, 4 x 6-pdrs on the quarterdeck and 4 x 6pdrs on the forecastle).


Sources Consulted in this Post:
Flags at Sea - Timothy Wilson
The Naval History of Great Britain Volume I - William James

Next up: Work continues with the Light Squadrons as I now turn my attention to my surfeit of brigs, with six new flush-deck sloops to be built then some schooners and cutters. 

Additionally Steve and I have been battling away in the Western Desert for the last six weeks in a titanic struggle recreating Operation Crusader with a gem of a game by GDW called '8th Army - Operation Crusader' with a rather unique hidden movement process that meant I couldn't post about until it was over. 

Finally I've been exploring Iron Age Dartmoor with Carolyn and Will so will post a look at our last expedition back in time.

More anon

JJ

Wednesday, 14 July 2021

All at Sea - Revolutionary War Batavian Dutch Frigates & Brig

A stern and side view of a Batavian Dutch frigate, inspiration for my new Batavian Light Squadron

The Batavian Republic was declared on the 19th January 1795,  the successor state to the Republic of the Seven United Netherlands that followed the collapse of the Dutch stadtholder, William V of Orange Nassau's forces together with his allies from Britain and Prussia; following a popular and successful invasion by French Republican forces that included a Dutch contingent, that forced the allies and William to evacuate the country and led to a popular uprising and the creation of the new republic, taking its name from the local ancient Germanic tribe, the Batavi.   

Capture of the Dutch Fleet lying at anchor by French cavalry, 23rd January 1795 - Charles Louis Mozin

The new arrangement effectively changed the Netherlands from a client state of Britain and Prussia to one of the French Republic, conducting its foreign and military policy at the behest of the latter leading in later years to the end of the republic and the creation of the new Kingdom of Holland on the 5th June 1806, and a new King Louis Bonaparte, Napoleon's brother, who like the former republican authority strove to maintain a certain level of independence from France that eventually led to his downfall, the kingdom ceasing as a political entity four years later. 

Interestingly the exceptionally cold winter of 1794-95 that accompanied the French invasion would also lead to the capture of the Dutch fleet frozen in in the shallow waters of the Zuiderzee between Den Helder and Texel and the rather unique action between French cavalry charging across the ice to confront and capture the fourteen Dutch warships lying there at anchor.

The first units created for my Batavian Dutch fleet include these two frigates

Thus from 1795 Britain had another enemy at sea to confront in the form of the Batavian Dutch who with ports only a few miles from the southern English coast posed an ongoing invasion threat, allowing as they did the French to amass landing boats which could be combined with a Dutch fleet in the Channel to support any such attempt from East Anglia to Ireland, as well as a threat to British merchants navigating to the port of London.


As well as in home waters the Dutch also had interests around the globe established in support of their own overseas trading network, from islands in the Caribbean, to their Cape Colony and Cape Town and the East Indies and able to provide victualing bases for enemy cruizers operating on British trade routes.

The Battle of Camperdown - Thomas Whitcombe
https://en.wikipedia.org/wiki/Battle_of_Camperdown

The threat from the Dutch battle fleet would be comprehensively neutralised on the 11th October 1797 at the Battle of Camperdown or Kamperduin where Admiral Duncan defeated the Dutch fleet under Vice-Admiral Jan de Winter, using tactics that would produce similar results at another naval battle of consequence in 1805.

Warlord Games have announced their intention to add several more models to their age of sail range to include a small third rate 60-64 gunner, and a 4th rate 50-gunner, both of which would be very useful for building a Dutch fleet for a Camperdown refight, but before then I thought I would start things off by putting together a Batavian Dutch light squadron.

The planned Warlord 64-gun model seen here alongside the current 74-gun plastic model makes building a Dutch fleet much easier when it becomes available alongside their planned fourth-rate.

Even after Camperdown the threat from Dutch light forces would persist and for the naval wargamer the period offers some interesting scenarios with forces other than the French and Spanish and I have a plan to build a sufficient number of frigates, brigs and sloops to enable them to be brought to the table.


As with the larger fleet units I like to build my collection around historical encounters and so my first force composes two frigates and a brig, soon to be joined by a ship-rigged sloop and cutter, with three specific actions in mind that these models will facilitate.

Scenario 1. - 22nd August 1795, 1615, near Eigerøya, off the Norwegian Coast 

British Frigate Stag 32-guns versus Dutch Frigate Alliante (Alliance) 36-guns
William James in 'The Naval History of Great Britain - Volume One described the action;

'On the 22nd of August, at 1 p.m., as a British squadron under the orders of Captain James Alms of the 36-gun frigate Reunion, composed of, besides that frigate, the 50-gun ship Isis, Captain Robert Watson, 18-pounder 32-gun frigate Stag, Captain Joseph Sydney York, and 28-gun frigate Vestal, Captain Charles White, was cruising in the North Sea, off the coast of Norway, the two Dutch 36-gun frigates Alliance and Argo, and the 16-gun cutter Vlugheld (Nelly, in the Gazette account), were discovered to windward, standing towards the shore on the larboard tack.

Chase was given, and a change of wind enabled the Stag, at about 4 h. 15 m. p.m., to close with the Alliance, the stern most vessel. The remaining British ships, meanwhile, devoted their attention to the Argo and Vlugheld, in the hope to cut them off from the harbour of Egeroe (Eigerøya), towards which they were directing their course. 

Defeat of the Dutch Fleet off Egero, 22nd August 1795 - Nicholas Pocock
https://en.wikipedia.org/wiki/Action_of_22_August_1795

After about an hour's action with the Stag, the Alliance hauled down her colours; but under what circumstances, as to damage or loss, the official account does not inform us, and, at this late day, we have no means of ascertaining.

The Stag, armed and manned like her sister frigate, the Lively, (26 x 18-pounder, 6 x 6-pounder and 6 x 24-pounder carronades) had four men killed and 13 wounded. The Alliance, whose 36 guns consisted of 26 long 12-pounders, six long 6s, and four brass 24-pounder carronades, with a crew of 240 men and boys, undoubtedly sustained a loss, and, in all probability, to a much greater amount than that of her superior opponent, the Stag; …'

The naval ensigns and pennants of the Batavian Republic. If you are interested in building similar kits then there are Batavian ensigns available on the Warlord Facebook page together with lots of ideas about building these models.
https://www.facebook.com/groups/WarlordGamesBlackSeasandBlackPowder

Scenario 2. - 12th May 1796, 0500 near Texel.

British Frigate Phoenix 36-guns versus Dutch Frigate Argo 36-guns
William James in 'The Naval History of Great Britain - Volume One described the action;

'Intelligence having reached Admiral Duncan, the British commander-in-chief in the North Sea, and then cruising off the Texel with a squadron of nine sail of the line, besides 50-gun ships, frigates, and sloops, that the Dutch 36-gun frigate Argo and three national brigs were on their way from Flickerve, in Norway to the first-named port. Captain Lawrence, William Halsted, in the 36-gun frigate Phoenix, accompanied by the 50 gun ship Leopard, 28-gun frigate Pegasus and brig-sloop Sylph, was despatched to intercept them.

The cutter Mary Anne and HMS Sylph c 1795 - Thomas Whitcombe
https://en.wikipedia.org/wiki/Action_of_12_May_1796

On the 12th of May, at 5 a.m., just as these ships, in pursuance of their orders, had made sail from the squadron, with the wind at west-north-west, the Argo, the three brigs, and a cutter, all standing upon a wind on the starboard tack, hove in sight in the south-east. Chase was immediately given, both by the detached ships, and by the squadron in the rear. At the approach of the former, the three brigs bore up, and were pursued by the Pegasus and Sylph; while the Phoenix and Leopard, the latter far astern, directed their attention to the Argo.


At 8 a.m., the Phoenix having got close to her weather quarter, the Argo hoisted Dutch colours; whereupon the former fired a shot across her. A few minutes placed the Phoenix alongside of her opponent to windward, and a smart action commenced on both sides, which continued for about 20 minutes; when, having sustained some damage in her masts, rigging, and sails, and seeing no prospect of escaping from the numerous foes surrounding her, the Argo struck her flag.

The Phoenix appears to have mounted eight 32-pounder carronades beyond her establishment as an 18-pounder 36, or 44 guns in all, with a net complement of 271 men and boys. The only damage she sustained was in her rigging and sails, and her only loss was one man killed and three wounded; while the Argo, whose armament was precisely the same as that of the Alliance, with a crew of 237 men and boys, lost six men killed and 28 wounded—a proof that her officers and crew were not deterred from doing their duty by the superiority of the force opposed to them.

Scenario 3. - 24th October 1798, 0800 30 miles north-west of Texel.

British Frigate Sirius 36-guns versus Dutch Frigate Furie 36-guns 
and Dutch Sloop Waakzaamheid 26-guns.
William James in 'The Naval History of Great Britain - Volume Two described the action;

'On the 24th of October, at 8 a.m., the Texel bearing south by east, distant 10 leagues, the British 18-poundcr, 36-gun frigate, Sirius, Captain Richard King, while reconnoitring that port, fell in with two Dutch ships of war, one the 36-gun frigate, Furie, Captain Pletz, the other, the 24-gun corvette, Waakzaamheid, Captain Neirop ; but the ships were not in a situation for mutual support, being about two miles apart. 

HMS Sirius captures the Waakzaamheid and Furie 24th October 1798 - Thomas Whitcombe

Passing within gun-shot of the former, which was the leeward most, the Sirius stood on until she could nearly fetch the Waakzaamheid. At about 9 a.m.. Captain King, having thus, as was his object, prevented the junction of the two ships, fired at and brought to the Waakzaamheid, who immediately discharged a lee gun, and hauled down her colours.


As soon as possession was taken of the Waakzaamheid, the prisoners removed, and a prize-crew put on board, the Sirius made sail alter the Furie: who, the instant she had witnessed the bloodless surrender of her commodore (for Captain Neirop was the senior officer), bore up, and, by the time the Sirius was ready for pursuit, had nearly escaped out of sight. 

By 5 p.m., however, the Sirius had the good fortune to overtake the escaping ship a running action now ensued, at times within musket-shot distance, the Furie returning the heavy fire of the Sirius, with a smart but ill-directed discharge of cannon and musketry. This continued for about half an hour; when the Furie, having her hull, masts, rigging, and sails much cut up, surrendered.


The damage done to the Sirius was but trifling, she having only received a shot through her bowsprit, had her rigging and sails a little injured, and one man wounded by a musket-ball.

The guns of the Sirius. a frigate of 1049 tons, were 44 in number, similar to those of the Phoebe at a preceding page. (26 x 18-pounder, 10 x 9-pounder and 8 x 32-pounder carronades)

The 36 guns of the Furie, a frigate of 827 tons, were long Dutch twelves and sixes; and the 26 guns of the Waakzaamheid, a ship of 504 tons, were all, except two brass sixes, long Dutch eights: two of these also brass, and, we believe, mounted in the bridle ports. Even then, 24 ports, calculated for 8 or 9 pounder guns, appear to be a great many for a ship of 504 tons. It is true, that the Waakzaamheid had two ports of a side on a lower or birth-deck; but the official letter expressly states, that she mounted 24 guns on her main deck.

The Furie, out of a complement, including 165 soldiers, of 28 men and boys, suffered a loss of eight men killed and 14 wounded. The "Waakzaamheid, as we have seen, made no defence; therefore her crew, including 122 French soldiers, of 222 men and boys, escaped unhurt. This renders it unnecessary to exhibit any formal statement of the comparative force of the combatants: suffice it that, could the two Dutch ships have united their strength in defence of their flag, they would still have been hardly a match for the Sirius.

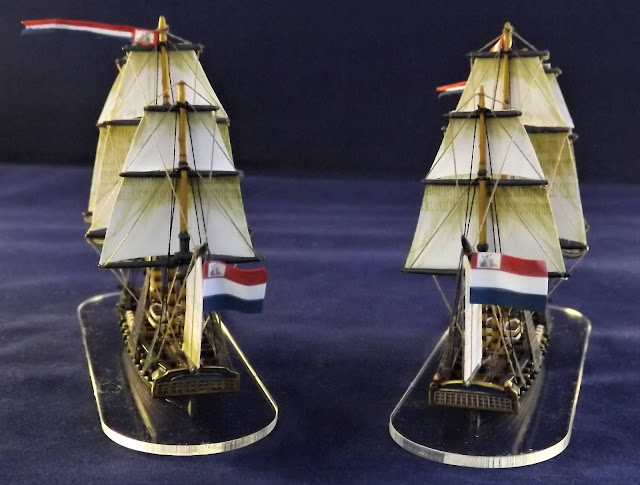
The start of my Batavian Dutch fleet, 'from little acorns mighty oaks do grow'

The two prizes contained on board, between them, 6000 stands of arms, besides other ordnance stores; which, along with the troops, they were carrying to Ireland. Both ships were purchased for the use of the British navy. One, under the name of Wilhelmina (a Fury being already in the service), became a 12-pounder 32-gun frigate: the other, under her own hard name, was, for the short time she reigned as a cruiser, attached to the 20-gun class. As a proof, too, that we had reason to doubt her having mounted, when captured, 24 guns on the main deck, 20 only were established there when the Waakzaamheid was fitted out in the British service.

(Needless to say my next Dutch builds will include a ship rigged sloop or corvette to model the Waakzaamheid).

However the next All at Sea post will be taking a look at my Early French Revolutionary War frigate and brig designed to facilitate small ship French actions prior to 1794.