Saturday, 2 August 2025

The World Turned Upside Down - The Delaware Regiment of Continentals.


The Delaware regiment of Continental infantry fought at most of the major battles of the American War of Independence from the time it was raised under Col. John Haslet on December 9th, 1775, to its final engagement at Combahee River in 1782. 

The Delaware Regiment in action at the Battle of Long Island 1776 - Domenick D'Andrea

Known as the "Delaware Continentals" or "Delaware Blues", they were from the second smallest state, and served, famously, at Long Island, White Plains, Trenton, Brandywine, Germantown, Monmouth, Camden, Cowpens, Guilford Court House, Hobkirk’s Hill, the siege of Ninety-Six, and Eutaw Springs; and won a reputation that set it apart from the rest of the army.
 

Gaining the nickname 'The Fighting Blue Hens' based on the men of Captain Caldwell's company, famous for holding gamecock fights with a specific breed of chicken, the Kent County Blue Hen, and possibly bringing the birds on campaign, their style of dress echoed that nickname as the American historian David McCullough in his book '1776' describes them as turned out in handsome red trimmed blue coats, white waistcoats, buckskin breeches, white woollen stockings, and carrying fine, 'lately imported' English muskets.

John Haslet (c. 1727 – January 3, 1777),
The first Colonel of the Delaware Regiment

Raised in early 1776, under the command of Colonel John Haslet they went north in July and August 1776, arriving in time to engage in the entire sequence of events surrounding the British capture of New York in 1776.

1st Delaware is led by Colonel John Haslet as they depart Dover Green and march north to New York City, July, 1776. Artwork “The Drum Beat of a Nation” by Stanley Arthurs.

At the Battle of Long Island, the Delaware Regiment fought with Colonel William Smallwood's Marylanders, with many commentators identifying them as the best two regiments in the Continental Army. 

They fought under the command of Brigadier General William Alexander, Lord Stirling, and were responsible for holding the Gowanus Road, the far right of the Continental Army line. 

The Battle of Long Island on 27th August 1776 - map by John Fawkes
https://www.britishbattles.com/war-of-the-revolution-1775-to-1783/battle-of-long-island/

They were immediately south of Brooklyn, with New York Harbour to their right, and on August 27th, 1776, the British sent much of their army well to the east, and under cover of darkness, easily turned the left flank of the Continental Army. Only on the right did the American's hold their own and Haslet later described "how his 'Delawares' stood with 'determined countenance', on them all the while, and the enemy, 'though six times their number', not daring to attack". But they were nearly surrounded and, once ordered to leave, could only undertake a harrowing retreat by wading and swimming across Gowanus Bay. 


Retreating across Westchester County, Haslet's men won a victory over a corps of Loyalists at Mamaroneck, New York. At White Plains on October 28th, 1776, the Delaware Regiment again fought with Colonel William Smallwood's Marylanders, reinforcing militia placed on the strategic Chatterton's Hill, that would see the militia flee in the face of the British attack, but both Haslet's Delaware's and Smallwood's Marylanders exacting a costly price in British and Hessian casualties for the reward for taking the hill.

John Fawkes' map illustrates well the importance of Chatterton's Hill, effectively anchoring 
Washington's emplace position at White Plains, and why taking it was so important for Howe to turn the American's out of such a formidable position.
https://www.britishbattles.com/war-of-the-revolution-1775-to-1783/battle-of-white-plains/

With expiring enlistments leaving fewer than a hundred men remaining in his regiment, Haslet crossed the Delaware with Washington and joined the attack at the Battle of Trenton on the morning of December 26th, 1776. However, on January 3rd, 1777, in a skirmish at the beginning of the Battle of Princeton, and with General Hugh Mercer down and wounded, Haslet tried to rally Mercer's brigade and was himself shot in the head and killed instantly. Nevertheless, they did rally and a surprising victory was won to complement the earlier one at Trenton.

The Death of Brigadier Hugh Mercer at the Battle of Princeton on 3rd January 1777  - John Trumbull
  
Following Haslet's death Lt. Col. David Hall was promoted to Colonel to lead the Delaware Regiment in March 1777, and some 312 soldiers of the new Delaware Regiment marched into camp at Morristown.

Colonel David Hall, who succeeded John Haslet in March 1777

The Delaware regiment was present for the American raid on Staten Island on August 22nd, 1777, the Battle of Brandywine on September 11th, 1777, where they were with General Stirling's reserve units at the rear when a surprise flanking attack by the British threw them into the thick of battle. They fought well and managed an orderly retreat under fire.

On October 4th, 1777, the Delaware Regiment was at the Battle of Germantown where their attack went well at first, but then they ran short of ammunition and scattered when their deep advance on a narrow front left them surrounded by the enemy, seeing the regiment suffer heavy losses, and Colonel Hall severely wounded and not fighting again. 


The following June, the regiment was again on the field at Monmouth in what would be the last of the big battles in the northern theatre.

In April 1780 the 2nd Maryland Brigade was assigned to the Southern Army, and the Delaware Regiment marched south with them, led by Lt. Col. Vaughan, with only about 300 men.

The Delaware Continentals during the Battle of Camden

At the Battle of Camden, the Delaware Regiment suffered heavy losses, with all officers above captain being captured and 48 men killed. At Camden, Captain Robert Kirkwood, desperately trying to keep his men engaged in the fight, waved his sword and shouted, "By the living God, the first man who falters shall receive this weapon in his craven heart!" 


Kirkwood's word's succeeded in preventing his men from running away, but roughly 50% of the 275 remaining soldiers became casualties, and after this disaster, and after this time the unit had no colonel and ceased to function as a regiment.

Illustration of Robert Kirkwood by Dale Watson who used historical research to represent what he might have looked like.

Continental Army leadership decided to split the regiment into independent companies. Captain Peter Jaquett took one company, Captain Robert Kirkwood took the other, with both companies having 96 men.

Guilford Courthouse “The Old Line,” by Bryant White

These men proved their worth once again at the battles of Cowpens and Guilford Court House in 1781, with both Kirkwood and Jaquett's companies operating with Henry Lee's cavalry forces, and additionally the Delaware companies were also often used to stiffen the main battle line, such as at Cowpens and Guilford, where in the former Kirkwood's company lost 25% of its men in the firefight and hand-to-hand struggle against the 7th Fusiliers.

Lt. Col. William Washington, leading the 3rd Continental Dragoons, is surrounded and captured by British redcoats at the Battle of Eutaw Springs - Don Troiani.

On September 8th, 1781, at the Battle of Eutaw Springs, Kirkwood’s men were in the thick of the fight in what would be the last major battle in the southern theatre as well as one of the bloodiest battles of the entire war. The battle turned for the Americans when Greene’s troops drove in the British lines. 

A Delaware private soldier - Don Troiani

When the attack began to falter, Greene ordered his reserves forward; Colonel Washington’s dragoons and Kirkwood’s light infantry. However, according to Colonel Otho Holland Williams of the 1st Maryland, Washington’s dragoons attacked prematurely. They ran headlong into British troops under the command of Major John Marjoribanks and were mowed down and badly chewed up. During the intense fighting, Washington was wounded and captured. While the remnants of the cavalry withdrew, Kirkwood’s light infantry charged the British line as Colonel Williams related “with his bayonets.” As a result, the Delaware company drove Marjoribanks’ men back, allowing time for Greene to manage a withdrawal.


The following month after Eutaw Springs, in October, 1781, Kirkwood fell ill, but continued as company commander. On January 1st, 1782, Kirkwood, who had only briefly seen his home in six years, was granted a furlough. By the following year, the Delaware troops still under Kirkwood’s command had followed him north. One detachment was stationed in Philadelphia, and the other in Newark, Delaware. 

What was left of the Delaware regiment would see out the war in garrison duty. Though having remained a captain for the war’s duration, the highly skilled and able commander was finally commissioned a Brevet Major on September 30th, 1783.

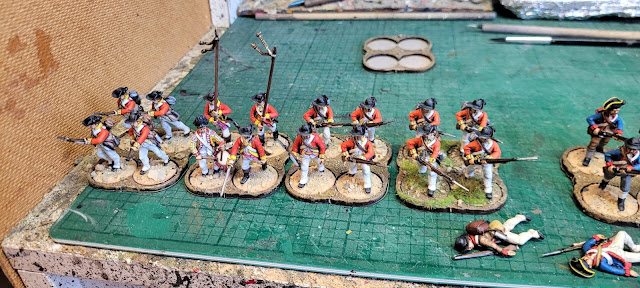
My Delawares, New Yorkers and a generic regiment in brown make up my first brigade of Continental Infantry for my World Turned Upside Down project.

My interpretation of the Fighting Blue Hen's takes much inspiration from Don Troiani's artwork above, using the Perry plastic Continentals, adapted for a more aggressive stance by the use of British arms as supplied with the Perry's Plastic British infantry set, and with a plastic Continental rifleman adapted to hint at the look of the Delaware companies that went south with Robert Kirkwood in 1780.

The look of the regiment is completed with a suitable colour from the GMB range of flags and arranged using the low profile sabots from Supreme Littleness Designs.

More anon

JJ

Sunday, 27 July 2025

Attack 2025, Devizes and AWI Stuff


Last weekend in the company of Steve M, John and Mr Steve, I drove up to the beautiful and historic county of Wiltshire to attend Devizes 2025, presented by the Devizes and District Wargames Group, and a show I have gone to for many years, back when it was put on in the Corn Exchange, and first reported here on JJ's back in 2014.

JJ's Wargames - Attack 2014

Attack is a lovely summertime venue, based as they now are at the Devizes School, and always makes a pleasant day out, and an opportunity for wargamers to indulge themselves in the hobby.


I should say that I hadn't intended on doing a show report this year, rather looking forward to simply enjoying the company of friends, looking at the games and traders on show and enjoying a nice pub lunch to conclude the day, with just a half a mind on any stuff that might be a useful addition to the AWI project, but not intending to spend big as the pot is currently growing back after my splurge at Partizan back in May.

So with the intentions in hand I found myself standing in front of Mr Stuart Faulkner's stand for Warpaint Figures admiring his 'touch me, bend me, feel me' flexible roads all ready to go on the table, and with me needing to add to my terrain in readiness for several AWI clashes I am working my new collection up to.

My picture, left, of the very nice road sections from Warpaint Figures, seen at Attack, and right my new road sections against the Fat Frank offerings, with the 'Y' junction and small curve part of the Warpaint Figures pack.

That said, I had my intentions in hand and not 'pulling the trigger' immediately on these very attractive roads, waited to check the dimensions against my collection of Fat Frank similar roads, and finding they would work, took advantage of the offer on Warpaint Figures of joining the VIP club on the web site and ordering the Curves Pack of 75mm wide roads with a 20% discount on my return home, and with every intention to adding to these over time.

I'm very pleased with these ready to go roads, so if in similar need, you can check them out in the link below.
https://warpaintfigures.com/collections/flexible-roads-tracks

I had a mind to call in at Colin Farrant's Charlie Foxtrot stand, aware of his retirement plans and sale of his business, and have recently acquired his marvellous Tidewater Home model and the New World Tavern to go with some others of his kits I will be building and featuring here on the blog in the coming months.

Colin's models are rather unique in the mdf world of kits and I am intending to complete my collection of his models and so was happy to pick up the Covered Well kit while I was there on the day.

https://www.charliefoxtrotmodels.com/

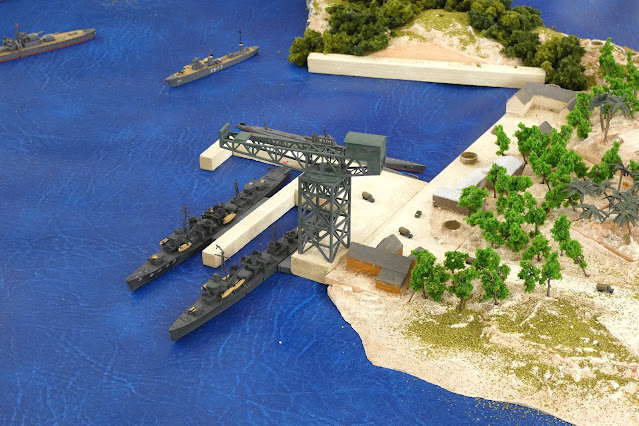
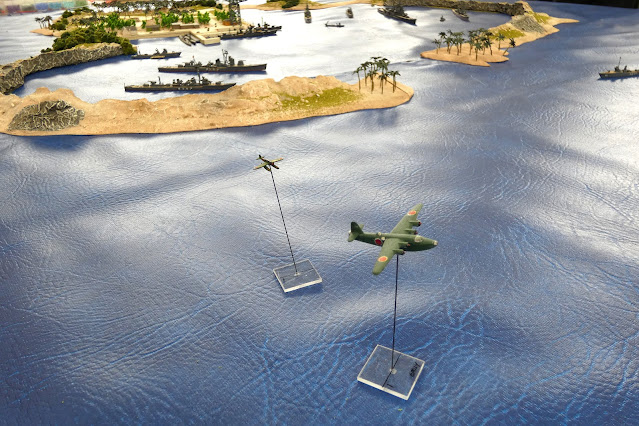
As mentioned, I was not looking to do a show report and so although having my camera to hand was happily just looking in at the various games on show with no particular game catching my eye until I ventured past this Pacific Air War 1:700 participation game, all set up awaiting the next set of players.


The models and island terrain were really nicely presented and so I pulled out the camera and grabbed some pictures while the table was clear of gamers.


By about 12.30, we were ready for bite of lunch and so headed off to the Bridge Inn at Horton, just outside of Devizes and overlooking the English Civil War battlefield of Roundway Down, a battlefield Mr Steve and I visited back in August 2021, with our first visit to the Bridge Inn following that little adventure.

Our lunch venue following Attack, on the canal at the Bridge Inn, Horton. 
https://thebridgeinnhorton.com/

JJ's Wargames - The Battle of Roundway Down and Siege of Devizes

The battlefield of Roundway Down on the horizon, seen from the nearby Bridge Inn at Horton

Finally, a sneak preview of the next step of the AWI collection nearing completion, with the two units seen below having been waiting patiently on my painting desk for nearly three weeks, two of which were while I was away in Kefalonia and Ithaca and are now getting the love they deserve, with just the final base work and colours to be attached before I showcase them, probably next weekend.


As always, lots of stuff to come here on JJs and as usual more anon.

JJ


Saturday, 26 July 2025

Anglo-Dutch Wars, Fleet Review - The English Fleet.


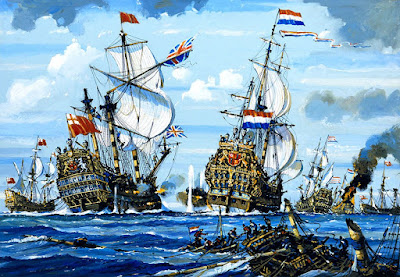
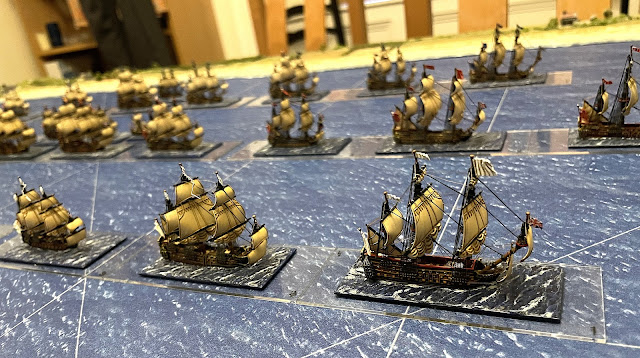
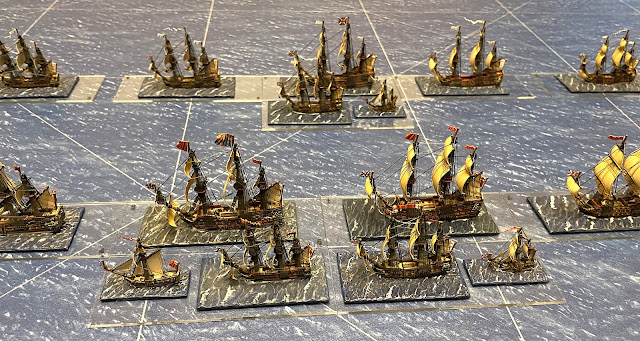
With a recent theme of Anglo-Dutch Wars after action reports from Capt. Steve using his marvellous collection of 1:1200 models to refight some of the naval battles that characterised the First Anglo-Dutch naval war, using General at Sea, links below, Steve recently sent me some pictures of his collection in the form of a naval review, and I am sharing them here as part of this series of posts.

JJ's Wargames - The Battle of Livorno (Leghorn), Part One
JJ's Wargames - The Battle of Livorno (Leghorn), Part Two

JJ's Wargames - The Battle of Plymouth 

To help understand better the extent of Steve's collection I have attached the order of battle of the English fleet and the arrangement of the various ships highlighted in the three squadrons (red, white and blue), and in a follow up post I will similarly portray the Dutch fleet.


The White Squadron
So below Steve has highlighted the White Squadron, showing the Van Division led by the Vice-Admiral in a second-rate, Triumph, followed by a third-rate and hired merchantmen.

The White Squadron, showing the Van Division led by the Vice-Admiral

Then below we can see the centre with Prince Rupert flying the Union flag from the main of the Royal James, preceded by a fourth-rate and followed by a third-rate. Note that the Squadron commands have a fifth-rate and a ketch alongside as eye candy and to represent the fireships etc that accompanied the flag officer.

Prince Rupert flying the Union flag from the main, preceded by a fourth-rate and followed by a  third-rate.

Then the Rear Admiral in a third-rate, the Defiance, with two fourth-rates.

The Rear-Admiral of the White accompanied by two fourth-rates

The Red Squadron
Next we see the Red Squadron, with the Vice Admiral in a second-rate, Royal Oak, supported by a third-rate and a hired merchantman.

The Red Squadron commanded by a Vice-Admiral in a second-rate, with a third-rate and hired merchantman ahead and astern respectively.

Then the powerful centre with the Duke of York in the Royal Charles and seconded by the Royal Sovereign, plus a 3rd and a 4th. 

The centre with the Duke of York in the Royal Charles and seconded by the Royal Sovereign

The Royal Charles is accompanied by a sixth-rate and a royal yacht as well as a fifth-rate and a ketch.

Portrait of James, Duke of York (1633-1701)
as Lord High Admiral - 
Henry Gascars

The Royal Charles with the Royal Standard at the mainmast is accompanied by a sixth-rate and a royal yacht as well as a fifth-rate and a ketch.

To complete the Red Squadron, we see below the Rear Admiral in a second-rate 80-gun Henry, with a third-rate and fourth rate in company.

The Rear-admiral of the Red Squadron

The Blue Squadron
Here is the Blue Squadron in which the Rear Admiral swapped places with the Vice Admiral so that if the fleet reversed course, it would not be led by the most junior flag officer.

The Rear Admiral in a third-rate with a fourth and a merchantman.

The Blue Squadron, with the Rear Admiral in a third-rate with a fourth and a merchantman.

The Centre with the Admiral in the Royal Prince supported by a third-rate and a fourth, accompanied by the usual fifth-rate and ketch.

The Blue Squadron centre, with the Admiral of the Blue in the Royal Prince

The 85-gun 'Royal Prince' (on the right) and other Vessels at the Four Days Battle, 1–4 June 1666

Then Vice Admiral bringing up the rear in a second-rate, Royal Katherine, with a third and fourth-rate in consort.

The Vice Admiral of the Blue Squadron bringing up the rear in a second-rate, Royal Katherine, with a third and fourth-rate in consort.

As a maritime button counter, and a man after my own heart, Steve has taken great pains to get the flags and paint schemes correct, based on regulations and eyewitnesses such as the van de Veldes, and this is especially so with the Dutch admiralties as we will see in the next post.

Flag etiquette was very important at this time. In fact Prince Rupert once opened fire on an English warship that was flying the flag of a general taking passage in it to Flanders, and had the unfortunate captain arrested and thrown into the Tower!

It follows then that Steve has two alternative flagships, one of the Royal Charles flying the Union flag when commanded by Rupert or Monck or both. Also the Royal Prince when commanded by Ayscue so a plain white command flag. The only admiral who fly a red command flag from the main was Edward Montagu, 1st Earl of Sandwich for a few months in 1665. 

Two alternative flagships, one of the Royal Charles flying the Union flag when commanded by Rupert or Monck or both, and the Royal Prince when commanded by Ayscue , thus flying a plain white command flag. The red flag at the fore on the Royal Charles is the signal to Engage

Finally, a wrecked English ship, that Steve uses to show a scattered stand that has surrendered (rather than remove the stand off the table as the rules General at Sea say).

A wrecked English ship used to mark a scattered stand that has surrendered.

Steve also let me know that it would only be right to highlight that this beautiful collection of models was painted by Mr Brad Bailey who has done much work for Rod Langton, and, as can be seen, the standard of detailing is stunning.

Having spent four years of my life working on my own age of sail collection, I can really appreciate the level of work and attention to detail seen here and I hope, like me, you are enjoying this look at the Anglo-Dutch war period.

As always, more anon.

JJ