
 |
| Clifford Tower |
Many cities in England have lost wholly or partially their city walls over the centuries as modern development has demanded room for expansion and access, but the visitor to York is fortunate that Parliament refused permission in the early 19th century for the local authority to tear down the city wall and apart from small areas of removal or adaptation to allow for example access to the railway station, the wall is almost complete with its bars (gates) and evidence of Roman and later medieval extensions.
During our visit Carolyn and I decided to put aside a day to walk the wall and see it and some of the attractions on it. In addition we made a separate visit to the heart of the Norman addition, later incorporated in the medieval defences, namely Clifford Tower; which is a typical Norman motte-and-bailey arrangement built around 1068 when William the Conqueror came up on his infamous ravaging of the north to demonstrate who was now in charge in the brutal way that William developed a reputation for.
The picture below shows the castle soon after its building in the 11th century with a wooden construction typical of the first Norman buildings.

In time the area became prosperous and recovered from the earlier depredations by William with York becoming a centre of regional government, a Royal palace, treasury and prison requiring a more sturdier and stone built castle as seen in the model and illustrations below.
The Great Tower and its remains which can be seen today was built in the late 13th century and was used in medieval times as the Royal treasury, together with lodgings and a chapel.

The bailey area was also reinforced with stone walls and gates and would have held the gaol, mint and other administrative halls, stables, lodgings and chambers.
 |
| An impression of the interior layout of the 13th century Great Tower |
The picture below shows the late 13th century castle further protected by a moat that was fed by the King's Pool created when the Norman's damned the Foss creating a large pond for fish breeding for the King's table and food for the garrison as well as enhancing the defences.

In March 1190, there were riots in the city against the Jewish community and many of them took shelter in the wooden tower. However, when it came under heavy attack by the citizens led by several local knights, the approximate 150 Jews, men, women and children, occupying the building opted for setting fire to it and committing suicide rather than being captured, with the survivors being massacred by the rioters.
 |
| The massacre of the Jews of York in 1190 |

The chapel served not only as a religious building, but its position over the main gate also meant it housed the portcullis as well.
In 1643 Clifford Tower served as a billet for soldiers garrisoning the city and in 1684 the tower was again badly damaged by fire and the evidence of that can be seen in the picture above with the blackened stone work close to the red bricks.

 |
| A view of what was the lower floor of the Great Tower but now appears as a courtyard in the open walls |
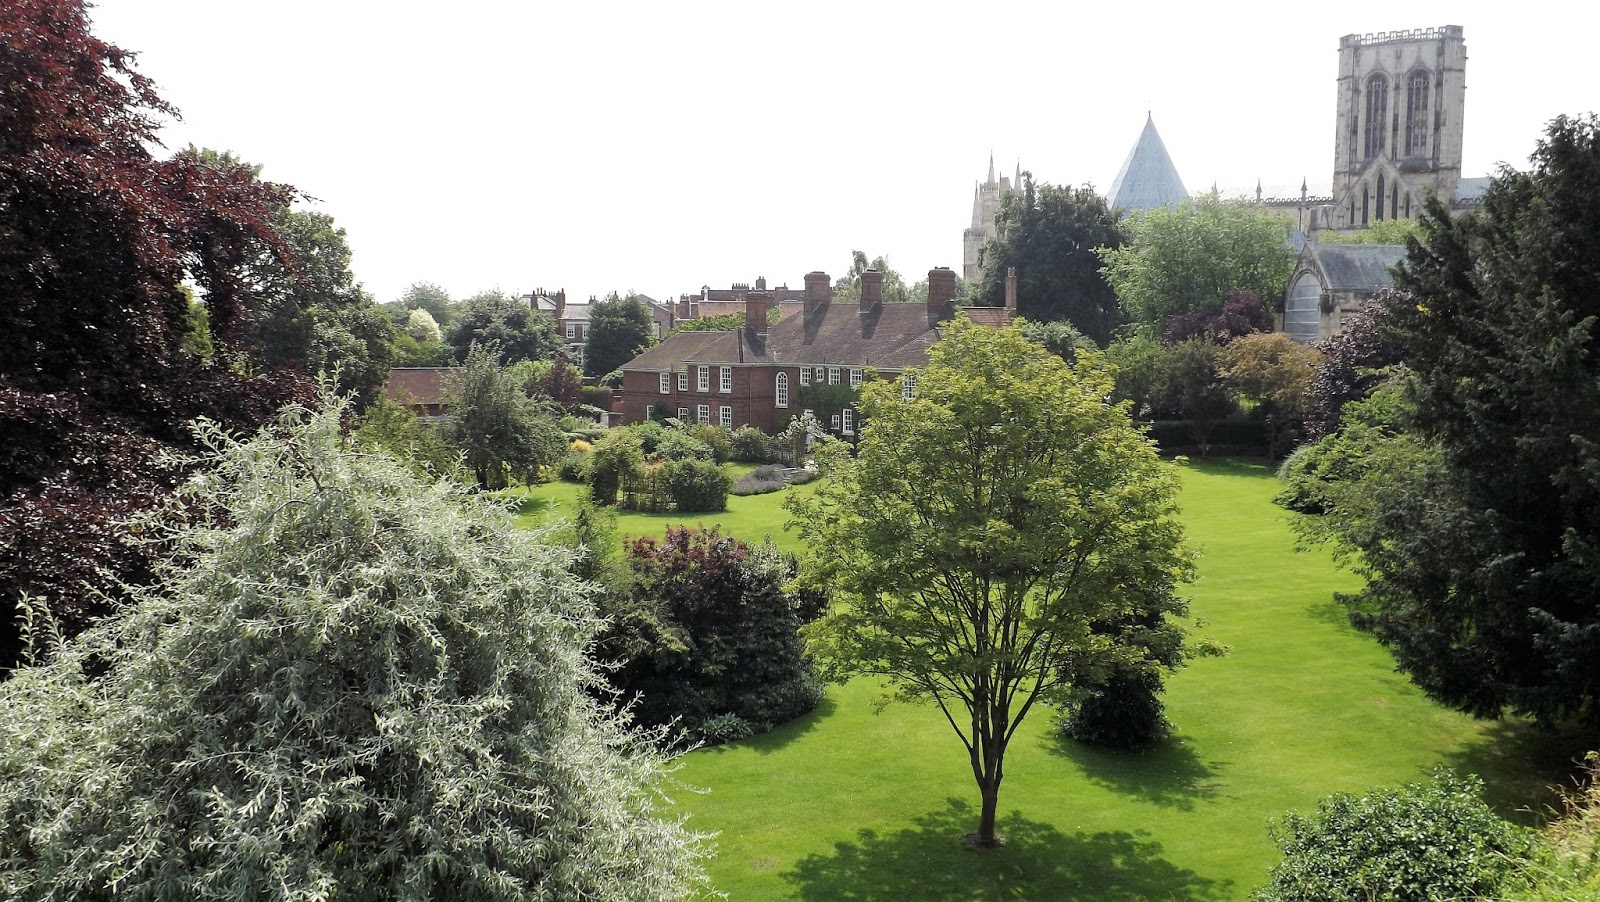
Clifford Tower is a much more peaceful building today offering great views out over the city towards the Minster.


York City Wall
 |
| York City Wall pictured in 1718 |
As mentioned Carolyn and I dedicated a day to walk the walls of York which cover just over two and half miles around the city, and with displays in the Monk and Micklegate Bars plus breaks for refreshments and time to take in the surroundings gives a good day's walk and set us up for a well earned dinner in the evening.
The map below is taken from the sign at Clifford Tower and I have added to it to illustrate the route we took, beginning at Bootham Bar, and the features I photographed along it. I have also emphasised the original Roman wall that would have surrounded the area around the Minster and the foundations of which underpin the later medieval additions.
The map below is taken from the sign at Clifford Tower and I have added to it to illustrate the route we took, beginning at Bootham Bar, and the features I photographed along it. I have also emphasised the original Roman wall that would have surrounded the area around the Minster and the foundations of which underpin the later medieval additions.
 |
| The Wall Map used to illustrate our route starting at Bootham Bar and following the circuit via Monk Bar. Note I have highlighted the layout of the original Roman Fortress wall with the Roman multi-angular tower circled in red (see the post on the Yorkshire Museum for a picture) and the missing wall in black. Clifford Tower discussed above is also circled in red to show its position in relation to the other defences. |
The medieval York City wall was built on taxes raised from goods brought into the city in 1266 and has served to protect it first from the Scots in 1319, the Parliamentarians in 1644 and the last threat from the Jacobites in 1745. However perhaps the final threat was seen off in 1800 when York council applied to Parliament to demolish the thing all together.
Bootham Bar

Bootham Bar was the natural place for us to start our walk as it was just along from our apartment in the city.

The bar is built on the foundation of the original gate or Porta Principalis Dextra of the older Roman fortress.


This is the gate that the Roman expedition to Caledonia and the northern frontier would have set out from.


The earliest parts of the gatehouse date from the 11th century.


The walk between Bootham Bar and Monks Bar follows the original Roman perimeter and gives a great view of the Minster.


Monk Bar

Monks Bar has some interesting figures lining its battlements with one known as the 'boulder thrower' and you can see them in the picture below.

Monks Bar is another one of the four fortified gateways into York and was built in stages from the early 14th century when the principle threat was from the Scots. The top storey was added in 1484 during the reign of King Richard III.

For its time Monks Bar was a state of the art defensive feature and retains its original portcullis and machinery together with overhead murder holes.
The gate retains two of its medieval toilets or 'garderobes' and has also served as a prison and a police house.

In addition it also serves as the home of the "Richard III Experience" with as you can see displays illustrating some of the major battles from the Wars of the Roses, plus items relating to Richard and the times he lived through.
See if you can identify the battles modelled by Mr Russell Marwood who manages this and the Henry VII exhibition at Micklegate Bar and put his wargaming talents to good use to produce these nice little battle scenes using as I recall Pendraken 10mm WoR figures.


All the items seen below were found on the battlefield at Towton and are mostly from the Bloody Meadow area and North Acres where some of the heaviest fighting occurred. I posted about Towton in a previous post.
Battle of Towton
Item number 2 (top left) is a piece of a hand gun found in the area of the Lancastrian line and is unique as a find for this kind of weapon on any of the battlefields for this period. Given that this is a fragment it makes me wonder if it caused more harm to the owner rather than the intended target.
Below the piece of handgun is a piece of armour with holes designed to allow this piece to be laced to another.
 |
| Towton Battlefield Items discovered in Bloody Meadow and North Acres on loan from Simon Richardson |
Other items include buckles, rings and a sword chape and the scabbard hangers (middle right) items 5.
Item 6 is a cross guard from a sword found in Bloody Meadow. Alongside, items 7 are a range of dagger and sword pommels designed to provide a mixture of balance to the weapon as well as a useful implement to strike an enemy opponent with. Next to them(item 8 middle left) are parts from a dagger including cross guard and hanger parts.
 |
| Model depicting the two lines at Towton, with Cock Beck and Bloody Meadow bottom left |


Below are the remains of one of the Towton victims discovered in the dining room excavations at Towton Hall, part of the Towton Battlefield Archaeology Project with funding from the Royal Armouries.
This unfortunate fellow was an adult male aged between 36-45 years and stood at 6 foot one inch tall

Despite his stature, this man suffered from poor nutrition in his early years, evidenced by the pitting seen in the eye orbits in his skull above.
His skull also displays blade and blunt force injuries with a sword nick seen at point 5 on his lower jaw.

His shins display evidence of inflammation, common in Towton skeletons, thought to have been caused by long marches.

The arrow at point 2 indicates nodes discovered on his spine, called Schmorl's nodes, suggesting this chap was not unfamiliar with carrying heavy loads of kit.
He also has a blade injury to his right hand, point 6.

And to add to his suffering, that little nick at point 4 on his left foot shows he took a stab wound that must have been rather painful.

The Wars of the Roses saw medieval armour reach a pinnacle of design in attempts to protect the wearer from blows and cuts by deflection and padding and this full harness gives a good impression of how these chaps would have appeared whilst fighting on foot.

Alongside the armour, the exhibition has several options in helmets for the self respecting Wars of the Roses foot soldier of the period, with examples for the more fashion conscious from Italy and Germany.


 |
| King Richard III wearing some of the items displayed below |
Originally set with rubies and diamonds in gold, these replica items of jewellery, based on the late 16th century portrait of Richard III by an unknown artist and held in the National Portrait Gallery, really help capture the look of the originals.


The banner carried by the chap below and the fact that he and his supporters are mounted should help to identify the battle scene modelled. Lets just say a lot of people ended up visiting the wrong area of ground purported for this battle up until recent times and is the battle associated with Richard III - no more clues.


Original features abound in Monks Bar and make the perfect venue for the Richard III experience.


From Monks Bar we followed the wall around the city towards the King's Fish Pool area, a part of ground flooded during the Norman occupation when the River Foss was damned.
Along the route we saw other remnants of previous buildings like the walls of an ice house seen below.


River Foss-King's Fishpool
On arriving at the River Foss, the wall comes to an end and you are led along the banks of the river towards the Red Tower where the wall continues.
For 700 years this area of York was protected by a large lake with a bridge, Layerthorpe Bridge, guarded by a fortified gateway and portcullis thought to have been added around 1309.

Given this areas association for providing a source of fish for the garrison it was great to see that the Foss is clean enough to still support wild fish including a rather fierce predator that can really liven up an anglers afternoon.

The pike is is sometimes referred to as the 'water-wolf' in reference to its voracious nature and my eye was caught by this little chap lying stock still close to the lilly pads, until Carolyn called my attention to one a bit bigger.

This is the bigger version and just as we proceeded to continue our walk this one struck with a flashing glint of silver as it snatched at one of the roach swimming close by.

The business end of the pike is packed full of teeth and it was a great thrill to see these hunting from under the lilly pads.


 |
| The map from 1610 shows the extent of the original lake between Layerthorpe Bridge and the Red Tower |
The Red Tower or Brimstone House marks the recommencement of the wall and this unusual building gets its former name from the red brick used in its construction rather than the more usual stone and the latter name from its use as a production facility in making gunpowder.

Built in 1490 as a watch tower over the nearby Fishpond, the Red Tower is on the side of the wall that received particular attention during the Parliamentarian siege in 1644 and the building suffered significant damage during it.
The building appears more as a house rather than a tower as the stone foundations are now covered in earth, rather than as in the drawing from 1852.


From the Red Tower the wall leads off towards Walmgate Bar.

Walmgate Bar
The Walmgate Bar with its magnificent barbican is thought to have been built by Edward I but several monarchs have left their impression on its appearance over the intervening centuries.

The wood and plaster building on the inner side dates from Elizabeth I and is now a snug coffee shop frequented by students working on essays on laptops and swapping gossip, and has a great roof top terrace with the wooden balustrade seen above, where Carolyn and I enjoyed a much needed sit down and drink on what was a very hot day.

The barbican seen above is thought to date from the reign of Edward III and facing the main Parliamentarian gun line on the opposite Lamel Hill suffered significant damage in 1644 with evidence of that still showing on the repaired stonework.


 |
| Evidence of shot and shell still marks the exterior of the barbican |

 |
| The ruined barbican from the damage caused in the English Civil War can still be seen in this print from 1813 |

The portcullis and original gates still remain on this amazing building and you can't help wondering if only these walls could talk.


Another monarch has left their mark on Walmgate with the arms of Henry V displayed above the interior gate.

We spent a bit of time enjoying the sun on top of the bar whilst sipping our elderflower presse and I grabbed some pictures of the wall leading off towards Fishergate Bar and over the barbican towards Lamel Hill now covered in modern day buildings.


Fishergate Bar
The inscription above the medieval Fishergate Bar commemorates the Lord Mayor of York, William Todd, knighted in 1487 by King Henry VII for his support against Lambert Simnel, another pretender and claimant of the English throne, during which time the Lord Mayor paid for the reconstruction of a large part of the wall.Lambert Simnel

In the 16th and 17th centuries the towers above the bar served as prisons for Catholics and lunatics.
In 1489 when the aforementioned Henry VII raised taxes an outraged and angry mob marched on the city and burned Walmgate and Fishergate Bars and the black scorch marks from the fire can still be on the stones lining the arch here at Fishergate.

The damage caused to the bar meant that it was bricked up until reopened and restored in 1827 to provide access to a nearby cattle market.


From Fishergate Bar it is but a short walk along the wall to Fishergate Tower.

Fishergate Tower
The map below, dated to 1736, shows the position of Fishergate Tower at point 35 and its guard of the bridge over the moat surrounding Clifford Tower and fed by water from the King's Fish Ponds.
The map is pivotal to understanding why this tower is where it is in modern day York with the section of wall attached to it coming to an abrupt end at the road junction alongside the Travelodge which is built in the area of the original moat.

Built around 1505 on the site of an earlier structure known as Talkan Tower, named after another Mayor of York in 1399, Robert Talken, the new tower was built to guard the postern, which is the small archway in the wall to the right of the tower.
The Fishergate postern was originally guarded with its own portcullis and as well as providing an access point would have also acted as a possible sally point for the defenders to launch attacks against any besieger.

The back of the tower seen below from the other side still has its original garderobe or toilet chute just visible projecting out from the top into the tree canopy. So not a place for any unwary passer by to stand for too long.

One sight we were keen to visit, that lies close by to Fishergate Tower, is the alleged grave of the infamous highwayman and murderer Dick Turpin whom I partly referred to in an earlier post from this year, on our trip to Wallingford, where master Turpin carried out many of his crimes.

Wallingford and Dick Turpin
Dick Turpin
Born in 1705 in Hempstead, Essex, Turpin became an apprentice butcher to his father John, and marrying at twenty five had his own butcher's shop from which he fenced poached deer.
By 1735 he was the landlord of a pub in Clay Hill where he teamed up with a bunch of villains known as the Gregory Gang committing murderous robbery in homes and on the highway. By July of that year he had earned the title of 'Turpin the Butcher' and with a fellow robber Thomas Rowden attracted a bounty of £100 for his arrest and capture.
In time his notoriety made it to risky for him to remain in the London area and by 1737 he was lodged in Brough in East Yorkshire, operating under an alias, John Palmer and purporting to be a horse trader, crossing the River Humber to commit further crimes, mostly theft.
In 1738 after threatening to shoot someone, Turpin attracted the attention of the local Justices of the Peace and being suspected of sheep and horse stealing was eventually identified in 1739.
Tried for horse stealing on the 22nd March 1739 at York Assizes and surprisingly not for the murder of Thomas Morris who had attempted to apprehend him in Epping Forest in 1735 and whose murder attracted a reward of £200 for his arrest; he was found guilty and sentenced to death by hanging and together with a fellow horse thief John Stead was executed at Knavesmire, York.
Following his burial at St George's Church, Fishergate the next day, his body was stolen by grave robbers but subsequently recovered and returned to St George's for reburial in quicklime to prevent any further disturbance.
As with many of these kind of villains, their story is often romanticised and the character is created into something they were not. This partly explains the fame of Dick Turpin in England, but as with most romantic tales they hide a grim reality that highwaymen were not gentlemen and their crimes were often accompanied with murderous brutality in an age when life was often cheap anyway.


Crossing the Rivers Foss and Ouse we were looking for the last section of wall and the Micklegate Bar, home to the Henry VII experience.
Sadly, on the day we walked the wall, the Micklegate Bar was encased in scaffolding and sheets undergoing some much needed TLC and so I didn't bother capturing the exterior, which was a shame as this bar, built in the 12th century has opened its gates to royalty and displayed the heads of traitors.
Micklegate Bar
 |
| Henry VII - National Portrait Gallery |

This is a much smaller exhibition than that of Richard III and one gets the impression of where the city's loyalty lies to this day, but at least Henry gets his rightful place in the history of the city and the conflict.


Barker Tower & River Ouse
Following our look round the exhibits at Micklegate Bar I was looking forward to a well earned evening meal and freshen up before dinner.I knew we were getting close to the river when we bumped into this young chap below and the crossing point at Barker Tower taking us back to our start point.

The 14th century Barker Tower and its opposite Lendal Tower, acted as points from where a chain could be hung across the river to control the passage of ships along it.


Once over the Lendal bridge you are back on the wall leading up to the Bootham Bar from where we started.
 |
| The view from Lendal Bridge over the River Ouse in York |
Just one post left to conclude our visit to York with a look at the city, the minster, Roman baths and the ghost legion on its march north.
I'm off on holiday to the Low Countries at the end of this week with posts planned about the Arnhem campaign and the Romans in Germania, plus the Saxons are coming followed by some Dacians.
More anon.
Very informative post, showing why I should return to York for another trawl around the city. I have always thought York council should invest a lot more into its history as the city has seen so many interesting events. I would love to see some exhibits regarding the Rising in the North against Henry the Eighth. Thanks for the post.
ReplyDeleteHi Robbie, thank you. Yes indeed, I'm glad you feel inspired for a return visit. Our trip to York has been a highlight of the year for Carolyn and I as we both thoroughly enjoyed our time there and I would encourage anyone interested in the history to plan a visit.
DeleteAs to Investment in history, I suppose I am always going to be in the lobby group wanting more but always concious of the other demands on public funds. I have to say that I found what is covered is well signed and there is plenty of information around for the interested visitor to learn more about the city. I would always reccomended doing plenty of pre-reading and homework for a trip like this if you want to dive deep on a place..
Thanks for your comment
JJ
Very enjoyable travelogue of York past and present. Always much to be learned from your travel reports, Jonathan. Much appreciated!
ReplyDeleteThank you Jonathan, that's very kind.
DeleteI have to say that writing these posts are as much for me as for readers of the blog like yourself as I find that marshalling my thoughts around what I have seen and then researching after the visit really adds to my appreciation of the history and the places visited and I often come away from writing a post finding out more about the subject than I first appreciated at the time and I have the habit of blogging to thank for my education.
Cheers
JJ
I love so much your post about your trip ! thanks for sharing info and beautifull photos from such places rich of history. ciao Carlo
ReplyDeleteCheer, Carlo, my pleasure and thanks for your comment.
DeleteJJ
Fantastic post. It gave me some really great bedtime reading for my boys, 7 and 4. The pictures of the armour were a big favorite as they are painting some 44mm plastic knight figures. That's quite a walk. I am really impressed by the level of preservation. Thanks for sharing.
ReplyDeleteHey thanks Adam, I'm very pleased you and the boys enjoyed the read. I miss bed time reading as my two lads aged 24 and 21 are a bit too big for bed time stories, but I congratulate you on getting them interested at that age as like you I encouraged the interest early and they both have got the bug as adults.
DeleteYes York is very unique and fortunate to still have most of the wall standing, unlike my home city of Exeter where our city wall is that bit older but sadly with 90% lost to modern development and none of its bars standing.
All the best
JJ