Saturday 31 October 2020

All at Sea, French Third Rates of Renown (Indomptable)

Not exactly the Indomptable, but a good excuse to display the amazing talent of French marine artist Antoine Roux and his contemporary rendition of a French third rate of the period seen off Marseilles.  

The French third rate ship of the line Indomptable was an 80-gun Tonnant class ship designed by, yes you've guessed it, Jacques-Noel Sane, laid down at Brest in 1788 and launched on the 20th December 1790.

Indomptable's first commander was the newly promoted Captain Etienne Eustache Bruix in January 1793 

On the 1st January 1793 she came under the command of the newly promoted Captain Etienne Eustache Bruix who would later go on to promotion as an Admiral to command part of the expedition to Ireland in 1796 and activities in the Mediterranean before assuming command of the Boulogne Invasion Flotilla in 1805.

The Indomptable's first taste of action would be the following year as part of Rear Admiral Villaret Joyeuse's Grand Fleet sailing from Brest during the Glorious First of June campaign under the command of Captain Lamesle and being one of the last two ships at the rear of the French line on the 29th May was engaged by HMS Barfleur 90-guns which left Indomptable so badly battered that only a dockyard refit would fix the damage.

The Battle of the First of June, 1794 - Robert Dodd (Royal Museums Greenwich)

It was the arrival of the three ships of Rear Admiral Nielly's squadron (Sans Pareil 80-guns, Trajan and Temeraire each 74-guns) that evening, that allowed the dismasted Indomptable to be sent back to Brest with the Mont Blanc 74-guns for urgent repairs, and thus missing the battle on the 1st June.
 

In December 1796 Indomptable would be under the command of Commodore Jacques Bedout and one of the seventeen French ships of the line detailed to escort General Lazare Hoche's expedition to Ireland.

Commodore Jacques Bedout commanded the Indomptable
during the Irish Expedition, December 1796

Setting sail from Brest on December 15th the French fleet was almost immediately scattered due to a combination of bad weather, poor seamanship and the attentions of British frigates and by the last week of December was in full retreat having failed to land a single soldier in Ireland and with total French losses amounting to 12 ships captured or destroyed and over 2,000 men drowned.

One of the twelve ships lost in the disastrous French expedition to Ireland in 1796 was the French 74-gun Le Droits de l'Homme coloured aquatint engraved by Robert Dodd after his own original  published by I Brydon February 1798. - National Maritime Museum 

In 1801, Indomptable was part of the Mediterranean Squadron based in Toulon and involved in First Consul Napoleon's plans to salvage his expedition to Egypt, following the almost total destruction of the French fleet in the Mediterranean by Rear Admiral Nelson at Aboukir Bay in August 1798.

The Formidable, sister ship to Indompatable
http://jjwargames.blogspot.com/2020/10/all-at-sea-french-third-rates-of-renown_25.html

As covered in my post looking at Indomptable's sister ship, Formidable, Indomptable formed part of Rear Admiral Linois's squadron that attempted to join with other French and Spanish warships gathered in Cadiz to commence operations against British naval forces in the Mediterranean together with plans to invade Lisbon or Alexandria with a convoy of French troops.

First Battle of Algeciras, 6th July 1801 - From The Naval History of Great Britain by William James

An outline of the Algeciras campaign can be read in the link above to my post covering the history of Formidable, suffice to say that the Indomptable under her commander, Captain Augustin Moncousu, took her place as the third ship at anchor under the guns of Algeciras in the first battle on the 6th July 1801.

The British attack was immediate, if somewhat piecemeal due to the light winds, with Rear Admiral Saumarez's ships attacking as they arrived to drop anchor close by, but the aggressive intent had the effect to cause Linois to order his ships to cut their cables and drift in closer to the shore and the protection from the Spanish guns.

Indomptable came under fire from HMS Audacious 74-guns, with the British ship ending up anchoring at long range, but when Indomptable complied with the signal to cut her cable, she ended up drifting out of control and grounding with her bow facing out to sea.

Saumarez responded to the French move by cutting his own cable aboard HMS Caesar 80-guns to wear past the becalmed HMS Audacious and take position on the vulnerable bow of Indomptable, raking the French ship, later to be joined by Audacious only adding to the misery she endured under the close damaging fire.

However the British were also suffering from the combined fire from the French ships and the Spanish coast batteries and gunboats and Saumarez was forced to withdraw leaving the stranded and struck HMS Hannibal 74-guns but also a badly battered Indomptable that had suffered the most number of men killed among the French ships with 63 men dead, including her captain and another 97 wounded, 160 casualties in all.

In the Second Battle of Algeciras that followed just six days later the Indomptable under her new commander Captain Claude Touffet was not part of the rear of the Combined Fleet that sailed for Cadiz and thus arrived unscathed from the night battle that ensued and an account of that fighting can be followed in my post covering Formidable also in the link above.

Like her sister ship Formidable the Indomptable would serve out the rest of the French Revolutionary War at Toulon as part of Vice Admiral Latouche Treville's Mediterranean Squadron and like her sister, form part of Vice Admiral Villeneuve's squadron that would break out from that port on the 30th March 1805 being part of Rear Admiral Dumanoir's second division (Formidable 80-guns flagship, Indomptable 80-guns, Swiftsure, Scipion and Intrepide each 74-guns).

Later in September, Villeneuve would report that Indomptable was a;

'Fine ship, sailing well, but having a very bad crew and very weak (through sickness and lack of good seamen).'  

As part of the first group of Allied ships to break out with Admiral Villeneuve in what would later become known as the Trafalgar campaign she sailed to the West Indies and on the return voyage would with the rest of the squadron meet with Vice Admiral Sir Robert Calder's squadron off Cape Finisterre on the 22nd July 1805.

Admiral Sir Robert Calder's Action off Cape Finisterre 23rd July 1805 - William Anderson
Calder's flagship, Prince of Wales, the British three decker at the centre of the picture, opens fire with other ships in the British line on Villeneuve's French squadron blurred by the fog that characterised this inconclusive fight. (Royal Museums Greenwich).

It was the quartermaster aboard Indomptable that spotted Calder's ships that saw the start of the inconclusive action fought in a fog that minimised the casualties but left Villeneuve happy to make it into El Ferrol on the Spanish coast having lost two ships and just over 1800 men in killed, wounded and captured, with Indomptable coming off lightly with just one man killed and one wounded.

By October 1805, Villeneuve and his Combined Fleet were gathered in Cadiz prior to sailing for their moment in history and the great naval battle of Cape Trafalgar fought on the 21st with the Indomptable sailing in the van under the command of Spanish Vice Admiral Alava aboard his flagship Santa Ana.

Battle of Trafalgar, showing position of Indomptable at approximately 12.00, adapted from

However Villeneuve reversed course, to head back to Cadiz having wore around at 08.00 fearing Nelson was attempting to attack his rear and cut him off from the Spanish port, and with Spanish Admiral Gravina out ahead of the van with his 'Squadron of Observation', Indomptable would find herself pretty much at the centre of the gaggle of ships that composed the line of battle that awaited the two British columns that bore down on them at midday as squadron positions were reversed.

HMS Royal Sovereign is isolated among three enemy ships as she breaks the Allied line, raking the Santa Ana to the left and the Forgueux to the right whilst taking fire from Indomptable dead ahead - Anthony Cowland
https://www.argc-art.com/gallery-maritime?product_id=53&route=product%2Fproduct

Under the command of Captain Jean Joseph Hubert she opened fire on the Royal Sovereign 100-guns as she led the British lee column and as she broke through the Allied line, engaging her steadily as the British flagship went alongside the Santa Ana 112-guns.

Close behind the Royal Sovereign was HMS Belleisle 74-guns under the command of Captain William Hargood, breaking the Allied line at about 12.20 approaching the same gap between the Santa Ana and the Forgueux, suffering some twenty to thirty casualties on the gun decks as the order went out to 'Stand to your guns!' whilst delivering raking broadsides to Santa Ana and Forgueux as she passed through and bearing down on Indomptable.

This illustration captures the moment as HMS Belleisle (second from the left) breaks the Allied line at 12.15 with Forgueux (far left) about to collide on her starboard quarter as she turns to pass the stern of the Indomptable in the centre of the picture whilst Santa Anna and HMS Royal Sovereign exchange broadsides (far right)

However as the Belleisle burst though the line amid clouds of billowing gun smoke the hull of the Forgueux loomed on the starboard quarter as the British ship attempted to steer for the stern of Indomptable. Second Lieutenant Paul Nicolas, Royal Marines aboard Belleisle described the moment;

'At this critical period, while steering for the stern of L'Indomptable (our masts and yards and sails hanging in the utmost confusion over our heads), which continued a most galling raking fire upon us, the Forgueux being on our starboard quarter, and the Spanish San Justo (? Probably means the Santa Anna) on our larboard bow, the Master earnestly addressed the Captain.

'Shall we go through sir?' Go through by . . . . .' was his energetic reply. 'There's your ship, sir (Indomptable), place me close alongside her.'

Our opponent defeated this manoeuvre by bearing away in a parallel course with us within pistol shot.'

With a shuddering concussion the bowsprit of the Forgueux plunged over the deck of the Belleisle, swinging her on the opposite course and locking the two ships together broadside to broadside as the Indomptable drifted away, not before firing a final broadside into the Belleisle.

Later in the battle Indomptable exchanged broadsides with HMS Revenge and although having suffered damage to her hull, masts, spars and rigging, she was able to sail away from the battle without needing a tow.

However having escaped the battle the ship would be wrecked in Cadiz harbour on the 24th October, after rescuing survivors from the Bucentaure that was also a total loss, only to slip her cable and end up on rocks herself, with most of her crew including Captain Hubert lost and just 2 officers and 178 seamen and soldiers surviving.


At Trafalgar L'Indomptable was armed with 30 x 36-pounder long guns on her lower deck, 32 x 24-pdr guns on her upper deck, 12 x 12-pdr guns on her quarterdeck, 6 x 12pdr guns on her forecastle and 6 x 36-pdr carronades on her poop.

At the time of the battle her crew was over strength in numbers but under strength in seamen with 887 crew, of which 580 were naval personnel, 247 infantry and 60 marine artillery.

Sources consulted in this post:
The Trafalgar Companion - Mark Adkins
The Battle of Trafalgar - Geoffrey Bennett
French Warships in the Age of Sail, 1786-1862 - Rif Winfield

Next Up: Mr Madison's War, Game Three on Vassal, a book review and we take a look at the Spanish Third Rates of Renown starting with Monarca.

Wednesday 28 October 2020

Barbarians - Netflix


I've just finished watching Series One of the new Netflix historical drama Barbarians, based on the Teutoburg Forest disaster of 9AD in the forests of Germania and I have to say I very much enjoyed it.


Ok so it's not Tacitus and the actual battle is squeezed into one of the six episodes, not for me quite able to create the impression of the three to four day attritional fighting that characterised the battle, but that said, it did capture some of the key events from the historical sources, with some artistic license to the story line and just as importantly the attention to historical detail in the sets and the dress of the actors really worked to get me hooked and looking forward to another series, which if the reaction so far is to go by seems fairly certain.
 

The storyline pretty much attempts to follow the historical accounts with 'spoiler alert' Arminius hoodwinking his surrogate father Varus into marching his three legions off into the woods, with a really clever and well acted set up showing how the whole situation is arrived at with some gorgeous sets showing Varus's summer camp complete with multiple Roman tents and a very impressive German hamlet of A framed houses around a large tribal meeting house.

However as well as a well acted storyline I was immediately grabbed with the attention to detail applied not only to the sets but to the look of all those extras which hopefully the few pictures from the series help to illustrate.

None of the dubious outfits seen in Gladiator, with Romans in a mixture of lorica segmentata and hamata worn by the common soldiers illustrating the gradual shift from mail to plate armour that seems to have occurred at this time on the German limes and wearing plain undyed tunics rather than the red seen worn by their officers.

Alongside that we had German warriors all displaying the kind of dress you would expect to see in Ancient Warfare magazine, complete with top knots in the hair and appropriate shield designs.

All this and Roman officers speaking in Latin with subtitles for those of us barbarians not quite able to keep up with such a civilized tongue.

If you haven't tuned into this series yet then you might want to have a watch as this is not the usual sandals and spear ancient drama and things have been left perfectly for the Romans to come storming back in Series Two with Germanicus keen to establish a bit of Pax Romana.

Sunday 25 October 2020

All at Sea - French Third Rates of Renown (Formidable)

The Second Battle of Algeciras, 12-13th July 1801. Formidable 80-guns under Captain Amable Troude in action with HMS Caesar, Spencer, Venerable and the frigate Thames off Cadiz , 13th July 1801 - Pierre-Julien Gilbert

Tracing the history of French ships built and operated during the French Revolutionary and Napoleonic Wars can be an interesting and a sometimes confusing affair which is not at all surprising as the times people lived through then were even more interesting and confusing.

So when considering the history of a French third rate of this period we have two such named ships of the name 'Formidable' to consider, namely the 74-gun Temeraire Class ship originally named Lion by the Royalist French authorities when laid down in 1791, but with the changes in administration that came about before her launch in April 1794 she was renamed Marat in recognition of the French Revolutionary leader; but on the 25th May 1795, in recognition of certain leaders no longer being as fashionable as they once were, not to mention all the heads that had been caused to roll in their time, the ship was renamed Formidable, taking part in the action of the 6th November 1794 that saw the capture of HMS Alexander which she managed to rake in the fight prior to her capture.

HMS Alexander striking her colours in the action of 6th November 1794 - William Shayer
https://en.wikipedia.org/wiki/Action_of_6_November_1794

However the career of the first French Formidable was relatively short lived as she herself was captured by the Channel Squadron commanded by Vice Admiral Hood, Lord Bridport at the Battle of Groix on the 23rd June 1795.

Ile de Grox 1795 - William Adlam
From the Royal Collection Trust an Aquatint showing the British fleet engaging and pursuing the French into Port Louis 23rd June 1795 during which three French ships were taken (Le Formidable, Le Tigre and Alexander)
https://militarymaps.rct.uk/french-revolutionary-wars-1792-1802/ile-de-groix-1795-this-view-of-the-british

And so we can turn our attention to the Formidable that is the subject of our model, the 80-gun Tonnant Class ship of the line, designed by Jacques Noel Sane, laid down in August 1794 and so named on the 5th October, perhaps a little premature as her predecessor hadn't yet been captured,  then renamed Figuieres on the 4th December, with me so far, then restored to Formidable on 31st May 1795; did they know something about the predecessor?

Well perhaps they did because she kept the name Formidable as she rolled down the slips at Toulon on the 17th March 1795, effectively giving the French navy two third rate ships of the line before the Royal Navy conveniently relieved them of one of them the following June!
 

In 1800, the Formidable was commanded by the very experienced Captain Esprit-Tranquille Maistral, a veteran of the American War of Independence and a survivor from a brief few months under arrest at the Chateau de Brest in 1794 during the turbulence of the revolution, he would go on to serve throughout the Revolutionary and Napoleonic War.

Captain Esprit-Tranquille Maistral

The Formidable would also be the flagship of Rear Admiral Pierre Dumanoir le Pelley who by 1800 was also a very experienced officer having commanded a division of ships on the expedition to Ireland in 1796 and played a leading role in the expedition to Egypt, during its planning and taking command of the harbour at Alexandria.

Of course, as we shall see, Admiral Dumanoir would re-hoist his flag on the Formidable in 1805 and command her and his van division at the Battle of Trafalgar which would see his command receive significant criticism for his performance that day.

Rear Admiral Pierre Dumanoir le Pelley

By 1801 the Formidable was under the command of Captain Landais Lalonde another very experienced officer having joined the French navy in 1751, in addition the ship was still a flagship in the Mediterranean squadron, now under the command of Rear Admiral Charles-Alexandre Leon Durand de Linois.


In July 1801 Linois would lead his squadron, Formidable, Indomptable 80-guns, Desaix 74-guns and the frigate Muiron 40-guns as part of a grand plan by Napoleon to regain control of the Mediterranean following the destruction of the French squadron by Nelson at Aboukir Bay in 1798.

Rear Admiral Charles-Alexandre Leon Durand de Linois

French ships had already departed from their Atlantic ports and arrived in Cadiz to combine with Spanish ships allotted to join in attacks on British naval forces in the Mediterranean and Linois was under orders to join them from Toulon and lead their offensive, with the addition of 1500 French troops to support possible attacks on Egypt or Lisbon.

This required Linois to make his way from Toulon to Cadiz and passing the British naval base at Gibraltar, out of which the British squadron under Rear Admiral Sir James Saumarez was operating to blockade the approaches to Cadiz.

First Battle of Algeciras, 6th July 1801 - From The Naval History of Great Britain by William James

Linois was warned of the presence of Saumarez' squadron after he captured Captain Lord Cochrane aboard the brig HMS Speedy off Gibraltar and decided to seek shelter under the Spanish guns in Algeciras Bay rather than press on to Cadiz.

The arrival of the French squadron off Gibraltar caused word to recall Saumarez who immediately gathered his seven ships of the line and a couple of frigates to arrive in the bay at 0700 on the 6th July and, finding the French in line of battle about 500 yards apart, anchored under the Spanish guns with eleven large Spanish gunboats in support, he immediately ordered an attack.

The Battle of Algeciras 6th July 1801 - Antoine Leon Morel-Fatio

However beset by low winds and poor navigation combined with Linois immediate response on sighting the British to warp his ships close into shore to gain the maximum protection from the Spanish guns, Saumarez's squadron was beaten off with the loss of the 74-gun Hannibal which ran aground and surrendered after taking heavy fire from Formidable, Spanish shore batteries and gunboats.

Both sides suffered heavy casualties with French losses amounting to 161 killed and 324 wounded and the British, as well as losing HMS Hannibal, 121 killed 240 wounded and 14 missing. The Formidable was herself badly damaged and reported losses of 48 killed which included her commander Captain Lalonde and 179 wounded.

The British Squadron under Sir James Saumarez make repairs in Gibraltar after the First Battle of Algeciras in July 1801 - Captain Jahleel Brenton

Linois immediately sent word overland to Spanish Admiral Don Jose de Mazzaredo at Cadiz for a force to come to his aid and escort his squadron into Cadiz whilst Saumarez limped back to Gibraltar to make hasty repairs in preparation for another attack.

On the 9th of July a powerful combined Franco-Spanish squadron under Vice Admiral Don Juan Joaquin Moreno consisting of two 112-gun ships, Real Carlos and San Hermenegildo, the 96-gun San Fernando, 80-gun Argonauta, the 74-gun San Agustin and the French 74-gun Saint Antoine having recently been purchased by the French from Spain and rapidly crewed by men taken from the French frigate squadron in Cadiz.

After arriving and anchoring late in the afternoon of the 9th July, signs of preparation to sail three days later caught the British squadron by surprise, still refitting in Gibraltar across the bay, as Saumarez thought the damage to the French ships would detain them longer; and so rapid orders were issued to the British ships to prepare to depart on the afternoon of the 12th in pursuit with a light easterly wind preventing the British squadron clearing the rock until 19.00 to tack across the bay with the Franco-Spanish not lifting their anchors until 19.45 as they headed into the Gut of Gibraltar bound for Cadiz with the British squadron following in line of battle.

Realising that the speed of the Franco-Spanish squadron was superior to his own, Saumarez ordered his line to split up ordering the faster HMS Superb 74-guns to engage the rear of their column with the other British ships to come up in support as quickly as they could.

The Second Battle of Algeciras 12th July 1801, HMS Superb sails clear in the darkness as the two Spanish first rates fire into each other in their confusion before both exploding and sinking with massive loss of life - Antoine Leon Morel-Fatio

With a combination of excellent sailing and gunnery by Captain Richard Keats on the Superb and Admiral Linois orders to the Combined Squadron to extinguish their navigation lights, that only helped cause confusion amid the Franco-Spanish ships when attacked by Keats, Saumarez was able to achieve a famous victory that saw the two Spanish 112-gun ships fire on each other and explode with both crews lost and the capture of the French 74-gun Saint Antoine after a thirty minute battle with HMS Superb.


The Formidable was also in the rear of the Combined Squadron but by copying British signal lights managed to pass the combat between Superb and Saint Antoine unchallenged, however as dawn broke on the 13th July and with the French and Spanish ships scattered as they made their way into the Atlantic, Formidable was spotted by Captain Samuel Hood commanding HMS Venerable 74-guns, with HMS Caesar 80-guns, Superb 74-guns and the frigate Thames 32-guns in hot pursuit.

Captain Amable Gilles Troude commanded the Formidable at the Second Battle of Algaciras
 after the death of her former commander Captain Lalonde at the First battle.

Captain Amable Troude was more than ready for the challenge of defending his ship by allowing the Venerable to close with him and battering the British third rate into a dismasted and badly damaged wreck with the use of his superior battery, thus forcing his other pursuers to break off and come to the aid of the badly damaged Venerable.

With witnesses ashore at Cadiz able to see the fight put up by Formidable and her escape into the port amid cheering crowds, Captain Troude was welcomed as the conquering hero and later granted an audience with Napoleon with his promotion to capitaine de vaisseau and dubbed by the First Consul 'The French Horatius'.

The fight between HMS Venerable and Formidable left the British ship grounded and badly damaged taking the bulk of British casualties in the battle as a whole with 18 killed and 87 wounded out of a total British loss of 18 killed and 101 wounded.

The Formidable was also heavily damaged in the fight but got away with just 20 killed but part of a total loss to the Combined Squadron of around 2,000 men.


Formidable would continue to serve with the French Mediterranean Squadron during the years leading up to the Peace of Amiens in 1802 operating from Toulon under the command of Vice Admiral Latouche-Treville.

However it would not be until the recommencement of war in 1803 and Napoleon's decision to direct his campaign of the invasion of Britain by bringing a combined Franco-Spanish fleet into the Channel that Formidable would see her next significant action; and it would be from Toulon on the 30th March 1805 that the first naval movements in that campaign would happen when Vice Admiral Pierre Charles Villeneuve escaped the blockade and sailed for the West Indies.


Villeneuve's squadron consisted of two divisions with himself commanding the first division aboard the 80-gun Bucentaure together with Neptune 80-guns, Pluton, Mont Blanc, Berwick and Atlas all 74-guns, and with his second division under the command of Rear Admiral Pierre Dumanoir le Pelley aboard the Formidable, together with Indomptable 80-guns, Swiftsure, Scipion and Intrepide all 74-guns; six frigates and two brigs sailed in support.

The capture of HMS Diamond Rock 3rd June 1805 - Auguste Mayer

The fleet captured HMS Diamond Rock off Martinique on the 3rd June before heading back to European waters to be intercepted by Sir Robert Calder's squadron on the 22nd June at the Battle of Cape Finsterre with Formidable not involved in the confused action and suffering no damage or casualties, before Villeneuve took the fleet into El Ferrol and from there down to Cadiz in August.

With his job now on the line following his failure to bring his fleet into the Channel, Villeneuve was compelled to sail into the Straits of Gibraltar that October in search of a British convoy exiting the Mediterranean and the chance to salvage his career despite the chances of running into a British blockading fleet under the command of Vice Admiral Nelson.


When the two fleets met on the 21st October the Formidable was under the command of Captain Jean Marie Letellier with Rear Admiral Dumanoir flying his flag as commander of the van division and led the four ships out of ten that turned back to come to the assistance of the centre of the Combined Fleet under direct attack from Nelson's division.

Dumanoir would come under significant criticism for his inability to lead his division back to the support of the Combined Fleet's centre, though some French accounts suggest that Nelson's initial heading for the van division held them in position right up until HMS Victory changed course and turned towards Villeneuve's flagship Bucentaure in what they describe as a British feint towards the van but always intending to cut the centre.

In addition to Nelson's late turning manoeuvre, the light north westerly breeze had its intended effect as Nelson calculated in that the van ships had great difficulty reversing course to the south and indeed Formidable unable to tack about resorted to lowering her boats to pull her bow through the wind thus only arriving in action as the late arrivals in Nelson's column came into range, seeing Formidable clash with both HMS Minotaur and Spartiate as Dumanoir attempted to cut off the two ships with his four.

Formidable shows off her metal deck complete with 12-pounder bow chasers on her forecastle and spiral steps up to her poop deck

Mr Robert Duncan, master of the Minotaur recorded;

'At 2.10, observed four French and one Spanish ships bearing down towards the Victory. Hauled toward them, as did the Spartiate, and commenced firing on the Admiral's ship (Formidable) . Passed the four French ships and attacked the Spanish ship with a broad pennant flying (Commodore Valdes) . At 4, wore and got alongside of her, Spartiate in company. At 5.12 she struck; found her to be Neptuno of 84-guns.' 

As the illustration below shows, Dumanoir would lose the Neptuno to the Minotaure and Spartiate as he led his remaining ships away from the battle and into later controversy for their role in it.

At Trafalgar, Formidable, not surprisingly, suffered minimal losses to her crew of just 8% amounting to 22 killed and 45 wounded.

Illustration from The Trafalgar Companion showing the possible last act of Trafalgar as HMS Minotaur and Spartiate force Neptuno to strike as the Formidable under Dumanoir leads the other three ships in his squadron away from the battle sometime just after 5pm.

Originally intending to lead his squadron back through the Gibraltar Straits to Toulon, Dumanoir was to have second thoughts fearing a confrontation with the British squadron of six ships of the line there under Rear Admiral Louis and on the 22nd October, assured that he had eluded pursuit from Admiral Collingwood's ships, he changed course to the west to go around Cape St Vincent, steering north for Rochefort.

However on the 2nd November as his squadron entered the Bay of Biscay, forty miles north west of Cape Ortegal they spotted the frigate HMS Phoenix, searching for Rear Admiral Allemand's squadron that had left Rochefort in July; and Dumanoir gave chase as the frigate led them south towards a British squadron of four ships of the line and four frigates under Commodore Sir Richard Strachan cruising off El Ferrol.

The Battle of Cape Ortegal 3rd November 1805 - Thomas Whitcombe

The hunter had become the hunted as Dumanoir fled before the superior squadron, but with Strachan able to slow down his quarry by having his frigates attack the rear of the French column, slowing them enough to allow his heavier ships to catch up and close.

Bob, David, Jack and myself refought a What If -Cape Ortegal using the new 1:700th collection and War by Sail, back in February this year before the world changed forever!
http://jjwargames.blogspot.com/2020/02/all-at-sea-cape-ortegal-4th-november.html

The battle was fought for several hours as the British managed to double the French column with the ships of the line on one side and the frigates on the other, eventually overwhelming all four French ships to be taken back to the UK as prizes and writing the final chapter in the Trafalgar campaign.

Bringing Home the Prizes; Sir Richard Strachan and HMS Caesar 80-guns tows in the Formidable, with rest of the French squadron under tow by the other ships under his command, 4th November 1805. - Francis Sartorious 

Losses recorded at the Battle of Cape Ortegal show total British casualties as 24 killed and 111 wounded and with the French much larger at 730 killed and wounded as well as four captured ships. The Formidable's casualties are estimated at about 200 men of the French total.

The battered Formidable was taken into the Royal Navy as HMS Brave, a fitting name for such a hard fighting ship, but her fighting days were effectively over, serving the rest of the war in Plymouth as a prison ship, before being broken up in 1816.


At Trafalgar Le Formidable was armed with 30 x 36-pounder long guns on her lower deck, 32 x 24-pdrs on her upper deck, 12 x 12-pdrs on her quarterdeck, 6 x 12-pdrs on her forecastle and 6 x 36-pdr carronades on her poop.

She had an over strength crew of 840 men which included 550 naval personnel, 235 infantry and 55 marine artillerymen.

When you next see Le Formidable in company she will be flying her Rear Admiral's command pennant.


Next up; A couple of books are now in the revue stack ready for some comment and a post covering our third game of Mr Madison's War which turned into a real cut and thrust affair right to the end, followed by my final French third rate of renown, Indomptable.

Saturday 24 October 2020

The Battlefields of Tewkesbury 1471, Ripple Field 1643 and the Iron Age Soppa's Hill Fort

Somerset's Advance at Tewkesbury - Graham Turner
 
Mr Steve and I managed to get in another battlefield walk before the new set of travel restrictions took effect in recent weeks, with he and I heading out to Gloucestershire to take a look at the pivotal battle of the Wars of the Roses, that at the time must have seemed like the end of all House of Lancaster's aspirations to take back the throne of England when Queen Margaret and her son Prince Edward were defeated by King Edward IV and Prince Edward the Lancastrian heir to the throne together with key principle Lancastrian nobles, slain at Tewkesbury on Saturday 4th May 1471.

Not only that, but we picked up where we left off on our last adventure exploring the English Civil War battlefield of Lansdown Hill (link below), by popping up the road from Tewkesbury to Ripple to see where, prior to Lansdown, Sir William Waller was driven back from the Welsh borders by Prince Maurice, at the Battle of Ripple Field on the 13th April 1643.


We then concluded our day out by calling in at Little Sodbury to take a look at the Iron Age Hill Fort above the village atop the Cotswold Escarpment very close to where Edward IV gathered his army as Queen Margaret arrived at Bristol, where he thought he might block her march on London only for the Lancastrians to make a night march in the vale below from Bristol, heading to Gloucester and their final meeting with the Yorkists at Tewkesbury.

Of course this is not the first time Tewkesbury has been reported here on the blog as Mr Steve attended a guided walk which he posted about back in December 2019 (link below) and so he kindly offered to lead the way based on his previous visit together with our usual habit of referring to other sources on the battle which too date has seen at least five different versions of the battle as illustrated in Steven Goodchild's guide to the battle published by Pen & Sword which I took along for the day.


The sat-photo map below is based on the English Heritage version of the battle and troop positions produced in 1994 and I have marked some of the key features together with numbered position points to show where the various pictures were taken on the day; as this battlefield, now being partly built over in the following five-hundred and fifty years, can be tricky to follow at ground level and hopefully it will help in understanding what you are looking at in the pictures from the day which was gloriously sunny and warm for September.

The battle positions based on English Heritage with the Lancastrians (blue) lining the hedgerows in the area known as the Gastons, with their flanks protected by the Southwick Brook (highlighted in blue) on their right and the Swilgate on their left. However with the Rivers Avon and Severn to their rear, a hasty retreat, should their line be broken would likely prove problematic, possibly disastrous!

When walking a battlefield for the first time, I like to read the sources and get a picture in my own mind as to what was going on before, during and after the battle to cause the various commanders to put their forces where they are reported to have done in response to those situations.

Once that picture is clear, or as clear as the sources allow, I am then keen to see the ground to work out what most likely was there at the time that would have influenced those decisions and likely had the most impact on the ground for the poor bloody infantry.

The map illustrating the places we visited on our day out together with the approximate routes of march that brought the Lancastrian and Yorkist armies to Tewkesbury in 1471. Edward's Yorkist army was able to shadow the Lancastrian's as they marched along the Severn Valley from Bristol looking to cross into Wales, but getting caught at Tewkesbury with the river at their backs.

When summarising the Tewkesbury campaign and subsequent battle, we find Margaret and Somerset's Lancastrians marching up through the West Country, gathering supporters, from Weymouth where the Queen's army landed on the 14th April 1471, Easter Sunday, the same day that King Edward IV was hard at work destroying her ally, the Earl Of Warwick's army at Barnet, north of London.

Needing to gather yet further supporters in the light of events before confronting Edward en-route to London, the Lancastrians now head for Wales and the hoped for support of the Tudor's, only to have Edward rapidly refit and rearm his army and march from London towards Bristol in an effort to catch them in the process.

The Lancastrians end up making a difficult march up the Severn valley from Bristol via Gloucester to Tewkesbury hoping to cross into Wales, only to find Edward's host shadowing their march from the easier marching ground of the Cotswold escarpment, descending to rob the Lancastrians of their artillery gathered in Bristol and Gloucester and able to pursue at a more leisurely pace to close on them at Tewkesbury before they are able to get their army across the river and thus force them to turn and face with it at their backs.

Thus with little option but to turn and fight, Somerset was forced to make the best use of the ground they were on which, close to the Rivers Severn and Avon, is obviously flat and low lying intercut with deep muddy banked brooks and criss-crossed with hedgerows, allowing for the defensive position adopted, but with little or no artillery, and facing an army using their own and the guns captured on the march, he was posed a significant problem in how to defend in the terrain whilst under bombardment with no significant means or reply whilst being inevitably 'softened up'. 

It would appear that even today the ground is very similar to that described in 'History of the Arrivall of King Edward IV' purported to have been written by an eyewitness to the battle referring to himself as 'Anonymous';

'Before them and on every hand foul lanes and deep dykes and many hedges with hills and valleys: a right evil place to approach, as could have been devised.'

Of course with a battle this far back in history, the sources are not often that precise with the detail we would like and thus educated guesswork comes in. So first off, where were the armies when they lined up? And what happened to cause the report of Somerset coming out out of his ensconced field to attack Gloucester's and King Edward's flank, only to be driven off by a Yorkist ambuscade party of possibly mounted light horse with spears placed overnight in the Deer Park on the Yorkist left flank? 

With those key questions, we set off to see the ground and make the first decision as to which map and version of this battle we would work with, which was the relatively latest interpretation from English Heritage and informs the satellite image map above.

Position 1 - Gupshill Manor

Steve and I started our expedition at one of the contemporary buildings from the time of the battle and right at the centre point between the two lines, Gupshill Manor, which today is a pub-restaurant and is the remains of what was a much larger complex of buildings partially destroyed by fire.

Close by, across the road, is an earthwork known as Queen Margaret's Camp and thought to be the remains of a medieval moated house 'probably', and I'm likely to be using that word or something similar a lot, demolished long before the battle.
 
Gupshill Manor is one of the several candidates for where Queen Margaret lodged before the battle


This area of the battlefield was likely 'no-mans land' at dawn on the the 4th May 1471 and likely area of bloody contest as the two lines closed before Wenlock's and Prince Edward's Lancastrians turned tail and fled back towards the town hoping to put the River Avon between them and King Edward's pursuing troops.

It would seem little in the way of archaeological finds have been recovered over the years from Tewkesbury and so unlike another recently uncertain battle site of the period, Bosworth for example, which has given up its secrets in artillery shot and other finds that have caused us to totally reposition and reconceive that particular battle, Tewkesbury remains one of educated conjecture.

The remains of the moated position of Queen Margaret's Camp are easily identified


The view from Queen Margaret's Camp with Gupshill Manor peaking above the hedges and with the fields occupied by Somerset's Battle behind it backed by the hills of Wales.

Position 2 - St Mary's Abbey

Looking to park our cars and walk the rest of the field we drove into town and specifically St Mary's or Tewkesbury Abbey the last resting place of some of the key notables to become victims of the fighting and, in its aftermath, witnessed the bloody retribution taken out on the vanquished by vengeful and pragmatic victors.


The abbey survived King Henry VIII's reformation thanks to the burghers of Tewkesbury delving into their deep pockets and buying it from the King in 1543 and likely saving it and its nearby lands, once those had been purchased from the crown by the town in 1609 from King James I and the nearby Vineyards later acquired by the town authorities in 1929, thus ensuring its survival into modern times and providing a time capsule of a building, its interior and exterior grounds, recalling those bloody times over five hundred years ago.

Sadly key parts of it such as the sacristy door were off limits to the public at the time of our visit due to the current pandemic restrictions and so key memorials and parts of the building specific to the battle were not on view, but hopefully the selection of pictures captures the feeling of this important building and its role in the battle.


Dr John Warkworth in 'The Warkworth's Cronicles' of 1479 describes the Abbey rapidly filled with fleeing Lancastrian soldiers, among them the Duke of Somerset, hoping to escape being cut down in the general rout by entering the holy building in search of sanctuary, and the arrival of King Edward at the head of his troops, sword in hand, to be met by a priest, with the sacrament in his hands having been  interrupted in the offering of the Mass, and describing how the priest met the king and;

'required him by the virtue of the sacrament, that he should pardon all those whose names here follow: the Duke of Somerset, the Lord of Saint John’s, Sir Humphrey Audeley, Sir Gervais of Clifton, Sir William Gremyby, Sir William Cary, Sir Thomas Tresham, Sir William Newburgh, knights; Harry Tresham, Walter Courtenay, John Florey, Lewis Myles, Robert Jackson, James Gower, James Delvis, son and heir to Sir John Delvis; which, upon trust of the King’s pardon, given in the same church, the Saturday, abode there still, when they might have gone, and saved their lives.'

Taking the king at his word the refugees stayed put and made no efforts to escape, but events, just two days later when the prisoners were led away from the building were to prove that Edward would not take the risk of sparing certain nobles who were life-long sworn enemies of him and his house and very likely to cause trouble in the future.


The south-east corner of the Abbey would have been that facing the two lines of battle, seen here with the River Swilgate to its front on a glorious September morning.

Tewkesbury didn't have or need a wall relying on the River Swilgate as a ready defence, seen here flowing around the grounds of the abbey with just the Holm Bridge, thought likely to have been a drawbridge to provide further security.

Position 3 - The Vineyards & Holme Castle


Heading south, away from the abbey, we made our way towards the battle lines on a very slight ridge known as the Gastons via one of the presumed locations for the stone built 13th-c Holme Castle, or at least so recorded on the battlefield monument.

Undulations in the ground and a slight motte like mound on which the monument stands had Steve and I going for this location, but who knows?


From the Vineyards and the monument we then worked our way along several town streets with several houses bedecked with the colours of one of the nobles or knights that fought in the battle, which is great to see Tewkesbury remembering its history and many thanks to the Tewkesbury Battlefield Society for supplying and maintaining the banners seen around the town .

Sir Humphrey Touchet's banner. Sadly for this Lancastrian knight, Tewkesbury would not end well.


Position 4 - Somerset's Position


On reaching the end of one of the outlying streets, Steve and I entered open fields, perhaps the least untouched by building development over the years and thus preserving a key area occupied by the Dukes of Somerset and Gloucester out on the flanks of their respective armies.

King Edward leads his men through the hedgerow as they close on Somerset's men behind it. His brother Richard Duke of Gloucester's banner can be seen advancing further along the line in the background - Graham Turner

It was along the hedgerows in these fields with the Southwick Brook running along the western most hedges bordering Lincoln Green Lane that Somerset's men would have taken their positions and from where they are reported to have launched their counterattack, working their way around the hedges and a very low lying hill to cross the front of Gloucester's battle and launch an attack on the gap between it and King Edward's

The manoeuvre, likely prompted by the barrage of arrows and artillery shot coming from the Yorkist line was repulsed and counter-attacked itself by the Yorkist mounted spearmen in the Deer Park beyond Lincoln Green Lane followed up by the Yorkist line advancing to the attack and driving the Lancastrians back from their positions before they broke and fled towards the River Severn and Tewkesbury town.


The hedgerows occupied by Somerset's men have been date tested to show that they are old enough to have been here during the battle

The Southwick Brook is still a formidable obstacle today, especially to heavily clad or armoured men on foot trying to get across it whilst having someone similarly clad trying to stop you with a sharp or pointed implement.

From the fields and hedgerows occupied by Somerset's men, Gupshill Manor can still be seen peeking through the bushes and trees.

Position 5 - Lincoln Green Lane


From Somerset's position there is a battlefield trail leading the walker out across Southwick Brook  towards Lincoln Green Lane along which Somerset's attacking group may have advanced to attack King Edward's line and in which they may have been counterattacked by the Yorkist mounted troops. 

Finally the lane was likely a main escape route back to the ferry point on the River Severn to the west of the town as Lancastrian troops tried to escape being cut down as their position collapsed.

Looking north along the lane leading behind the Lancastrian position and back towards the River Severn

Looking south along the lane towards the Yorkist line and its flank

The view over the hedge of Lincoln Green Lane and the trees beyond on what was the Deer Park from which the Yorkist mounted spearmen made their attack

The Arrivall describes King Edward's plan for the placement of his 'plump' of two-hundred, likely mounted spearmen in a wood overlooking Lincoln Green Lane in the Deer Park;

'he considered that upon the right hand of their field there was a park, and therein much wood, and he, thinking to purvey a remedy in case his said enemies had laid any ‘bushment [ambush] in that wood of horsemen, he chose out of his fellowship two hundred spears, and set them in a plump, together, near a quarter of a mile from the field, giving them charge to have a good eye upon that corner of the wood, if case that any need were, [and] to put them in devoir [service] and, if they saw none such, as they thought most behoveful for time and space, to employ themselves in the best wise as they could.'


Making our way north along Lincoln Green Lane we came to a junction with the field seen above leading down to the River Severn from the original position occupied by Somerset's battle; and on the opposite side of the road the one seen below. You have to imagine both these fields clogged with panic stricken Lancastrian soldiers running for their lives with the Yorkists in hot pursuit as the battle reached its dramatic conclusion. 

Position 6 - The Bloody Meadow


If you visit battlefields in the UK, and probably elsewhere, you will find many of them have a 'Bloody Meadow' or similarly ghoulishly named feature over which the vanquished of one army were bloodily slaughtered by the victors of another, often found at a particular choke point where numerous fugitives were trapped and forced to die in heaps due to the unmerciful nature of battle enraged soldiers.


This narrow field, still to this day bordered by thick undergrowth and trees, leads down to one of the main escape routes, the ferry crossing on the River Severn, which was just one of those choke points causing the men at the back of the crowd trying to get away along this route to be stopped in their flight and cut down en-mass by the pursers.


Position 7 - Holm Hill


From the morbidly named Bloody Meadow, we walked along the road into the town that crosses the River Swilgate at Holm Bridge to arrive at an open piece of ground just before it called Holme Hill and the second possible location described for Holme Castle and an observation position for Queen Margaret during the battle.


By the time we had walked to Home Hill, it was past midday and so we decided to take full advantage of the weather and enjoy our open air lunch amusing ourselves with the rendition of the battle offered up by Lieutenant Colonel Blythe in 1950 suggesting this position being the right flank of the Lancastrian line held by Wenlock's battle defending in the ruins of Holme Castle and used to anchor the Lancastrian position. 

Of course if HBO or some other likely organisation decide to make a TV depiction of the battle, that has got to be one of the principle scenes, with Queen Margaret on a battered battlement raining arrows on the Yorkists, perhaps with Sir Peter Jackson directing, as Yorkists in black armour attempt to scale the position!!

As you might imagine we weren't buying Colonel Blythe's account and it seems the stonework unearthed in the area has now been surmised as being possible outbuildings of the nearby abbey.

Looking out from Holm Hill towards the battle lines. A suggested rearward position occupied by Queen Margaret during the battle

The River Swilgate seen here from the bridge into town meanders its way up from the Severn to wind its way to the south of the Abbey seen in the pictures above

Position 8 - Town Centre and the River Avon


Following the road into town from Holm Bridge presents an opportunity of seeing more of medieval Tewkesbury with its timber framed houses along by the mill on the Avon where many of Wenlock's and Devon's soldiers would have been killed trying to escape; to the amazing abbey cottages lining church street, occupied during the battle and the Tewkesbury Cross, the site of the market house, where senior Lancastrians were tried before being marched to the scaffold in Church Street.

Classic timber framed houses at the back of town on streets which would have been chocked with Lancastrians trying to get across the river

The Abbey Cottages in Church Street close to where the Lancastrian nobles would have been executed

The Duke of Somerset meets his end on the block at Tewkesbury as illustrated in The Arrivall

Tewkesbury Cross the site of the market house at which the captured Lancastrians were tried for treason on the 6th May 1471, before Richard Duke of Gloucester and Constable and Marshall of England

Straight out of the 15th century and still indicating where to get a new string for your longbow

Position 9 - The Ferry Point (Fugitives Crossing) 


Finally before departing the town over the River Severn to head out to Ripple, we walked down to another picturesque site with a rather morbid history, the old ferry crossing, looking delightful in the September sunshine with a pub beckoning from across the water, but another likely scene of carnage in 1471 as the fugitives from Bloody Meadow desperately sought for a way across

The last hope of escaping a bloody day, with sanctuary so close and yet so far for many a Lancastrian

Ripple Field 


Recovering our cars parked up by the abbey and rapidly lowering windows to let out the heat of the day that had built up whilst we had been walking, we set course three miles north of Tewkesbury and the little village of Ripple.

This time our journey was taking us back to the spring of 1643 that saw the English Civil War in the West Country and along the Welsh borders move up a notch in intensity as General Sir William Waller, newly appointed commander of the Parliamentary Western Association, following his successful campaigning in southern England and the capture of Portsmouth moved west looking to sever the King's communication with south Wales and the south west of England from his new capital, Oxford and these important potential sources of Royalist recruits.


Leaving a trail of devastated village churches in the wake of his Puritan army and making night marches to avoid the attention of Prince Rupert's cavalry, Waller occupied Bristol in mid-March 1643.


Avoiding Rupert yet again who occupied Cirencester, Waller advanced on Gloucester to join up with the garrison under Colonel Massey, driving off the nearby Royalists at Highnam on the River Severn just below Tewkesbury on the 24th March capturing 1,500 Royalist infantry in the process, advancing still further in April to plunder Monmouth and Chepstow in the wake of the Royalist retreat.

The response from the King in Oxford was rapid and Prince Maurice was dispatched to the area with 2,000 men but Waller was fortunate and skilful enough to evade back across the Severn and by the 11th April was back in Gloucester having suffered little loss.

The next day Colonel Massie marched from Gloucester and captured Tewkesbury, destroying a Royalist pontoon bridge close by forcing Maurice up river to Upton if he were to cross it and descend on Gloucester.

A recent review of the English Civil War Atlas revealed this gem of a page. I wish we had had it on the day!

With Waller joining Massey later that day, the plan was to move on the bridge at Upton to prevent Maurice from crossing and enabling Waller to press his advance north to Worcester, but when Maurice discovered his pontoon bridge destroyed, he was already on the march to Upton ahead of Waller and, getting across the Severn, the two armies met at Ripple on the 13th April, three and a half miles north of Tewkesbury.

Both armies numbered about 2,000 men but with Waller's force composed nearly all of cavalry which he deployed on Old Nan's Hill (Ordnance Hill) able to observe the army of Maurice deployed below in three divisions. 


Waller launched his cavalry in a charge that was repulsed by the Royalists, convincing Waller that discretion was the better part of valour, especially with a single narrow lane behind, his only escape route back to Tewksbury, should things go wrong he decided to withdraw under the cover of his artillery, dragoons and a few musketeers deployed on the ridge as cover.

Maurice, unsure of what his enemy was up to advanced cautiously with flanking columns sent along the lanes, but it soon became obvious that Waller was withdrawing and a Royalist cavalry attack over the ridge and a follow-up flank attack from one of the flanking columns turned a retreat into a rout, with the Parliamentarians now struggling to get clear of the village with its narrow hedge lined lanes.


The car-park layby opposite Ripple Village Hall makes a perfect place to pull in to walk to the battlefield, with the lane being one of the two advanced along by Maurice's flank columns 

A panoramic shot of Ripple field with Old Nan's Hill to the left and the Royalist start position at the far right hedge line of the ploughed field

Wallers cavalry would have occupied the hill ready to charge down into the field below

In an attempt to stem the Royalist pursuit, Waller threw in Sir Arthur Haselrig's Lobsters, heavily armoured cavalry, that brought a temporary respite, but not enough to prevent his army from being pursued almost to the walls of Tewkesbury until a relief force sent out from the town was able to drive off the Royalist cavalry and bring the remains of Waller's force into the town.

Superior Royalist cavalry had won the day yet again, with Prince Maurice drawing off to Evesham and later returning to Oxford.

Waller would recover his forces and capture Hereford on the 25th April to then persist in his attempts to advance on Worcester in June which was unsuccessful, by which time he would be forced to head back to the West Country to counter the advance of the Royalist army of Sir Ralph Hopton as it made its way into Somerset.


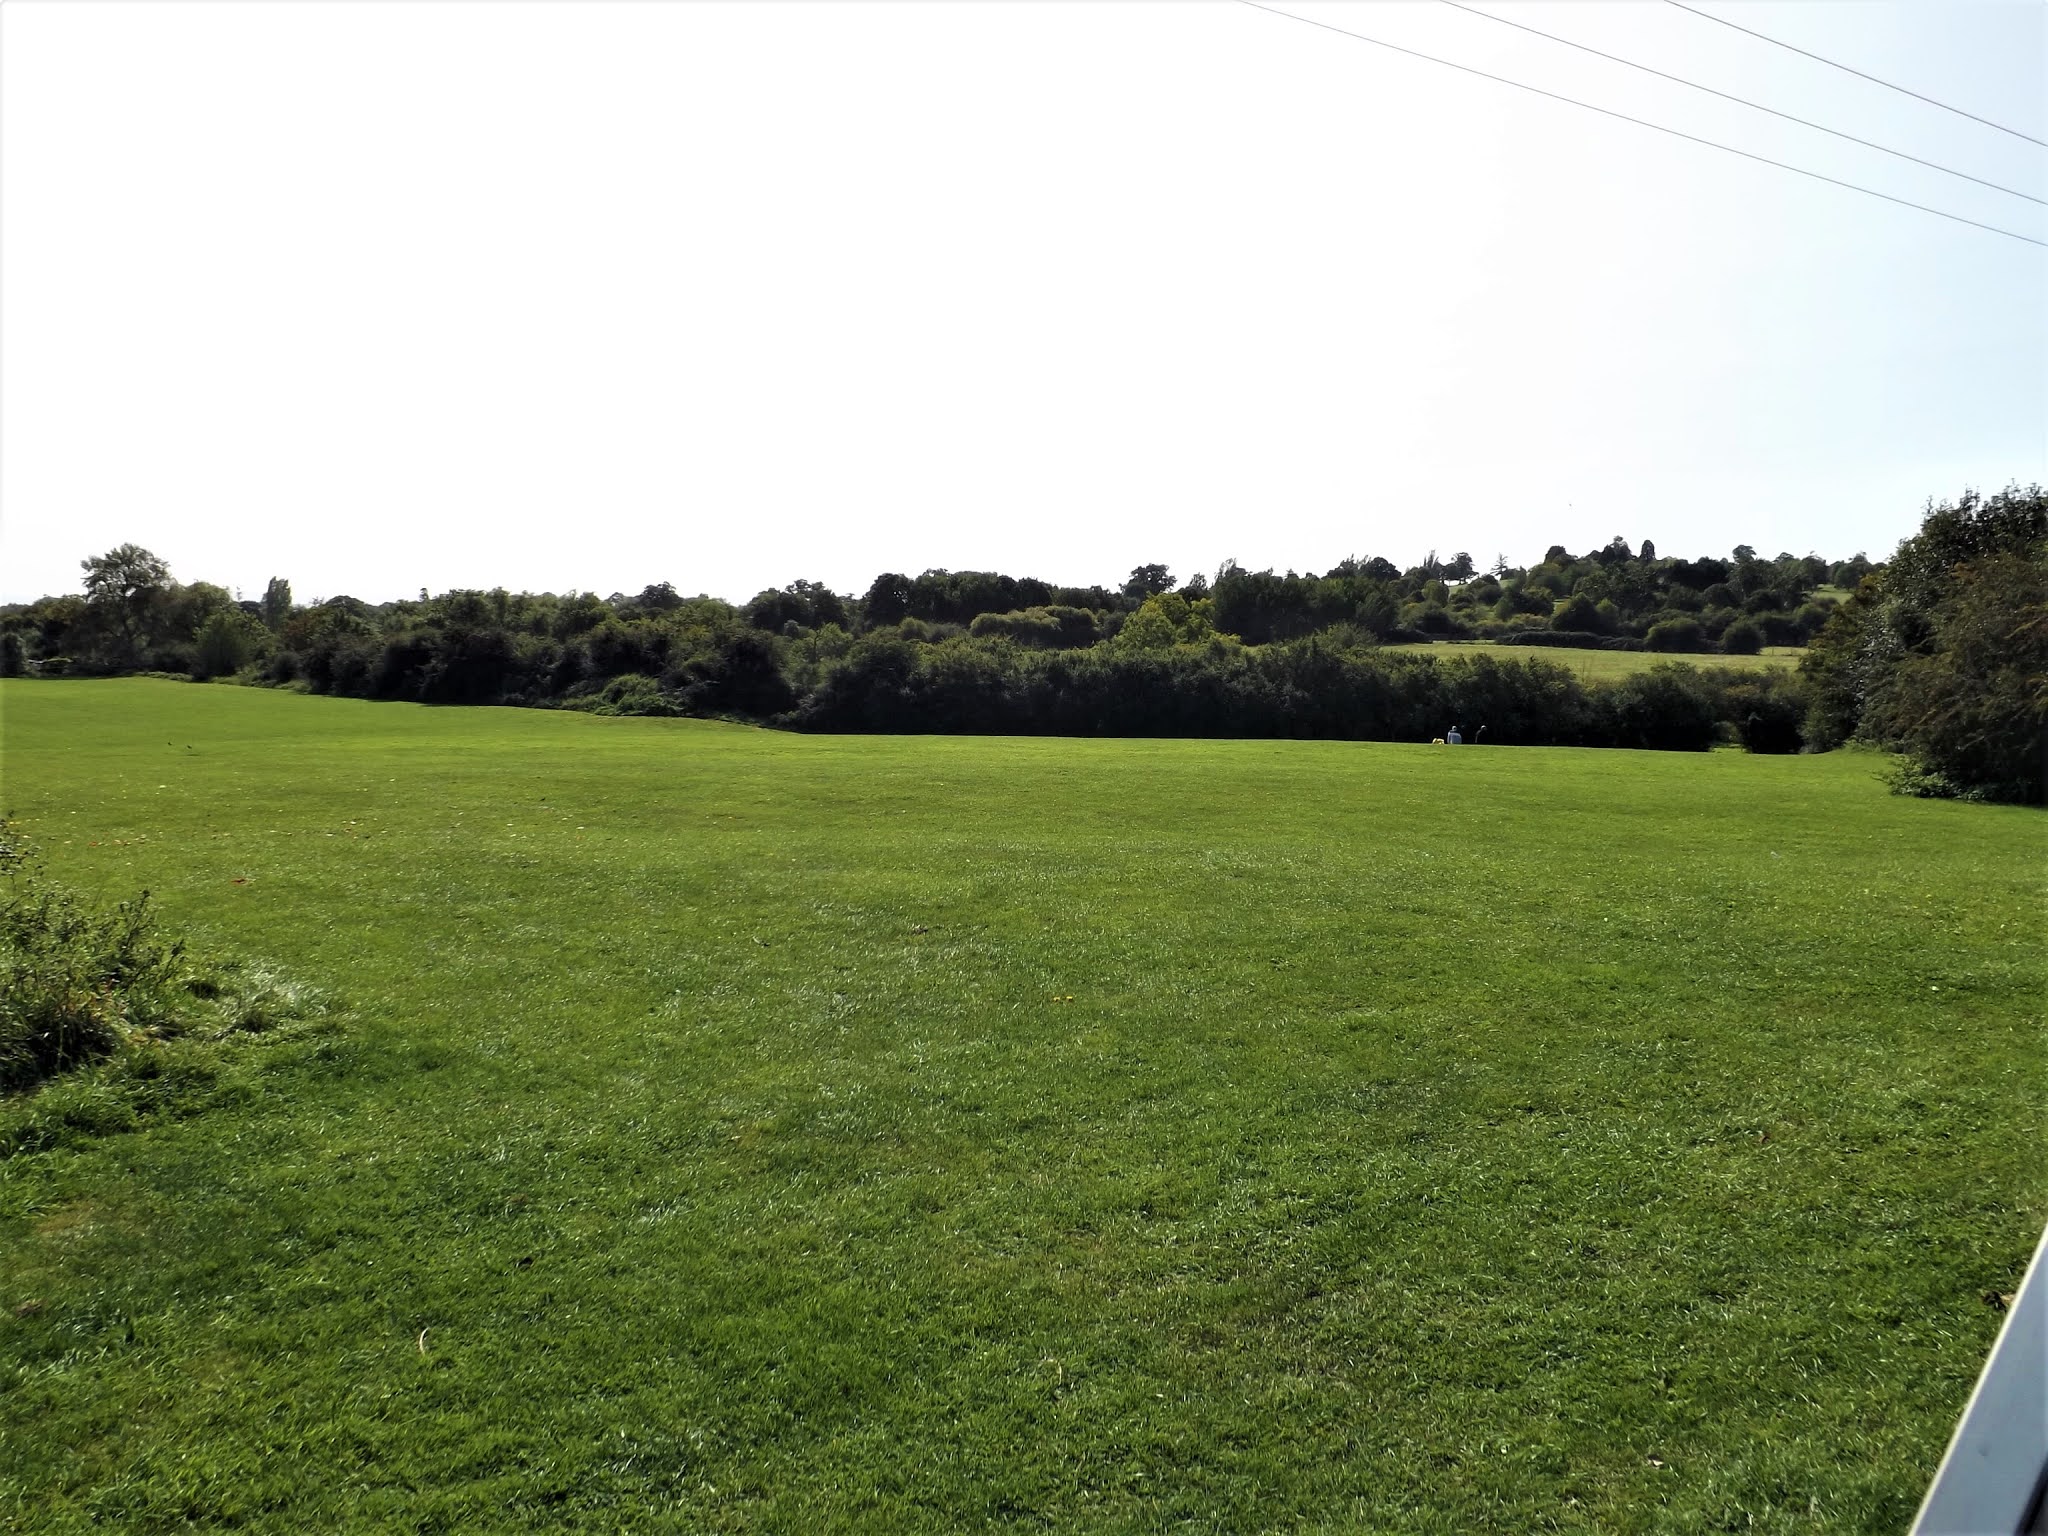
A view from the top of the hill looking towards the Royalist start line at the far end of the ploughed field.

Ripple Field seems little changed from 1643 save a few telegraph poles and one can stand atop Old Nan's Hill as we did, easily imagining Haselrig's Lobsters launching themselves down towards the Royalist lines at the far end of the lower field.

From the top of the hill looking back into modern day Ripple with later buildings in the village seen below

Further into the village on the lane from the village hall, the buildings are readily recognisable as being of the period and before the battle, and would have seen Royalist and Parliamentary cavalry come and go.

Soppa's Hill Fort - Little Sodbury


With the afternoon drawing in, but still with plenty of sunshine left, we headed off back down the motorway towards Bristol, heading for Little Sodbury above the M4 and atop the Cotswold escarpment on which King Edward IV drew up his army from its long march from London looking to intercept Queen Margaret, who he anticipated would head straight for the capital following her entry into Bristol.


One of the likely sites suggested as a potential camp and muster area for Edward is the Iron Age hill fort above the village of Little Sodbury known as Soppa's Hill Fort, a seemingly perfectly defensible set of earthworks and ditch enclosing ground offering excellent views towards Bristol and into the vale of the River Severn.

King Edward is described in the sources as marching on Sodbury Hill, which given that the name is not in use today is not easy to pin down.

The Arrivall states;

'The King, the same Thursday, soon after noon, came near to the same ground, called Sodbury Hill, and, not having any certainty of his enemies, sent his scowrers all about in the country, trusting by them to have news where they had been. About that place was a great and fair large plain, called a wold, and doubtful it was to pass further, until he might hear something of them, supposing they were right near, as so they might well have been, if they had kept forth the way they took out of Bristol.

Our first view of the outer rampart of Soppa's Hill Fort as we left the tree line of Little Sodbury Wood

And when he could not hear any certainty of them, he advanced his whole battle, and lodged his vanward beyond the hill, in a valley toward the town of Sodbury, and lodged himself with the remnant of his host, at the same hill called Sodbury Hill.

Early in the morning, soon after three of the clock, the King had certain tidings that they had taken their way by Berkeley toward Gloucester, as so they took indeed.'


As well as its interest as a possible site for Edward's camp on the march to Tewksbury, Soppa's fort has a long history of its own, perhaps just as important a landmark for its role as a camp site for the Saxon Army that would defeat the Britons at the Battle of Dyrham (Deorham) in 577 AD, which would drive the Romano Britons down further into the southwest in the face of the relentless Saxon advance.


Even today the ramparts look formidable at ground level


This amazingly preserved ancient hill fort made a perfect way to end our day and we still had one reward left on the way down with a glorious view out over the River Severn Valley between Bristol and Gloucester.


A fantastic view from the Cotswold Escarpment into the Vale of the River Severn as we made our way down from Soppa's Hill Fort. An amazing way to end a great day walking, talking and enjoying exploring the history of an ancient landscape 

Thanks to Mr Steve for his company on another fun day exploring British history in the landscape and just in time before things got crazy again with a small minority of people insisting on behaving in a way that seems determined to pass on a virus likely to cause yet more unnecessary deaths before the year is out and now requiring large parts of the country to lock down, yet again, preventing traveling and association.

Oh well at least we have days like these to console ourselves with until better times arrive, and I hope everyone keeps safe and sound in the mean time.

Sources referred to in this post:
Tewkesbury, Eclipse of the Hose of Lancaster - Steven Goodchild (Pen & Sword)
Tewkesbury 1471, The Last Yorkist Victory - Christopher Gravett & Graham Turner (Osprey Campaign)
The English Civil War Atlas - Nick Lipscombe (Osprey)

Next up: The French Third Rates of Renown are joined by the 80-gun Tonnant class Formidable, another book review and more adventures in Vassal Land with a third game of Mr Madison's War.