Saturday 27 February 2021

The Medieval Fighting Man: Costume and Equipment 800 to 1500 - Jens Hill and Jonas Freiberg


Some reference books end up becoming turn to ones whenever I'm getting stuck into a painting project, so much so that the book very often ends up perched somewhere close to my painting desk as a ready reference whilst working out the look and detail on a particular sculpt and the best colours to use to bring out the detail.

Last week I added to my collection of books that have started to fall very much into that select group of ready references, namely the Europa Militaria Specials series of Osprey sized paperback books covering the military dress of a particular era or theme as presented by some of the best re-enactment groups around.


The book in particular is 'The Medieval Fighting Man' which is currently on offer from the Naval and Military Press for just £2.99 which is a must buy price in my opinion and when I received it I had intended just to refer to it for this brief review but then I remembered the other books I have in this series that would deserve equal recommendation for the same reason and ones I have used regularly when painting up my collections of Saxons and Vikings and Romans.


The fact of the matter is that these groups of reenactors have made a large contribution to the archaeological evidence that supports how we portray these warriors from such a long time ago in that they have taken a lot of trouble to recreate their equipment and dress and then, when worn, have helped a lot in the understanding of how these warriors may well have worn the gear functionally; rather than simply based on educated guesswork and contemporary illustrations from artists who may never have fought in the gear they portrayed and were getting their information from those who had or had witnessed these warriors in action.


Needless to say this extra information adds to the way modern wargaming figures are now sculpted and the look we can create with our table-top armies, but these pictures of the way the reenactors carry the equipment and the look of it hanging on the body, not to mention the colour of the equipment and dress can really help those of us who want to capture that look in our figures.

My Romano-Dacian collection is about two thirds complete and I have finished my Saxon-Viking collection but may end up adding to it at some time and I have a very large collection of Perry 28mm Wars of the Roses to yet get started on and so these books will feature very much in my projects as they come under the brush.


The sample pictures included here in this post are taken from my latest addition and like the other two on the Romans and Vikings are lavishly full of colour photos like these which are invaluable to the figure painter.


The late medieval selection features these shots of the typical men at arms and poleaxe armed foot knight and there are similar illustrations covering the look of these men across the era from late Viking, the Crusades, and 13th, 14th and 15th century European armies from knights to the common soldier and armed citizen troops, with some great pictures of typical weaponry ideal for working out how to paint that particular crossbow mechanism or arrow shafts painted with a red oxide pigment mixed with linseed oil to protect them from the elements.

The Medieval Fighting Man is 96 pages and consists of the following sections:

Preface
Acknowledgements

Viking Warrior - 8th to 9th Centuries
Carolingian Landowner - Early 9th Century
Scandinavian Trader - 9th to 10th Century
Viking Warrior - Late 10th Century
Norman Miles - 11th to 12th Century
Infantry Serjant - Second Half of 12th Century
Knight Templar of the Third Crusade, 1190
Castellan Knight and Foot Soldier - 13th to 14th Century
Crossbowman - Mid 13th Century
The Longbowman - First Half of the 14th Century
Officer and Foot Soldier, 1485
The Armed Citizen, 1470 - 1500

Bibliography

Each section has text describing the times depicted by each warrior, with more information about their clothing, arms, equipment and their role on the battlefield.

There are some one-hundred and thirty full colour photographs of the re-enactors including full back and front figure portraits mixed with close ups of the gear and other equipment, intermixed with about a half-dozen full colour period examples of artwork that support the look of these men.


If you are the slightest bit interested in painting these early warriors then these books are a goldmine of reference information and if, like me, you have a rather large collection of late medieval types to get stuck into or you're working on those beautiful Footsore Miniature sculpts for the Barons War, then I would definitely recommend checking out the offer from Naval and Military Press in the link above or below.


Next up: More to come on JJ''s as I conclude the posts covering Steve and my fighting of Ardennes'44 with a dramatic battle to end our refight of the first three days of the campaign and work progresses in JJ's Dockyard as the next six ships are fitting out with sails and rigging.

Wednesday 24 February 2021

Ardennes'44 The Battle of the Bulge on Vassal - Part Two (17th December)

 
The situation in our Ardennes'44 game on the the second day (December 17th) opened up with great promise for the resumption of my German offensive plan following a very successful opening particularly on the 5th Panzer Army front in the centre where avenues opened up to allow rapid progress towards St Vith and Bastogne in the next twenty-four hours.


However a quick glance at the Appearance Card below for Turn 3, the 17th December, shows the large number of US reinforcements set to arrive in response to the offensive, with likely rapid reinforcement of the troops facing the 6th Panzer Army on the German right flank spearheaded by 1st and 12th SS Panzer Division with German reinforcements principally limited to a few army battalions, the balance of 3rd FJ Division and a von der Heydte Fallschirmjager drop in the area, but not much else.

Turn 3 (17th December) Order of Appearance, shows the arrival of the powerful US 7th Armoured Division on the 6th Panzer Army front (Arrival Points H indicated top right of each counter). German Reinforcements for the Germans are minimal, including von der Heydte parachutists, but the Greif Commando traffic blocks should help to slow the US troops reaching the front line.

As expected and in reality the ill-trained FJ parachute drop came to nothing with them being dispersed and captured and the fighting on the front around Elsenborn and Monchau proving difficult for the SS units to make much progress.

The front on December 17th AM as my three German Armies attempt to consolidate their gains and press forward to other target areas, circled red and with two behind German lines, to ensure the ten needed to ensure victory by the close of the battle on the 18th. The arrows indicate the principle attacks made in each area and the red boundary lines indicating the army areas.

The area facing the 6th Panzer Army offers a tantalizing opportunity for the SS units to break through past the US defenders on the Elsenborn Ridge to take the towns of Elsenborn and hopefully Monchau before pressing on to the next key line of Malmedy, the fuel dump on the Malmedy Road and Eupen beyond. However the US units on this front present a tough opponent with rapid reinforcement should a breakthrough fail to materialize and despite my best efforts using SS Kampfgruppe Peiper and the 12th SS to open up the main road on their respective fronts, which with Peiper was managed, the fighting to do it left no opportunity to move other units forward to secure key points.

Day Two AM - 17th December, 6th Panzer Army Front
US troops make a fighting withdrawal off the Elsenborn Ridge with the units under the blue '1' counter in the first stage of surrender checks, but doing a great job holding up rearward German troops as 1st SS Peiper struggle to clear the road to Malmedy and 12th SS are held up in front of Monschau by strong US forces backed by tanks and artillery.

The 12th SS attempted to break the line around Monschau with a 5:1 attack on the weakest part of the line only to have their attack aborted by a Time on Target US artillery strike on their forming up positions that completely unhinged and stopped the attack, (US artillery on the defence most commonly lowers the attack ratio by one or two levels but has to be treated with caution, as with a '1' rolled, as Steve managed, they can get a TOT barrage) whilst Peiper on the road with 1st SS failed to clear US blocking units, forcing me to throw in Panzer Brigade 150 with their disguised US armour to help the attack.

Day Two AM - 17th December, 5th Panzer Army Front 
A much more successful picture for the German 5th Panzer Army able to capitalise on the success of the opening attacks which drove back or destroyed most of the US units defending forward on this front, with survivors seen here under disrupt markers. The attack allowed  spearhead units from Panzer Lehr to take Clervaux and press forward on Bastogne and Houffalize and for 116th Panzer Division to advance on St Vith although delayed by some US rear-guard bridge-blowing that forced units to move up via Manarch. Infantry units have pushed out on the left to threaten Wiltz and consolidate the bulge.

The success of the attack through the centre of the US lines could be gauged by the stacks of 'Disrupted' US troops driven back from their positions on the River Our and retreating to Bastogne via Clervaux alowing Panzer Lehr and 2nd Panzer Division to press forward in their wake with the 26th Volksgrenadier Division moving out to the army boundary line with 7th Army to press their attack towards Wilz.

More resistance was encountered by 116th Panzer Division as their attempt to push on through the bottleneck on the road to St Vith was stymied by US bridge blowing that forced follow up units to divert to other crossings close to Manarch before turning right for the key town which will likely offset its fall for another day.

Day Two AM - 17th December, 7th Army Front 
The 7th German Army is an Infantry Army composed of infantry and volksgrenadier divisions stiffened by the inclusion of the 5th Fallschirmjager and their attached StuG brigade. These chaps don't move that quick and their general lack of armour and limited artillery resources convinced me to be conservative on the gains I might hope to make on their front with the importance of taking the key towns of Echternach, Diekirch and hopefully Ettelbruck before going firm on those key points and protecting their gains and the left flank of 5th Panzer Army driving to Bastogne.

With the limited mobility and armour resources of 7th Army I contented myself on this front of securing my forward river line defence around Echternach, repairing bridges to my rear, bringing forward my guns in support of the line and limiting further attacks to 5th FJ Division which they pressed well threatening to take Diekirch and hopefully Ettelbruck later that day before the arrival of strong US reinforcements on the 18th.


So with a good consolidation of ground made on the morning of the 17th December, but with worrying issues on the German right flank, could further progress be made to secure key targets in the afternoon of the 17th?

The front on December 17th PM showing principle German attacks across the front with three key towns falling to German troops to go with the two taken on the 16th and with Bastogne and St Vith now invested by German troops with the US defenders grimly holding out. However the offensive on the right is struggling and two groups of 12th SS on the extreme right are overextended and find themselves out of supply (red out of supply markers above the grey offensive arrow) as they try to batter their way into Monschau.

The afternoon of the 17th saw US troops pushing forward engineer battalions into key towns just behind the front line as their comrades further forward sought out blocking positions in forests close to main roads to force follow up German units to deal with them before pressing on to their key targets.

Day Two PM - 17th December, 7th Army Front
With their more limited resources in terms of armoured and mobile assets 7th Army continued to aid the German offensive taking the towns of Diekirch and Ettlebruck to add to Echternach taken on the 16th and securing three out of the five possible victory zones on their front. Their task on the 18th would be to go firm and hold their gains.

Despite the US efforts to slow the German advance three more victory centres fell in the afternoon fighting and another three came under attack as the US front continued to fall back under the attacks on 7th Army and 5th Panzer Army fronts, with five of the ten German objectives taken by the end of the day leaving another five to be captured and held on the 18th.

Day Two PM - 17th December, 5th Panzer Army Front
The Army Panzer Divisions of Lehr, 2nd and 116th Panzer continue their offensive with support from the 26th Volksgrenadier Division as Wilz falls to the latter and Bastogne holds just to Lehr and 2nd Panzer whilst 116th Panzer close in on St Vith.

However US resistance on the German right flank threatened to undo the gains made else where with the critical towns of Elsenborn and Monschau vital to securing the ten areas needed to secure the progress made on the first three days.

Day Two PM - 17th December, 6th Panzer Army Front
The US defenders on the 6th Panzer Army front continue to resist stoutly under the attacks of SS Panzers and Tiger II battalions, with their stiff artillery fire in the morning being stiffened as US troops cut off the supply route to the forward troops of 12th SS as they attempted to batter their way into Monschau. Note the three grey Greif Commando road blocks in US rear areas designed to slow down US off map reinforcements from Eupen and Limbourg marching to the area. The arrival of 7th Armoured Division puts the objectives of Malmedy and Eupen beyond the reach of 6th Panzer Army.

So with half the German objectives achieved in the first two days of Operation Wacht am Rhein and with the first truck loads of US Airborne troops arriving from Paris it would be all to play for on the 18th December to grab the other five key areas and hold on to them as US reinforcements are rushed forward.


In the third part of this series of posts Steve and I will conclude our game focussed on the first three days of the Battle of the Bulge with a climactic ending that had us both on the edge of our seats as our digital-cardboard warriors fought hard in the closing phases of play.

Next up I have a book review and work progresses on the next six models to join the Trafalgar Collection.

Saturday 20 February 2021

All at Sea - Trafalgar Project Update

The Battle of Trafalgar - Montague Dawson

So, as promised, I thought I would do a bit of an update on the Trafalgar Collection and the project to wargame this most famous of sea battles in the glorious scale of 1:700th and what remains to be done in the period of lockdown but with the vaccine roll-out here in the UK promising better times ahead and hopefully a return to gatherings around a table-top game.

Anyone with the slightest interest in the age of sail and naval history, and most folks with a basic knowledge of world history and the key events that have shaped it will probably know the basics of the Battle of Trafalgar and many others in the hobby have set out to wargame it on the table, particularly in 2005 during the bicentennial commemoration of Lord Horatio Nelson's most famous victory.

However not many games have attempted this battle in scales much larger than 1:1200 which with the possible exception of a few chaps who spent their time scratch building 1:600th Airfix models of HMS Victory and Shannon into passable 3rd and 5th rates for all the ships of the British, French and Spanish navies, has meant that the former scale has been the traditional way of gaming this battle, until now!

One of the display cabinets about two-third full, seen last year and now with only one shelf left to take the last few models! 

Regular followers of the blog will know that since October 2019, I have been very much focussed on building a collection of Warlord Games, Black Seas range of 1:700th Napoleonic era ships, which has seen me showcase the models available in the generic Third Rate and Frigate & Brig boxes, through the various Fleet boxes and Third Rates of Renown of the British, French and Spanish navies with the collection growing through 2020 as more models were completed.

The British collection on show for Naval Wargames Day last year complete with additional brigs and sloops that will not be on the table for Trafalgar
http://jjwargames.blogspot.com/2020/08/international-naval-wargames-day-2020.html

During the process I showed occasional pictures of the collection as a whole gradually filling my display cabinets or as in August last year in support of Naval Wargames Day the three fleet groups, just about making up reasonable sized squadrons.

In December, and my review of the blog for 2020 together with my usual look forward into 2021, I announced my plan to complete the orders of battle for the Trafalgar fleets with a view to staging several games in support of our usual veterans charities, as we have done previously with the Talavera 208 project and more recently with the Devon Wargames Group and Too Fat Lardies at our annual club Lardy Day.

The pictures below shows the collection as of last weekend with the addition of the six French third rates completed then and with just twelve more models required to complete the build part of the project.

The three navies that participated in the Battle of Trafalgar with the British line up to the right followed by the Spanish and French , in order of rating with the three decker 1st and 2nd rates closest to camera, then the 80's 74's 64s, 5th rates and two French brigs.

The scale of these models, especially when painted in the style of their historical predecessors and fully rigged really makes a feast for the eye as you take the time to scan the look of the different fleets with their own peculiarities and the line ups help to give an idea of the look of the table when all the models are out in full battle array and amid gun-smoke markers.

From the other end of the lines with the diminutive French brigs to the right 

Trafalgar is one of those games that I think occupies a spot on the bucket list of many table-top gamers and has certainly been on mine since my first years in the hobby but I never really felt that the smaller scales were able to quite create that 'Grand Manner' look established by the late, great, Peter Gilder who epitomised that style of game with Napoleonic land battles and the pictures of his games that appeared in the books and magazines of the seventies.

As well as completing the last twelve models I am very much thinking about the game plan, with my previous post looking at potential rule sets which has led me to consider table size and player numbers required to manage sixty odd ships through a six to eight hour game.

This aspect will be the first to get tested with some games once we can get back around a table and I can organise a few of the chaps at club to help me sort out what will work and what will not.

Another consideration, early on was settling on a potential venue to stage the game where we will have the space and security to run the game over a day with plenty of easy access and parking for the players and anyone else who cares to come along and see the game up and running.

Finally I'm working out what I need in the way of containers to be able to safely transport this lot around as an when required. 

HMS Victory next to the Royal Sovereign and with the mighty Santisima Trinidad and Santa Anna just behind, stand out dramatically from the more numerous third rates

The plan of battle, likely requiring a table of twelve feet or more in length and about five or six feet in width to allow enough sea room for the two British and Combined Fleets, with five commanders on the British side and six on the Combined Fleet together with a Flag Captain on each side to take care of game admin.

So the final models are already being prepared in the dockyard with a British and Spanish first rate, two French and one British third rate and a French frigate forming the next group of six to join the line up, to be followed by three British and one Spanish first rate and the schooner HMS Pickle and the cutter HMS Entreprenante, yes even all the unrated vessels will be on the table.

The penultimate group of six models are on the stocks at the time of writing.

Finally I would like to record by thanks and gratitude to the chaps at Warlord Games and specifically Gabrio Tolentino who heads up the Black Seas project and who perhaps is responsible for the fact that a lot of age of sail naval gamers are getting into 1:700th as a scale these days, with the additions on the 3D printed circuit showing the popularity of this scale, and with the Warlord offerings of high quality and readily adaptable to scratch building and other modifications as I have shown here on the blog.

I had to reach out to Warlord this week to help me rectify an issue with two of the final build models, which they sorted immediately as well as providing some other models for a future project and a marvellous gift that will be offered as a raffle prize for our charity raising games and a particular thank you to my Customer Support contact Conor Trainer who made things happen and was very helpful when I phoned earlier this week.


I intend to showcase the builds I'm working on, some of which are intended to portray some very key ships from the battle and when the collection is finished I'll put up some pictures of the three navies and a closer look at the models.

If you are interested in the models built so far and the books I've reviewed in conjunction, plus rigging and modelling tutorials on the JJ's YouTube channel, then just click on the 'All at Sea' tab at the top of the blog to link to all the posts covering the collection.

Next up: Steve and I are fast reaching a dramatic conclusion to our Ardennes'44 game on Vassal which has provided a lot of entertainment as the Germans struggle to capture enough victory point areas in the first three days of the offensive to get a win, and I have a book review to do before returning to the next six models to join the Trafalgar collection.

Tuesday 16 February 2021

Ardennes'44 The Battle of the Bulge on Vassal - Part One


For the last five weeks on a Tuesday nights Steve M and I have been battling away in the Ardennes of 1944 refighting the last WWII German offensive in the west that came to be known as 'The Battle of the Bulge' as the German 7th Army and 5th and 6th Panzer Armies crashed over the Belgian frontline facing US troops on December 16th in what was thought to be a quiet sector of the front, where battered US divisions from other sectors could be safely sent to reorganise and accommodate fresh replacements from the rear.

Over the years my Battle of the Bulge itch has tended to be scratched by playing, first the 1981 Avalon Hill classic game of the name with copious reading of various General Magazine editions to work out the best possible attack set ups and the various percentage chances of success; swiftly replaced when I first discovered it and introduced it to Steve, 'Tigers in the Mist - Ardennes Offensive' also by GMT which we both love playing and would have probably done so this time around if there was a Vassal module to use.

The counter artwork is nicely captured in the Vassal module with the usual stats of Attack-Defence-Movement familiar in other games allowing a ratio of attack factors versus defence factors to be calculated 

So wanting to indulge ourselves with another bout of bridge blowing and Panzer hunting we looked for an alternative and decided to play a game I have had in my collection since it was first published but never had out on the table and given the size of it, perhaps is a little unsurprising.

The map shot below shows how massive a game this is with a hex scale of 1.6 miles, daily turns of eight hours (two day turns and one night turn and units representing, brigades, regiments and battalions, and for those willing to commit the time and effort the potential to play right through to December 30th, incorporating Operation Nordwind and the Allied counterattack in the wake of clearing skies and the return of the tactical and strategic air forces to hammer the Germans back to their start lines.

The glorious map from Ardennes'44 as presented in the Vassal module with the German start forces lined along the bottom map edge in highlighted army group/divisional areas (blue, grey and red) and with German army boundaries (red hex lines) extending into the US sectors to prevent units intermixing in the early days of the German offensive. 

The size of the game illustrates well why Vassal is such a great platform to play on, having allowed us to play about a day's action of US and German turns each evening, leaving the saved copy of the game ready for our return a week later to pick up where we left off with map and counter graphics beautifully displayed making it so easy to immerse ourselves in it.

A close up of the German start line and the various units displayed in the positions awaiting my final adjustments as I assumed command for our game. Units not able to move from their positions are marked by yellow counters and US troops in fixed defences are shown under their +2 defence markers all set for the initial German artillery barrage prior to the first attacks to go in.

As with all Bulge games the situation presented to both players is what it was historically with a large number of German units looking to barrel along the few roads that run against the grain of the country, namely gaps in the mountains and hills and across rivers to eventually get out into more open country before crossing the River Meuse and on to Antwerp, leaving the shell shocked American defenders to do their best to slow the Germans at those choke points to allow their powerful reinforcements time to get into position to stabilise the offensive before pushing it back.

Thus we approached the game on that basis focussing our attention on working towards those objectives whilst learning the game play as we went, which is generally how we get to grips with all our first game plays, after a read through of the rules and a sharing of our learning, and in the end we decided to play the six turn scenario (ending December 18th) which focusses on the early German drive to secure key towns (ten) together with, if possible, exiting the first German spearhead units off the map.

The Turn Record Track and Reinforcement schedule illustrates the two day turns which include a German and US turn in each followed by a night turn, with limited movement options and during which the US player goes first. As can be seen big stacks of US reinforcements are due on the17th and 18th of December as the Allies wake up to what is happening. 

My basic plan to start the offensive would have to be to get my infantry on both sides of the River Our that runs along the German start line parallel to the West Wall fortifications bringing overwhelming force where possible to the US forces holding that line, ideally near to key bridges which I hoped to capture to allow my armoured and mechanised units to start to break into the American rear areas.

On the right of the German line in the red area occupied by Dietrich's 6th Panzer army spearheaded by 1st and 12th SS Panzer Divisions, the river was not an issue but here the road network up to Malmedy is more limited in the number of approach routes and with stronger US units in position with others close by ready to reinforce via Eupen and Monschau.

Key VP Towns highlighted in red circles, and grey/red if captured. Grey arrows show spearhead attacks by Panzer Divisions.
Day One (first two day turns and one night turn), at the end of 16th December on the 7th Army/6th Panzer Army Front and German units have pushed the American defenders off the River Our, threatening to push through to St Vith and Bastogne, with key bridges held and others under construction and two VP towns (Echternach and Clervaux) in German control.

As it turned out, a combination of massing large attacks of four and five to one using the copious amounts of German artillery on the first day of the offensive together with my die rolls being blessed by the Devil with numerous '1's' and '2's' (low rolls are good in Ardennes'44), Steve's defenders were rapidly pushed back or destroyed on the 7th Army/6th Panzer Army Front with victory point towns of Echternach and Clervaux taken on the first day and routes opened up to three others (Ettelbruck, Wiltz and St Vith), with the capture of ten such towns giving victory to the Germans in the six turn (16th  to the 18th December) scenario.

The Germans are blessed with 'Big Cats' and Panzer Grenadiers, but you still need to get them to where they are needed in country not best suited for driving a Tiger II around.

However the desperation built into the very planning of this offensive is well modelled as the German player discovers the limited capacity of dragging forward his artillery to support further attacks across the River Our and a limit placed on the number of artillery units able to reactivate on the succeeding days due to limited stocks of ammunition and the reduced ability to bring them forward; as well as the hold ups on poor roads in bad weather caused to German follow up units waiting to use the limited number of river crossings, and if that was not bad enough, the road blocks the US player can start to lay down ahead of German spearhead units, simulating the occasional Allied air attack or other similar hold ups.

Artillery and armour are key to German attacks in that they help shift a two or three to one attack with column shifts up to four and five to one and US units left in their wake are taken care of by the slower moving infantry and Volksgrenadier regiments who look to isolate them and attack the weaker units or cause the 'low morale/straight off the boat' units to surrender.

As my lead infantry units sought to consolidate river crossing points to facilitate the forward movement of the panzer units, I started to discover the need to push the Americans well back from them as Steve managed to blow a few bridges after I had crossed them but having failed to get his infantry further away from them, leaving them open to infiltration attacks - oh well, did I mention about learning the rules as we played!

Key VP Towns highlighted in red circles, and grey/red if captured. Grey arrows show spearhead attacks by Panzer Divisions.
End of Day One on the 6th Panzer Army front, and despite 1SS forcing their way into Bullingen with KG Peiper leading the charge to threaten Malmedy and the Monschau Road, the single road through the Losheim Gap illustrates well the problems faced on this front, with a strong US defensive line in front of Rocherath/Krinkelt funnelling the SS divisions either side and reducing the frontage of the offensive to just one or two lead units and with 12th SS unable to push forward in heavily forested terrain. 

The 6th Panzer Army front sets different problems to the German player with a very strongly held US defence line next to the Losheim Gap really limiting the approach routes, but with a successful attack by Kampfgruppe Peiper into Bullingen the race was on to get to Malmedy before the Americans could block the road effectively.

With German units on the road to St Vith and Bastogne and with KG Peiper in Bullingen, can the offensive keep going before the US reinforcements move in?

In Part Two, we'll see how well the German offensive continues on into the 17th December as Steve's American front line attempts to recover from the shock and early success of the German attacks.

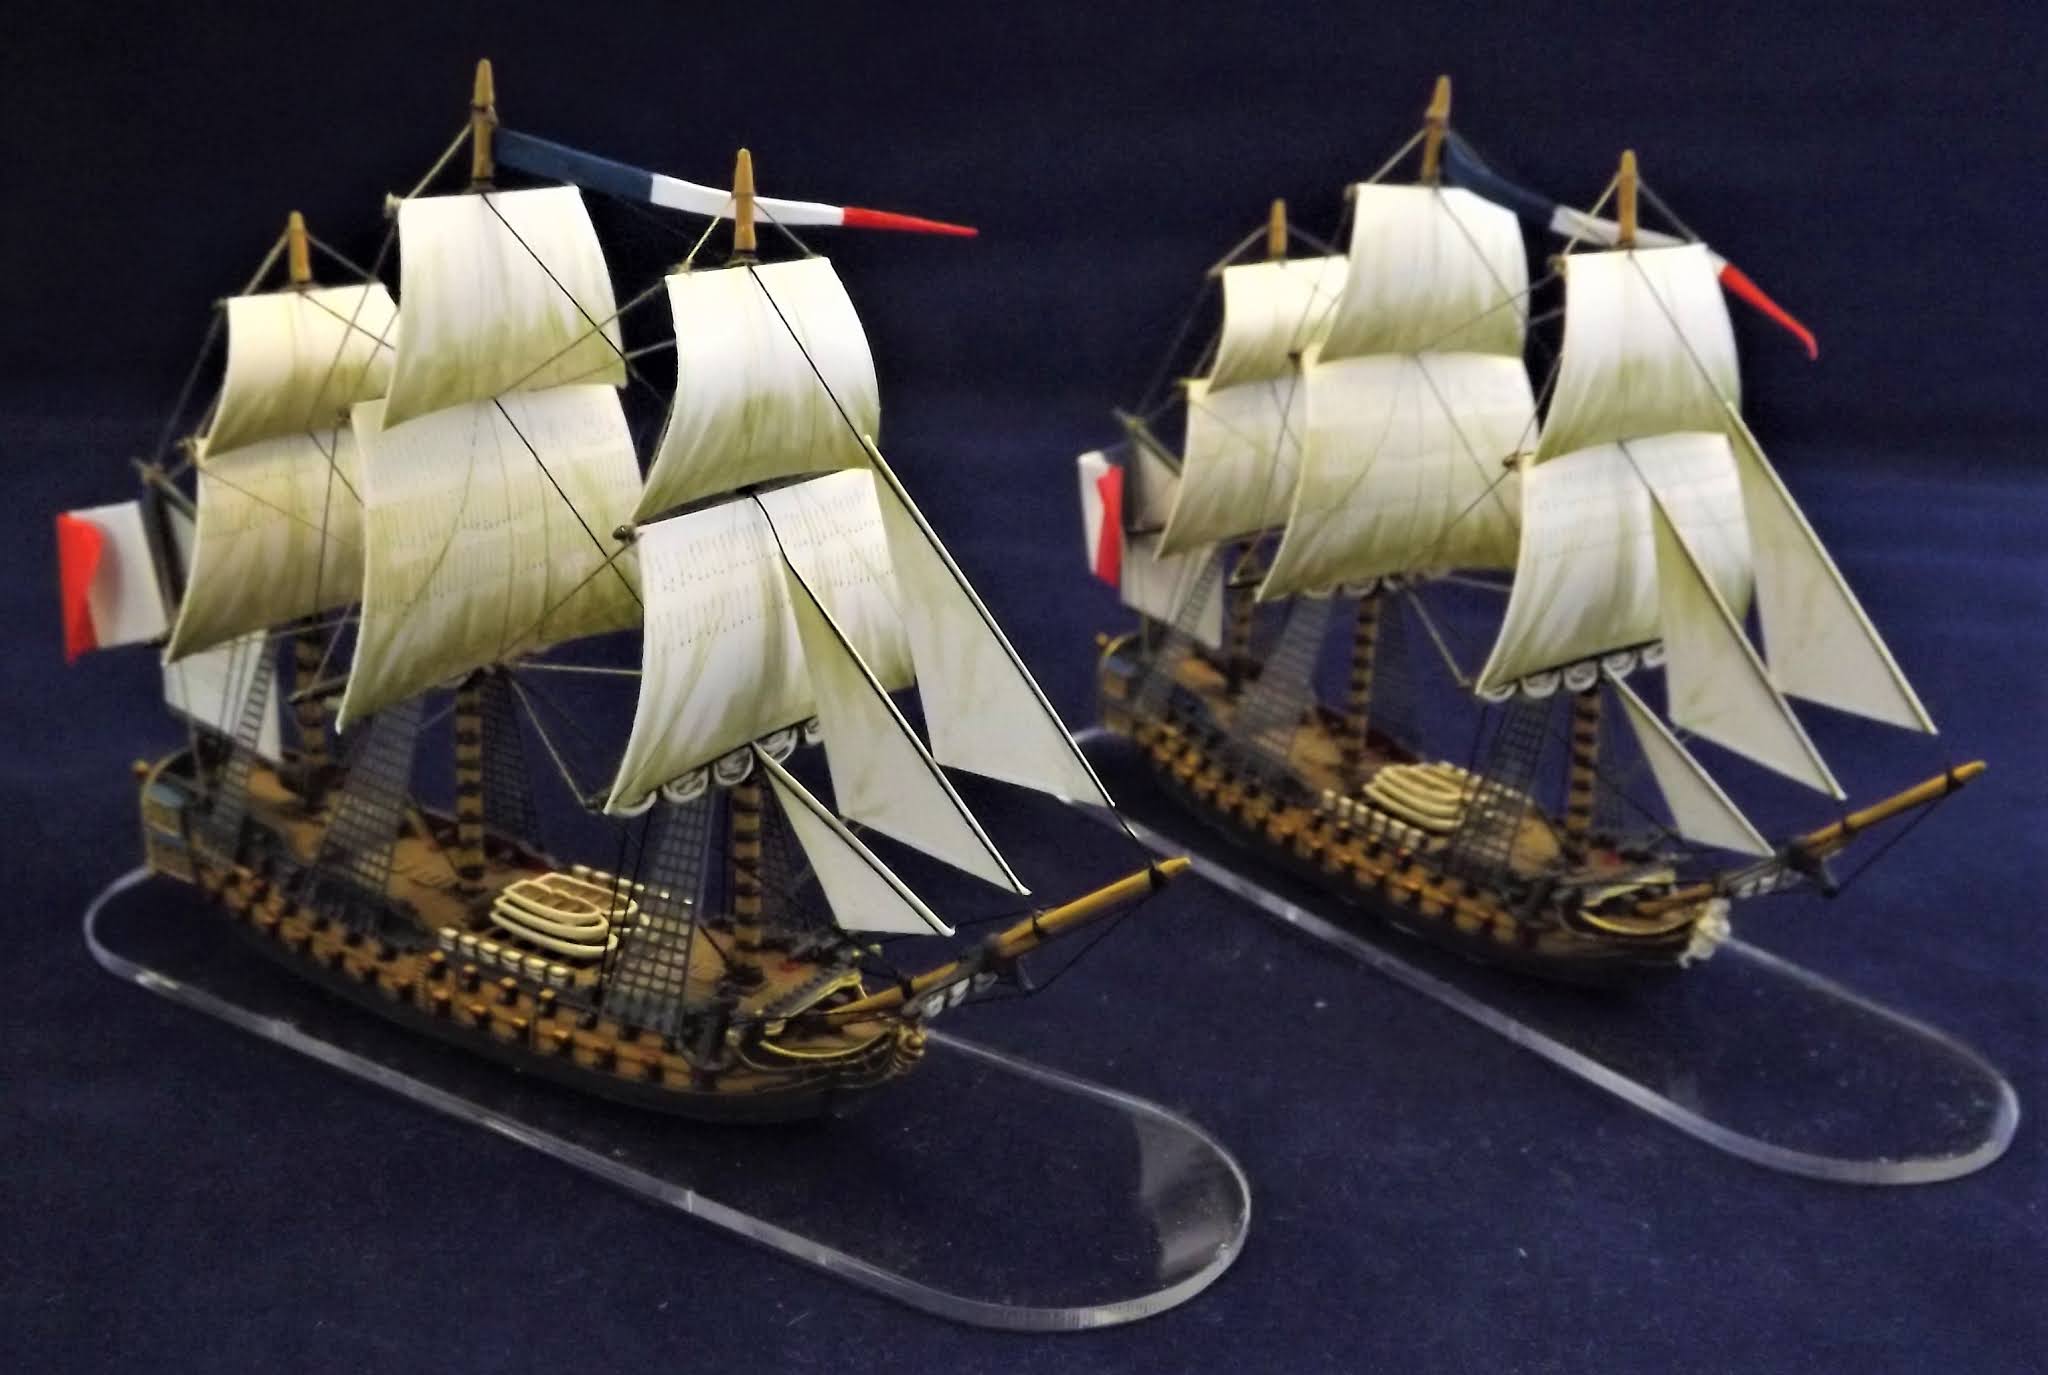
Next up: The Trafalgar Build project is coming to a conclusion as the last twelve models await work in JJ's shipyard and I take a look at the collection to date and further ideas about putting together a 'big game', post-pandemic restrictions on social gathering.

Saturday 13 February 2021

All at Sea - Generic French 3rd Rates in Revolutionary War Trim

 
After adding six generic British 3rd rates to the collection just before Christmas, I set about doing six generic French 3rd rates which would have been completed last month but for my decision to get some models out on the table to do the Leeward Line scenario and the Scourge versus Le Sans Culottes game.

Not the greatest of years ended on a high for me, managing to get my six additional British generic third rates finished, and taking a big chunk out of the models left yet to be built and keen to get started on the French in 2021
http://jjwargames.blogspot.com/2020/12/happy-christmas-2020-what-interesting.html

These reinforcements for the Combined fleet move the Trafalgar build project into its final stage with just eleven more models needed to be added to complete the sixty odd models needed for the project.


It is very satisfying working through several of these models in one go and I have now developed a settled production line method of constructing, painting and rigging these kits to get a batch of six models completed in about three weeks.

Generic 74's Pair One


Given that my preceding French models have been done in regular chequer-board paint schemes I decided that my next group of generic models should add a bit of variety to my French squadrons by including models completed with a more Revolutionary look to them, forgoing the dark black-grey strake along the centreline of the lower and upper gun decks with a yellow-ochre look instead together with similarly painted gun-ports to give them that distinctive broad strake of the earlier period ships.

Jacques-Noel Sane, chief French ship designer of the era

In addition I decided to have them look like a variation on a theme, which the Sane led designs of French ships no doubt encouraged and so I used the same stern galleries on the models and simply varied the figureheads and the colours (gold and white-ivory) of them to give that variation effect, together with slightly different colour trims (red, gold and white) to the galleries as well.

Generic 74's Pair Two


The French 74-gun Mont-Blanc and other ships off Marseilles 1803 - Ange-Joseph Antoine Roux
The typically French rounded stern galleries are well illustrated in Roux's picture and caused me to choose the most rounded version supplied in the Warlord box set.

Generic 74's Pair Three

Admiral Villeneuve had fourteen French 74-gun and four 80-gun third rates at Trafalgar and with all the 80-gunners complete and now twelve 74's alongside them I just have two more 74's to do.


In the next All at Sea post, I'll review what's left to complete the ship build part of the project and some of the other thoughts I have about the collection as a whole and the game I would like to recreate which follows on from some of the considerations discussed in my previous post looking at rule sets; then I will post the first pictures of the first fleet to get finished which will be Villeneuve's Combined Franco-Spanish fleet of thirty-three ships of the line, five frigates and two brigs.


Next up, Steve and I have been battling away in the Ardennes forests and hills for the last four weeks and much fun has been had with Vassal hosting GMT's Ardennes 44.