
 |
| 'Captain Bligh goes to War', HMS Director leads the attack of the Leeward Division at Camperdown - Geoff Hunt |
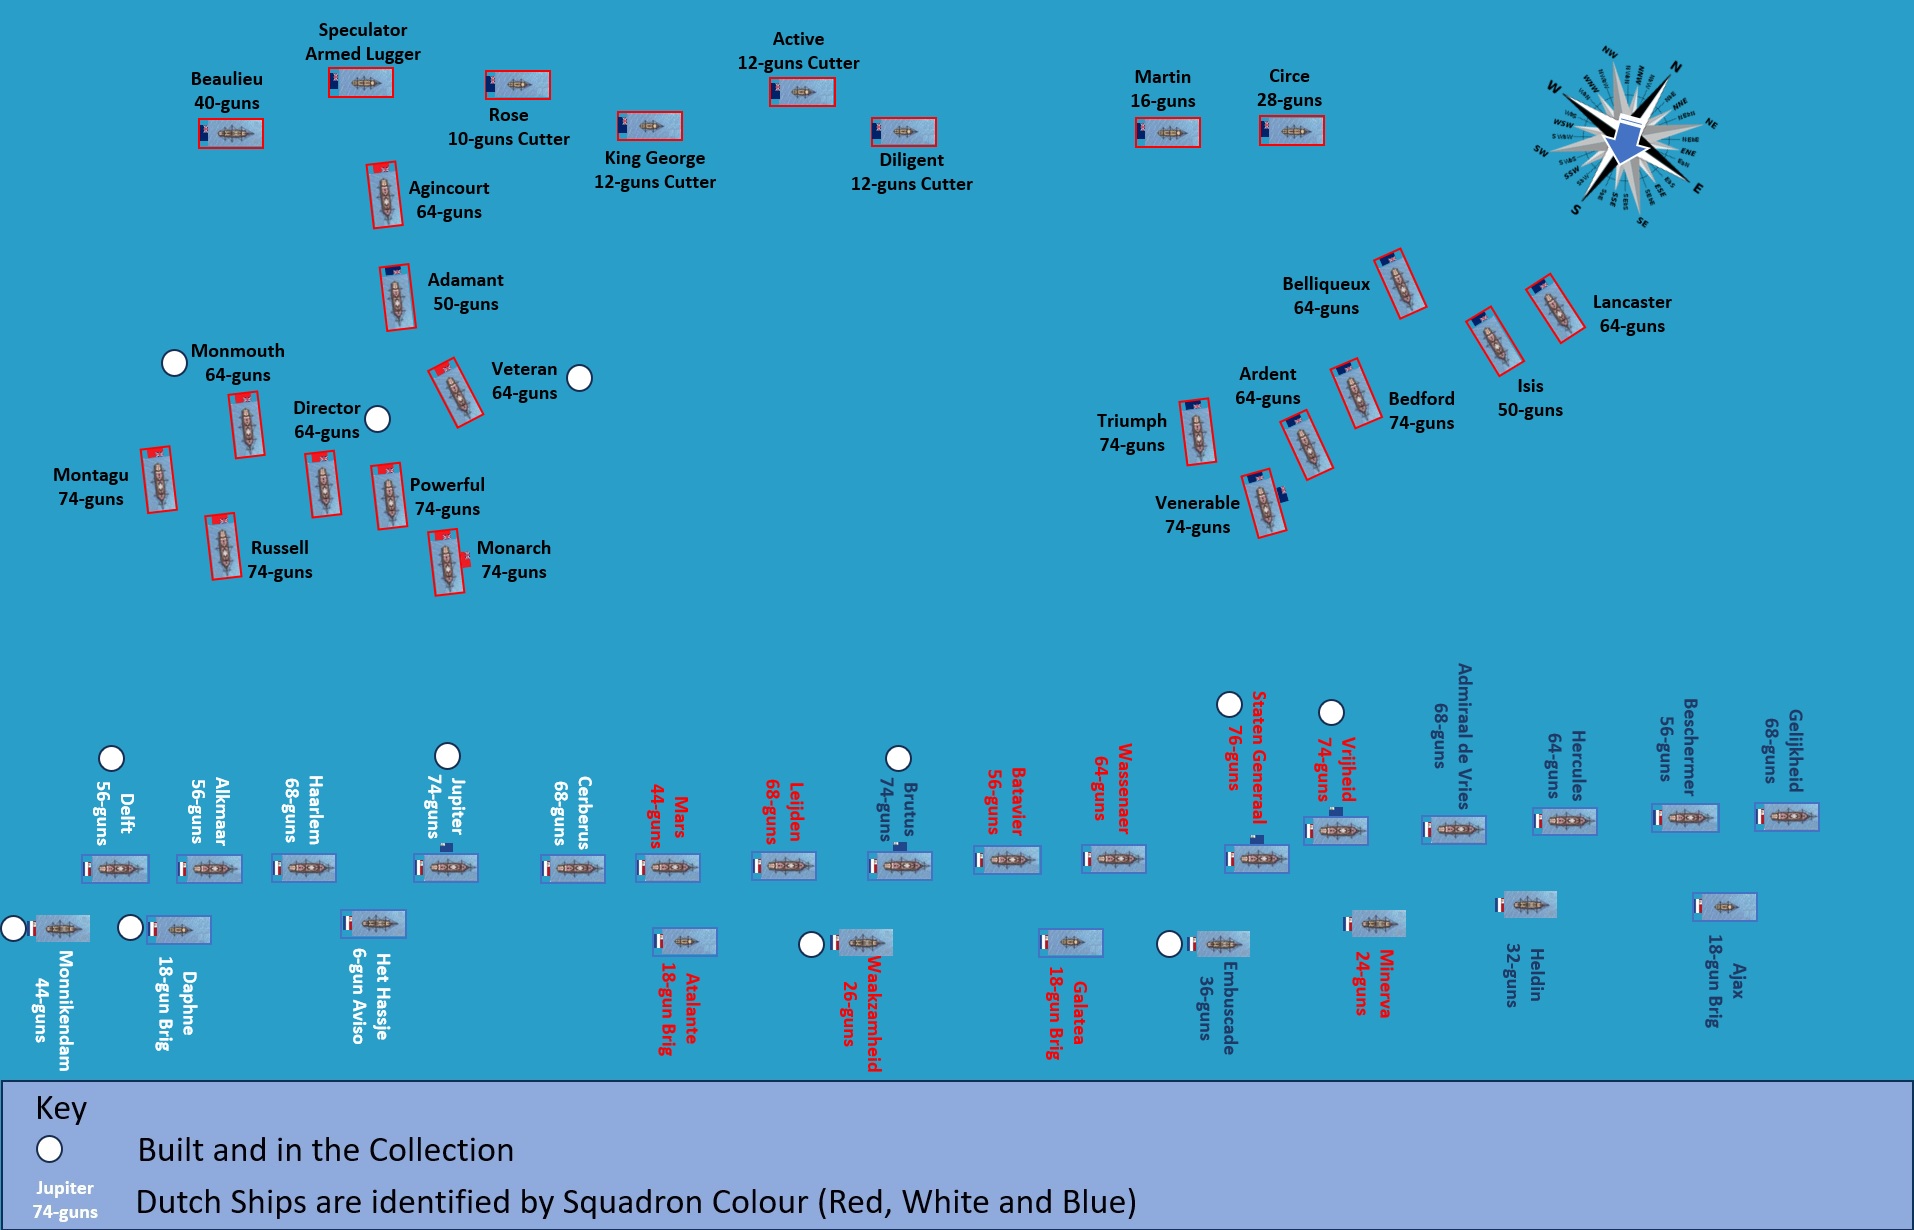
Following on from Part One, see link below, of this 'Project Build' series of posts looking at my progress in building the British and Batavian-Dutch Fleets for the Battle of Camperdown, I have turned my attention to the British fleet, and in particular the nine ships that made up the Leeward Division, under the command of Vice Admiral Richard Onslow.
 |
| JJ's Wargames - All at Sea, Battle of Camperdown, Project Build Part One |
As you will see from the Order of Battle below, the fighting force of the Leeward Division consisted of its eight third rates, 74-gunners and 64-gunners, four of each, and initially I have started with the latter, carrying the red ensign of Sir Richard's colour.
 |
| Vice Admiral of the Red, Sir Richard Onslow - Thomas Philips (National Maritime Museum) In the next post I will look at Sir Richard Onslow and his part in the Battle of Camperdown when I showcase his flagship, HMS Monarch and two other of the Leeward Division's 74's, HMS Montagu and Russell. |
As could be the case with naval battles from the age of sail, sailing order would give way to where a captain found himself when the gunfire started and Camperdown is no different, with the British focussed on making best speed to close with the enemy when Duncan realised the Dutch were attempting to close with the shore, and directing his fleet to close quickly, and break through their line to engage on the leeward side, regardless of sailing order and the Dutch squadron arrangements not quite working to plan as the three columns shook out into line of battle just before midday and the flagship Brutus ending up away from the rest of the blue-squadron in the line that met the British attack.
 |
| With the addition of the four Dutch flagships, I've made a good start on the Batavian fleet and it was time to start getting stuck into the British so that I can bring these two fighting forces together as a joint project |
The illustration I have created above is based on the map from the book 'de Delft' as shown in Part One of this series of posts, and I created it to try to make sense of the various maps and accounts of the two fleets organisation and sailing orders as the battle commenced, with the Batavian Dutch arranged in squadron groups of red, white and blue, similar to the British system, although it is uncertain whether they had adopted this organisation prior to the battle.
In addition I intend to use it as a way of tracking progress in the build, hence those models highlighted that have already been built and are part of the collection, including these new British 64's.
This illustration may well be subject to change as I discover new facts about this rather enigmatic battle, and I should add that much of the light ship arrangements shown are rather speculative and based on educated guesswork as to where they may have likely positioned themselves before the battle, mixed with those I have evidence from various sources that they actually were in and around the area shown
 |
| The actual Leeward Command as detailed in Clowes Vol. IV Page 326, with it seems the frigate Beaulieu in attendance to repeat signals and to tow out damage friendly ships or prizes, and as mentioned, Admiral Duncan's signal to make best sail towards the enemy sees the fourth-rate HMS Adamant end up as part of Onslow's command, as shown in the plan above. |
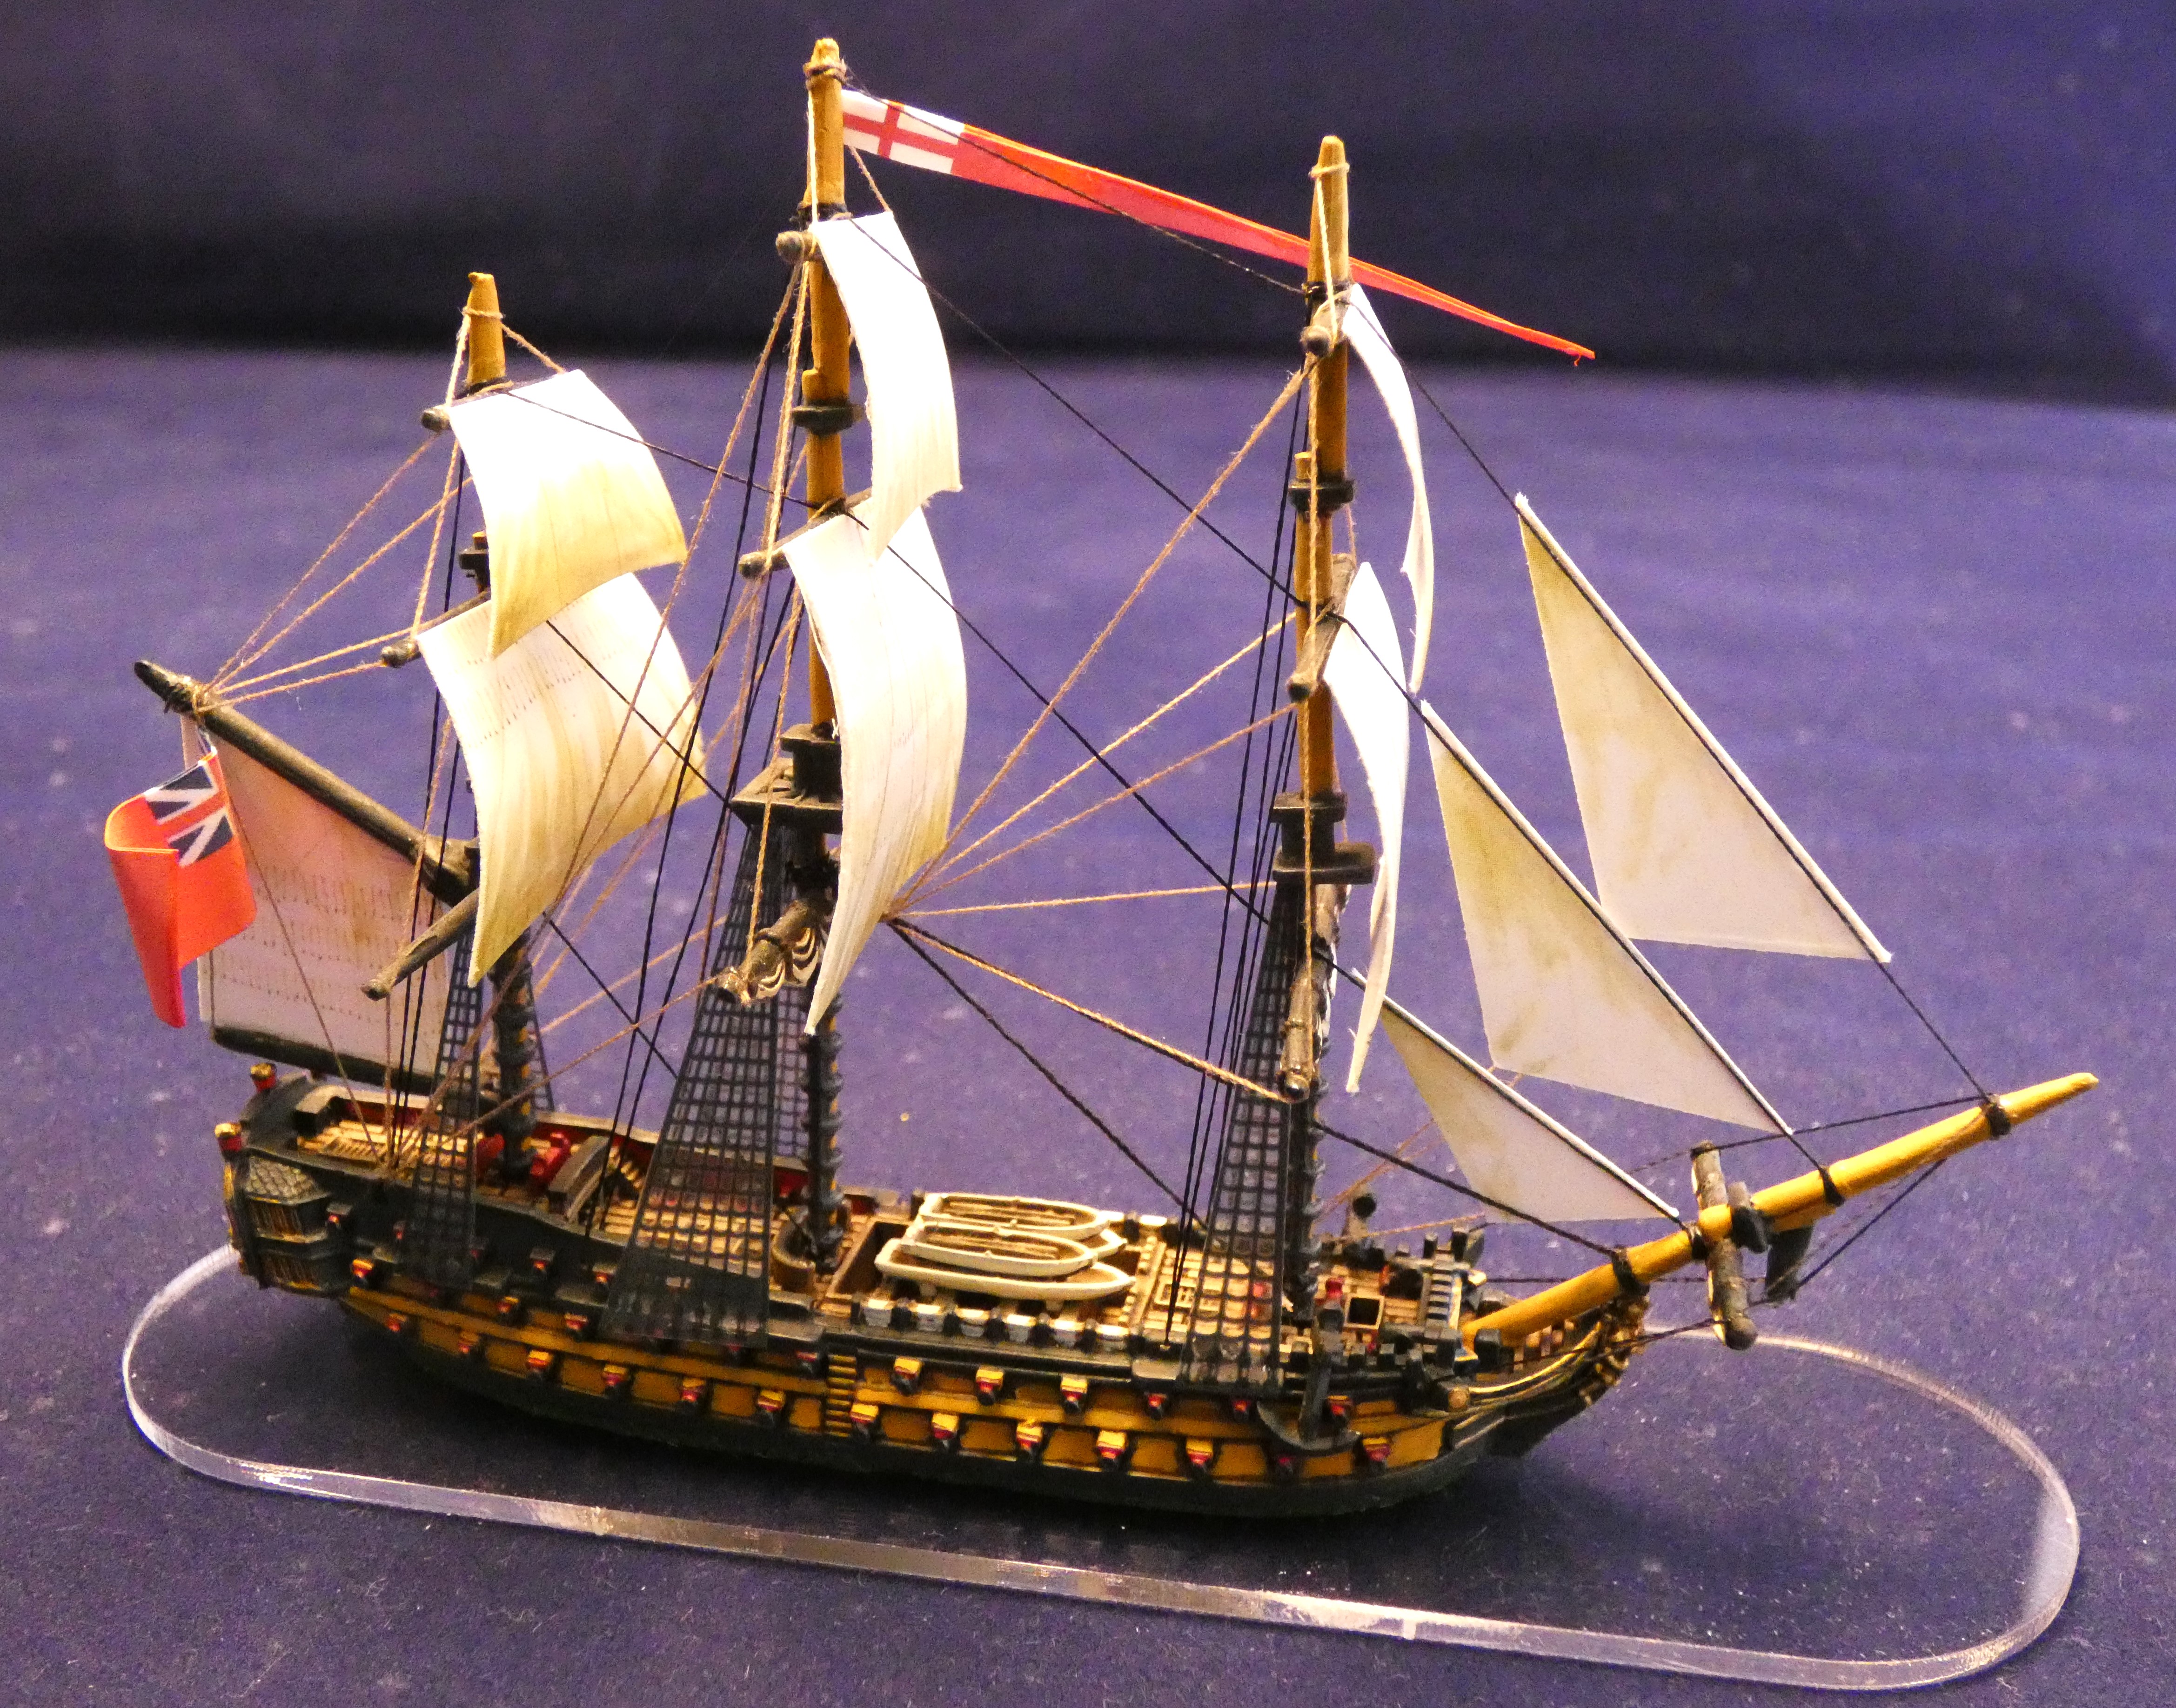
For this part of the project build, I decided to use the first of the Warlord small third rate models that they launched with, that originally came with metal mast components, that have since been replaced with the plastic third rate set that comes with the 74-gun sprue.
As the British had upgraded their 64's to have the more modern gaff and boom spanker sails, and the metal is a lot less easier to modify than the plastic, it made sense to use these for my British, reserving the plastic options for my Dutch where I will need to create the lateen rigged mizzens.
 |
| Cross of St Patrick, added to the Union flag in 1801 after Camperdown |
As mentioned in the preamble to my first post, I have decided to flag my Camperdown British in the colours they carried on the day, namely red and blue ensigns, and so I have produced my own set of colours with the Union canton excluding the Cross of St Patrick that was not added until 1801 with the Act of Union which saw the addition of the Irish symbol to the existing flag and creating the modern Union Flag, more commonly referred to as the Union Jack.
The Warlord small third-rate was designed to incorporate plastic components from the 74-gun third rate, which also includes the use of the figureheads, one of which I incorporated into these models, with the first one illustrated using one of the plastic options, which adds to the variety you can create with these models
HMS Director
HMS Director was a St Albans class 64-gun third-rate ship of the line designed by the great British naval architect Sir Thomas Slade famous for his other designs that included, HMS Victory, Agamemnon and Bellerophon, to name but a few, and she was built at Gravesend, Kent, launched on 9th March 1784.
Her general characteristics were:
Tons burthen 1388 (bm)
Length of gundeck 159 feet
Beam 44 feet, 4 inches
Depth of hold 18 feet, 10 inches
Her armament consisted of:
Gundeck: 26 x 24-pounder long guns
Upper gundeck: 26 x 18-pounders long guns
Quarterdeck: 10 x 9-pounder long guns, 6 x 18-pounder carronades
Forecastle: 2 x 9-pounder long guns, 2 x 24-pounder carronades
The service record of the Director prior to the Battle of Camperdown shows the ship being fitted out as a Medway guardship in 1789 before fitting out as a ship of the line the following year in response to the Spanish Armament crisis after the Nootka Sound incident.
 |
| Captain William Bligh illustrated here in 1792. Most famous for his role in the mutiny of HMAV Bounty in 1789 |
Returned to Ordinary in June 1790, the Director would be fitted out for war service in 1796 at Chatham and recommissioned under Captain William Bligh who would remain with her until 1800.
 |
| The mutinies among the ships of the Channel (Spithead) and Nore Squadrons was a principle cause of the French plans to bring together the Dutch and French fleets at Brest possibly in support of another invasion attempt. However the Dutch fleet did not sally forth until after the mutinies had been resolved. This caricature of the meeting held on the 20th May 1797, at which the 'Delegates of the Fleet' presented their list of eight demands, shows Admiral Charles Buckner (extreme left), Commander in Chief, The Nore, and President of the Delegates, Richard Parker ( extreme right) who was later hanged for treason and piracy from the yardarm of HMS Sandwich 90-guns, the vessel where the mutiny started |
The Director was one of the ships that mutinied in the Nore Squadron during the Spithead and Nore Mutinies that occurred on the 12th of May 1797, with the Director being the last ship to raise her colours in submission to the authorities, it later being learned that Bligh's nickname among men in the fleet was 'that Bounty bastard'.


In my next post covering HMS Monarch and Sir Richard Onslow, I will take a look at the 1790 Signal Book and the signalling made during the battle in a bit more detail.
In the previous post looking at the Dutch flagships I mentioned how poor in general the British ships logs are for Camperdown, except for perhaps one, the notable exception being Captain William Bligh's Director, which might not have done him any harm in seeing him awarded his Naval Gold Medal and is worth recounting here, whilst looking at my interpretation of the ship.
Extracts from the log of HMS Director at the Battle of Camperdown.
William Bligh, Captain, - Admirals' Journals, Vol. IV.
'October 11th. P.M. - At 12.40, the Monarch (Vice-Admiral Onslow) began to engage the Dutch Vice-Admiral in a most spirited manner. At 12.45 we began with a second ship in the rear, the Russell having just begun before us with the sternmost ship, the rest of our division came on and on all sides there was a general firing.
 |
| Battle is joined, shown here at 13.00, with the Director shown having crossed the bows of the Alkmaar firing as she bore |
The Dutch gave way, and the ships became mixed, so that it required sometimes great caution to prevent firing into one another. The Dutch began to strike, and particularly one to us, but we engaged different ships, indeed I believe most all the enemy's rear received shot from different ships of ours.
 |
| Its 14.00 and the battle has been raging for an hour and a half and the Dutch rear has all but been overwhelmed, leaving HMS Director to head for the Vrijheid, as described in Captain William Bligh's log. |
The Director was now advancing towards Vice-Admiral Onslow' s ship, when we found the ship he was engaging had struck, and the rear of the enemy done up. It appeared to me now that some force was wanted in the van, as we saw five ships unengaged and apparently not hurt, and also the Dutch Commander-in-Chief without any ship of ours engaged with him. There was no time to be lost, as night was approaching, and as there were enough ships in our lee division about the rear of the enemy to take possession of them, I made sail (and passed the Monarch) engaging some of the centre ships, for I considered now the capture of the Dutch Commander-in-Chiefs ship as likely to produce the capture of those ahead of him, and I desired my first lieutenant to inform the officers and men I was determined to be alongside the Dutch Admiral.
 |
| HMS Director raking the Dutch flagship Vrijheid - Samuel Owen |
At 3.5, we began the action with him, lying on his larboard quarter within 20 yards, by degrees we advanced alongside, firing tremendously at him, and then across his bows almost touching, when we carried away his fore mast, topmast, topgallant mast, and soon after his main mast, topmast and topgallant mast, together with his mizen mast, and left him nothing standing. The wreck lying all over his starboard side, most of his guns were of no use, I therefore hauled up along his starboard side and there we finished him, for at 3.55 he struck and the action ended. (1)
 |
| At 15.00 the Director moves in to finish the fight with Vrijheid. |
Admiral Duncan, who we knew had been severely engaged with the van of the enemy, had wore, and was now on the starboard tack standing from the shore about a half a mile to leeward of the Dutch Admiral. I therefore bore up to speak to him, when he hailed me to take possession of the Vrijheid, the ship we had just beaten, and I sent my first lieutenant on board in consequence. The Dutch Admiral, Mr. De Winter, was taken on board of Admiral Duncan, and as the captain could not be removed owing to a death wound, my first lieutenant sent to me the captain-lieutenant, who was next in command.

As soon as the action ceased, my officers came to congratulate me, and to say there was not a man killed who they knew of, and of such good fortune I had no idea, for it passed belief. Before we got up with the Dutch Admiral, we had a share with the Veteran in making a Dutch ship strike, and we passed close to leeward of a Dutch ship of the line on fire. Our defects are, our fore yard shot away, topsail yard badly wounded, bowsprit shot through, the fore topmast shot through the head, booms and boats shot through, stays, running rigging, and sails much cut.'
(1) According to the Dutch accounts of the battle the Vrijheid never struck her colours. When the masts fell the ensign was shown on a spar; this was shot away, but was replaced with a blue Admiral's flag. This again was shot away, and there was nothing left to strike. An officer hailed from the Montagu and asked in good Dutch if she had surrendered, and an officer of the Vrijheid replied, ' What do you think about it ? ' The ship was then taken possession of, apparently by the Director, though the Circe's boat took Admiral de Winter to the Venerable (D' Vrijheid, p. 201).

HMS Monmouth
The 64-gun ship of the line Monmouth had originally been built for the East India Company and given the name Belmont, but was instead purchased by the Royal Navy, one of five ships then being built in commercial dockyards along the River Thames at the start of the French Revolutionary War, herself being launched on the 23rd April 1796 and commissioned in September.
Three of the other purchases, later named HMS Ardent, Agincourt and Lancaster would serve alongside her at the Battle of Camperdown.
Her general characteristics were:
Tons burthen 1440 (bm)
Length of gundeck 173 feet 1 inch
Beam 43 feet, 4 inches
Depth of hold 19 feet, 8 inches

Her armament consisted of:
Gundeck: 26 x 24-pounder long guns
Upper gundeck: 26 x 18-pounders long guns
Quarterdeck: 10 x 9-pounder long guns
Forecastle: 2 x 9-pounder long guns.
 |
| HMS Monmouth in company with East Indiamen in 1808 |
The Monmouth was also involved in the Nore mutiny, with the crew taking her first lieutenant, Charles Bullen, prisoner and threatening to execute him.
 |
| Captain William Carnegie, Earl of Northesk |
Her then captain, William Carnegie, Earl of Northesk, who would serve as third in command in 1805 with Nelson and Collingwood at Trafalgar, was confined to his cabin by the mutineers, but managed to intervene and he was then selected by the mutineers committee to carry their terms to the king, he having a reputation as a friend to seamen


"Now, my lads, you see your enemy before you. I shall lay you close on board, and thus give you an opportunity of washing the stain off your characters with the blood of your foes. Go to your quarters, and do your duty."
Monmouth would engage both the Delft and the Alkmaar during the action, capturing both, that would leave the Delft very badly damaged, likely causing her to sink on passage back to England, and leave the Monmouth with five killed and twenty-two men wounded.

As with HMS Director, the log of the Monmouth has an interesting account of the action.
Extracts from the log of HMS Monmouth at the Battle of Camperdown.
James Murray, Master, - Official No. 2807.
'October 11th. P.M. At 15 minutes past 12, the Vice-Admiral began to engage, and broke the enemy's line, passing under a Dutch admiral's stern. At 20 minutes past, the second ship in the enemy's rear began to fire on us, which we returned, and passed through their line astern of our opponent engaging on both sides. The action now became general.
 |
| At 13.00 Monmouth passed through the enemy line recording '. . . the second ship in the enemy's rear began to fire on us, which we returned, and passed through their line astern of our opponent engaging on both sides.' |
At 50 minutes past 12, the Russell shot up alongside the weather ship we were engaging and began to engage also, several of whose shot having struck us, we desisted firing for a time upon the enemy lest our shot might injure the Russell.
 |
| HMS Monmouth in action with Delft, with the Alkmaar close by demolished by the British third rate earlier in the battle. |
The ship on our larboard bow, which we had been engaging for 50 minutes, having lost her main topmast and mizen mast, we hove all aback to engage the ship astern of her, and after having exchanged three broadsides with him, observing he kept away, bore round up, ran athwart his hawse, raked him, and backing alongside him to leeward engaged him very close for 40 minutes, when he struck to us and proved to be the Delft, of 66 guns and 375 men.
 |
| At 14.00 the Monmouth has been engaged with the Alkmaar for 50 minutes and has now 'hove all aback' to engage the Delft. |
Lowered down the cutter and sent the 1st lieutenant and men to take possession of her. Filled and shot to the before-mentioned ship, which had lost her main topmast and mizen mast, which after firing a few shot at, she bore up towards us and said she had struck. Soon after the Agincourt running athwart our hawse fired 2 shot into us.

Hoisted out another boat and sent an officer and men to take possession of her. Found her to be the Alkmaar, of 56 guns and 350 men. People employed repairing the damages received in the action.
 |
| It's 15.00 and the Delft has struck, the fight recorded in the Monmouth's log; 'having exchanged three broadsides with him, observing he kept away, bore round up, ran athwart his hawse, raked him, and backing alongside him to leeward engaged him very close for 40 minutes, when he struck to us and proved to be the Delft, of 66 guns and 375 men.' The Delft was no 66-gunner but she certainly fought like one! |
At 7, made sail, the most disabled prize in tow. At the close of the battle, perceived that 8 sail of the line and a frigate had struck, among which was their Commander-in-Chief and their Vice-Admiral. During the action, perceived a Dutch line-of-battle ship on fire abaft. At 12, moderate breezes and cloudy; prize in tow.'
HMS Veteran was a Crown Class 64-gun ship of the line designed by another great British naval architect, Sir Edward Hunt, and launched at East Cowes on the 14th August 1787, one of his last ships, following his death earlier that year, that saw the new 74-gun ship go into the Ordinary having cost the exchequer £38,954 to complete after fitting out and coppering, just over £7.5 million in today's money.
Commissioned in March of 1793, Veteran was made ready to join Admiral Howe's Channel Fleet, before being ordered to join the Leeward Islands Squadron in November of that year sailing under the command of Captain Lewis Robinson, who would be killed in operations against the French island of Martinique.
She would complete her service in the Caribbean in 1796, returning to England to be paid off in the October of that year.
Her general characteristics were:
Tons burthen 1397 (bm)
Length of gundeck 160 feet 6 inches
Beam 44 feet, 6 inches
Depth of hold 19 feet, 5 inches

Her armament consisted of:
Gundeck: 26 x 24-pounder long guns
Upper gundeck: 26 x 18-pounders long guns
Quarterdeck: 10 x 9-pounder long guns, 6 x 18-pounder carronades
Forecastle: 2 x 9-pounder long guns, 2 x 24-pounder carronades
.jpg)
Veteran was returned to service in May of 1797 under the command of Captain Abraham Guyot, who would command the ship until the arrival of the man who would take her into action at the Battle of Camperdown, Captain George Gregory, where she would suffer 4 killed and 21 wounded.

Her role in the battle saw her cut across the Jupiter before turning in pursuit of the Dutch centre and following the Dutch defeat played an important role in the struggle to save the battered Delft, sending across a tow line to the stricken Dutch fourth-rate in rising seas, and later sending across the first rescue boat to bring off the Dutch wounded.
So finally to round up this post, the log of HMS Veteran and her record of the Battle of Camperdown.
Extracts from the log of HMS Veteran at the Battle of Camperdown.
EDWARD GROUNDWATER, Master. Official No. 3094.
at 12, to engage, the Belliqueux and Russell to port in succession;
at 12.20, the Belliqueux to keep her station;
at 1.10, Adamant to engage;
10 minutes past 3, we made No. 68; Admiral Nos. 101, 10, 100, 171 and 7; at 4, Admiral Nos. 109,
64, and 171.
10 minutes past 1, one of the enemy's ships of the line and a frigate struck.

About 1 we stood into the enemy's line, firing our broadsides at such ships of the enemy as we could bring them to bear on. At 20 minutes past 1, perceived one of the enemy's ships on fire.
 |
| The log report above records the movement of the Veteran seen here as she passed the Jupiter, flagship of Vice-Admiral Reyntjes |
The action appeared now to be general. 24 minutes past, supposed the enemy's Vice-Admiral from his flag being down to have struck.

About 2, we was in close action with a ship of the line and a frigate. The former bore up, when we raked her till she struck and [she] proved to be the Gelijkheid. Stood on firing at such ships as had not struck. Observed shortly after such ships as had not struck endeavouring to escape.
 |
| By 14.00 the Veteran had moved to support the battle with the Dutch van, engaging the 68-gun Gelijkheid. Note the position of the Dutch 64-gun Hercules observed to have been on fire by the Veteran at 13.20 |
 |
| A section of a painting of the battle by Thomas Luny, showing the Dutch Hercules 64-guns on fire, an incident recorded in the log of HMS Veteran as she moved to support the fighting with the Dutch van. |

At 45 minutes past 2, the action ceased. Sounded occasionally in 10 and 9 fathoms. Egmond-aan-zee, SE by S, 4 leagues. Answered our signal to stay by prizes in the NE. Lost in the action 3 men killed and 25 wounded, 3 guns disabled and our sails and rigging much cut. Carpenters employed in stopping shot holes, ship's company in knotting and splicing the rigging.
 |
| At 15.00 Veteran and Belliqueux are shown alongside the now struck Gelijkheid with, as the log of the Veteran records, a boarding party sent over at 19.00 to secure the prize, together with other men sent across to the Vrijheid. |
At 7, sent an officer with a party of men on board the Gelijkheid, and a petty officer and 10 men on board the Vrijheid, the Admiral de Winter's ship. The Circe took the latter in tow. Made and shortened sail occasionally. Standing to join the fleet.

At 8, Egmond E by S. The Admiral WNW 4 miles, Montagu, Circe, and two prizes in company. At n, saw 9 sail of the enemy's ships bearing SW by S 3 or 4 miles. Spoke the Montagu and Circe.'
I intend to finish building the strictly eight, but including the fourth-rate Adamant 50-guns, nine ships of the British Leeward Division with three of the 74-gunners next to feature, Montagu, Russell and Sir Richard Onslow's flagship, Monarch.
Next up, Mr Steve and I enjoyed a couple of days last month exploring some famous English Civil War and Medieval battle sites, together with a few Tolkienian landmarks in Oxford, and the Odyssey to the Antipodes continues as Carolyn and I headed further north into Queensland, Australia.
More anon
JJ
I appreciate these morning posts. I have not yet read it because I am still awake after the England Rugby defeat and to be honest your posts form part of my Sunday breakfast routine . I have always thought in any case that daylight better rewards the photos of your wooden walls. I have boardgamed the subject but never with miniatures. Strange because we are an island race. I have dabbled overly with WW1 and ironclads, I cannot paint rigging. Nevertheless I like the cut of your jib. With best wishes as always.
ReplyDeleteHi and thank you,
DeleteI often have a likely reader in mind when I sit down to compose these posts and your picture of a Sunday morning retreat from an England rugby defeat to the delights of escape into hobby and history has been added to the collection.
I hope to inspire others to indulge in wargaming our naval history, as the exploits and achievements of the men, women and children, all of whom served on board these amazing wonders of 18th & 19th century technologies deserve to be remembered and the games generated often bring to life the narrative of their real life exploits in a much more vivid way than simply reading a book.
In addition there is an added thrill in trying to create a three dimensional tabletop vista of a Pocock or Whitcombe painting of one of the great naval actions of the era added to the narrative of players struggling with the command decisions and factors their real life counterparts had to contend with.
History and Art combined.
Kind regards
JJ