

JJ's Royal Dockyard continues to play host to senior dignitaries from the Admiralty and repeat renditions of 'God Save the King' from the band of His Majesty's Royal Marines as two British first rates slip down into the water to await fitting out.
This week my British collection of models has been joined by two British three-deckers, one of historical renown in the history of the Royal Navy, the other, a generic model, representing the British preference for deploying first and second rates to act as their command ships and units of power throughout key points of their battle formations.
As in the previous three posts in the series, see the links below, I have pulled together some background history to tell the story of these ships and the role they played in the Royal Navy of their time.
All at Sea - On the Stocks in JJ's Dockyard, New British Builds, Part One
All at Sea - On the Stocks in JJ's Dockyard, New British Builds, Part Two
All at Sea - On the Stocks in JJ's Dockyard, Ne British Builds, Part Three
HMS Royal Sovereign
 |
| HMS Royal Sovereign of 100-guns flying Signal 16 from her mainmast repeating Nelson's final signal at the Battle of Trafalgar - 'Engage the enemy more closely' |
HMS Royal Sovereign was designed by Sir Edward Hunt and built and launched in Plymouth, Devon on 11th September 1786 for a cost of £67,458 or just under £11.5 million pounds in today's money.
 |
| Hull plan of the 1786 Royal Sovereign -National Maritime Museum |
 |
| The second HMS Royal Sovereign circa 1725 pictured as flagship at the Nore - L de Man |
As a three deck, first rate ship of the line carrying 100 guns ranging from 32-pounder, 24-pounder and 12-pounder long guns, she was a powerful addition to the fleet and was at the time the third ship in the Royal Navy to carry the name, preceded by King Charles I's, Sovereign of the Seas 90-guns, later renamed Royal Sovereign launched in 1637 and the Royal Sovereign 100-guns launched in 1701 and flagship of the Channel Fleet in the Seven Years War.

Her first significant action was as part of Admiral Lord Howe's fleet at the Glorious First of June in 1794 under her commander, Captain Henry Nichols and being a 'fast sailing ship' the flagship of Howe's second in command, Vice Admiral Sir Thomas Graves, commanding the van division aboard which he would lose a leg in the battle
 |
| Vice Admiral Sir Thomas Graves c.1794 - Francesco Bartolozzi |
Royal Sovereign was one of four ships in Howe's fleet to take significant casualties in the exchanges of fire between the two fleets on the 29th May with eight killed and twenty-two wounded, that saw the Channel Fleet as a whole suffer 67 killed and 128 wounded and left Royal Sovereign with material damage to her masts and rigging, however by 10.30 the next morning all ships except HMS Caesar reported to Admiral Howe that they were ready for action.
However the French had taken more heavy damage and suffered a corresponding casualty rate that left the fleet the worse off with Indomptable 80-guns, needing a dockyard refit, Tyrannicide 74-guns without any topmasts and having to use its lower sails whilst placed under tow and Terrible 110-guns and Eole 74-guns, with significant hull damage. In addition Admiral Villaret-Joyeuse had the disappointment of seeing his lead ship Montagnard 74-guns depart the fleet on the evening of the 29th without any explanation soon followed by the corvette Venus 28-guns, sent after the deserting vessel, but also not returning.
The 30th of May saw the two fleets maintain contact in poor visibility, but not engage, allowing French reinforcements of three ships of the line to arrive and allow Villaret-Joyeuse to send the Indomptable back to Brest for repairs.
 |
| The Glorious First of June 1794, painted c.1795 - Philip James de Loutherbourg |
On the morning of the 1st June 1794, the day dawned clear with a smooth sea and a moderate wind of about sixteen knots from the south-east.
At 05.00 the British fleet turned towards the French on a north-west heading, before turning to the north at 06.15 and then on a westerly heading at 07.10 when Howe signaled 'the hands to breakfast'.
With the tradition of the Royal Navy fighting better on a full stomach met, Howe signaled at 07.16 for the fleet to engage the enemy closely followed by another signal at 07.25 for them to pass through the enemy line and attack to leeward.
Howe designed to breakthrough the French line and create a 'pell-mell battle' in which the superior British sailing and gunnery skills would prove superior to the French fleet; but sadly for his plans Admiral Graves lived up to his lack lustre performance during the American War and his indecisive engagement at the Battle of the Chesapeake, together with several of the captains in his van in turning away to engage in some traditional line to line bombardment.
 |
| The Glorious First of June 1794 At 07.16 Howe signaled his fleet to 'engage the enemy closely' followed at 07.25 to 'pass through the enemy line and attack to leeward'. https://upload.wikimedia.org/wikipedia/commons/a/ab/June_1_1794_Order_of_Battle_Map_EN.svg |
Fortunately for the British, Howe would not be denied his victory, and carrying on where Admiral Rodney concluded the American War with his breaking of the French line at the Battle of the Saintes in 1782, Howe's flagship, HMS Queen Charlotte 100-guns, carved her way through under the stern galleries of the French flagship Montagne 120-guns at 10.10 am, firing a full broadside the length of the enemy ship killing some 100 of its crew and wounding another 200 in the passing bombardment.
Closely following the Queen Charlotte and using similar tactics, were HMS Bellerophon 74-guns, Leviathan 74-guns, Marlborough 74-guns, Defense 74-guns, Invincible 74 guns, Brunswick 74-guns, Ramillies74-guns, Montagu 74-guns, Royal George 100-guns and Glory 90-guns, which left the French line broken and at the end of the day six enemy ships of the line captured as prizes.
 |
| As the flagship Vice Admiral of the Blue, Sir Cuthbert Collingwood at Trafalgar, I have HMS Royal Sovereign flying a blue pennant from her foremast |
HMS Royal Sovereign would remain a key component of the Channel Squadron throughout the French Revolutionary War and in 1795 Vice Admiral William Cornwallis would raise his flag aboard her during which time she would see action in June of that year during what would become known as Cornwallis's Retreat, covered in the third post in this series and the section about HMS Mars 74-guns, that played a key role in the action.
 |
| HMS Royal Sovereign in the 'thick of it' during retreat of Admiral Cornwallis and his squadron off of Brest - Thomas Luny |
By mid afternoon HMS Mars had come under heavy attack from the leading four French ships that were chasing the British squadron and caused Cornwallis to turn the Royal Sovereign back to the aid of his hard pressed rear most ship.

The raking fire brought to bear on them by the Royal Sovereign proved to be instrumental in causing them to fall back and allowing the Mars to get away just before the French broke contact thinking a relief British squadron was over the horizon.
 |
| Admiral Cornwallis who raised his flag aboard HMS Royal Sovereign in 1795 |
Of course the most famous moment in the history of the ship would come on the 21st October 1805 when the Royal Sovereign took her place at the head of Vice Admiral Cuthbert Collingwood's Lee Column at the Battle of Trafalgar, being the first British ship to break the Franco-Spanish line, living up to her reputation as a fast sailer in the light winds that prevailed on the day..

Cuthbert Collingwood, first met Nelson in 1777 during the American War of Independence when they both served together aboard the frigate HMS Lowestoft 32-guns, that would mark the start of long and friendly relationship with both of their careers running in close parallel to one another right up until Trafalgar.
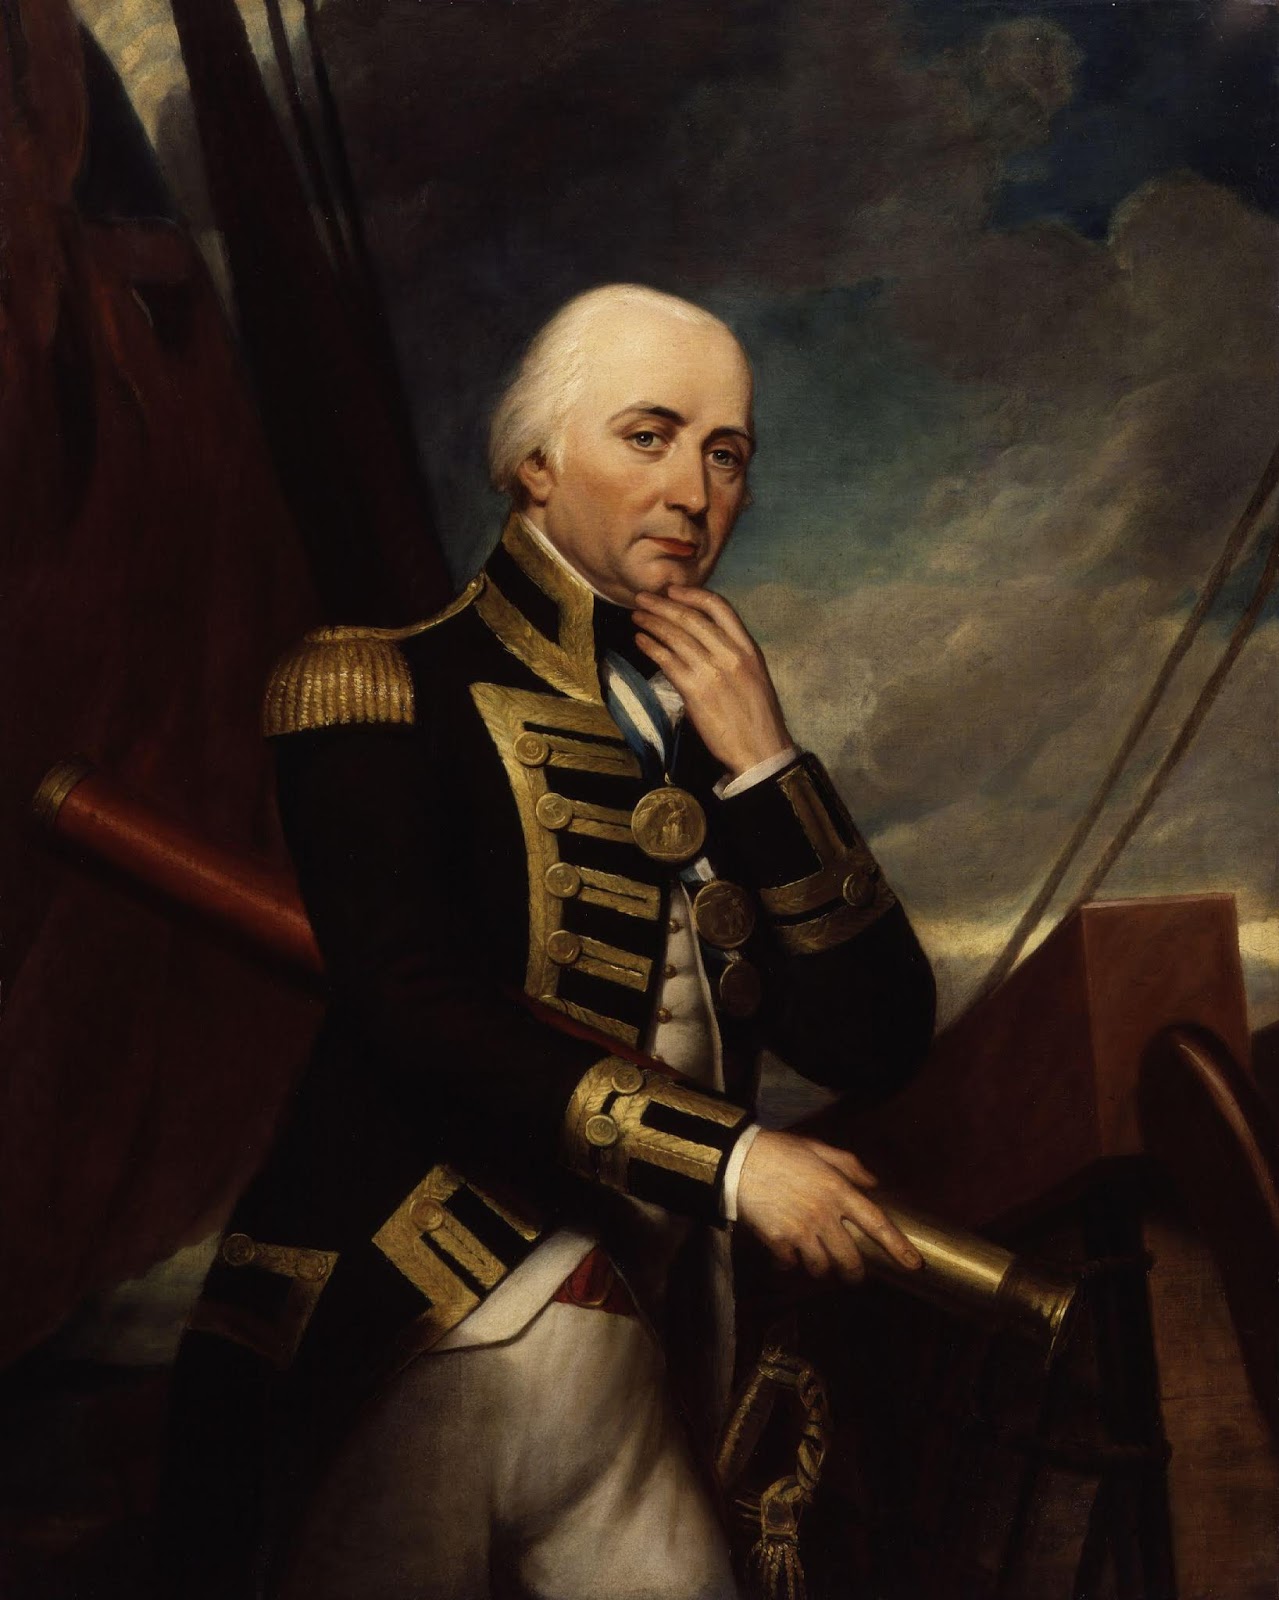 |
| Vice Admiral Cuthbert Collingwood - Henry Howard |
With the commencement of the Napoleonic War in 1803, Collingwood was appointed to Vice Admiral Cornwallis's Channel Squadron, and later promoted to Vice Admiral in 1804.

In August 1805 Admiral Collingwood in the Royal Sovereign was commanding a detached squadron of six ships tasked with watching the port of Cadiz and it was his small detachment that was chased away by Vice Admiral Villeneuve's combined fleet as it made its way down the coast from Ferrol and around Cape St Vincent into the Spanish port on the 20th of that month.
Collingwood later reported 'They are in the port like a forest' reckoning them 'now to be 36 sail of the line and plenty of frigates. What can I do with such a host? But I hope I shall get a reinforcement, suited to the occasion.'
Nelson joined Collingwood off Cadiz on the 28th of September relieving Admiral Calder who had arrived with 26 sail the previous month but was subsequently ordered to return home on Nelson's arrival to face court martial for his command of the Battle of Cape Finisterre in July, covered in my previous post.
 |
| HMS Royal Sovereign bears down on the Franco-Spanish at the Battle of Trafalgar shortly before the Forgueux fired the first broadside of the battle - Stuart Bolton |
Nelson recalled the five ship inshore squadron blockading Cadiz established by Collingwood, writing at the time 'The enemy are still in port, but something must be immediately done to provoke or lure them to battle' and taking his battle fleet away from Cadiz, fifty miles to the west, leaving only frigates to watch the port.

On the 18th October 1805 against the advice of his subordinate commanders not to leave port, Villeneuve received intelligence that persuaded him otherwise. Firstly Vice Admiral Francois Rosily was in Madrid having been sent from Paris by Napoleon to replace him for his failure to enter the English Channel; secondly a British convoy was reported in the straits having sailed from Gibraltar with just four escorts offering an opportunity to order the fleet to sea before Rosily arrived and perhaps some salvaged honour. The Bucentaur hoisted the signal 'Prepare to weigh'.

Captain Sir Henry Blackwood aboard the frigate HMS Euryalus was tasked with alerting Nelson to the sailing of the combined fleet and soon news was on its way to the British admiral, with light winds causing the Franco-Spanish force to finally get clear of the port by noon on the 20th October, by which time Nelson had ordered his fleet on a parallel track towards the straits designed to intercept them the next day.
 |
| HMS Royal Sovereign after a refit and lying at anchor in Plymouth Sound - Stuart Bolton |
At just before twelve noon on the 21st October, the Royal Sovereign at the head of the Lee Column came within gun range of the Forgueux 74-guns, as her commander Captain Baudoin gave the order to open fire, fine on her starboard bow, followed a minute later by one, fine of her port bow from the Spanish first rate Santa Ana 112-guns, flagship of Vice Admiral Don Ignatius de Alava.
 |
| Captain Edward Rotherham, commanded HMS Royal Sovereign at the Battle of Trafalgar |
Royal Sovereign's commander Captain Edward Rotherham held the ship on a steady course, unperturbed, with officers and men standing patiently at their double-shotted guns, ordering the men and marines on the upper-deck to lie down for their safety and to hold their fire until ordered to do so just before crossing the bow of the Forgueux and stern quarters of the Santa Ana at 12.20pm.
On the Victory, Nelson watching the progress of Royal Sovereign through his telescope, observed to those close by his admiration, declaring "See how that noble fellow Collingwood takes his ship into action!"
 |
| The Spanish first rate of 112-guns Santa Ana, flagship of Vice Admiral Don Ignatius de Alava |
As the Royal Sovereign passed through the enemy line, Collingwood remarked to Rotherham, "Oh Rotherham, what would Nelson give to be here", and with the order to commence firing given, the double-shotted broadside smashed the ornate woodwork on Santa Ana's stern galleries causing mass death and destruction as she passed by, whilst simultaneously delivering a similar treatment to the Forgueux's bow, receiving a broadside in response from the French ship, before the Royal Sovereign swung round to fall broadside to broadside with the Santa Ana to engage in a two hour battering at about 400 yards range as Vice Admiral Alava ordered his gun crews across to the leeward guns to take on the British first rate.
The Santa Ana struck at 14.15 having taken fire from other British ships passing through the line as well as that in her battle with the Royal Sovereign, suffering 238 dead and wounded from her total strength of 1189 men at the start of battle.
 |
| Royal Marines on the forecastle of Royal Sovereign - Christa Hook, Osprey Over one-hundred marines served aboard Royal Sovereign at the Battle of Trafalgar |
The Royal Sovereign ended the battle without a mizzen or mainmast and a badly damaged foremast, with most of her rigging shot away and casualties numbering 141 dead and wounded from a starting strength of 826 men.
Hearing of the death of Nelson, Collingwood assumed command of the fleet at the close of the battle, transfering his flag to the frigate Euryalus whilst taking the Royal Sovereign under tow as he oversaw the securing of the British fleet and its prizes as the weather took a turn for the worse.
After Trafalgar the Royal Sovereign served with the Mediterranean squadron, blockading Toulon up to November 1811, returning afterwards to the Channel fleet through 1812-13.
Post war she was converted to a receiving ship in Plymouth, being renamed HMS Captain in 1825 until being broken up there the following year.

Typically HMS Royal Sovereign would have carried 28 x 32-pdr long guns on her lower deck, 28 x 24-pdrs on her middle deck and 30 x 12-pdrs on her upper deck with additionally 10 x 12-pdrs on her quarterdeck and 4 x 12-pdrs on her forecastle.
British Generic First/Second Rate

The generic British first rate contained within the Warlord British fleet box and now sold separately, allows the collector of these models to field these first (100 plus guns) and second rate (98 -90 guns) three deckers of 100 to 90-guns that were typical of the era with the typical strength of these ships in the Royal Navy through the French Revolutionary and Napoleonic Wars numbering between five to eight first rates and seven to sixteen second rates with an average strength in the early part of those wars at around sixteen ships on strength.

These three deckers formed a significant component of British fleets in the major engagements of the era;
Glorious First of June - 7 ships (3 First Rates)
Cape St Vincent - 6 ships (2 First Rates)
Cape Finisterre - 4 ships
Trafalgar - 7 ships (3 First Rates)

In 1793 when the Revolutionary War commenced the Royal Navy had five first rate ships of the line with two in commission all of 100-guns;
Victory
Britannia
In ordinary
Queen Charlotte
Royal Sovereign
Royal George
First rate ships invariably carried 32 pounders on the lower deck, 24 pounders on the middle deck and 18 pounders on the upper deck, with carronades mainly carried on the quaterdeck and forecastle.
 |
| HMS Queen Charlotte, first rate ship of the line, pictured at the Spithead Review, c.1790 - William Anderson National Maritime Museum |
Alongside the first rates, the Royal Navy could also deploy sixteen second rates of which seven were in commission;
Boyne - 98 guns
Duke - 98 guns
Princess Royal - 98 gun
Queen - 98 guns
St George - 98 guns
Windsor Castle - 98 guns
Sandwich - 98 guns
In Ordinary
Atlas - 98 guns
Glory - 98 guns
London - 98 guns
Prince George - 98 guns
Impregnable - 98 guns
Prince of Wales - 98 guns
Prince - 98 guns
Blenheim - 90 guns
Namur - 90 guns

The three decker second rate was first conceived of in the 1670's as a cheaper alternative to the first rate.
The 98 gun ship was created merely by adding 8 guns to the quarterdeck of the 90 gun variety, usually armed with 32 pounders on the lower deck, 18 pounders on the middle deck and 12 pounders on the upper deck.
 |
| HMS Namur - Jack Spurling HMS Namur of 90 guns had perhaps a more illustrious history than the Victory serving from 1756 through the Seven Years War, French Revolutionary War and Napoleonic War that saw her eventually razeed to a 74-gun third rate in 1805, seeing action at the Siege of Louisbourg 1758, Battle of Lagos 1759, Havana 1762, Cape St Vincent 1797 and as a 74 gun razee, Cape Ortegal 1805, retiring to harbour service in 1807. |
The Warlord model comes with three different figureheads and with a little bit of careful work others from other kits in the range could no doubt be affixed to provide plenty of variation to a British battle line.

 |
| HMS Temeraire - Geoff Hunt HMS Temeraire 98 guns served throughout the French Revolutionary and Napoleonic Wars from her launch in 1798, gaining the nickname 'The Fighting Temeraire', and sailing astern of HMS Victory at Trafalgar, her only fleet action. |

In time the second rate fell into decline, with some Admirals preferring to use the two deck 80-gun ships even when they had these three deckers available to them, given that the second rates were short and high making them poor sailors.
Quotes highlight the problems these ships had, noting that the Prince of 1788 'sailed worse than other ships' and the London of 1766 'does not stand under her canvass particularly well' or that the Duke of 1777 'was neither weatherly nor for-reaches with other men of war' , and it was 'the opinion of many competent judges that the classes between that of 100 guns and the 80 gun ships of two decks are are very unnecessarily continued in the Royal Navy'.

 |
| HMS Victory races HMS Temeraire towards the Franco-Spanish line at Trafalgar - Geoff Hunt |

No matter what the comments from those who were in the know at the time or of those who had to sail them, the British three decker makes an impressive addition to the look of your fleet when out on the table and this model captures the look quite nicely.

Typically a second rate 98-gun ship of the line would be armed with 28 x 32-pdr long guns on the lower deck, 30 x 18-pdr on the middle deck, 30 x 12-pdr on the upper deck , 8 x 12-pdr on thequarter deck and 2 x 12-pdr guns on the forecastle.
Next up in All at Sea the focus shifts to the Spanish Navy or Armada Espanola with my first model in the collection, the Santisima Trinidad.
Fascinating article - thank you - and some lovely models. It's almost impossible to appreciate the sheer scale of the national resource invested in the Royal Navy - a First Rate was cutting edge industrial technology at the time. Collingwood - and Royal Sovereign - have never received their just appreciation (I'm slightly biased because I served in HMS COLLINGWOOD for a couple of years!).
ReplyDeleteBeautiful ships JJ and the history! Yes the history!
ReplyDeleteThank you. The history that the models represent is for me and I think many others, a big part of the hobby of historical wargaming, so its great when others, like yourself, enjoy that aspect to.
DeleteHi Jeremy,
ReplyDeleteThank you and glad you enjoyed the read.
Well Nelson clearly held Collingwood in high regard and genuine friendship and with regard to the Royal Sovereign, she was obviously well regarded, being the flagship of several admirals in her time and able to match the Victory for a good turn of speed, the Victory being known as a fast ship and one of Slade's finest builds.
As regards cost of the build, the value quoted is simply a pound for pound comparison at today's values, but perhaps the true cost in terms of man hours and the time needed to allow wood to season, with the Victory for up to two years, and the likely value placed today on the time of the artisans involved would likely raise the cost significantly higher, so these war machines were indeed a massive investment and explains why even the mighty Royal Navy had relatively few of them in service at any time.
Truly a great post, well done. Impressive information and superb models.
ReplyDelete