Last Saturday I spent a very pleasant day running two Kiss Me Hardy games of my scenario 'Nailing the Colours, Battle of the Vanguards' recreating the fight between the Batavian-Dutch and British vanguards at Camperdown.
 |
| Devon Wargames Group - Clotted Lard 2024 |
The Battle of Camperdown was a story of two separate actions, one between the British and Dutch Van Squadrons and the other between the British and Dutch rear squadrons, with the Dutch centre attempting to support both and not really achieving either, thus while the Dutch rearguard was overwhelmed by British numbers and guns, a more equal combat was being contested to the north.
There the combat was centred around the two flagships, Duncan's Venerable engaging De Winter's Vrijheid eighteen minutes after Monarch broke the line to the south which saw a separate fight take place between the opposing ships that lasted about an hour until reinforcements from Onslow's squadron, Director 64-guns, Powerful 74-guns and Veteran 64-guns joined Duncan's ships to seal the British victory.
 |
| The highlighted portion of this view of the battle just before it commenced indicates the portion of the Battle of Camperdown, Nailing the Colours represents |
At the height of the combat, the colours and signal flags on Venerable were brought down by cannon fire. To ensure that there was no suggestion that the flagship had surrendered, a sailor named Jack Crawford scrambled to the top of the mainmast and replaced them as the battle raged beneath him.
 |
| The battle between the British and Dutch flagships, Venerable and Vrijheid as depicted by Thomas Whitcombe, with the latter about to become dismasted in this exchange of fire. |
Casualties in the battle were very heavy on both sides, attributed to the Dutch tactics, mirrored by the British, of firing at the enemy hulls rather than attempting to disable their masts and rigging as with other continental navies, with the worst hit of the British ships being Ardent 64-guns with 148 casualties, and Belliqueux 64-guns under Cpt John Inglis with 103 casualties.
In total, British losses were recorded, depending on your sources, after the battle as somewhere between 203 to 228 killed and 622 and 812 wounded, including 16 of the latter who subsequently died. Many of the British ships were badly damaged, taking on large quantities of water through damaged hulls. One of the worst hit was Venerable, which had to be completely dismantled and reconstructed after returning to Britain before the ship was ready for active service again.

Batavian-Dutch losses were later reported as 540 men killed and 620 wounded, with Vrijheid the worst hit with the loss of almost half of its total complement. Among the losses were Captain Hinxt of Beschermer and Captain Holland of Wassenaar, both of whom were killed early in the battle. Also lost were Captain Van Rossum of Vrijheid, who was struck in the thigh by a cannonball and died shortly afterwards from the effects of the wound. There were also large numbers of wounded among the Batavian-Dutch fleet, including Rear-Admiral Story.
 |
| Admiral Duncan receiving the surrender from Vice-admiral De Winter at Camperdown - Daniel-Orme |
One of the few Dutch officers to escape injury or death was De Winter himself, who later commented
"It is a matter of marvel that two such gigantic objects as Admiral Duncan and myself should have escaped the general carnage of this day."
The scenario focusses on the attack by the British Vanguard under Admiral Adam Duncan before the arrival of elements of the British leeward division under Vice Admiral Onslow after they having quickly overwhelmed the Batavian rear and driven off the centre.
 |
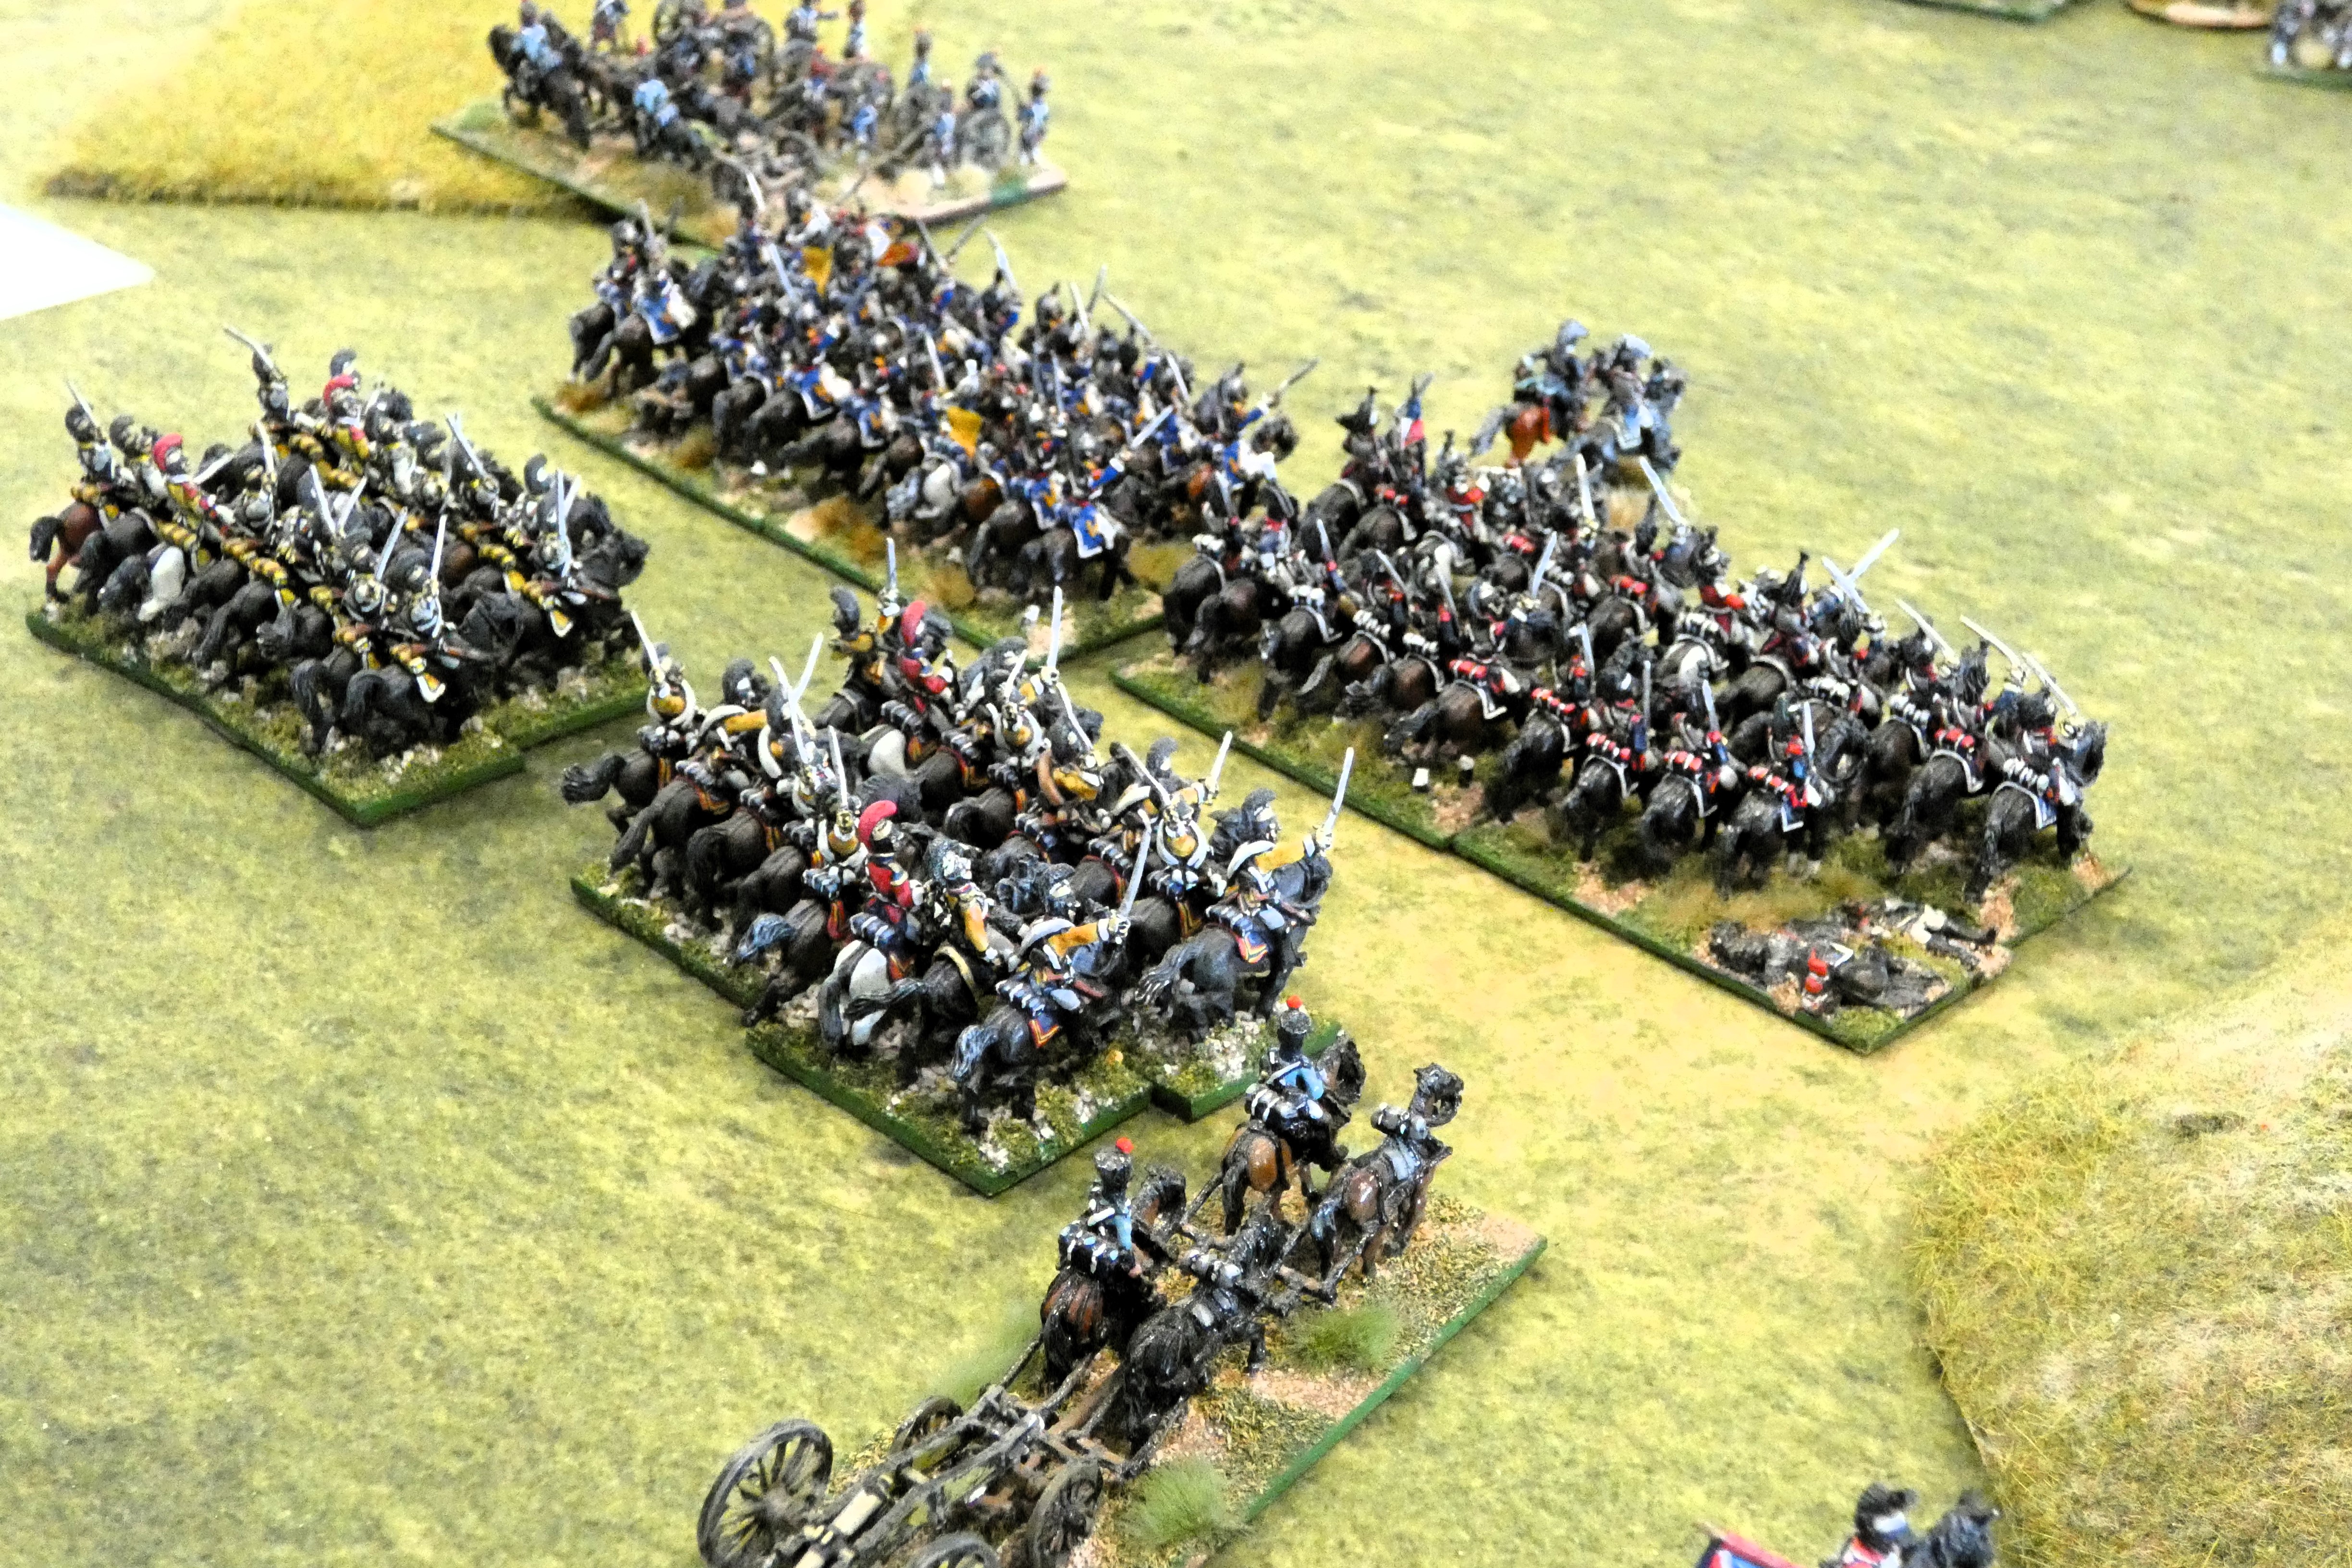
| The table set-up as depicted in the table plan, with the Batavian van in battle-line spaced 9cm between their bases and their light ships looking to cover the gaps. |
Camperdown like Trafalgar offers itself up to being broken down into separate actions that are squadron on squadron fights within the context of the larger battle, and if so inclined this scenario could easily be extended through to the arrival of the three British reinforcements should players have the time to fight it to that point.
 |
| Admiral Duncan's British squadron are set up in their line of bearing each aiming for a gap in the Batavian line having been signalled ten minutes earlier to break the enemy line and to engage closely. |
That said I was content to play this in its basic format to play test the concept and learn any changes that would improve things, such as bringing the British closer in the second game and moving the Batavian line closer to the centre of the table thus shortening the British approach to bring on the fighting more quickly and to allow the Batavian's more room to manoeuvre to deal with British ships breaking in among their two lines.
 |
| The table all set up for our game at Clotted Lard - Let battle commence |
 |
| The example of the ship record card for the Batavian flagship Vrijheid rates them as Elite Sans Culottes, gaining the extra dice, but no additions for long and extreme range rigging shots |
To better model the Batavian tactics, I removed the rigging shot bonus dice added to Sans Culottes crews and raised all the Batavian squadron, except Vrijheid, to elite for firing but, again excepting Vrijheid, to average for all other occasions such as sailing and morale.
The Vrijheid, already being an elite ship, didn't gain from the change but given her flagship status and the more robust morale rating that implies already makes her less likely to succumb to British firing than other ships within her squadron, and better able to stay in the fight as she did historically whilst also very capable of dishing out a lot of hurt to any British ship that comes alongside.
 |
| The British van squadron are ready to advance. |
The two games were quite different in that in the first game the British got the rub of the chit draw often managing to get their fire chit out first and before their movement whilst also succeeding in getting slightly over half their ships to break through the enemy line and issuing raking fire as they did so.
 |
| In the opening exchanges of our first game, extraordinarily, the Venerable has failed to break the Batavian line and has turned away to begin a short range exchange of broadsides with Rear-admiral Story's Staten Generaal. Closest to camera the 74-gun Triumph opens up with bow-chasers on the 64-gun Wassenaer. |
Similarly the choppy waters didn't do the Batavians any favours, with their fire to leeward already reduced to partial, recreating the comments of many of their captains reporting that the conditions forced them to close their gunports on that side, perhaps related to their ships being of much shallower draft, but with the choppy rolling conditions rolled for further reducing their firing to partial, partial broadsides.
 |
| The typical rolling attack of a British breaking the line manoeuvre in line of bearing pinning any attempts for forward units to wear and come around in support of those behind. |
 |
| The Wassenaer has her angle of broadside template out to assess when to open fire on the approaching Triumph. |
 |
| Further along the line the first British ships have broken through and are engaging to leeward whilst also returning the salute from the smaller Batavian ships. |
 |
| A fire has broken out aboard the British flagship Venerable, that was extinguished in the next turn |
That said despite the problems imposed on the gunnery attacks by the weather, KMH still produced its drama with the odd fire breaking out here and there and several high officer casualties suffered that would eventually cause a successful strike test to result on one Batavian ship of the line.
 |
| Venerable, extreme right is in the thick of the battle with Staten Generaal, now having put out an earlier fire but dealing with a shot away helm as the 'Out of Control' marker suggests. |
 |
| The Lancaster 64-guns, Isis 50-guns and Belliqueux 64-guns, bear down on the Batavian line having successfully rolled to break it and pass through to leeward. |
These battles within a battle make for great ways of exploring these historical actions and make for great club games for several players to take commands within each group of opposing ships, and I will likely take this one along to club and attach a copy of the briefing I prepared in the wake of Clotted Lard adding the alterations based on that play test, together with the ship record cards for printing out to get playing straight away, provided you have your models ready to go.
There is a link below for the scenario PDF.

In terms of victory conditions, I include the usual break-off rules to assess win or loss, but in the actual fight, the Batavians put up strong resistance with the flagship Vrijheid fighting for about an hour and losing several masts in the process, only striking with the arrival of the British reinforcements relatively fresh from their fight with the Batavian rear.
If you translate the approximate time scale of KMH to two minutes per move this equates to thirty turns, however I tend to work with a four minute battle time scale, incorporating ideas about a sliding time scale based on varying winds and ship movements that averages the move time to about a four minute move.

If you have the luxury of fighting over a longer time, then I would work to fifteen turns as a maximum scenario length in which time it is assumed the British reinforcements have arrived. If the Batavians are still fighting with no break-off inflicted then they have matched De Winter's result and a game victory, if they have caused a British ship to strike and are still fighting that should equate to an outright victory otherwise the British should be accorded the win at their end of the line, probably after a hard fight if history is anything to go by.
As a postscript I only had one battle damage casualty from our two games, my little 32-gun Batavian frigate Heldin.
 |
| The 32-gun fifth rate Heldin undergoing repairs in the riggers yard following Clotted Lard |
 |
| 'Ship-Shape' and 'Bristol-Fashion' |
I've run lots of games now with these models, and generally they prove very robust to handling, and like their historical counterparts are amenable to repair to rigging as required as seen here twenty-four hours later and ready for the NWS meeting at the FAA Museum, Yeovilton next Saturday, and, as they say 'the show goes on'.

I'm off on my travels again soon and this coming weekend in the next run-out for the Camperdown Collection we will have the whole thing out on the table as we prepare to play The Battle of Camperdown with all fifty models at the NWS Meeting at the Fleet Air Arm Museum, Yeovilton, this time using David Manley's rules, 'Far Distant Ships', so if you fancy a day out seeing the fantastic collection and displays in the museum, your access will also enable you to come along and see the naval wargames on show as well.
As always I will post an AAR with plenty of pictures of the day together with a look at the other naval games on show.

Plus I will be looking back to this time last year and my Bantry Bay scenario with another post looking at the Bantry Bay cannons at Cardiff Castle, courtesy of Ollie after Carolyn's and my trip up to the Welsh capital last week to visit her and Will, so more to come here on JJ's.
JJ