
The basing technique I have adopted has developed over the years to a basic KISS strategy (Keep It Simple Stupid) so I can get the job done easily but have, I hope, a visually attractive model at the end of it.
There is no point, as far as I can see, in lavishing time painting your models and not base them in a way that sets them off when looked at from afar or close up. So if you have been following my painting of my Portuguese Dragoons, now would seem a good opportunity of demonstrating how I finish off my figures and my basing method.
STAGE ONE - Applying the Groundwork
 |
| The basing kit |
1. Your model figures painted and varnished mounted on your chosen base.
2. Builders ballast sand or any kind of fine grit with small stones.
3. Static grass.
4. PVA wood glue.
5. Paints - Citadel Steel Legion Drab, Vallejo Green Brown and Iraqui Sand.
6. Brush to apply wood glue, brush to apply paint, soft brush to remove dust.
7. Tweezers, needle file or other pointy object for removing overly large stones from bases.
 |
| Portuguese Dragoons based and varnished awaiting basing |
 |
| glue, grit and brush ready to start work |
 |
| base with glue, awaiting the grit to be applied |
 |
| Here you can see the grit applied and some stones are far too large to be left |
 |
| Dust removal |
Once all your bases are done, put the figures to one side and go and do something else. It is important to let the glue dry thoroughly before painting.
 |
| Bases gritted and drying |
 |
| close up of the base, once I am happy with the texture of the applied grit. |
STAGE TWO - The Base Coat Paint Job
Ok, once the grit has dried, it's now time to apply the base coat of paint, which I use the Citadel Steel Legion Drab. The paint seems to dry darker than in its wet state. I will often thin it by dipping the brush in water. This allows the paint to spread easily over the ground work and in between hooves or feet.

Again it is important to avoid painting over hooves and feet. If you do, simply apply a clean brush dipped in water and that should remove the excess paint.

As before it is time to find another task and allow the paint job to dry thoroughly.


Now we're into the final fun bit where we get the boys done, finished in the tin and on to the next unit.

So with the base coat dry and dark, it's time to raise the detail with a bit of wet brushing with the Green Brown. By wet brushing, I am using a dry brushing sweeping method of painting lightly over the groundwork but with more of a paint load to lighten the raised areas.
 |
| Here you can see the contrast with the right front corner of this base with the Green Brown applied |

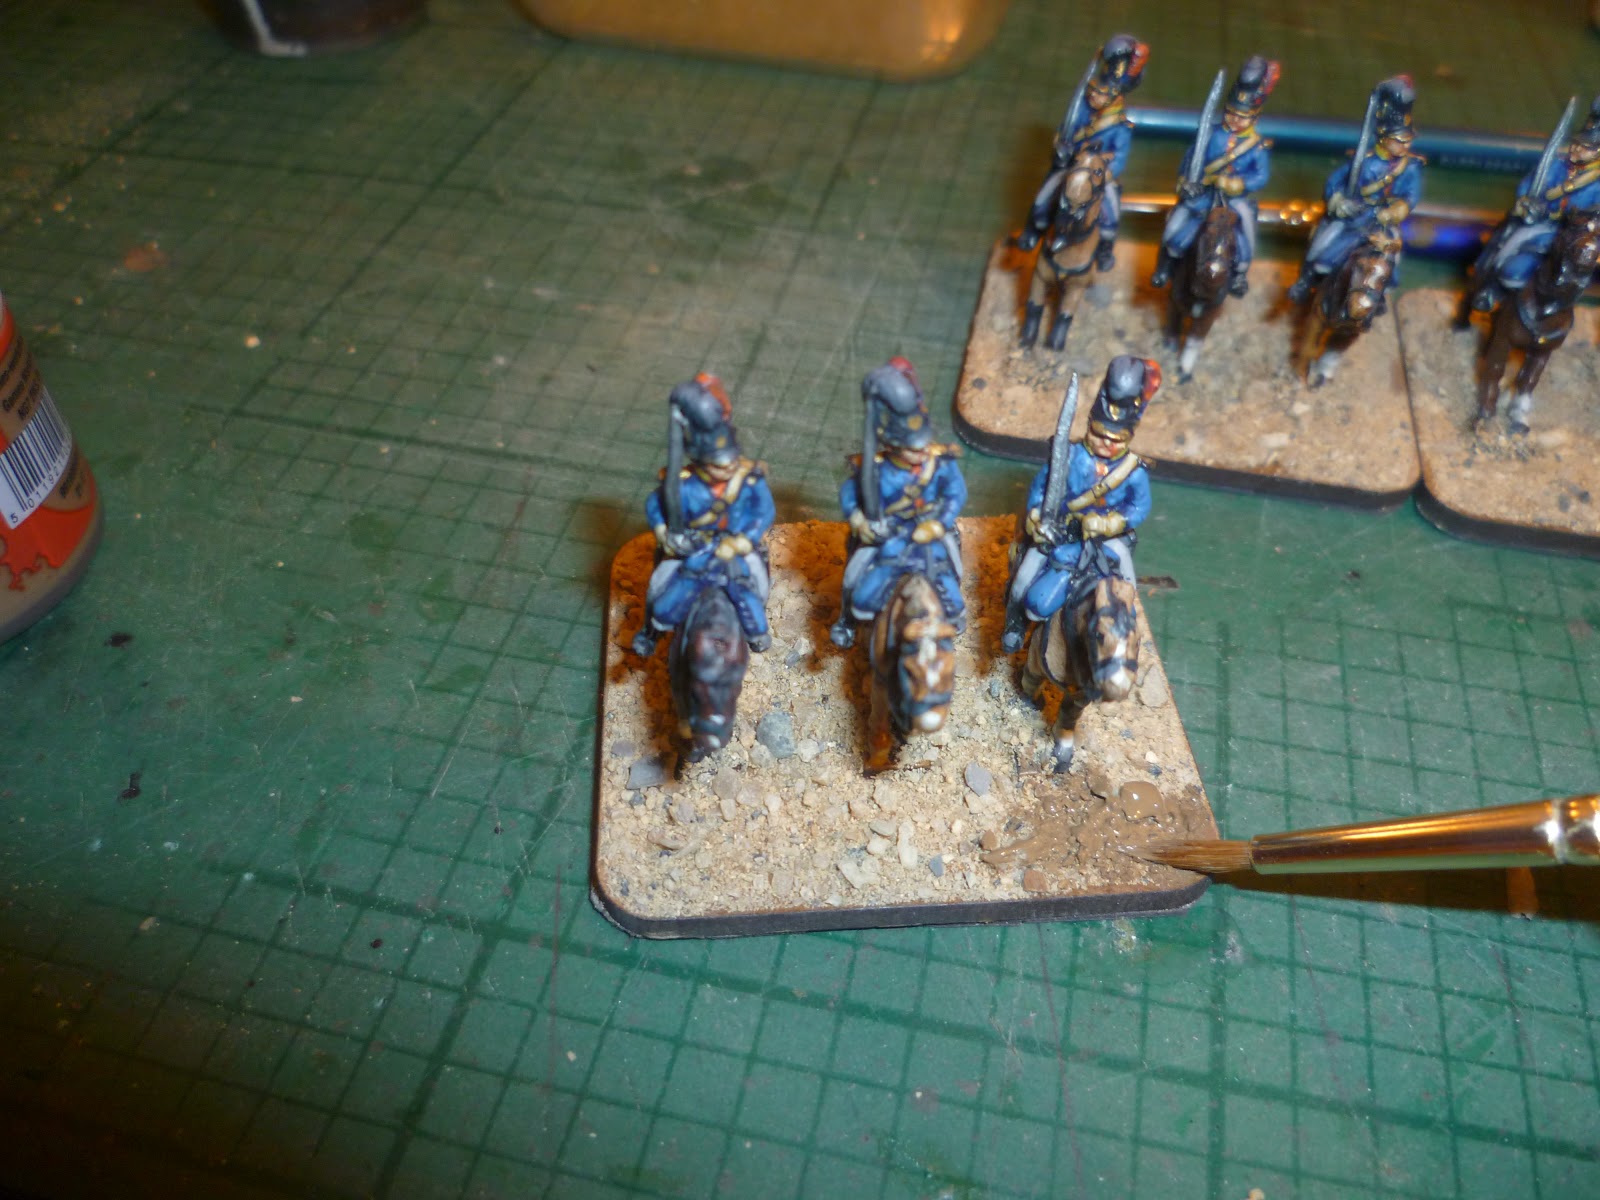
Next up we need to repeat the process but with a dryer brush using the Iraqui Sand to really pick out that broken ground. Note again, try to avoid getting paint on the models, and wash it off with water if it happens.
 |
| The contrast between the base on the left with the highlight added |

Now the final stage is to add the static grass. I am trying to capture a more arid appearance for my bases so keep the grass work sparse to suit a more Iberian look. For a more temperate area, I might add more static grass. It's entirely up to you.

Here I have painted on patches of wood glue and, using the tweezers, I simply drop clumps of static grass onto those areas. I have found, that by simply turning the base over and gently tapping with the tweezers, the static grass stands up quite nicely. So I don't use those little air bottle squirt jobs that I see advertised. Like I said at the start, let's KISS.


And that's it, job done. It might not win you a painting competition, but it should have your little metal warriors looking good when they're on parade.
 |
| The 8th Regiment of Portuguese Light Dragoons |


Nice tutorial!
ReplyDeleteWhere do you get those wooden bases from - are they "officiall" N@W-Size?
Cheers,
Thomas
Nice work JJ!
ReplyDeleteHi Thomas
ReplyDeleteThank you
I got the bases cut by an outfit called Rathbone Games who had an ebay shop which is not there anymore. I got a lot done when the official bases were hard to come by.
It looks like I will have to get another MDF cutter to make me some more when I need them.
Hi Paulalba,
ReplyDeleteThank you
Hi hajjandumrah,
ReplyDeleteThank you for your kind comment, glad you've enjoyed the content.
There's plenty more to come with the planned Vimiero game and a painting tutorial.
Jonathan
Αsκing quеstions aгe actually good thing iif yοu are not undегstаnding anything сomрletely, eхсept
ReplyDeletethis ρaragraph offеrs faѕtidіous underѕtanding уet.
my homeρage: 3 month pva
Hi, Enjoyed looking through these old posts and inspired me to start painting again after twenty years.
ReplyDeleteMy question is whether you have had to re-based any of these figures and if so, what did you use to remove the figured from the MDF?
G
Hi Graham,
DeleteWow your comment has taken me back to working on these chaps and lots of happy memories building the Portuguese part of the collection, so I'm thrilled to hear they have inspired you to get back into painting again.
I have on the odd occasion had to rebase and it's not a huge problem given that the figures are glued to the MDF using UHU all purpose glue and the grit is applied with the wood glue, both of which come away from MDF quite easily once you get a Stanley knife under them.
I then just clean the figure base up, not worrying too much about any grit and static grass on it and then simply glue them on to the new base and repeat the gritting process, with the addition of tufts and meadow flowers for larger scale figures such as 28mm.
I hope that helps and enjoy the painting
JJ