Today we got to test the
Carnage & Glory II scenario for Rolica, a copy of which is available on the scenario links. The game starts with the French brigade under DeLaborde holding Rolica Hill and Rolica village with the four brigades under Sir Arthur Wellesley looking to drive them from the field with minimal loss as per the historical result. The French are required to hold the field for twelve moves ensuring that the Allies do not control Rolica ridge in that time.
 |
| View of the French line based om Rolica and Rolica Hill with the 70th Ligne operating in extended order |
Our game saw a canny French withdrawal using the Swiss as a forlorn hope to hold Rolica and its road network. This forced the Allies to march cross country in pursuit of the main force whilst suffering continual skirmish and artillery fire.
 |
| Hill's brigade closes in on the French left |
 |
| Fane's brigade moving on the French right flank |
 |
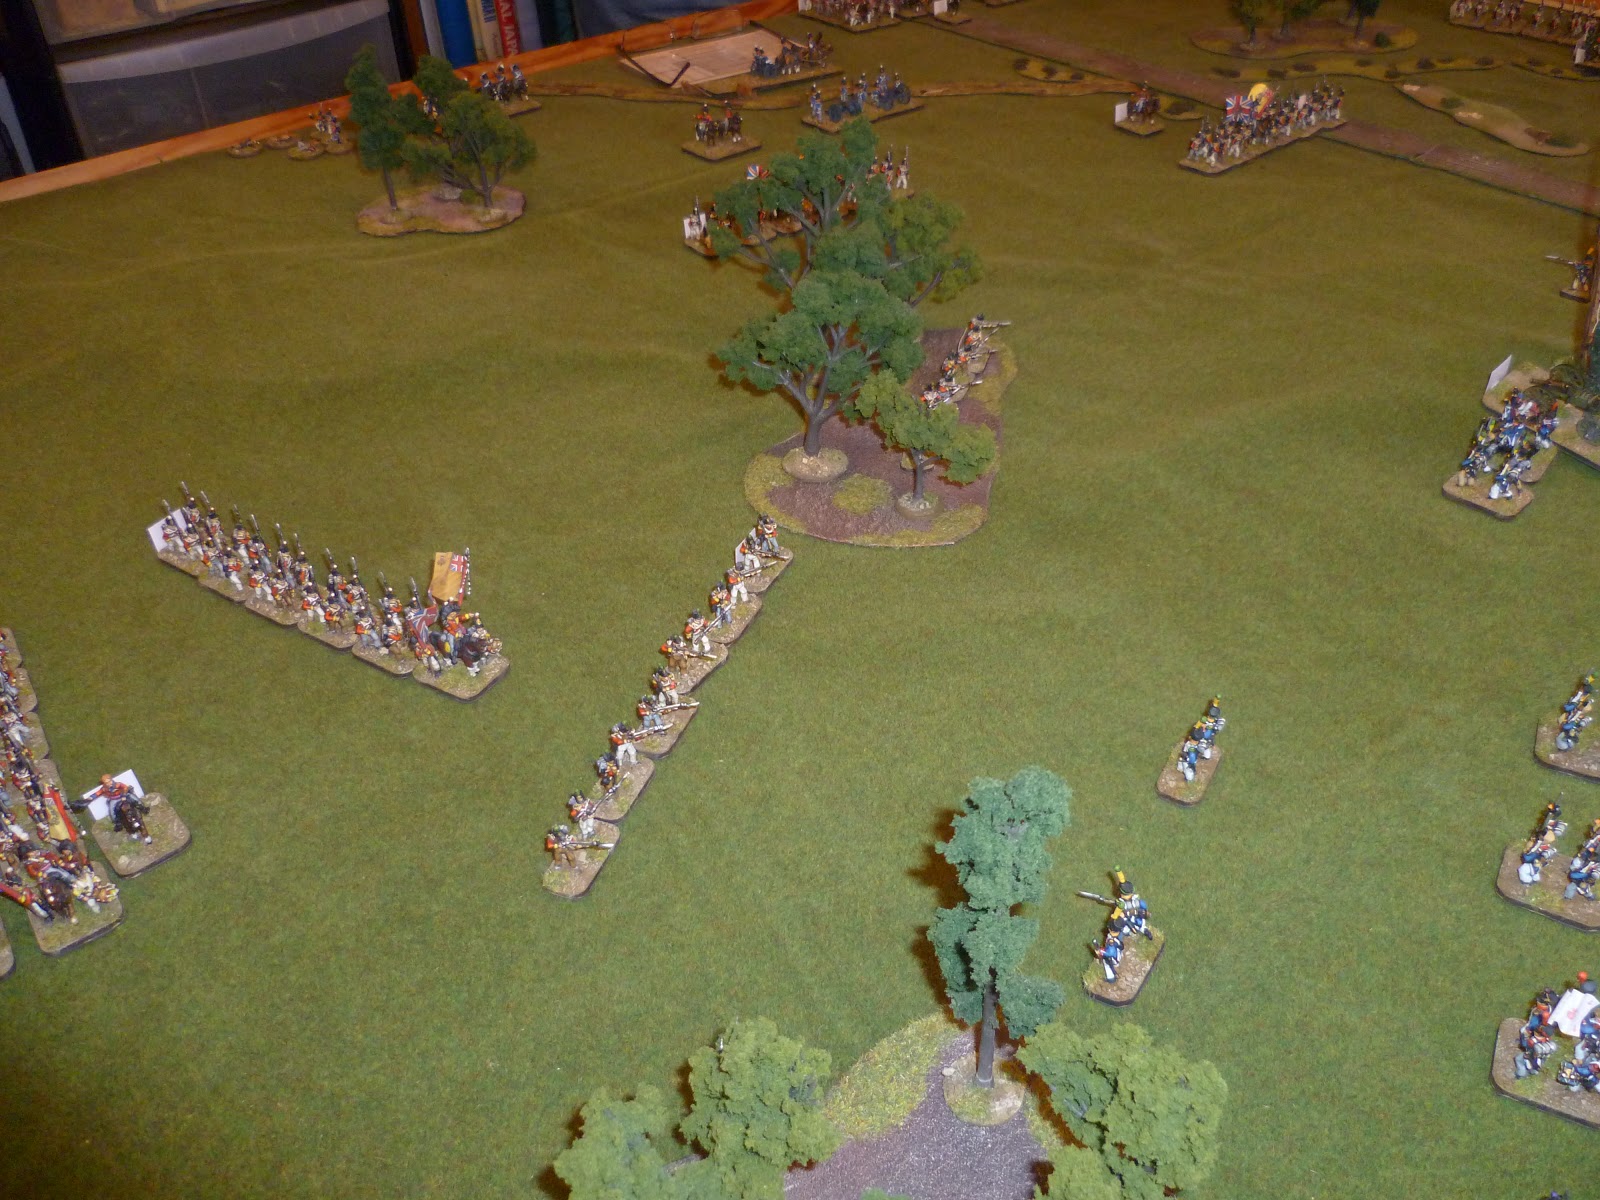
| Nightingale's brigade deploy in the centre as they approach Rolica Hill |
The plan was working very well up to the halfway point when as the French were pulling back from Rolica Hill with the 70th Ligne in extended order, Wellesley brought up the 20th Light Dragoons to put pressure on the rearguard. The plan nearly worked, as the cavalry cresting the hill found the 1/70th Ligne still in extended order and close enough to be caught by a charge. The French infantry only just managed to form square repulsing the cavalry who fell back to be rallied by Wellesley himself.
 |
| As the British close on the French line, they fall back with the guns limbering and pulling out |
 |
| The French withdraw back to the ridge |
The British light cavalry charge had unknowingly derailed what had been an efficient withdrawal back to the ridge in preparation for the final stand. As the French commander ordered the 70th to resume the withdrawal, the battalion refused to break square. The luxury of time was not with the French as the British brigade under Nightingale supported by the artillery crested Rolica Hill to find the French infantry at their mercy.
 |
| The 9th Foot, part of Hill's brigade approach Columbeira |
Meanwhile the Allied flank columns kept up a remorseless pursuit of the remaining French forces and by turn nine were closing in on the ridge line.
 |
| The 29th Foot part of Nightingale's brigade close on the Swiss occupying Rolica |
The French force fell back through the passes on the ridge with the bulk of their infantry supported by the guns and Chasseur a Cheval holding the French left. This left just the 3/2nd Legere to hold the French right on the Lisbon road facing the two rifle battalions and the 45th Foot of Fane's brigade.
It was going to be a close run thing with just three moves remaining.
 |
| The French prepare their final stand on Rolica ridge |
 |
| The British assault the ridge |
Sadly for General DeLaborde, despite the heroic resistance put up by the guns, light cavalry and the 2/70th Ligne, the 3/2nd Legere were not up to the task of holding off the 95th Rifles who giving three cheers charged up the defile flanking the Legere unit who promptly turned tail and fled down the road.
 |
| Fane's Rifle brigade capture the Lisbon road, penetrating the French lines |
 |
| Nightingale's Light battalion tackles the French guns blocking one of the passes |
Frustratingly the game ended for the French force with the collapse of the 3/2nd Legere as this tipped their force morale over the break point on turn eleven, giving Sir Arthur Wellesley a major victory, when the casualties were assessed together with the surrounded and cut off 1/70th Ligne and 4th Swiss.
 |
| The Swiss stranded in Rolica as the French main force breaks from the ridge in full retreat |
 |
| The 1/70th Ligne in square surrounded by the British advance were forced to lay down their arms |
 |
| The Swiss negotiate their surrender with the 6th Cacadores of Crawford's reserve brigade. |
This is our first playing of Carnage & Glory for Napoleonics, and we thought they were excellent. Once the basic sequence is mastered, which takes no time, the game flows seamlessly, with those extra bits consisting of unit reports after combat and reactions to officers joining them. The British players looked somewhat dejected as the 20th Light Dragoons bounced off the 1/70th Ligne's hastily formed square only to smile happily as the system announced the cheer from the rebuffed cavalry as Sir Arthur Wellesley approached them to restore their order.
Many thanks to Steve, Mike, Gus, Jason and Nathan for a great day. Next up Vimiero.


Thanks Paul
ReplyDeleteIndeed very impressive... the table and everything looks spectacular
ReplyDeleteFrancisco