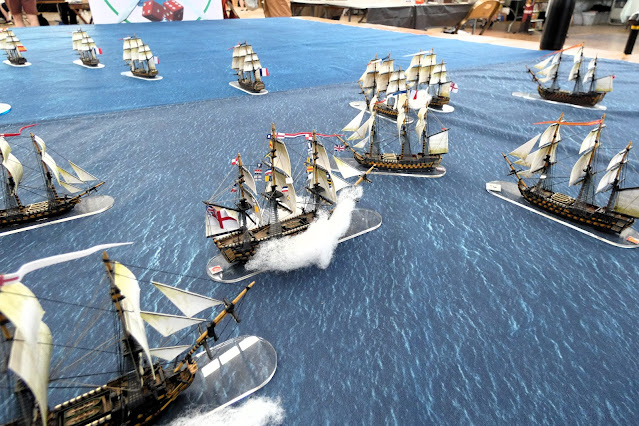
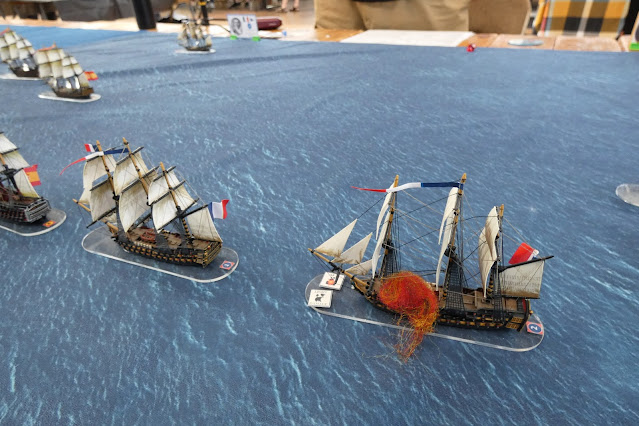
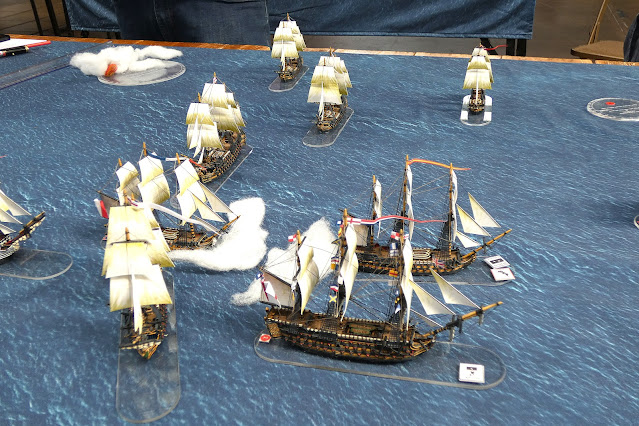
My regular weekly post on a weekend has been slightly delayed this week as the focus for this weekend was hosting a game of Far Distant Ships (FDS) at the local wargaming show in Exeter, Legionary 2025, where I ran one of three games hosted by the club at the show, mine focussing on the Battle of Trafalgar in its 220th anniversary year this October 21st.
 |
| JJ's Wargames - The Battle of Trafalgar, Plans and Preparations |
Last month I put up a post looking at the preparations for this particular game, the materials for the rules and warm up preparations at club to get back up to speed with playing FDS since the last run out with them back in October last year when I ran the Battle of Camperdown at the NWS Meeting at the FAA Museum Yeovilton.
 |
| JJ's Wargames - Naval Wargames Society Weekend, 2024 |
 |
| The table plan for our game at Legionary based on Mark Adkins plan of the battle at 11.45am and illustrating the twenty 6' x 2' tables we would need for the game in 1:700 |
This would be the first time using FDS to play Trafalgar, and a significant test for the rules moving from Camperdown with fifty models on the table to a battle with seventy-three, and I was very much looking forward to the game as well as getting back together with friends to enjoy their company rolling bones and chatting wargames stuff amongst other things.
 |
| Our rules for the day, Far Distant Ships, slightly amended to cater for our 'Grand Manner' way of playing, using 1:700 models. |
The chaps from the Exmouth club who host Legionary, had sorted our tables out for our forward party of myself, Jack and Steve M. to arrange at about 08.30 in time for our players set to arrive about an hour later, and despite a few issues, entirely of my own creation, the table was arranged and the fleets laid out in good time for everyone's arrival.
The various commands were allocated based on preferences and the help of a few dice, and by about 10.00 following a quick briefing we were ready to play.
As in previous games we were joined by friends from the Penarth Club, Glyn, Andy and Lee and with a few new players from the Devon club recently converted to the joys of age of sail gaming using Far Distant Ships, and new friends were made as we settled down to start the first moves of play as the British fleet closed the Allied line in preparation to break it and bring on Nelson's famous pell-mell battle.
 |
| The other British approach tables with the balance of the Leeward Column and Nelson's Windward Column to the left of picture. |
Having run a few of these large battle scenarios over the last four years there are methods of play I have quickly learned to facilitate a good game, and a handy order of battle with all the ship stats, commander stats and a ready method of identifying any particular ship as required is a must.
My preferred method is an ID or unique Pennant Number applied to the base of each model that is easily checked against the order of battle for each respective fleet, providing a ready reference for the players and helping me to identify ships and specific parts of the battle when I come to do these AAR's for yours and my pleasure.
 |
| Similar to the Combined Fleet Orbat, the British line up with Rear-admiral Northesk's details at the bottom and his flagship HMS Britannia. |
My preferred method is an ID or unique Pennant Number applied to the base of each model that is easily checked against the order of battle for each respective fleet, providing a ready reference for the players and helping me to identify ships and specific parts of the battle when I come to do these AAR's for yours and my pleasure.
Both fleets were operating under Nelson's and Villeneuve's standing orders prior to the battle, so you will not see any fancy wargaming manoeuvres beloved in other replays of this famous battle, but not a very realistic option for the historic commanders involved; particularly Villeneuve, who realising the poor sailing and gunnery abilities of his ships and crews ordered his squadrons to operate in line ahead, shoot at the enemy rigging on the approach assuming they were intent on breaking his line and relying on his larger crews to come out on top of any close fighting and boarding actions.
Sadly for the allies, Villeneuve's decision to reverse course and head back to Cadiz on first sighting of the British fleet had proven his concerns only too real with his line a complete mess as depicted in the set up, leaving ships from different squadrons intermixed and with large gaps in the attempt at forming a new line seemingly inviting the onrushing British columns to pass through them issuing devasting raking fire as they passed.
 |
| Let battle commence as the first salutes are issued along the line of battle |
The Combined Fleet commanders were thus duly appraised of Villeneuve's orders to them and with sail settings at 'Easy' they commenced an opening fire aimed at the approaching British columns, festooned with canvas following Nelson's signal to approach the enemy line as quickly as possible under 'Full Sail' thus reducing the time they would have to endure the enemy fire on the approach but of course making shots at their rigging that more effective.
The first British ship to feel the effects of this set-up was Collingwood's Royal Sovereign, greeted by some well aimed fire from the French 74-fun Fougeaux, causing light damage aloft.
However the opposed die roll used in FDS used to calculate results of various forms of combat resulted in the dreaded result of a natural 6 and 1, with the British being the lower result and suffering a critical hit that caused confusion on the quarter deck, the least damaging of results, but a warning of not dismissing the threat posed by approaching an enemy line bow on.
The loss of one of the British commanders, slightly different from the historical record but none the less dramatic in the story of our game, seemed to galvanize both sets of fleet commanders as they earnestly set about the first exchanges of broadsides at very close range, with no messing about with shooting at the sticks, but with more deadly intent as hulls, stern galleries and bowsprits filled the view from opposing gun ports.
 |
| The French 74-gun Duguay-Trouin straddles the bow of an oncoming British third-rate part of Nelson's Weather Column as the battle grows in intensity. |
With the first close range exchanges complete and some serious damage inflicted we left the game in the balance to allow everyone to get some well earned sustenance and to take a look round a very busy show in preparation for a return afternoon session of play.
 |
| The 112-gun Spanish first-rate Rayo at quarters and ready for the approaching onslaught set to hit the line on her larboard side. |
In addition I got a chance to chat with folks interested in the game together with other friends in the local wargaming community with a few plans made for future gaming opportunities before we were soon back at the table ready to recommence.
 |
| Both British columns have contacted the Allied line, with the dogfight between the Allied rear and British Leeward column developing, centre-rear of the picture. |
The battle was quickly moving into the up-close and personal stage of the fighting that characterised the battering nature of the historical battle, and to prod the British team of commanders to greater efforts I informed them that the required run-rate of Allied ships taken was one strike per two turns of play if they were to match the result of the 'Immortal Memory' himself.
Suitably prompted, the Leeward Column got stuck into the afternoon session of play as Lee and John led the charge as a successive wave of British ships closed with the Allied line, taking their tests to pass through the gaps before them, adjusting their sail set to allow them to administer the first stern and bow rakes as they passed by.
Raking is a very effective way of inflicting severe damage on an enemy warship in this period of naval warfare, sometimes leaving the target reeling on a Medium Damage result, but occasionally being so effective as to cause a Heavy Damage outcome forcing the target to take an immediate strike test.
 |
| HMS Victory approaches the enemy line swathed in smoke as her 'crack' crew issue broadsides from both larboard and starboard batteries. |
The former result somewhat disappointed the British as they sailed on after administering a rake, until they realised that the number of command points available held by opposing admirals, to be used to remedy such damage to a lower 'Light Damage' status were extremely limited, and thus choices had to be made as to which ships took priority for such repair attempts, that would leave others vulnerable to having their Medium Damage battered to a worse result in subsequent rounds of firing.
With the oncoming series of British ships arriving before the Allied line in their echelon line abreast attack formation, the Franco-Spanish line had little respite from a succession of attacks, combined with those British ships that had passed through their line, turning onto a bow wind and allowing them to luff up alongside already badly damaged enemy ships, and pour in a close range broadside as well.
The Allied rear squadron had a starting break-off threshold of seven preservation points meaning that the loss of two of its third rates reduced that threshold to just three points, and once that was passed would cause a test for the remaining ships in the squadron to attempt to leave the battle.
With the afternoon session of play moving into the last half hour of the show, the final turn of our game only emphasised the effectiveness of the British fire at close range as ships started to strike along the Allied line, not solely in the rear but in the centre and rear elements of the van.
As a result of this intense combat five more Allied ships hauled down their colours and the British command were finally up with Nelson's run-rate.
With the Combined Fleet teetering on a break off test in a further moves of play and with the show getting ready to close, we called our game.
The story of this Battle of Trafalgar saw the following highlights;
Turn 5 - Game Time 12.25.
Vice Admiral Collingwood mortally wounded by French sharpshooters aboard the French 74-gun Fougeaux.
The Spanish 74-gun Bahama strikes to HMS Bellerophon after a devastating close range broadside caused her to strike immediately
Turn 6 - Game Time 12.35
Six Allied ships struck in the following ten minutes of battle
The Spanish 74-gun Montanez strikes to HMS Bellerophon which had moved along the allied line after shattering the Bahama.
The Spanish 74-gun San Francisco de Asis strikes to HMS Temeraire after a stern rake.
The French 74-gun Algeciras
The French 74-gun Fougeaux
The French 74-gun Pluton
The Spanish 74-gun Monarca
Those losses left the Allied Rear on 4 Preservation Points (PP), Centre on 2 PP and the Van on 3 PP
The show seemed very well attended with plenty of activity around the traders and bring and buy stands and we had a marvellous day's gaming with lots of laughs and banter which is the traditional way we like to play, and I have come away much enthused and looking forward to doing a two-day recreation of Trafalgar on the 4th-5th October at the FAA Museum as part of the Naval Warfare Society gathering.
 |
| The Battle of Trafalgar, 21 October 1805: End of the Action, by Nicholas Pocock circa 1808 (RMG) |
Thank you to Jack, Steve M., Lee, Capt. Steve, Glyn, Mark and Andy, not forgetting Matt and John who created the fun of the day and I look forward to getting together around another large table soon.
More anon
JJ


Fantastic game JJ, thanks for putting it on, well done to you and your team BZ.
ReplyDeleteWillz.
Hi Willz,
DeleteLovely to see you at Legionary and thank you mate.
Keep in touch.
JJ
This looks absolutely magnificent!
ReplyDeleteHi Thomas,
DeleteThank you, its always fun to get all the toys out on a big table like this. Glad you enjoyed the post.
Cheers
JJ
Great stuff and looking forward to see the AAR of the october game
ReplyDeleteHi Colbourne,
ReplyDeleteThank you glad you enjoyed the post and you and me both in terms of looking forward to October.
More anon as I always say.
Cheers
JJ