
 |
| Geoff Hunt's picture of HMS Indefatigable battling through heavy seas in pursuit of the French 74-gun Droit's de l'Homme, homeward bound following the failed attempt to land troops in Ireland in December 1796. |
With Clotted Lard 2023 and the next Naval Wargames Society Meeting coming up next month, I was keen to get planning something new for both shows and following my recent book review looking at Britain's Last Invasion, The Battle of Fishguard 1797, by Phil Carradice, see link below, I felt inclined to follow that thread of an idea to look at the naval aspect of the whole French plan to principally invade Ireland in the December of 1796 and develop a 'What If' scenario around the failed French attempt to land troops in Bantry Bay.
 |
| JJ's Wargames - Britain's Last Invasion |
My game plan was primarily based on the scenario from the Lardies Christmas Special of 2014, link below, 'The Irish Question' by Nick Skinner, but with a few changes to incorporate up to six players, should the need arise.
 |
| https://toofatlardies.co.uk/product/2014-christmas-special/ |
The map I put together develops on the suggested 'What If' in Nick's original game plan, by presupposing that the French arrived and established a guarded anchorage in Bear Haven a few weeks before they arrived historically and that because of the weather and the dispersal to the French fleet that it caused, Commodore Bedout has been forced to round up those remaining scattered transports, and bring them in to bolster General Grouchy to commit to the French landing, despite his undoubted reservations.
 |
| A French map of Bear Haven and the approach to Bantry Bay |
Additionally the scenario proposes that unlike the historical event, the Royal Navy managed to get a small force of frigates and third-rates out to the south-west coast of Ireland to oppose the arrival of these French troops and thus sets up this hypothetical engagement fought in the approaches to Bear Haven, Bantry Bay.
The map above provided the impulse to rearrange my table, taken from a French account of the invasion attempt and with some slight liberty taken on distances I decided to use Sheeps Head and Black Ball Point illustrated on it as my coastal gateway, before which my encounter would take place.
 |
| Cliffs like these from the west coast of Ireland and similar to those in North Devon and Cornwall formed the inspiration for the look I wanted for my game. |
I should also add that the cliff terrain I decided to model will also be standing in for other encounters I have in mind around the Northern European mainland and so they would incorporate some generic features such as coastal paths, to allow for the addition of the occasional coastal fort or battery as the need might be.
Looking around for suitable inspiration to fire up my own imagination for the look of my planned table I came across some videos made by Mel Bose, a.k.a The Terrain Tutor whose Terrain Book I have a copy of and whose videos have helped on other previous projects, and specifically his Dover Cliff Headland build, link below, with suitable adaptions to go for the granite look I was after, together with a larger scale for the 1:700 models being used.
Mel's videos convinced me of the need to invest in a better hot wire cutter and I had plenty of high density foam in the loft left over from my Oporto table built for my 18mm Peninsular project a few years ago, and so I got stuck in with PVA glue and plaster with the two headlands carved and plastered in no time at all.

I recently purchased most of the Brigade Models range of 1:700th buildings, which will join the collection going forward, but here are some of their forts and houses atop the cliffs to give a better appreciation of scale and the imposing look I wanted for these headlands, that hopefully will scream to players, 'stay away, there are big nasty rocks close to these which you can't necessarily see and don't want to go anywhere near!!'
 |
| https://www.brigademodels.co.uk/1-700/index.html |
My first plan was to copy Mel's original idea of using foam board as a base, covered in Artex to create the waves crashing on the rocks effect, but in the end decided on a different approach, to better fit in with the look of the model ships and the sea cloths I use.


The next step was the painting process and this involved getting out the craft shop acrylics, mainly greys, burnt umber and other brown assortments to get the base coat colours done followed by the dry and wet brush shades, following Mel's suggestions on weathering, involving running diluted dirty brown streams along the channels in my cliffs and also creating the tide line at the bottom.

Also I decided to seal the backs of my cliffs with extra strong Gorilla Tape which was plastered over near the edges and given a coat of grey paint to match the cliff colours, thus providing protection to the foam and plaster work and neatly sealing everything down, with the whole paint job given a spray of matt car lacquer or varnish from Halfords, following Mel's recommendation to use car varnishes, because of their higher spec, and I was very pleased with the result.


Before moving on to the final stages of flocking the tops of my cliffs, I bought a sheet of 2mm acrylic that is used for glazing garden sheds and marking out a pattern around each cliff section, before getting my son Tom to take his power saw to it to cut them out to the appropriate shape.

I used a small brush to make sure the paths were clear of flock so that they stood out appropriately.


To finish off the acrylic bases I put a bead of PVA glue around the base of each cliff to seal it to the base and then applied a coat of Modpodge over it and the base once it had dried, applying bits of kapok stuffing to create the sea spray effects.


My new cliff sections made their debut at club last weekend and will form the backdrop to the game with their imposing height and implied threat of disaster should they be approached with contempt.


In addition to my first pieces of terrain this project also brought a requirement to create some specific models that captured the look of troop transports, most of which were former French East India Company vessels taken over for the job, with most of their defensive armament removed to better cater for accommodation of soldiers, horses and stores.
Thus I was looking around for something that would create the look of these ships, still similar in appearance to the accompanying warships, with strakes and gilded galleries and beaks but somehow different as well.
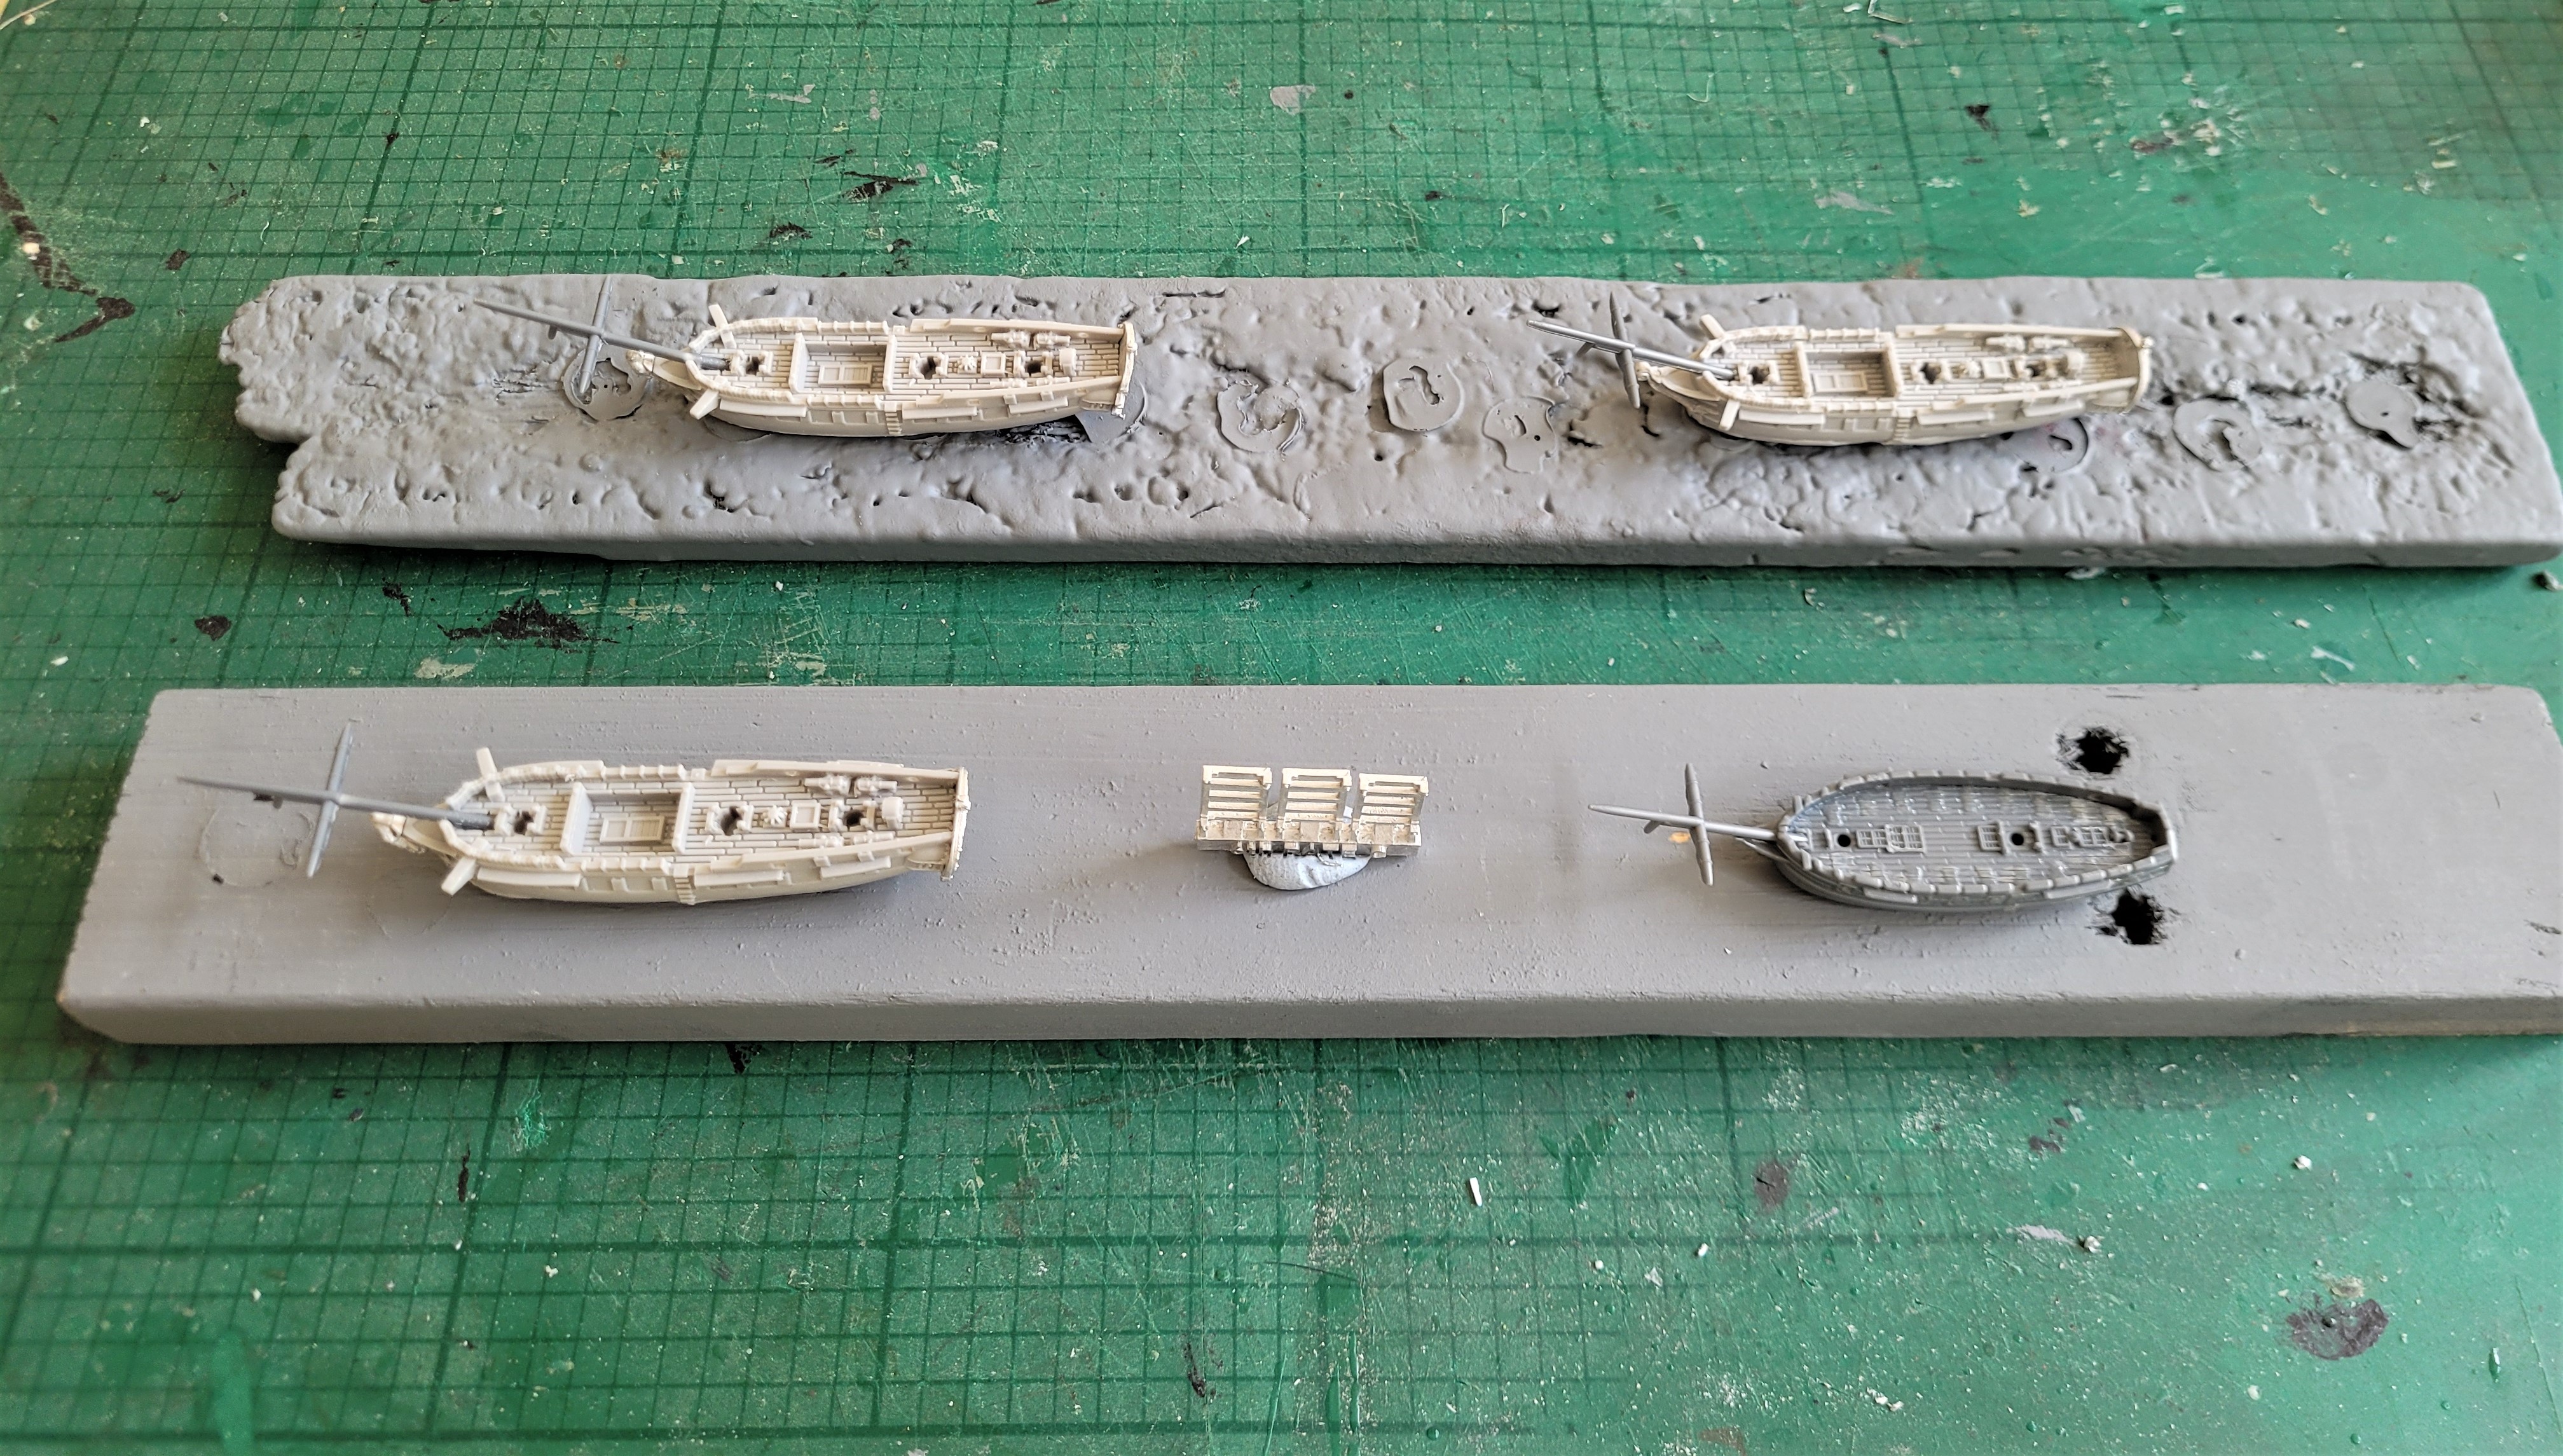
The model hulls are shown below with the guns removed from the brig and filler applied where needed prior to base coating and I will follow this post with a look at them once they are done.


If you haven't seen the game AAR for the debut role-out of this scenario then just follow the link below
to the DWG Club blog.
 |
| Devon Wargames Group - Bantry Bay 1796 Kiss Me Hardy |
More anon
JJ
What a great project. Love the cliffs they look superb!
ReplyDeleteHi Ray, thank you, I was really pleased with the end result. JJ
DeleteAn above and beyond project! Looking forward to the next installment.
ReplyDeleteHi William, thank you, that's very kind, and lots of stuff still to do this year.
DeleteCheers
JJ
Terrific stuff. I had to look twice to make sure the first completed piece wasn't actually a big lump of rock sitting next a work in progress. I enjoyed you Brisbane roundup too. It is always interesting to see the place where you live through someone else's eyes.
ReplyDeleteHi Lawrence, Thank you on both accounts and re Brisbane, Carolyn and I have lots of lovely memories of our time in the city.
DeleteCheers
JJ
The terrain is certainly very impressive - great work JJ! I also enjoyed reading your impressions of NZ a few months back!
ReplyDeleteHi and thank you.
DeleteI am looking forward to remising about New Zealand next month as we are welcoming a Kiwi to the DWG club meeting next month who touched base with me during that trip and is over here for a few months.
Cheers
JJ
Excellent terrain eye candy.
ReplyDeleteWillz.
Hi Willz,
DeleteThanks mate, it's made for a very pleasant change to get back to a bit of terrain making after a long break.
JJ