

In my last post, Carolyn and I were exploring Darwin, the capital city of the Northern Territory and finding out a bit about the town and its history, see link below, this being the tenth and final leg of our trip to Australia back in Jan-Feb 2023.
 |
| JJ's on Tour - Up the Top End in Darwin, Northern Territory, Australia. |
Our journey through Australia had started back in December 2022, when we arrived in Melbourne just before New Year after touring through New Zealand having arrived there via Vancouver, Hawaii and Fiji on a Pacific tour that had started the previous October 2022.
 |
| Our route so far on our travels through Australia, starting down in Melbourne just before New Year 2023. Map courtesy of https://www.freeworldmaps.net/australia/ |
Whilst in Darwin we had planned to tour inland to see the country in this part of the Northern Territory and to hopefully see more of the wildlife that frequents these tropical parts of the continent, whilst meeting the folks that make this place such a unique part of the country.
 |
| The local map around Darwin showing the two principal areas we visited on the Adelaide River and down the Stuart Highway to Katherine. |
Then on another adventure we took another tour that stayed on the historic Stuart Highway, along which many of the WWII fighter airstrips had hurriedly been created to defend Darwin and its surrounds from Japanese air attacks in World War II, to the Edith Falls and Katherine Gorge, to really get a sense of the amazing sights to be seen in the National Parks that make up a large part of the surrounding country, designed to better protect this natural wonder for future generations to appreciate.
 |
| Our trip to Katherine saw us making the detour out to the Edith Falls, before joining a boat cruise along the river via the Katherine Gorge and the rapids at Knotts Crossing, an extraordinarily beautiful part of the world. |
Jumping Crocodile Cruise
It was with great anticipation that Carolyn and I made our way into the commercial business area of Darwin early one morning to catch our coach that would take us on a guided tour out to the Adelaide River and more precisely to the Jumping Crocodile boat trip that we were booked in for, setting out along the Stuart Highway, before making a hanger left onto the Arnhem Way, past, as we were reliably informed by our guide, the Australian capital of the 'mullet' so called hairstyle that I had thought died out in the late 80's with Kajagoogoo, but turns out it is making a comeback in the uniquely named town of Humpty Doo.
 |
| One of the old WWII airstrips still to be seen near Darwin on the Stuart Highway |
In addition to keeping an eye out for outrageous hairstyles we were also treated to the preserved history of the area as the various fighter strips built alongside the road leading out of Darwin were pointed out to us evoking pictures in my mind of Spitfire Mk V's and VIII's and Curtis Kittyhawks roaring off at full throttle into the blue to contest another Japanese bombing and strafing attack.
 | |
Spitfires taking off from Livingstone 1943
|
Stopping just outside of Humpty Doo for a tea/coffee and natural break, we continued our journey past the dry scrub and sparse trees that characterise the country in these parts, made aware of the continual bush fires that are a part of the natural ecosystem with grasses reliant on fires to allow regrowth of new grasses and with trees developed to have branches high enough up the trunks to allow them to survive the height of the flames that sweep through on a regular basis.

Eventually we were parked up at the Jumping Crocodile jetty awaiting our skipper and the important briefing that would proceed our cruise to emphasise the importance of enjoying the experience whilst observing the very necessary requirement of not leaning out of the boat beyond the heavy steel cage of bars that encompassed it to avoid ending up on the breakfast menu of the creatures we were about to meet.
Sadly this briefing proved futile for one individual who despite being made aware of the dangers had to be reminded not to extend their arm out over the water with mobile camera in hand trying it seemed to get the perfect close-up whilst doing a very good impression of a piece of chicken on the end of a long string!

Of course whilst waiting to embark I made the most of the opportunity to capture some pictures of the other residents in the area and the magpie geese first seen in Port Douglas flying very high and distant graced us with some close up cameo shots.
 |
| Magpie Goose, Anseranas semipalmata, are important to Aboriginal people as a seasonal food source, as well as subjects of recreational hunting, and tourist attractions, thus their expansive and stable presence in northern Australia has been "ensured by protective management". |

However with the briefings completed and the usual collection of crocodile attack stories vividly described by our skipper we embarked on the boat and prepared to make our way up river with much anticipation while I enjoyed the antics of the principle bird of prey in these parts namely the Whistling Kites, enjoying circling on the early morning thermals as the sun gradually grew warmer with each minute.

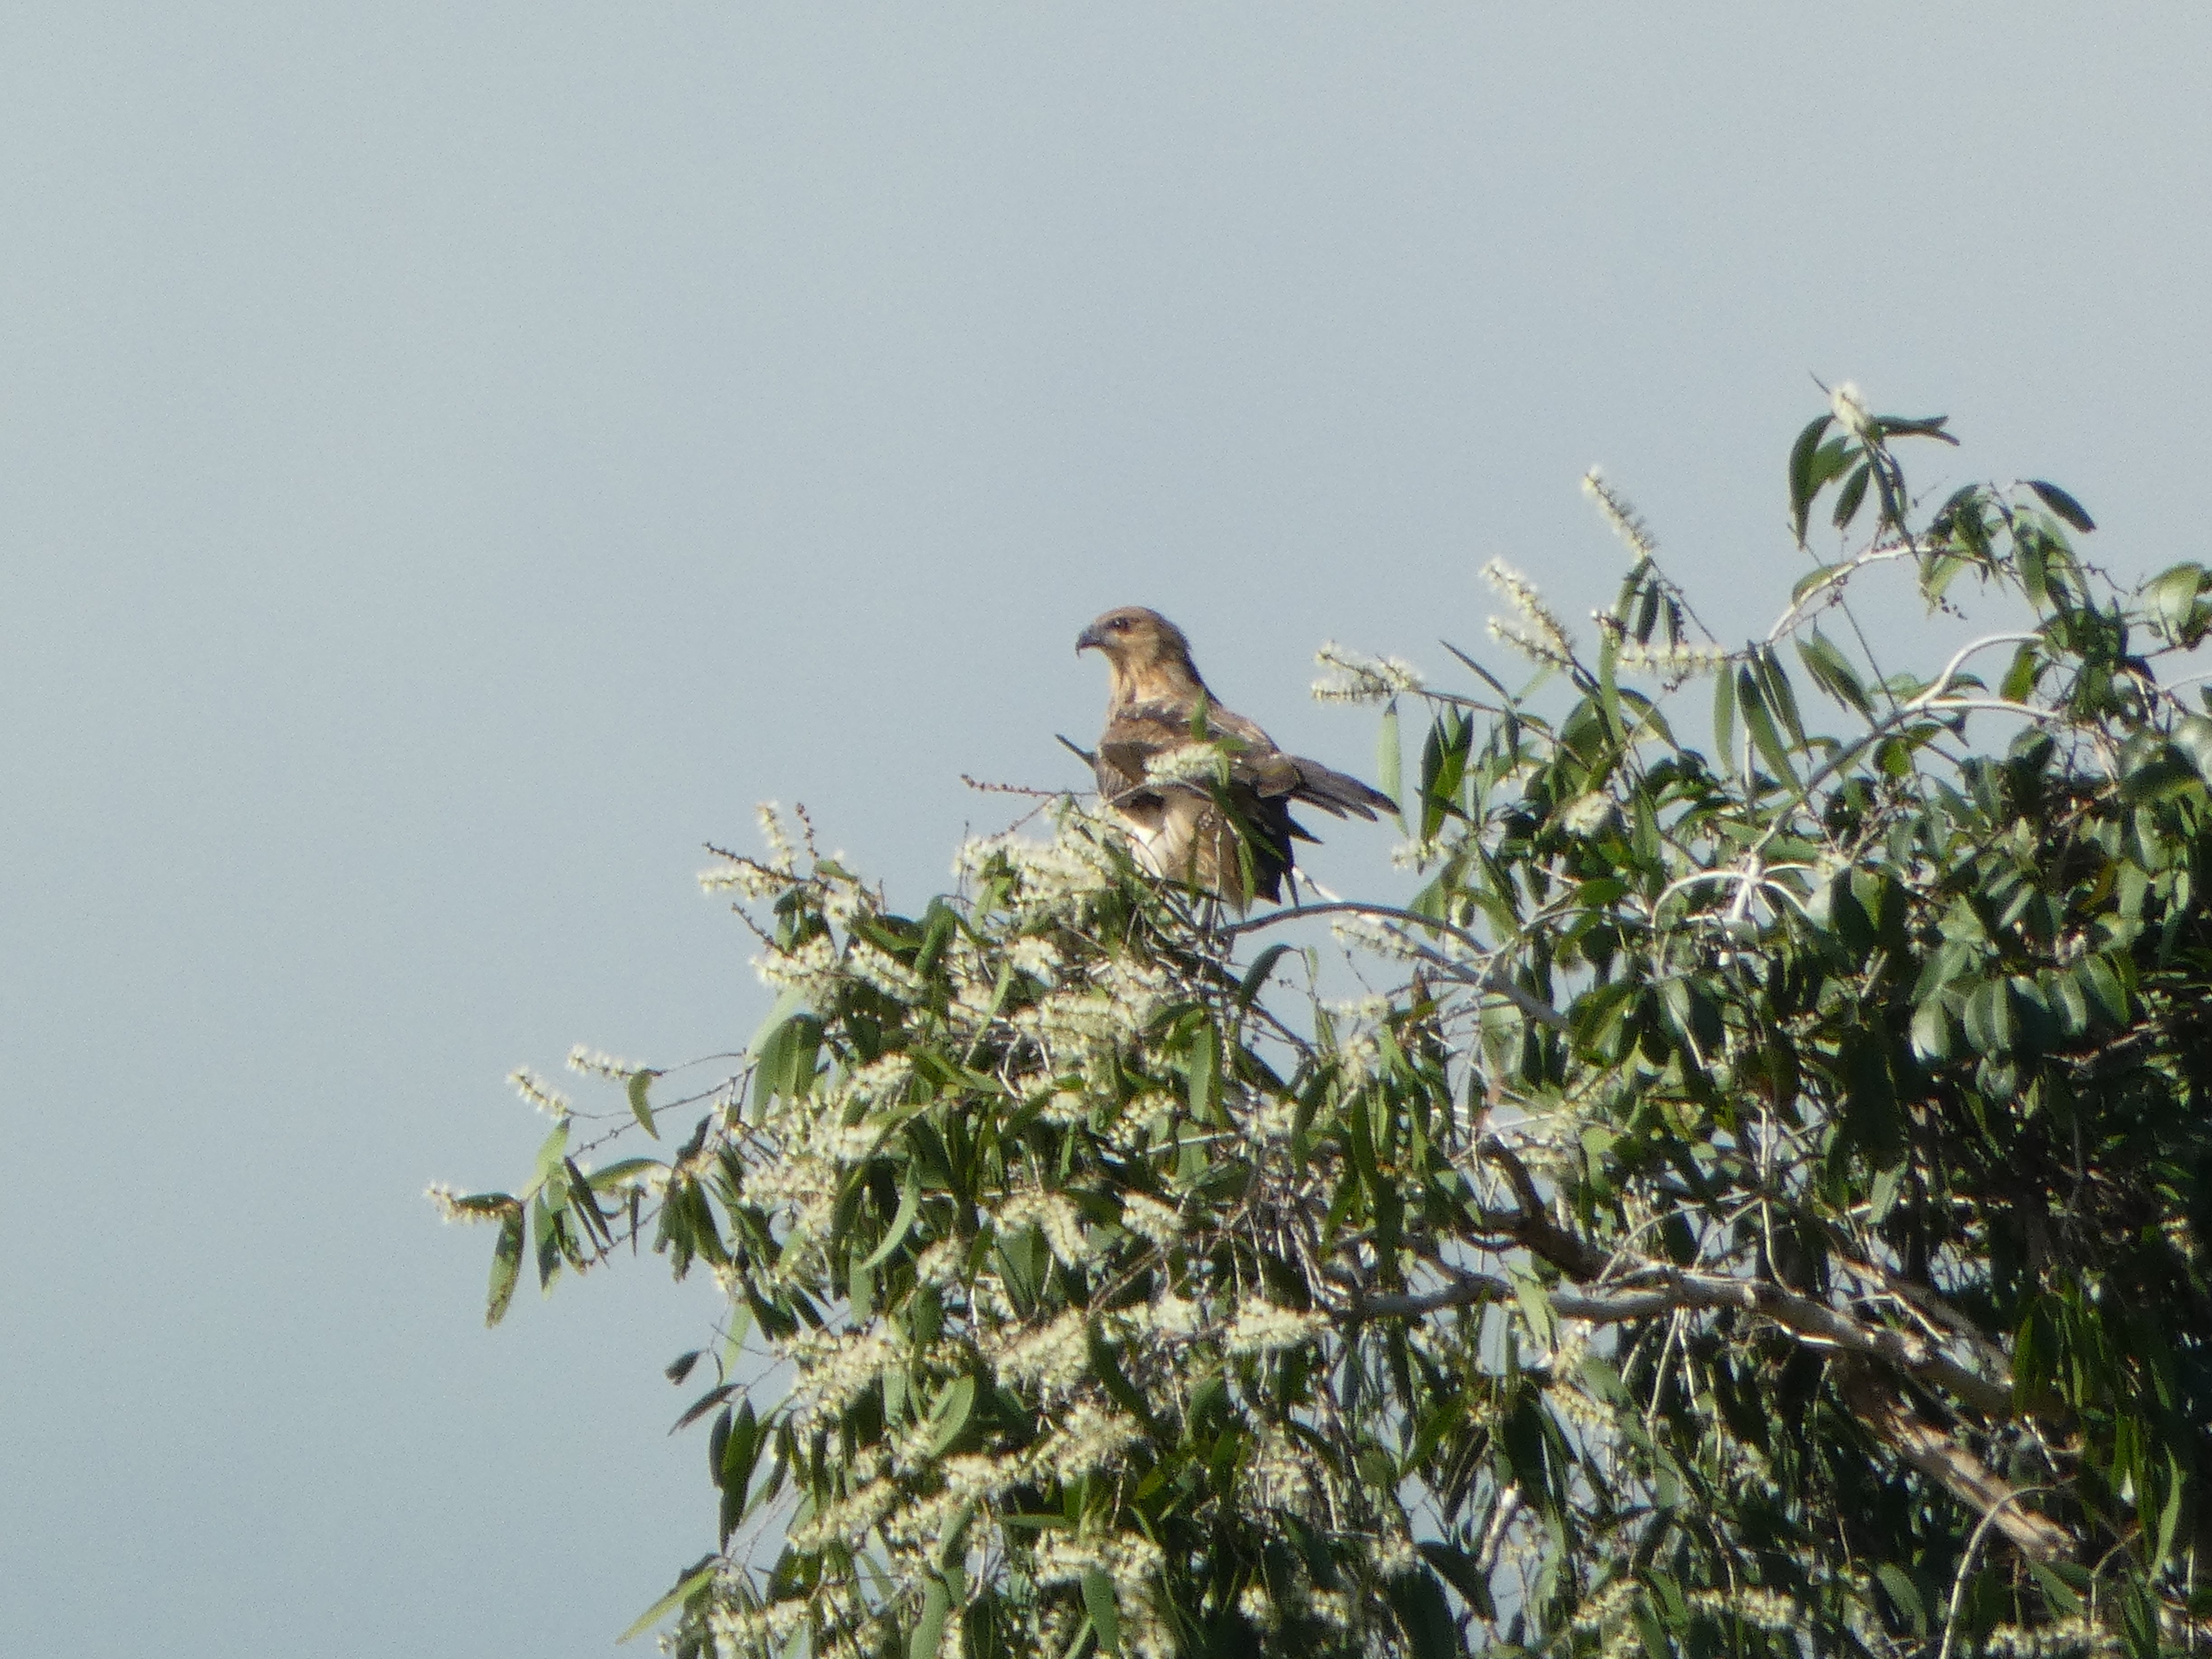 |
| Whistling Kite, Haliastur sphenurus, found throughout Australia, New Caledonia and much of New Guinea. Also called the whistling eagle or whistling hawk, it is named for its loud whistling call, which it often gives in flight. |

As well as the sky above, the water around was teeming with local wildlife emphasised with the appearance of archer fish close to the surface each time our boat eased into a small bay along the river bank as our crew scanned the area for potential crocodile sightings.
 |
| Banded archerfish, Toxotes jaculatrix. A study found that banded archerfish could be trained to hit moving targets at an accuracy rate of greater than 50% |
The archer fish is a remarkable creature in its own right with its rather fascinating ability to spit water to a great distance for such a relatively small fish and with the accuracy needed to dislodge any unaware insect clinging to overhanging plants and cause it to fall into the water below before ending up as fish food.

Most archerfish are able to spit at a range of 150 centimetres (59 inches), though some larger specimens may be capable of ranges of up to 2 to 3 metres (6 ft 7 inches to 9 ft 10 inches). When a prey is shot down, the banded archerfish begins to move towards the place where it will land within 100 milliseconds and can reach it within 50 milliseconds of its hitting the water.
Whilst admiring the groups of Archerfish manoeuvring close to the surface, it wasn't long until our mooring was joined by the creature we were all looking forward to seeing, as a female 'salty' surfaced close by in the little bay on the river where she had been known to have nested in previous years.
 |
| The saltwater crocodile, Crocodylus porosus, is a crocodilian native to saltwater habitats, brackish wetlands and freshwater rivers from India's east coast across Southeast Asia and the Sundaic region to northern Australia and Micronesia. |
The size of this female was very impressive considering we had only the experience of seeing the baby versions on our trip along the Daintree River, back in Queensland and everyone aboard was transfixed as she slowly made her way towards the boat, drawn in by the chicken quarter loosely tied to a chord on the skippers feeding rod.
 |
| Our cautious female eyes up the boat before moving closer for a feed |
Females are thus similar in size to other species of large crocodiles and average slightly smaller than females of some other species, like the Nile crocodile; and the saltwater crocodile has the greatest size sexual dimorphism, by far, of any extant crocodilian, as males average about four to five times as massive as adult females and can sometimes measure twice her total length.


Agro and Sneaky were on top form that morning as we cruised up and back along the river demonstrating the sheer power and awesomeness of these apex predators and why they are very much at the top of the food chain in these parts.


Suddenly the female that had been happily grabbing the proffered chunks of raw chicken turned away from the boat and headed back to her original station close to the bank which was remarked about as unusual, almost as if she had been spooked.


Within minutes of the female having departed, the boat seemed to move under a slight swirl in the river that was most noticeable on the side where the female had been feeding and suddenly those on that side were greeted by the toothy grin of a very large male known locally as 'Sneaky' for very obvious reasons, he having moved in under the keel of our boat completely unnoticed until he decided to break the surface, making it very obvious why the smaller female had moved away.
 |
| The swirl in the river close to the boat was the first sign that 'Sneaky' was close by. |

Male saltwater crocodiles are very territorial, patrolling and defending their own sections of the river on which several females might be found usually holding their own smaller part of the river in his territory and with whom he will mate, and this part of the river was Sneaky's patch.
 |
| Now that is one big male saltwater crocodile |
These big male salties will fight determinedly against other males intruding into their territory and Sneaky was bearing the scars of a recent fight with the male next door, named locally as 'Agro' who had had the temerity to move into Sneaky's part of the river to get some chicken on a recent cruise, only to find his nose between the teeth of his neighbour as the two males had a full on fight to remind all parties where the demarcation line was, and Agro was seen later up river, still bearing the scars of that fight on his nose, when he came to pay us his respects.
 |
| Sneaky jumps for his chicken quarter showing his missing lower front tooth lost recently in his big fight with Agro from next door. |
To really appreciate the power and awesomeness of this amazing creature I have uploaded a video clip of Sneaky in action.
Further up river 'Agro' hove into view still bearing the scar on his nose from his recent confrontation with Sneaky.
 |
| Agro, carries a pink scar on his snout, a souvenir from his recent dispute with Sneaky. |
Agro and Sneaky were on top form that morning as we cruised up and back along the river demonstrating the sheer power and awesomeness of these apex predators and why they are very much at the top of the food chain in these parts.


Carolyn and I had a fantastic cruise with The Original Adelaide River Queen Jumping Crocodile Cruises and our skipper Rex was excellent with his knowledge of these amazing creatures and the other wildlife to be seen on the river and it was a great comfort to see the loaded automatic he carried on his belt, although I wasn't sure if that was to shoot the crocodile of any unfortunate tourist dragged off his boat, possibly to save them from an agonising and tormented end.

On the return journey from our meeting with Sneaky and Agro, we pulled in at the Adelaide River War Cemetery, administered and beautifully kept by the Commonwealth War Graves Commission (CWGC) where we had an opportunity to pay our respects to those killed in this part of Australia in World War II.

I have visited quite a few CWGC cemeteries around the world and all are an oasis of peace and beauty in this busy modern world and wonderfully maintained as memorials to the ultimate sacrifice made by those who have gifted us the freedoms we enjoy today.

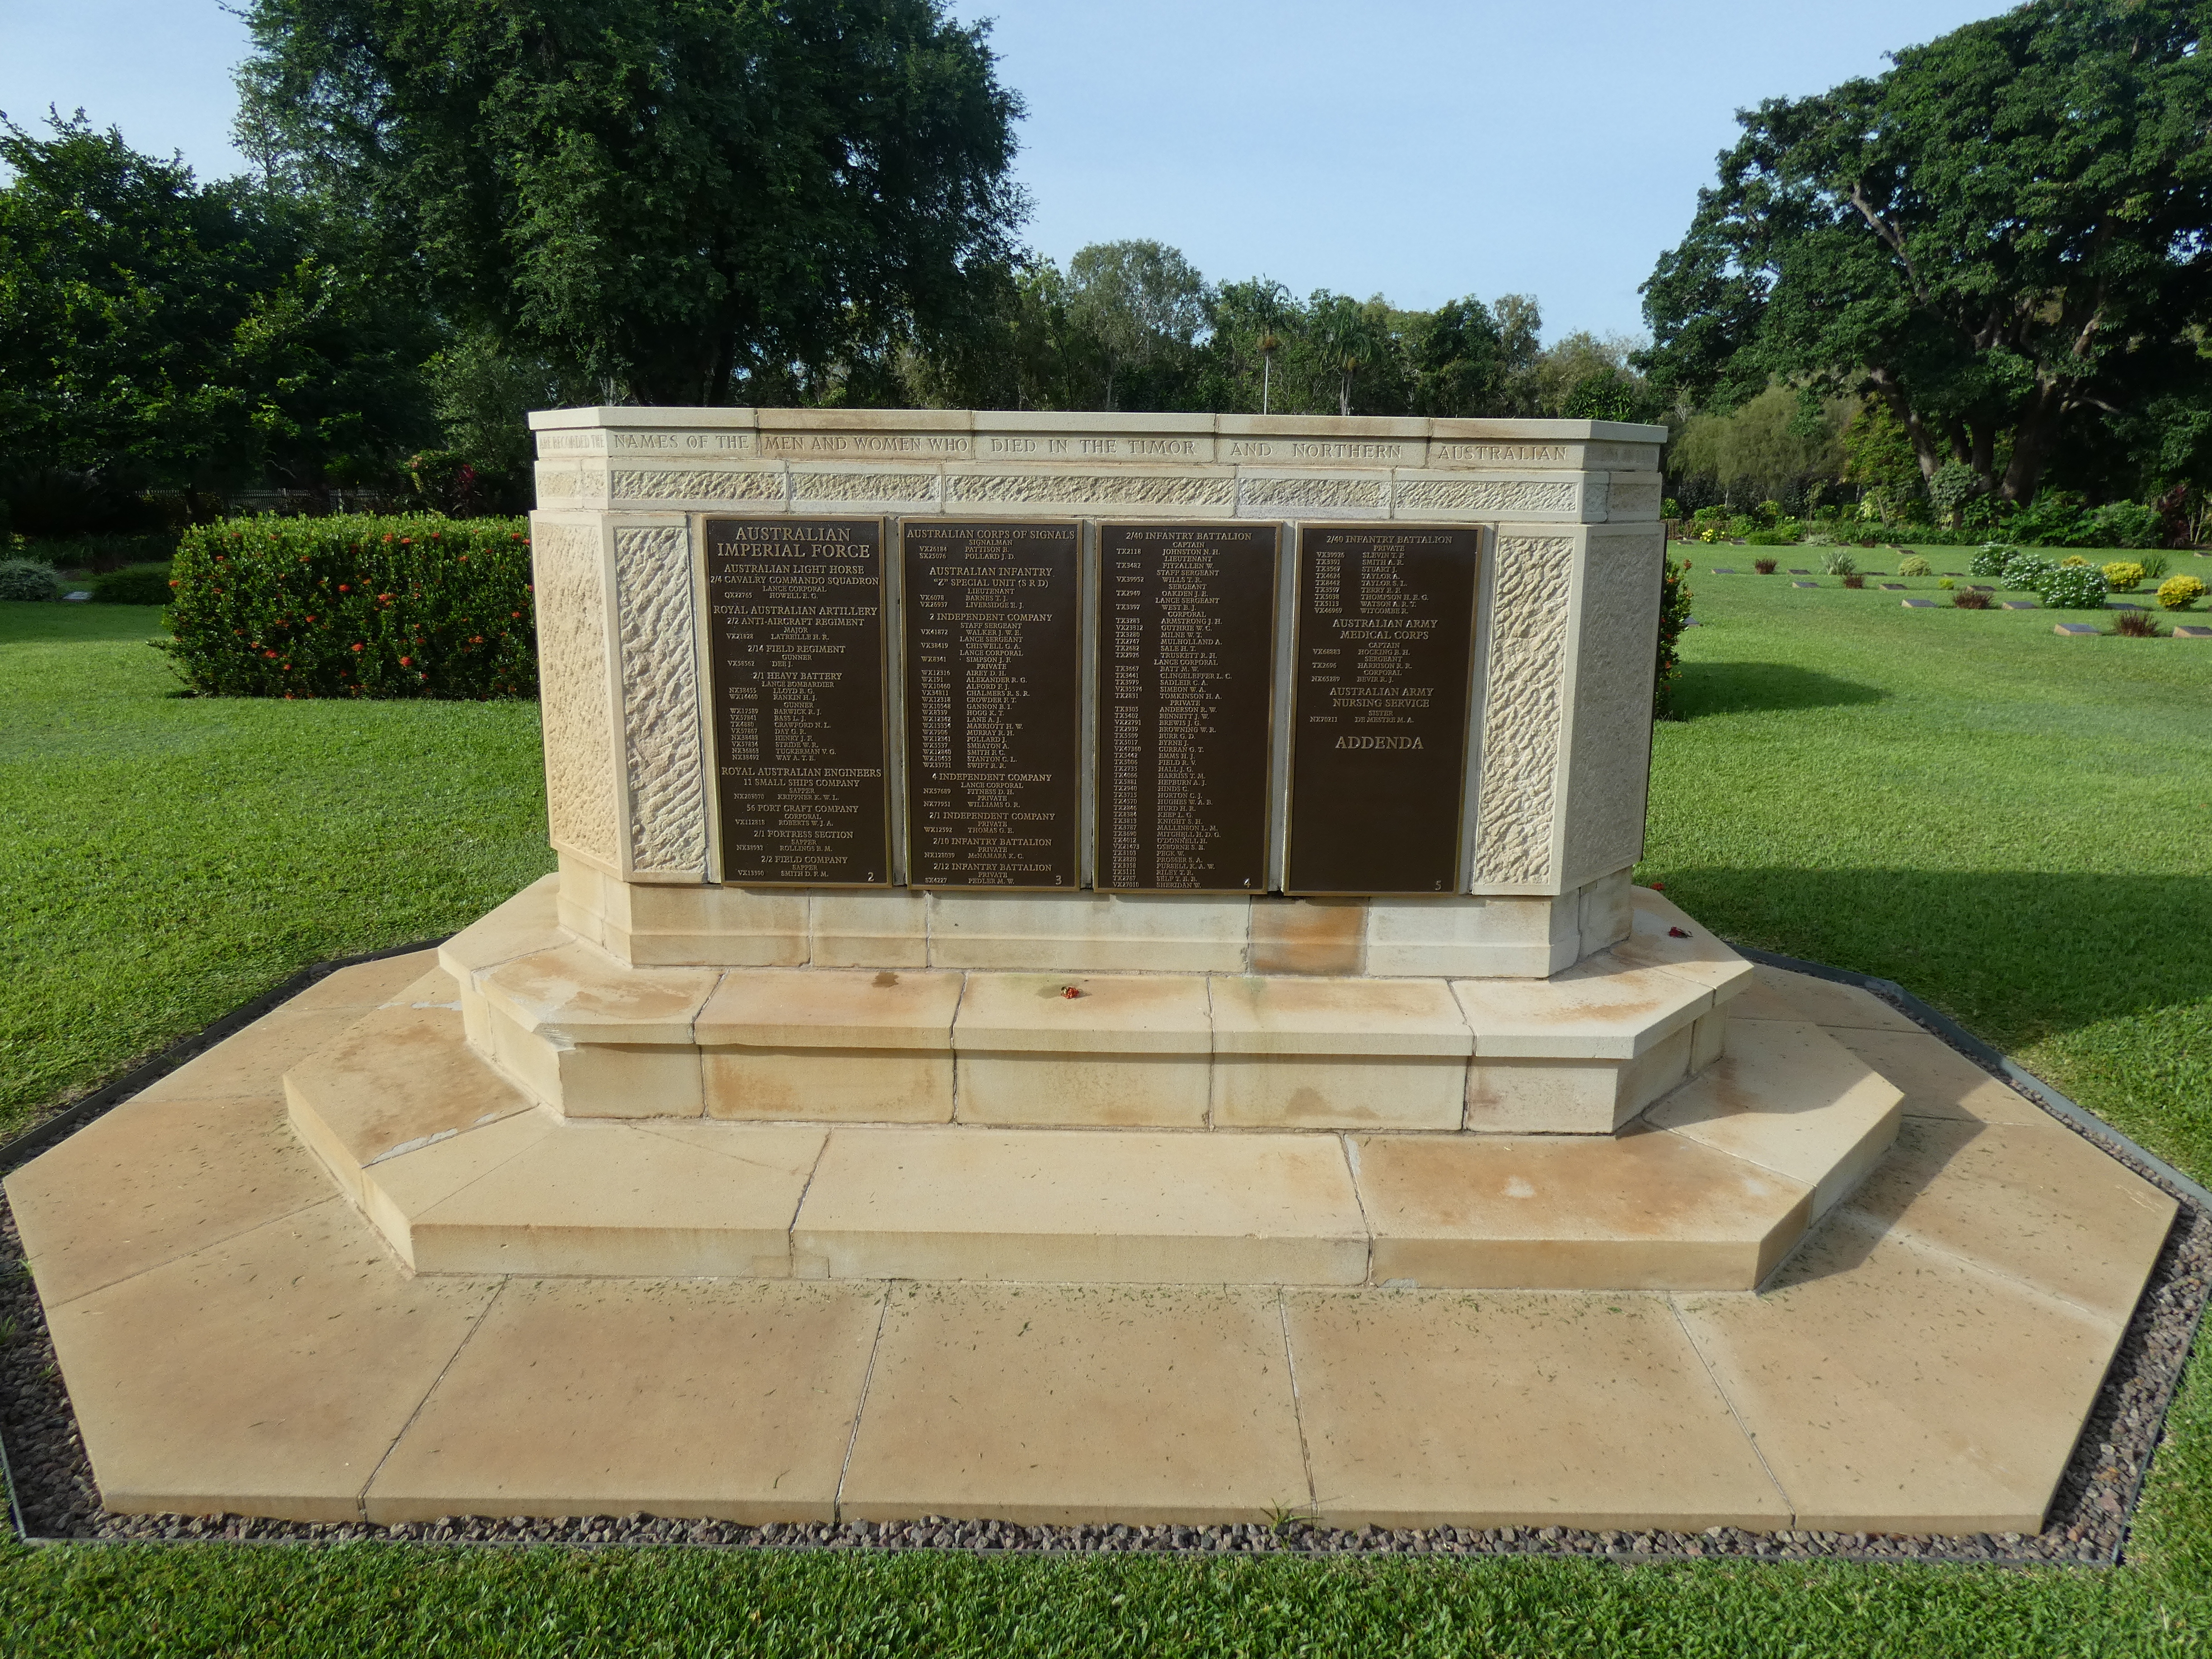


Perhaps the most moving aspects of visiting the graves of the fallen is the grief at their loss expressed in the loving messages from family which really brings home the futility of war for all involved but especially those who lost loved ones and for Carolyn and I enjoying our time traveling was a gentle reminder of how fortunate we were at not knowing such grief in our own lives.


The youth of many of those killed was also a stark reminder of the fact that it is often the young that we send to war, but how sad to see the grave of young Deck Cadet Stobo, just sixteen years old when he was killed during the first air raid on Darwin on the 19th February 1942.


Such casualties are easy to dismiss as 'collateral damage', but that ignores the added callousness displayed by military forces that simply don’t care, contrasted with the sincere efforts of those that make every effort to avoid them.

Oblivious to the grief and pain of loss expressed on the monuments around them, nature expressed in the delightful form of the Northern Fantails, the local species (Rhipidura) hear abouts and one that we first encountered in New Zealand back in November the previous year (Rhipidura fulignosa), could be heard scurrying about in the nearby leaf litter, no doubt in search of a tasty bug or two to feed a growing brood of young, and their busyness was a beautiful symbol of life carrying on in peace and a fitting memorial to the sacrifice of the generation we were paying respects to.
 |
| Northern Fantail, Rhipidura rufiventris, is found in New Guinea and northern Australia (from Broome in Western Australia to the Shire of Burdekin in Queensland) and is natural habitats are subtropical or tropical moist lowland forests and subtropical or tropical mangrove forests. |

Our next adventure into the interior of the countryside surrounding Darwin saw us taking our early-morning bus ride again along the Stuart Highway, out to the Nitmiluk National Park, previously named Katherine Gorge National Park, with its northern edge bordering Kakadu National Park.
 |
| The Stuart Highway, often referred to simply as "The Track", runs 1,690 miles (2,720 km) from Darwin, in the Northern Territory, via Tennant Creek and Alice Springs, to Port Augusta in South Australia. https://commons.wikimedia.org/wiki/File:StuartHighway.png |
The Stuart Highway is a remarkable road, perhaps one of the great historical roads to rank alongside the Ridgeway in England or the Silk Road between China and India for its significance; serving not only the function of a major modern-day link in the road network of Australia, and facilitating our happy tour inland, with the added functionality as a potential landing strip along its length for the Royal Flying Doctor Service, but also as a monument to one of the great founding fathers of the modern country and great British and indeed Scottish Victorian explorer, John McDuoall Stuart, who led the first successful expedition to traverse the Australian mainland from south to north and return, through the centre of the continent, in 1861–1862.
.jpg) |
| John McDouall Stuart, circa 1860 – British explorer (1815-1866) |
In 1871–72 the Australian Overland Telegraph Line was constructed along Stuart's route and the principal road from Port Augusta to Darwin was also established on a similar route.
The route was traversed by motor vehicles in the 1920s and with the needs of military transport in World War II a proper metalled road was nearing completion in July 1942, with a few sections still to be tarmacked, to produce the modern road of today.


The Edith Falls is a series of cascading waterfalls and pools on the Edith River, located approximately 37 miles (60 kilometres) north of Katherine, a town of just under 7,000 souls and the fourth largest in the Northern Territory.

The local Jawoyn people, are the custodians of Nitmiluk National Park and in the Jawoyn language, Nitmiluk means "place of the cicada dreaming", which I have to admit is a glorious name for a national park, and perhaps the Royal Duchy of Cornwall and the Prince of Wales should come up with something similarly inspiring for the Dartmoor National Park back home, but then on reflection perhaps not, as speaking as a 'first nation member' you can't beat your own heritage with Sir Arthur Conan Doyle's 'Hound of the Baskervilles' thrown in for good measure.

Anyway I digress; the principal motive for our visiting the park was to visit the world famous Edith Falls and Katherine Gorge which are stunning examples of the beauty to be found in the local area which I hope I have captured in my pictures from our day.

The Edith Falls is a series of cascading waterfalls and pools on the Edith River, located approximately 37 miles (60 kilometres) north of Katherine, a town of just under 7,000 souls and the fourth largest in the Northern Territory.

The falls descend from an elevation of 577 ft (176 metres) above sea level and range in height between 29–39 feet (8.7–12 metres ), with trails to the top of the escarpment, allowing visitors to view the waterfalls that are also connected to Katherine Gorge via the 41 mile (66-kilometre) Jatbula walk.

 |
| Another Banded Archerfish, Toxotes jaculatrix, this one not having to avoid salt water crocodiles this far up river. |
 |
| Black Faced Cuckoo Shrike, Coracina novaehollandiae, is a common omnivorous passerine (perching bird) bird native to Australia and southern New Guinea which are widely distributed in almost any wooded habitat throughout the region, except in rainforests; but can also occur in urban areas, and are a fairly common sight on power lines in Australian cities such as Sydney and Perth. |
This was followed up by my quietly detaching myself from our tour party as I spotted a local speciality, the Blue Winged Kookaburra, Dacelo leachii, native to New Guinea and Northern Australia, managing to get my pictures before I was spotted by someone in the group who noisily announced what I was taking a great interest in, that caused the bird to make a rapid departure into the surrounding trees as the ensuing stampede of tourists advanced to join me in my part of the bush.
 |
| Blue Winged Kookaburra, Dacelo leachii, with its very distinctive blue wings and brown shoulders is native to northern Australia and southern New Guinea and was first collected by Sir Joseph Banks in 1770, but was initially overlooked and confused with the laughing kookaburra, and was finally officially described by Nicholas Aylward Vigors and Thomas Horsfield in 1826. |
This episode clearly demonstrates why I quietly move away from large groups of noisy folks when trying to meet the locals, and Carolyn has learned to wait quietly while I take pictures before enquiring what it is I've seen or simply looking over my shoulder and following my concerted gaze to learn for herself.
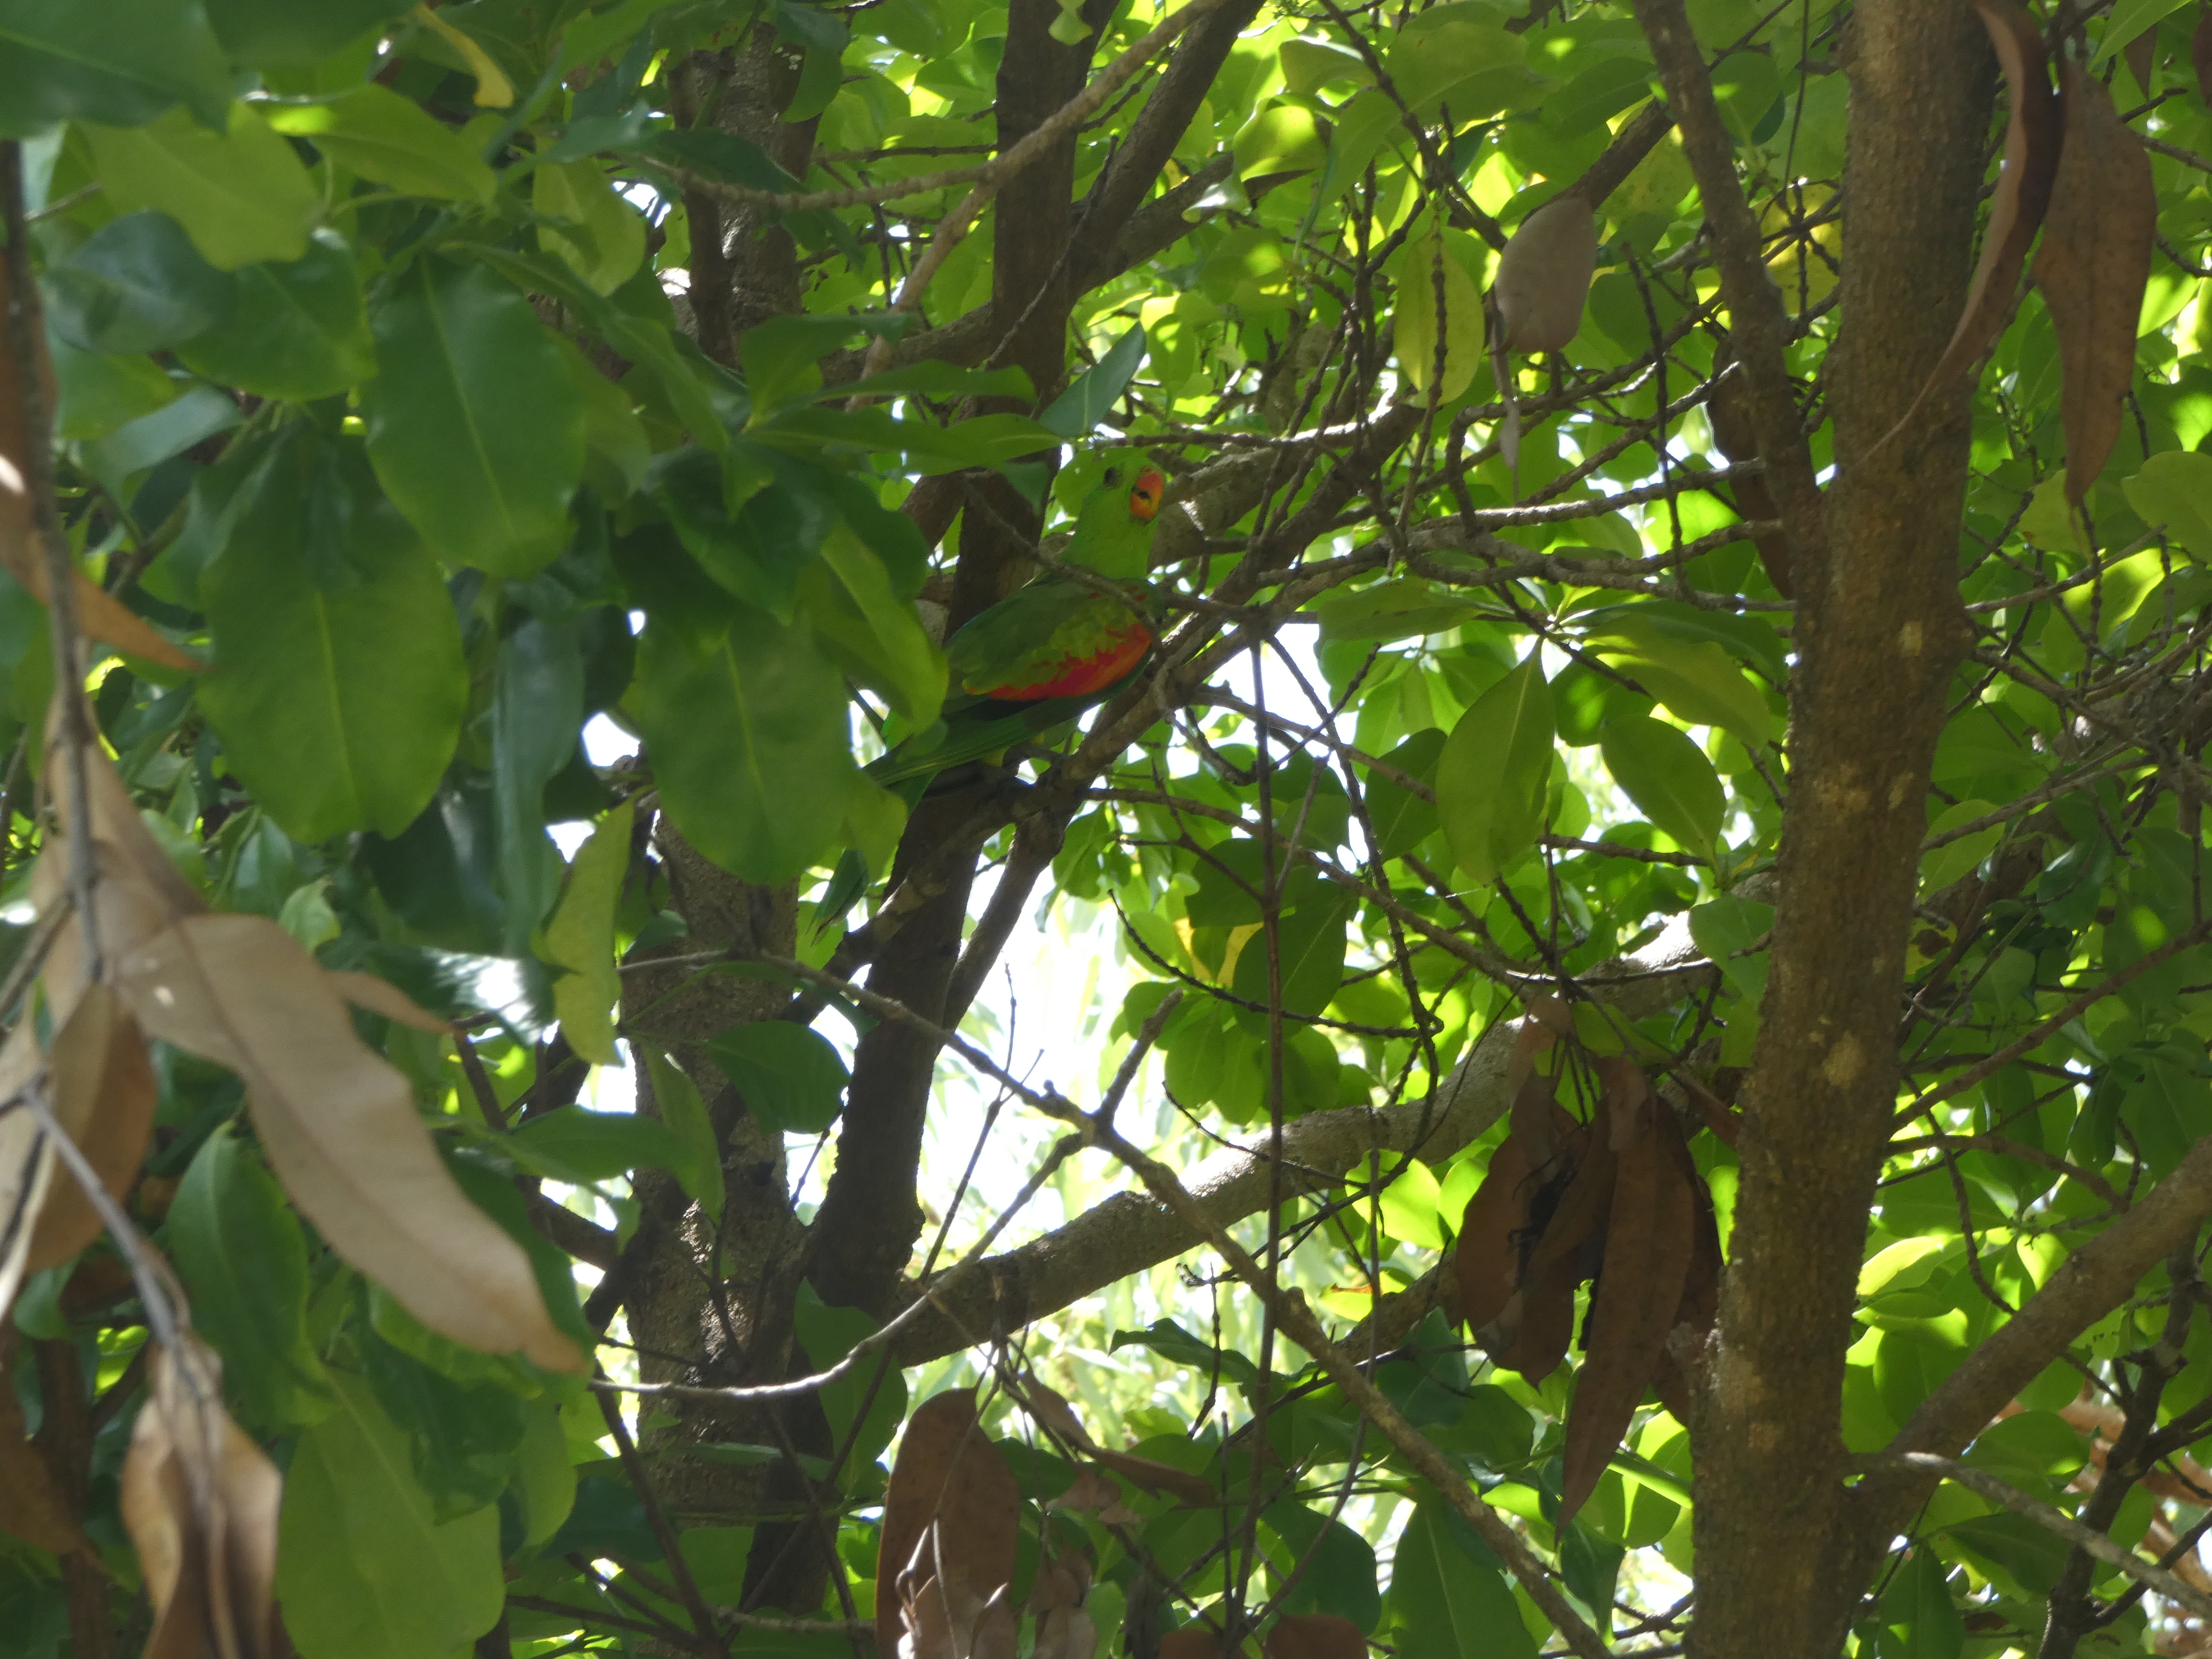 |
| Red Winged Parrot, Aprosmictus erythropterus, can you spot me yet? Native to Australia and New Guinea, it is found in grasslands, savannah, farmland, and woodland. |
The short drive from our little excursion to visit Edith Falls soon saw us parked up near the jetty area to join our boat to take us on a pleasant afternoon cruise up and back along the Katherine Gorge, with superb views to be seen from the parking area above the river bank before we made our decent to begin our voyage.


 |
| An illustration of the Fairy Martin, Petrochelidon ariel, and its nests from my copy of The Compact Australian Bird Guide, my familiar companion on our trip to this part of 'Down-Under'. |


With our appetite for the delights of antipodean bucolia fully satisfied in the Nitmiluk National Park we returned to Darwin and in the third and final post covering our stay there I will take a look at two museums I was keen to visit during our stay, namely the Darwin Military and Aviation Museums, to inbibe a little more of the local military history of the area.
As always, more anon
JJ