

Corunna Retreat - Peninsular War Tour 2019
The period between January 1809 when Sir John Moore's army retreated to Corunna and April with the arrival of more British troops at Lisbon, together with the return of Lieutenant General Sir Arthur Wellesley to command them, saw another one of those periodic lulls where the French took stock of their territorial gains, in the main, and prepared to make further inroads into those areas of the peninsula not then occupied by Imperial forces.
These moments of comparative stasis for the main armies in the theatre were by no means peaceful or without actions, as one side sought to consolidate and police its hold on recently acquired ground and the other sought to disrupt such activity and inflict losses where the opportunity presented.
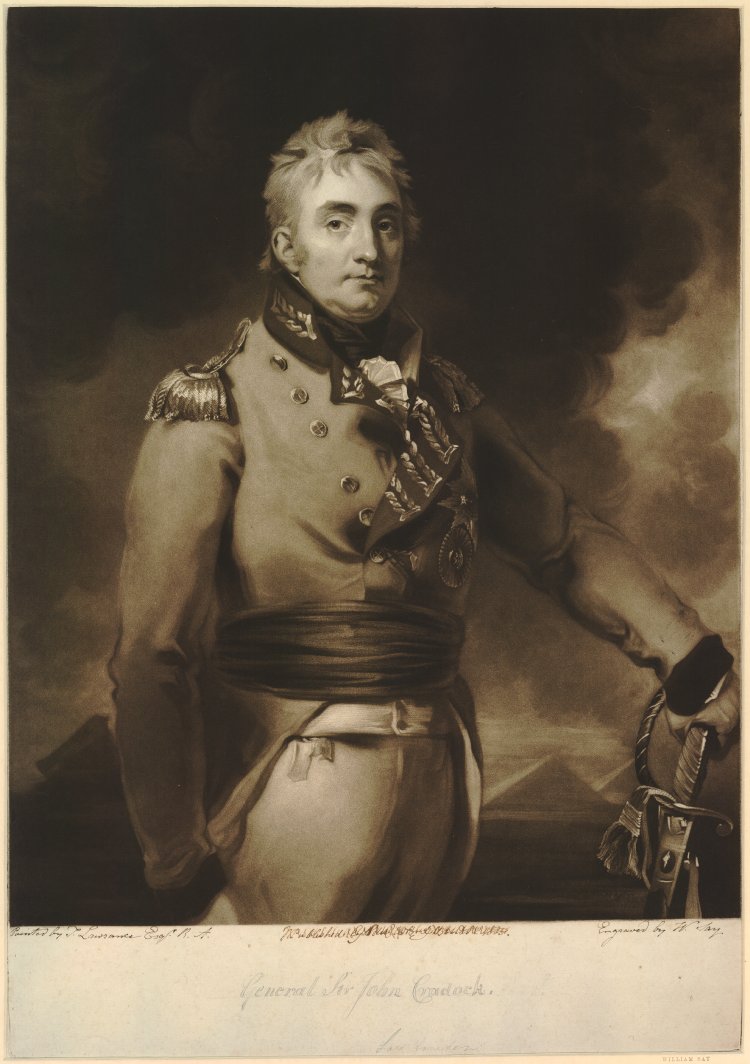 |
| Major General Sir John Cradock commander of British troops in Portugal after the evacuation of Sir John Moore's army at Corunna in January 1809 |
During this time the British and their Portuguese allies took stock of their positions in and around Lisbon under the steady but cautious management of Major General Sir John Cradock as Marshal Soult entered Portugal with French II Corps, via the tortuous mountains of northern Portugal, harassed constantly by Portuguese militia and eventually forced to halt his invasion in Oporto as he desperately tried to reestablish contact with other French forces and his own outposts.
Meanwhile Marshal Victor and I Corps was tasked with monitoring and rooting out the remains of the Spanish forces that had been virtually destroyed by Napoleon's invasion in the previous autumn south and west of Madrid as King Joseph established his court and centre of operations; with the French Marshal also watching the Portuguese border for any Anglo-Portuguese movements around his and their garrisons and attempting to control the ever growing threat from partisans, all in preparation for fulfilling the Emperor's master plan for a dual invasion of Portugal by I and II Corps designed to split and defeat the Allied defences.
This period of the war saw many small actions fought over the plains of Western Spain as Allied forces sought to disrupt French plans by control key areas of terrain and harassing their troops.
One of the principle formations that lead the Allied fight was the British trained and led Loyal Lusitainian Legion deployed in the area to coordinate attacks with Portuguese militia and Spanish partisans, basing its operations in the Portuguese fortified town of Almeida, giving it immediate access to the frontier and western Spain.
 |
| A soldier of the Loyal Lusitainian Legion as depicted in the Bussaco Military Museum |
The Loyal Lusitainian Legion (LLL) was a Portuguese unit organised by emigre Portuguese officers and the Portuguese ambassador in Britain.
As well as Portuguese officers, the unit was led by British officers, including its commander, Colonel Sir Robert Thomas Wilson with a cadre organised in Plymouth in 1808 before its transfer to Portugal at the end of that year to raise further men into a planned Light Infantry Regiment of two battalions and a light six gun artillery battery.
As well as leading the small war in Western Spain it would see action in the Talavera campaign and at the Battle of Bussaco before its eventual disbandment and absorption into the Allied army as the 7th, 8th and 9th Portuguese Cacadores.

The map below is adapted from one produced by Sir Charles Oman in his history of the Peninsular War, incorporating details from a similar map in the Osprey 'Raid' series of books looking at the LLL and its activities leading up to the battle of Alcantara on the 14th May 1809.
Its operations in Western Spain are clearly shown starting from its operating base at Almeida (1) in January 1809, where, joined by Portuguese militia and Spanish partisans it soon launched deep attacks into Spain (2) during the next three months, causing the French to think they were facing a major Allied force in the area.
 |
| (1) January 1809 - Loyal Lusitanian Legion along with Portuguese militia and Spanish partisans commence deep raids into Western Spain. (2) Jan, Feb, March 1809 - LLL fans out across the area causing alarm among the garrisons of Lapisse's division over the likely size of the Allied force in the area. (3) Early April 1809 - General Lapisse, summoned to rejoin Victor at Merida, makes a feint towards Ciudad Rodrigo, summoning the city and drawing in the Allied forces to its defence before pressing on south. (4) Merida is Victor's I Corps HQ able to watch the frontier area and especially Badajoz. (5) Lapisse sacks Alcantara on his way through and retreats as Colonel Mayne raids the town on 12th April 1809. (6) 14th May 1809 - Thinking that Mayne's position around Alcantara heralds an Allied offensive towards him, Victor attacks and takes Alcantara. (7) June 1809 - Victor pulls back his forces to Talavera to shorten his supply links with Madrid whilst maintaining his observation of the Tagus valley. |
The principle French formation in this area was General Lapisse's 2nd Division on detachment from Victor's I Corps and based at Salamanca.
The movements and actions of this division during this period are covered in my post
2/45e Regiment de Ligne looking at the French regiment as part of my Talavera 208 project, that saw the eventual summoning of the division back to I Corps in and around Merida, and Marshal Victor's subsequent actions leading up to his eventual withdrawal to Talavera where he hoped to better provision his army, finding it difficult to sustain itself between Trujillo, Caceres and Merida.
The Bridge at Alcantara
With the arrival of Lieutenant General Wellesley in Lisbon on the 22nd April 1809, the Allied stance in Portugal changed almost immediately from the defeatist attitude of General Cradock, ready to board the boats at the first sign of a French advance towards the capital, to an aggressive defence of the country that would see the new commander of Allied forces head north to drive Marshal Soult back over the Galician mountains in disarray at the second battle of Oporto on the 12th May 1809 and freeing the country of French troops.
To guard the approaches into eastern Portugal whilst he headed north to deal with Soult, Wellesley dispatched Major General J.R. Mackenzie with 12,000 Allied troops to watch and guard the border area around Alcantara against any possible attack by Marshal Victor.
Mackenzie gathered his troops around Castello Branco in Portugal under orders to hold the French on the upper Tagus should they advance on central Portugal, with the key position between him and Marshal Victor's I Corps being the bridge at Alcantara just over the border.
Alcantara's imposing Roman bridge was built in the 2nd century AD at the behest of Emperor Trajan as recorded in 105 AD on one of the inscriptions on the archway at its centre, and straddles the deep valley of the River Tagus nestled below the Moorish town of that name, derived from the Moorish 'al-Quantara', simply meaning 'the bridge'.
In 1214 the town was finally captured from the Moors by King Alphonso IX of Leon and entrusted to the Knights of the Order of Calatrava, succeeded two years later by the Knights of St Julien del Parero who later became the Order of Alcantara, securing the town throughout the 'Reconquista' until the fall of Moorish Grenada in 1492.
The remains of its kinghtly past are all too obvious to this day with the monastery of San Benito built in the late 15th century by the Order of Alcantara, still to be seen atop the hill overlooking the bridge
In 1809 the change in the Allied higher command also saw a change in command for the LLL with Sir Robert Wilson called to serve on Wellesley's staff bringing with him all his acquired knowledge of the theatre; seeing Lieutenant Colonel William Mayne assume command; and on the 27th April 1809 receiving orders to to march with the Legion and its guns to Alcantara, together with Lieutenant Colonel Grant commanding the Idanha Militia Regiment.
Mayne's orders stated;
"Sir,
I am commanded by Marshal Beresford to direct that you proceed immediately with the Loyal Lusitanian Legion, under your command, to Alcantara.
You will be followed by the militia regiment of Idanhia, which is ordered to march to Castello Branco, and to place itself under your orders.
You will, of course, take with you the guns and howitzers attached to the Legion ; and on your arrival at Alcantara, you will make such a disposition of your force as shall appear to you best for the defence of the passage of the Tagus at that place. This is an object of great importance, and you will therefore take every measure necessary to ensure it. The Idanhia regiment marches tomorrow, and will reach Castello Branco on the 3d of May. I have not sent any specific route for your march from Castello Branco to Alcantara, you will, therefore, of course, march the Legion and the other regiment, by that which shall appear to you the shortest and most convenient.
You will have the goodness to acknowledge the receipt of this letter, and when you arrive at Alcantara, you will report, for the Marshal's* information, upon the state of things there, and
upon all that you may think necessary for him to be acquainted with.
I have the honour to be, &c. &c.
(Signed) B. D'URBAN,
Quarter-Master-General.
P. S. Lieutenant- Colonel Grant, who was on his way to Sir R. Wilson, has been directed by the Marshal to join you, as I am aware of the great assistance you will derive from his commanding
your cavalry and out-posts."
* Refers to Marshal Beresford, nominal commander of Portuguese Troops under the Portuguese Regency and General Wellesley.
 |
| Our first view of the amazing Roman bridge at Alcantara, spanning the the River Tagus, with its arch dedicating the crossing to the Emperor Trajan. |
The precise order of battle for Mayne's force is not recorded but Lt.Colonel Mayne describes his force as numbering no more than 1,800 men.
 |
| Portuguese Dragoons of the 11th Regiment as depicted here accompanied Mayne's brigade to Alcantara bridge |
If we work on a figure of around 1,800 to 2,000 men, various sources suggest a cavalry contingent composed of fifty troopers of the Portuguese 11th Cavalry, six cannon and crew, with the 1st battalion of the Legion at about 750 men and the Indanha Militia Regiment indicated at around 1,200 men strong in two battalions.
 |
| The Loyal Lusitanian Legion provided the model for the Portuguese army as a whole, trained to British methods and that would first appear in 1809, providing an infantry force as steady and able to deliver formidable firepower as the British. |
Marshal Victor was soon aware of the build up of Allied troops on the border with Portugal as Mayne's force not only set up positions on the bridge at Alcantara but started to push out patrols beyond the town on the French bank of the Tagus; and General Lapisse would have no doubt appraised him of the identity of the aggressive green clad troops his soldiers were encountering.
 |
| The Portuguese Idanha Militia had blue tunics with red collar and blue cuffs and a round hat with a fur crest over the crown and yellow plume to its side. In reality the uniform may have looked quite different after the effects of campaigning. |
Cut off from Ney's VI Corps in Galicia and Soult's II Corps somewhere in northern Portugal by the activities of Spanish and Portuguese partisans, Victor can't be blamed for feeling somewhat exposed, with the Army of Estremadura building up its strength around the walls of Badajoz under General Cuesta and a more aggressive Allied posture on the Portuguese border perhaps indicating a possible joint offensive towards him.
Inactivity was clearly not an option, as the Emperor would expect him to offer support to Soult's offensive by initiating action towards eastern Portugal, despite the threat to the south from Cuesta. Thus he determined to advance on Alcantara and into eastern Portugal with a strong detachment of around 10-12,000 men to create a diversion, whilst leaving the balance of his corps around Merida to observe the Spanish.
 |
| A wide angle view of the bridge from the Allied side of the Tagus with the convent of San Benito and the town on the hill beyond the bridge, centre of picture. |
The French force, led by Victor was composed of General Lapisse's 2nd Division, familiar with the terrain and the opposition, together with part of Latour Maubourg's dragoon division and about twelve 8 and 12 pounder guns marching from Merida on the 11th May.
 |
| Portugal is an extremely hilly and mountainous part of the Peninsula and since 1764 it had equipped its forces with light mountain artillery. British light howitzers and French brass 4 pounder light guns were sent from Britain to be issued to the Legion, this example seen in the Almeida Military Museum. |
On the 14th May French troops closed in on the town and skirmishing commenced as they drove in the Allied pickets.
Lt. Colonel Mayne described the action in his report to General Mackenzie thus:
"Sir, I did myself the honour to report to you last night from the camp at Alcantara, of the advance of the enemy, and of our out-posts being drawn in.
I retained the cavalry in the town of Alcantara during the night, with a guard of 50 infantry, keeping patroles, videts, &c. to ascertain the immediate approach of the enemy, and as the battle is not always given to the strong, I flattered myself that my letter of last night would have been followed by a more pleasing one than this.
 |
| The probable position of Lt Colonel Mayne's command post during the battle |
Our artillery fired with great effect on the enemy entering the town, covering at the same time Lieutenant-Colonel Grant as he passed with his detachment over the bridge to join me.
Our batteries, composed of 6 guns of the Legion, were formed with fascines, gabions, &c. and calculated to defend the bridge; the infantry were formed on the heights, under the cover of some temporary breast works.
 |
| The view of the French positions around the convent on the hill with the zig-zag road descending along which the French columns would have approached the bridge with their guns massed on the opposite bank providing covering fire |
About nine o'clock a very tremendous fire commenced from the two sides of the Tagus, which continued incessant; about 12 o'clock the militia regiment of Idania Nova, not being accustomed to any thing of this kind, and witnessing their officers and men falling and wounded on every side, made a precipitate retreat in a body leaving me occupying the heights of Alcantara, with the remnant of the Loyal Lusitanian Legion, (500 men) and the batteries of artillery.
The French at one o'clock had seven guns all posted, bearing upon our position, and I thought it advisable to put fire to the mine of the bridge of Alcantara, the last act of the munificence and grandeur of Trajan, (Augustus Caesar,) and perhaps so truly venerable, that it ought not to be disturbed, and it only blew up on one side, leaving a free passage for the enemy across the Tagus.
 |
| The LLL fought at odds of twenty to one to stem the tide of the French attack as they struggled to fall back after a nine hour battle, captured brilliantly in this illustration from Osprey's 'Oldest Allies- Alcantara 1809' title in their Raid series of books covering the action - picture by Mark Stacey. |
Thus situated, 1200 men of the Idania Regiment having basely left me, I had only one resort, which was, to give Lieutenant-Colonel Grant the command of the main battery, as the only means of preventing the enemy immediately pressing upon me while I effected a retreat.
The cavalry of Almeida being reduced by fatigue from 50 to 20, were no cover to me, I therefore thought it advisable to sacrifice one field-piece for the security of the three others and the two howitzers; and finding Lieutenant Colonel Grant very ready to undertake the fighting of the main battery with this one piece, I moved away with the other five, and he did this from two o'clock to three: and I should be doing little justice to his magnanimity, (if I thought myself of sufficient consequence,) to say, that he met with my most grateful approbation.
 |
| The view over the bridge from the Allied bank and with the closest section that was destroyed when the mine was ignited under the closest arch |
Alcantara can never be named but he with it must be remembered. Our ammunition being nearly wasted, and our killed and wounded surrounding us, it was absolutely necessary to adopt this mode of retreat with the few brave Lusitanians that were left; and to secure my artillery, the remaining gun was spiked and rendered of no use to the enemy on Lieutenant-Colonel Grant's leaving it to its fate—after he had continued to fire it for one hour to the great deception of the enemy, giving me time enough to pass the plain country, before the enemy's cavalry appeared on the Alcantara side of the bridge of Seguro.
 |
| The second arch from the left one, the one destroyed by the mine placed by the LLL before the battle |
When Lieutenant-Colonel Grant retired upon me, 100 cavalry were close to us, and ready to move upon my infantry, who were much exposed; but by a ruse de guerre, shewing only four horsemen in front, and causing a distant firing of the Cacadores, they unexpectedly retired, and I learn by a peasant, since to Alcantara.

A painful task now remains for my attention under existing circumstances, which is, to detail our killed and wounded; and although our loss is severe, I am given to understand it is nothing in comparison with that of the enemy's, which has been immense, from the large and numerous body that was exposed to our batteries.
 |
| The high ground at top right of picture, below the walls of San Benito, is the possible location of Victor's command post during the battle |
Loyal Lusitanian Legion.
Wounded*—143 rank and file; Lieut. Colonel Grant, slightly; Lieutenant Felix Mendoza, badly, since dead; Lieutenant Beltron, badly, and Joachim de Costa, slightly.
Missing.—15 rank and file ; 2 subalterns.
Idania Nova Regiment.
Wounded.—17 rank and file, 1 Lieutenant.
Missing.—4 subalterns, 1 150.
I have the honour to be, &c.
W.M. Mayne.
Colonel of Brigade and the Loyal Lusitainian Legion
P. S. As soon as I can learn the intention and the movements of the enemy, I will write again.
 |
| The Tagus carves its way to Portugal, much calmer these days with a modern dam constructed just up from the bridge |
The account by Rene Chartrand in the Osprey title 'Alcantara 1809' draws attention to Mayne's detailing of the casualties sustained by the Indanha militia, which confirms the unit breaking from the action in the numbers reported as missing for the regiment, but also shows that its senior officers remained at their posts with its captains and lieutenants listed among the dead and wounded.
French casualties are not recorded and thus difficult to estimate in detail but a later British report suggests 1,400 men which is thought to be on the higher end of the likely number but not extremely so.

 |
| The bridge seen from the French line |
 |
| In May of 1812 Wellington ordered repairs to the Alcantara bridge in preparation for his Salamanca campaign, to enable siege guns to be brought up from Elvas. Colonel Henry Sturgeon and Captain Alexander Todd of the Royal Staff Corps together with help from the Royal Navy devised an amazing rope suspension bridge, tensioned using capstans, to bridge the 100 feet gap that allowed the heavy siege guns to be brought across. This drawing by Sir Andrew Leith-Hay, intelligence officer and ADC, gives great detail to the dimensions of the bridge and the massive difference in high and low water levels in the Tagus now controlled by the nearby dam. |
 |
| A French artilleryman's view of Colonel Mayne's position and the high ground beyond occupied by the Allied infantry |
 |
| The French view along the bridge |
 |
| Map illustrating Allied and French positions after the action at Alcantara with the Anglo Portuguese forces of General Mackenzie about Castello Branco and the Spanish forces of General Cuesta about Badajoz and with Victor's I Corps split between Alcantara and Merida. |
In the days that followed the action, Victor's troops probed beyond the bridge and skirmished with the green clad LLL before General Mackenzie's position at Castello Branco, until the Marshal received news that Soult had been defeated at Oporto and chased out of northern Portugal.
 |
| The small Roman temple is in perfect condition on the French side of the bridge |
On the 17th May Victor evacuated Alcantara and fell back to Merida to regroup in the face of a growing threat from the Army of Estremadura which had been probing his positions around the city whilst he had been on the Tagus.
With the countryside in the area barren and stripped of supplies and with the threat of Allied action in the area growing day by day, King Joseph finally recognised the sense in allowing Victor to fall back closer to Madrid to improve his supply situation and be in support from the forces of the King and General Sebastiani's IV Corps operating near to the capital; and so Victor left Merida and marched to Talavera on the 14th June, blowing the bridges on the Guadiana river at Merida and Medellin as he pulled out.
 |
| The dedication panel to Emperor Trajan, 'a local lad done good' |
The Allied troops followed the French retreat by occupying Alcantara soon after they vacated and on the 8th of June they made sure the bridge was unusable by totally destroying the arch damaged in the action, much to the annoyance of the Spanish who felt that there was no need for it.
However in the latter part of May and early June, as Victor wrote to Joseph suggesting he be allowed to retire to Talavera, Joseph was still keen to press for an advance via the bridge into eastern Portugal only being dissuaded on getting confirmation himself of the fate of Soult's corps on the 10th of June and reinforced by the news from Victor that the Allies had indeed destroyed the damaged arch on the Alcantara bridge on the 8th.

With Victor's withdrawal to Talavera, the summer campaign of 1809 was about to unfold, as Sir Arthur Wellesley having finished his work in the north of Portugal moved quickly, and without the French being aware of his presence, to join General Mackenzie's force at Castello Branco whilst writing to General Cuesta proposing a joint offensive to destroy Victor's I Corps before he could unite with Joseph and Sebastiani, resulting in the battle of Talavera to be covered in the next post.
The Bridge at Almaraz
The River Tagus formed a line of delineation during the Peninsular War between the northern and southern theatres with the few bridges across its deeper parts assuming great significance when armies of both the Allies and French sought to support one another and when the enemy attempted to prevent such cooperation either by outright control or destruction of the few crossing points.
The map below is adapted from Oman's history which shows the River Tagus and the key crossing points along its length up to Toledo just south of Madrid.
Having looked at the the key bridge at Alcantara, Carolyn and I drove further up river to another one of those key Tagus crossing points, the bridge at Almaraz which was a site that had two significant roles to play in two Allied offensives.
 |
| Oman's map adapted to show the principle bridges crossing the Tagus up to Toledo |
The first Allied offensive occurred in 1809 and picks up the story from where the previous one left off with the Allied armies of Wellesley and Cuesta looking to join forces and attack Marshal Victor now fallen back to Talavera.
With Sir Arthur Wellesley and his British army, gathered around Castello Branco and General Cuesta's reformed Spanish Army of Estremadura gathered around the walls of Badajoz; the plan for the campaign saw the two allied armies uniting above the Tagus and moving along the northern bank to Talavera, and from there to Madrid, with the British army crossing into Spain on the 3rd of July having received the necessary assurances of supply being provided for the British troops as they advanced to Plasencia.
 |
| Brigadier General Charles Stewart was Adjutant General to Wellesley in 1809, pictured here in 1812 in hussar uniform, left a detailed description of General Cuesta and his army at the meeting at Almaraz Bridge. Portrait by Thomas Lawrence |
On the 10th of July 1809, Wellesley and his staff rode forty miles ahead of the British army to meet with General Cuesta now encamped around Almaraz having marched up from the south and Brigadier General Charles (Vane) Stewart, later Lord Londonderry left the following account of the meeting between them;
"Having set out from Plasencia for Cuesta's head-quarters, we were met at a flying-bridge across the Tietar by a squadron of Spanish hussars. The hussars, who belonged to the regiment of Villa Viciosa, were upon the whole well mounted and equipped; and we afterwards discovered that they had been selected to escort us because their appearance was superior to that of any other corps in the Spanish army. Unfortunately, however, in conducting us towards the bridge of boats upon the Tagus, our guides lost their way; and darkness had, in consequence, set in before we approached the camp.
This was the more to be regretted, as Cuesta had drawn out his whole force for Sir Arthur Wellesley's inspection. The troops had been under arms during four hours, in momentary expectation of our arrival; whilst the poor old man himself, though still lame from the effects of his bruises at Medellin, remained on horseback at their head, during the greater part of that time.
 |
| The Bridge at Almaraz seen from the southern bank, the meeting place between Cuesta and Wellesley for the upcoming Talavera campaign. |
Our arrival at the camp was announced by a general discharge of artillery, upon which an immense number of torches were lighted, and we passed the Spanish line in review by their blaze. The effect was very singular. As the torches were held aloft, at moderate intervals from one another, they threw a red and wavering light over the whole scene, permitting, at the same time, its minuter parts to be here and there cast into shade; whilst the grim and swarthy visages of the soldiers, their bright arms and dark uniforms, appeared peculiarly picturesque as often as the flashes fell upon them.
Then there was the frequent roar of cannon, the shouldering of firelocks, mingled with the brief word of command, and the rattling of accoutrements and arms, as we passed from battalion to battalion. All these served to interest the sense of hearing to the full as much as the spectacle attracted the sense of sight.
 |
| The Villaviciosa 'Hussars' identified by Stewart were in fact Spanish dragoons |
Nor was old Cuesta himself an object to be passed by without notice, even at such a moment and under such circumstances. The old man preceded us, not so much sitting on his horse, as held upon it by two pages,—at the imminent hazard of being overthrown whenever a cannon was discharged, or a torch flared out with peculiar brightness. Indeed, his physical debility was so observable as clearly to mark his total unfitness for the situation which he held. As to his mental powers, he gave us little opportunity of judging; in as much as he scarcely uttered five words during the continuance of our visit.
In this manner we passed about 6,000 cavalry, drawn up in rank entire, and not less than twenty battalions of infantry, each consisting of perhaps 700 to 800 men. These formed but one portion of the army, the rest being either at the bridge of Arzobispo, or in position along the Tagus; and they were all, with a few exceptions, remarkably fine men. Some, indeed, were extremely young—too young for service—particularly among the recruits which had lately joined; but take them for all in all, it would not have been easy to point out a better-made, stouter, or more hardy-looking body of soldiers in the service of any nation in Europe.

Of their appointments, it is not possible to speak in the same terms of commendation. There were, indeed, some battalions whose arms, accoutrements, and even clothing might be pronounced respectable; but in general, they were very deficient, particularly in shoes. It was easy to perceive, likewise, from the attitude in which they stood, as well as from the manner in which they held their arms, that little or no discipline prevailed among them; and hence that, in general, they could not be regarded in any other light than as raw levies.
 |
| My rendition of the 1st Battalion Spanish Marines as part of Talavera 208 https://jjwargames.blogspot.com/2017/02/talavera-208-bassecourts-spanish-5th.html |
Some corps there doubtless were, such as the Irish brigades, a battalion or two of marines from Cadiz, and the remnants of their grenadier battalions, which deserved a higher military character. But speaking of them in the aggregate, they were little better than bold peasantry, armed partially like soldiers, but completely unacquainted with a soldier's duty.
This remark applied fully as much to the cavalry as to the infantry. The horses were many of them good, but their riders manifestly knew nothing of movement or discipline; and they were, as well on this account as on the score of a miserable equipment, quite unfit for general service. The artillery, again, was numerous, but totally unlike, both in order and arrangement, to that of other armies; and the generals appeared to have been selected according to one rule alone, namely, that of seniority.
 |
| It was a gloriously blue, hot day and I couldn't not but notice some distinctive large white birds of prey circling high above |
They were almost all old men, and, except O'Donoju and Largas, evidently incapable of bearing the fatigues, or surmounting the difficulties of one hard campaign. It was not so with the colonels or commanders of battalions, who appeared to be young and active, and of whom we had every reason to believe that many were rapidly learning to become skilful officers."
Stewart then describes how General Cuesta retired for the evening, but later, joined the British party with his staff for a late supper at 11pm and spent the next hour listening to, but not joining in, the conversation among the two groups of staff officers, before retiring for the night.
 |
| The close up revealed another bird I have never seen in the wild before, yellow headed Egyptian Vultures, a visitor from North Africa. |
The next morning the two commanders met for their discussions around their plan of campaign with Cuesta presenting his commanders to Wellesley.
Charles Stewart described the meeting;
"....he presented them one by one to Sir Arthur Wellesley, the ceremony taking place after breakfast on the 11th; but no words were exchanged on the occasion, and each retired after he had made his bow. The ceremony having been gone through, Sir Arthur Wellesley and Cuesta withdrew, at the request of the former, to an inner apartment, where they held a conference which lasted four hours.
I heard that O'Donoju, who assisted his general, was the chief speaker, and that Cuesta was, as usual, almost silent. When it came to a close, dinner was announced; and we sat down, about three o'clock, to about forty dishes, the principal ingredients in which were garlic and onions.
 |
| Graham Turner's excellent rendition of the meeting between Cuesta and Wellesley at the Almaraz bridge, with my picture of the same scene below. General O'Donoju is seen making the introductions with an honour guard of Villavicosia Dragoons in the background. The scene is speculative as the precise location for their meeting is not clear, but the area near the bridge is used today by modern picknickers. From Talavera 1809, Osprey Campaign. |
Our meal did not occupy much time, and on Cuesta retiring, as was his custom, to enjoy his siesta, we mounted our horses, and rode out into the camp. By this means we were enabled to see more of the regiments separately, than we had seen during the torch-light review. We saw, however, nothing which raised them in our estimation, and we returned at a late hour, fully convinced, that if the deliverance of the Peninsula was to be effected, it must be done, not by the Spaniards, but by ourselves.
At an early hour next morning we took leave of Cuesta, and set out on our return to Plasencia. The old Spaniard brightened up as we bid him farewell, embracing us, while he repeated over and over again that he was fully satisfied with the result of the interview."
The two commanders had agreed that they would bring their forces together at Arzobispo, the bridge at Almaraz having been destroyed by Cuesta's retreating army in May, and from there to advance on and attack Marshal Victor at Talavera whilst General Venegas would be instructed to advance and pin General Sebastiani around Toledo to prevent him coming to the others support.
Events however were to prove quite different!
 |
| My picture of the old Almaraz bridge as seen above |
In May 1809, the Army of Estremadura commanded by General Cuesta was falling back before the advancing I Corps of Marshal Victor, pursuing the Spanish army south of Madrid and which saw the eventual crossing of the Tagus by both armies as they moved south to conclude the campaign at the Battle of Medellin on the 28th March 1809.
Battle of Medellin - JJ's Wargames
It was during this campaign that the 16th century Almaraz bridge was destroyed by the Spanish in their retreat, looking to cause as much delay to Victor's army as possible.
As seen above the Alcantara bridge was blown up by Colonel Mayne at the conclusion of his battle with Victor's troops on the 14th of May.
Thus at the end of 1809 the Tagus could only be crossed at the bridges of Arzobispo, Talavera and Toledo, with the first two being set among difficult ground and bad roads leading up to the river at that point, described by Napier as;
"....so crowded by the rugged shoots of the Sierra de Guadalupe, that it may be broadly stated as impassable for an army ..."
forcing an army with artillery and heavy baggage to cross via Toledo, about another one-hundred miles further upriver from Almaraz.
In the Autumn of 1809, the French replaced the bridge at Almaraz with a heavy pontoon bridge positioned slightly down river from the original old one and guarded by small forts and emplacements built on each bank together with the added security of a small boat at its centre that would allow it to be removed over night.
 |
| French engineers were some of the best in the Napoleonic era and were quickly able to put back a usable bridge, to link French armies above and below the Tagus close to the Portuguese border - Illustration from Artillery Equipments in the Napoleonic Wars, Osprey. |
As mentioned in my post Battle of Salamanca - Peninsular War Tour 2019 , Wellington, in 1812, now commanded an army capable of taking on any one French army in the Peninsular but, in his preparation to face Marshal Massena's Army of Portugal, he needed to put in place the preparatory plans to make it difficult for the French to bring additional forces against him when he determined to strike; and, as we have seen, part of those plans would see repairs made to the Alcantara bridge now that Cuidad Rodrigo and Badajoz were in Allied hands.
However the holding of these key positions and bridge were designed primarily to facilitate the movement of his own troops and, in anticipation of the French deciding to do the same thing by having Marshal Soult bring troops over the Tagus in support of Marshal Massena, he had to take steps to make that more unlikely than not, which determined the plan to destroy the French pontoon bridge at Almaraz, thus forcing Soult, if he should come to Massena's aid, to take the one-hundred mile detour to Toledo.
 |
| Looking along the River Tagus from the old bridge to the position selected for the French pontoon bridge destroyed by the Allied attack in 1812, which would have been placed about where the river narrows. |
As already mentioned in the Salamanca post, Wellington's interception of key French communications and their deciphering enabled him to get a clear understanding of the French situation and in this case their dispositions on or near to the bridge, as outlined by Oman;
"...only one French division [Foy's at Talavera] was anywhere near it, that determined Wellington to make the sudden stroke at that central strategical point which he had thought of in February. At
that time he had refused to try it, because there were three French divisions on the Tagus. Now there was only one at Talavera, two marches from Almaraz, and the nearest reinforcements at Avila were two very long marches from Talavera. The possibility presented itself that a column might strike at Almaraz from somewhere on the Portuguese frontier, and take the place by a coup-de-main, with or without first beating Foy, whose strength of 5,000 men was perfectly known to Wellington."
 |
Lieutenant General Sir Rowland Hill was tasked by Wellington to launch a daring surprise raid to take
out the French bridge of boats across the Tagus at Almaraz - Lord Hill in 1819 by George Dawe
|
General Hill's force for the upcoming operation consisted of:
Lieutenant General Tilson-Chrowne
Major General Howard's Brigade:
50th Foot
71st Highland Light Infantry
92nd Highlanders
1 Company 60th Rifles
Colonel Wilson's Brigade
28th Foot
34th Foot
1 Company 60th Rifles
Colonel Ashworth's Brigade
6th Portuguese Infantry Regiment
18th Portuguese Infantry Regiment
6th Caçadores
Major General Long
13th Light Dragoons
Lieutenant Colonel Dickson
Major Maxwell's 9 pounder Battery (3 guns)
6 24-pounder howitzers
Oman's account continues;
"Hill could count on two or three days of undisturbed operations before the nearest reinforcing division, that of Foy, could reach Almaraz: on four or five more, before troops from Avila could come up. It must be noted that everything would depend on the absolute secrecy that could be preserved as to the start of the expedition: but on this Wellington thought that he could count. The Spanish peasantry seldom or never betrayed him: the French had no outlying posts beyond Almaraz which might give them warning. The garrison was in a normal state of blockade by guerrillero bands haunting the Sierra de Guadalupe.
 |
| The Regiment de Prusse as illustrated by Histofig and part of the French garrison at Almaraz |
The garrison of the works consisted of a depleted foreign corps, the regiment de Prusse or 4th Estranger, mustering under 400 bayonets, of a battalion of the French 39th of the Line, and of two companies of the 6th Leger, from Foy's division, with a company of artillery and another of sappers. The whole may have amounted to 1,000 men, of whom 300 were isolated in the high-lying Castle of Miravete, five miles from the bridge-head.
The governor, a Piedmontese officer named Aubert, had manned Fort Napoleon with two companies of the 6th and 39th. The foreign corps and one company of the 6th were in Fort Ragusa and the bridge-head; Miravete was held by the centre companies of the 39th."
 |
| Map illustrating the proximity of the Almaraz bridge to the Portuguese border and city of Elvas, with the route taken by Hill's force via Merida |
As Oman goes on to explain;
"The orders for Hill's move were given out on May 7th. He was to march from his head-quarters at Almendralejo with two British brigades (Howard's and Wilson's) of the 2nd Division, and the Portuguese brigade attached to the division (Ashworth's), one British cavalry regiment (13th Light Dragoons), and to cross the Guadiana at Merida. Beyond the Guadiana he would pick up Campbell's Portuguese cavalry brigade, which was lying at Arroyo dos Molinos. The march was then to be as rapid as possible, via Jaraicejo and Miravete. The expeditionary force made up 7,000 men in all.
....Hill's column reached Merida on May 12th, but was delayed there for some hours, because the bridge, broken in April, had not yet been repaired, as had been expected, the officers sent there having contented themselves with organizing a service of boats for the passage. The bridge was hastily finished, but the troops only passed late in the day...
...Once over the Guadiana, Hill reached Truxillo in three rapid marches [May 15], and there left all his baggage-train save one mule for each company with the camp-kettles. The most difficult part of the route had now been reached, through successive mountain ranges separating Truxillo from the Tagus.
On the 16th, having crossed the first of them, the column reached Jaraicejo: at dawn on the 17th, having made a night march, it was nearing the Pass of Miravete, the last defile above the river. Here, as Hill was aware, the French had outlying works, an old castle and two small forts, on very commanding ground, overlooking the whole defile in such a way that guns and wagons could not possibly pass them.
 |
| The view of the hill with Fort Napoleon on top and the remains of which are seen top right. Howard's brigade attacked from the direction of the road to the right which was not there in 1812. |
After planning to attack the Miravete defences, it became clear, after the forces moved against them over night and became disordered in the process, that the position was too formidable for an immediate assault and with the French now alerted to his presence and thus no time for a more formal assault process using his heavy guns; Hill had to rapidly change the plan to one of masking the Miravete position with part of his force and all his guns, whilst taking an assault force of infantry and twenty gunners via the Pass of La Cueca and the village of Romangordo to attack the forts around the bridge, before dealing with the bridge itself, this planning including a day to properly reconnoiter the ground.
Oman's account continues;
"The detachment selected for this purpose was Howard's brigade (l/50th, l/71st, l/92nd), strengthened by the 6th Portuguese Line from Ashworth's brigade, and accompanied by 20 artillerymen in charge of the ladders. So rough was the ground to be covered, that the long 30-foot ladders had to be sawn in two, being unwieldy on slopes and angles, as was soon discovered when they were taken off the carts for carriage by hand. The route that had to be followed was very circuitous, and though the forts were only five miles, as the crow flies, from the place where the column left the road, it took the whole night to reach them.
 |
| A detailed map illustrating the French positions around the Almaraz pontoon bridge and the route taken by Hill to bypass the defences at Mirabete |
.... Just before dawn the column reached the hamlet of Romangordo, a mile from the forts, and rested there for some time before resuming its march.
The sun was well up when, at 6 o'clock, the leading company, coming to the edge of a thicket, suddenly saw Fort Napoleon only 300 yards in their front. The French had been warned that a column had crossed the hills, and had caught some glimpse of it, but had lost sight of its latest move: many of the garrison could be seen standing on the ramparts, and watching the puffs of smoke round the Castle of Miravete, which showed that the false attack on that high-lying stronghold had begun.
....At a little after 6 o'clock the 900 men available, in three columns of a half-battalion each, headed by ladder parties, started up out of the brake on the crest of the hillside nearest Fort Napoleon, and raced for three separate points of its enceinte.
The French, though taken by surprise, had all their preparations ready, and a furious fire broke out upon the stormers both from cannon and musketry. Nevertheless all three parties reached the goal without any very overwhelming losses, jumped into the ditch, and began to apply their ladders to such points of the rampart as lay nearest to them. The assault was a very daring one—the work was intact, the garrison adequate in numbers, the assailants had no advantage from darkness, for the sun was well up and every man was visible. All that was in their favour was the suddenness of their onslaught, the number of separate points at which it was launched, and their own splendid dash and decision.
Many men fell in the first few minutes, and there was a check when it was discovered that the ladders were over-short, owing to their having been sawn up before the start. But the rampart had a rather broad berm, a fault of construction, and the stormers, discovering this, climbed up on it, and dragging some of the ladders with them, relaid them against the upper section of the defences which they easily overtopped. By this unexpected device a footing was established on the ramparts at several points simultaneously—Captain Candler of the 50th is said to have been the first man over the parapet: he was pierced by several balls as he sprang down, and fell dead inside.
The garrison had kept up a furious fire till the moment when they saw the assailants swarm over the parapet—then, however, there can be no doubt that most of them flinched: the governor tried to lead a counter-charge, but found few to follow him; he was surrounded, and, refusing to surrender and striking at those' who bade him yield, was piked by a sergeant of the 50th and mortally wounded.
 |
| A close up of the remains of Fort Napoleon seen from the foot of the hill |
So closely were the British and French mixed that the latter got no chance of manning the inner work, or; the loopholed tower which should have served as their rallying point. Many of the garrison threw down their arms, but the majority rushed out of the rear gate of the fort towards the neighbouring redoubt at the bridge-head. They were so closely followed that pursuers and pursued went in a mixed mass into that work, whose gunners were unable to fire because their balls would have gone straight into their own flying friends.
The foreign garrison of the tete-de-pont made little attempt to resist, and fled over the bridge. It is probable that the British would have reached the other side along with them if the centre pontoons had not been sunk: some say that they were struck by a round-shot from Fort Ragusa, which had opened a fire upon the lost works; others declare that some of the fugitives broke them, whether by design or by mischance of overcrowding.
This ought to have been the end of Hill's sudden success, since passage across the Tagus was now denied him. But the enemy were panic-stricken; and when the guns of Fort Napoleon were trained upon Fort Ragusa by Lieutenant Love and the twenty gunners who had accompanied Hill's column, the garrison evacuated it, and went off with the rest of the fugitives in a disorderly flight towards Naval Moral.
The formidable works of Almaraz had fallen before the assault of 900 men—for the tail of Hill's column arrived on the scene to find it all over.
 |
| The road leading to Romangordo, left with Fort Napoleon on the hill to right of picture. The broken ground over which Hill's troops advanced is still very evident today. |
The loss of the victors was very moderate—it fell mostly on the 50th and 71st, for Chowne's demonstration against Miravet had been almost bloodless—only one ensign and one private of the 6th Cacadores were wounded. But the 50th lost one captain and 26 men killed, and seven officers and 93 men wounded while the half-battalion of the 71st had five killed and five officers and 47 men wounded. The 92nd had two wounded thus the total of casualties was 189.
Of the garrison the 4th Estranger was pretty well destroyed—those who were neither killed nor taken mostly deserted, and its numbers had gone down from 366 in the return of May to 88 in that of July 1. The companies of the 39th and 61st Leger also suffered heavily, since they had furnished the whole of the unlucky garrison of Fort Napoleon. Hill reports 17 officers and 262 men taken prisoners, including the mortally wounded governor and a chef de bataillon of the 39th. It probable that the whole loss of the French was at least 400.
After the action, Fort Napoleon was blown up and the French bridge together with stores, ammunition and equipment was destroyed before the Allied troops retired on the 20th May, leaving the French garrison in control of the positions around Miravete, which they later abandoned on the 11th July.
For a really detailed account of this attack and one I used for my brief visit to the site, I would very much recommend Pedro Prieto and Robert Burnham's post on the Napoleon Series site with a link posted to it below.
Next up, we continued our exploration of the River Tagus valley with a much anticipated visit to the battlefield of Talavera, a battle that, having spent four years studying intensely for my own series of games for Talavera 208, I was very much looking forward to walking upon and seeing the ground close up.
https://www.napoleon-series.org/military/battles/Peninsula/RiverCrossings/TagusRiver1.pdf
https://www.napoleon-series.org/military/virtual/c_almaraz.html
https://archive.org/details/narrativeofcampa00lill/page/n5
Raid, Oldest Allies, Alcantara 1809 - Rene Chartand, Mark Stacey and Johnny Shumate, Osprey.
Talavera 1809, Wellington's Lightning Strike into Spain - Rene Chartrand & Graham Turner Osprey Campaign.
Regardless of its importance during the Peninsular War, the bridge at Alcantara is a stunning piece of history in its own right.
ReplyDeleteYes indeed, the first time you see it really takes the breath away.
ReplyDeleteJJ
Thank you so much for sharing all of this. It has been very enjoyable to read thus far!
ReplyDeleteHi Kevin,
DeleteWelcome to the blog and thank you for your comment. Glad you are enjoying the series, with lots to come as we head south before heading back north to look at the Vitoria campaign.
Cheers
JJ
This series of blogs would be really useful for anyone wanting to visit the Peninsular battlefields. The text makes for very easy reading, and the photographs would make it easy for a visitor to orientate themselves on the field. You should consider making a guide book from them. The only thing missing would be clear directions to find the start of each location. When I visited the same battlefields many years ago I found it very difficult to know where to park, and then how to find the exact location. I am sure that it must be easier these days with satnav, but not everyone would have the skills to use one. The problem with a blog is that it is a very instant thing, and difficult to find some months or even years later. But a guide book based on your blogs could become a very useful standard guide. You would probably have to cut down drastically on photographs to reduce cost.
ReplyDeleteThank you Paul, I am extremely flattered.
DeleteI am not sure whether my efforts would add very much to the plethora of battlefield tour guides already available, of which I have made use of on my adventures.
I write these accounts very much to consolidate my own understanding of what I have seen, alongside what I have read, in an effort to also translate the battlefield in the eyes of an historical wargamer rather than a general reader or historian.
By that, I mean that I have read many accounts showing modern day pictures of a given battle, but have often come away wanting to know exactly what I am looking at and who was fighting in that particular view and from what direction they were coming and the lines of sight for the soldiers stood on that spot and preferably an account from someone who was there at the time. The kind of information that feeds the imagination of scenario writers and players that often gets left out of the guide books and general histories. More modern wars have been well served in this way of looking at battlefields, particularly WWII and the 'Before and After Battle' publications, that do this kind of writing so well.
I am conscious that many others around the globe, interested in this kind of information and view point may never get the chance to look at these places and so I think a blog platform is about as good a way as any to be able to share the experience and allow others to use the information I have been able to assemble; but if the Pen and Sword publishers who have produced these kind of guides for other periods are interested in doing something then who knows?
In the meantime I am very happy to share in this series of posts and to encourage more people to take up an interest in historical wargaming that will make the hobby even better for me and future enthusiasts.
Thanks again for your comment.
JJ
Great work JJ and a holiday to boot.
ReplyDeleteRegards
Peter
Thank you Peter, yes indeed, and certainly one to remember.
DeleteCheers
JJ
I think you have achieved what you set out to do extremely well. I have always liked the mix of present day photographs with quotes from historical characters who were there “on the day”.
ReplyDeleteI remember reading a book called “Campaigning with the Duke of Wellington and Don Featherstone”, by the man himself. Each battlefield had a chapter of quotes from available histories, and a short description of the battlefield now at the end.
I found it to be one of the most readable of Don’s books. But your series of blogs is far better, if only because of the mass of photographs and illustrations.
I am not really aware of what battlefield guides are currently available. But I suspect that most will only have a general description of how to get there and where to park. I know that you do a lot of battlefield exploration, and you must find how important it is to park in the right place and find the correct path to follow.
I was very, very impressed that you managed to find the exact location of some more less well known battlefields. Perhaps you could do a blog explaining how you plan these holidays, and in particular exactly how you find the right track.
I am sure that your blogs will have given much enjoyment to many wargamers, and helped many who will never be able to walk the ground to understand it much more. What a great advantage digital photography is. When I did my battlefield exploration I had to rely on rolls of film. I never knew until they were developed whether a shot worked or not. And cost alone prevented taking more than one or two of each location.
Great work, and well done.
Regards
Paul
Thanks for the detailed photos and background!
ReplyDeleteThanks for the effort put in to writing this. Just finished reading the new Sharpe novel “Sharon’s Command “ which has him here at the battle. Was nice to read what the differences were!
ReplyDeleteHi Phil,
DeleteThank you for your comment and appreciation for the post.
I know the Sharpe novel you mention having read it myself quite a few years ago now, and it was nice also to be reminded of our trip back in 2019 which was the culmination of a lifetimes ambition to explore the Duke's Peninsular battlefields whilst enjoying the many delights Portugal and Spain have to offer.
Thank you and a Happy 2024
JJ