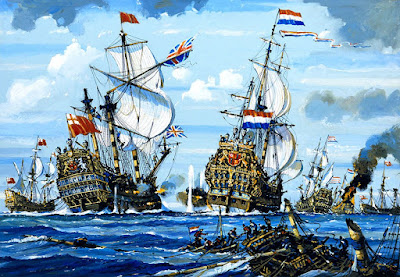
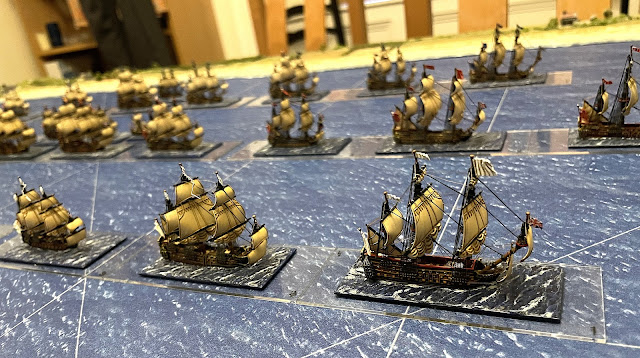
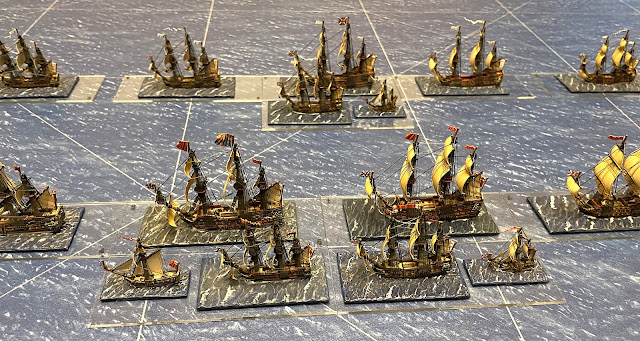
With a recent theme of Anglo-Dutch Wars after action reports from Capt. Steve using his marvellous collection of 1:1200 models to refight some of the naval battles that characterised the First Anglo-Dutch naval war, using General at Sea, links below, Steve recently sent me some pictures of his collection in the form of a naval review, and I am sharing them here as part of this series of posts.
 |
| JJ's Wargames - The Battle of Livorno (Leghorn), Part One JJ's Wargames - The Battle of Livorno (Leghorn), Part Two |
 |
| JJ's Wargames - The Battle of Plymouth |
To help understand better the extent of Steve's collection I have attached the order of battle of the English fleet and the arrangement of the various ships highlighted in the three squadrons (red, white and blue), and in a follow up post I will similarly portray the Dutch fleet.
The White Squadron
So below Steve has highlighted the White Squadron, showing the Van Division led by the Vice-Admiral in a second-rate, Triumph, followed by a third-rate and hired merchantmen.
 |
| The White Squadron, showing the Van Division led by the Vice-Admiral |
Then below we can see the centre with Prince Rupert flying the Union flag from the main of the Royal James, preceded by a fourth-rate and followed by a third-rate. Note that the Squadron commands have a fifth-rate and a ketch alongside as eye candy and to represent the fireships etc that accompanied the flag officer.
 |
| Prince Rupert flying the Union flag from the main, preceded by a fourth-rate and followed by a third-rate. |
Then the Rear Admiral in a third-rate, the Defiance, with two fourth-rates.
 |
| The Rear-Admiral of the White accompanied by two fourth-rates |
The Red Squadron
Next we see the Red Squadron, with the Vice Admiral in a second-rate, Royal Oak, supported by a third-rate and a hired merchantman.
 |
| The Red Squadron commanded by a Vice-Admiral in a second-rate, with a third-rate and hired merchantman ahead and astern respectively. |
Then the powerful centre with the Duke of York in the Royal Charles and seconded by the Royal Sovereign, plus a 3rd and a 4th.
The Royal Charles is accompanied by a sixth-rate and a royal yacht as well as a fifth-rate and a ketch.
 |
| Portrait of James, Duke of York (1633-1701) as Lord High Admiral - Henry Gascars |
 |
| The Royal Charles with the Royal Standard at the mainmast is accompanied by a sixth-rate and a royal yacht as well as a fifth-rate and a ketch. |
To complete the Red Squadron, we see below the Rear Admiral in a second-rate 80-gun Henry, with a third-rate and fourth rate in company.
 |
| The Rear-admiral of the Red Squadron |
The Blue Squadron
Here is the Blue Squadron in which the Rear Admiral swapped places with the Vice Admiral so that if the fleet reversed course, it would not be led by the most junior flag officer.
The Rear Admiral in a third-rate with a fourth and a merchantman.
 |
| The Blue Squadron, with the Rear Admiral in a third-rate with a fourth and a merchantman. |
The Centre with the Admiral in the Royal Prince supported by a third-rate and a fourth, accompanied by the usual fifth-rate and ketch.
 |
| The Blue Squadron centre, with the Admiral of the Blue in the Royal Prince |
 |
| The 85-gun 'Royal Prince' (on the right) and other Vessels at the Four Days Battle, 1–4 June 1666 |
Then Vice Admiral bringing up the rear in a second-rate, Royal Katherine, with a third and fourth-rate in consort.
 |
| The Vice Admiral of the Blue Squadron bringing up the rear in a second-rate, Royal Katherine, with a third and fourth-rate in consort. |
As a maritime button counter, and a man after my own heart, Steve has taken great pains to get the flags and paint schemes correct, based on regulations and eyewitnesses such as the van de Veldes, and this is especially so with the Dutch admiralties as we will see in the next post.
Flag etiquette was very important at this time. In fact Prince Rupert once opened fire on an English warship that was flying the flag of a general taking passage in it to Flanders, and had the unfortunate captain arrested and thrown into the Tower!
It follows then that Steve has two alternative flagships, one of the Royal Charles flying the Union flag when commanded by Rupert or Monck or both. Also the Royal Prince when commanded by Ayscue so a plain white command flag. The only admiral who fly a red command flag from the main was Edward Montagu, 1st Earl of Sandwich for a few months in 1665.
Finally, a wrecked English ship, that Steve uses to show a scattered stand that has surrendered (rather than remove the stand off the table as the rules General at Sea say).
 |
| A wrecked English ship used to mark a scattered stand that has surrendered. |
Having spent four years of my life working on my own age of sail collection, I can really appreciate the level of work and attention to detail seen here and I hope, like me, you are enjoying this look at the Anglo-Dutch war period.
As always, more anon.
JJ


No comments:
Post a Comment