

After our four day R&R break in Fiji, we recommenced our travels by grabbing another flight on Fiji Airways, this time heading for Auckland in New Zealand to commence our travels through North and eventually South Island, naturally starting at the top and working our way to the bottom.
Carolyn and I have never been to New Zealand and we were both very much looking forward to exploring this very interesting country for very many reasons and so when I sat down to write this post I had to think hard and fast about how I would share our experiences in a cohesive way, capturing a feel for this remarkable country but obviously with my historical wargaming eye front and centre of the experience.
 |
| Map of our travels over three weeks through North Island with the numbered areas designed to help follow our route and the places visited. - Courtesy of Backpack New Zealand http://www.backpack-newzealand.com/ |
So I intend to compose several posts covering North Island before looking at our adventures in the South Island to try and do justice to the amazing places we have visited and to give each post a theme that links them.
 |
| The spectacular view of Auckland from the top of Mount Eden and its volcanic peak Maungawhau, with the Sky Tower dominating the centre ground of the modern city skyline. |
The map above gives an idea of the zig-zag route we ended up taking after arriving in Auckland, Point 1 for those unfamiliar with the geography of North Island, and picking up our car to start our travels down to Wellington with the numbered areas indicating the approximate order of our route.
For this particular post, I thought I'd start with a particularly New Zealand themed historical era and one I've been researching prior to travelling, namely the 'New Zealand Wars' or as I was more familiar with growing up in the UK, 'Maori Wars', or as is sometimes referred to here in New Zealand as 'The Land Wars'.
 |
| I reviewed this title back in 2020 when I was doing some early prep-reading http://jjwargames.blogspot.com/2020/04/the-new-zealand-wars-1820-72-australian.html |
I should add, Ian Knight seems to dance on the eggshells of politically correct terminology when he chose New Zealand Wars as the title for his Osprey Men at Arms title, which I brought with me on this trip, suggesting the title Maori Wars implied blame in the ears of modern New Zealanders.
If that is the perception by any of my readers, I am happy to adopt the more neutral title I've used for the post, but would add that there was and is no implied blame in the title, Maori Wars, as British parlance, in describing the many colonial conflicts that characterised the rapid expansion of the British Empire in the 19th century, often simply using the name of the opponent in a given conflict to speedily differentiate it, one from another, hence, Zulu War, Boer War, Ashanti War etc.
I would also reiterate the comments written by James Cowan in is magnificent history of the wars in two volumes, another tome I brought with me on this trip, when he refers to the respect mortal combat generated between both parties;
'On the European's side the conceit which found expression in the declared opinion that a company of British grenadiers could march from end to end of New Zealand and carry all before them was quickly exchanged for an admission that the naked Maori was a better warrior than the heavily armed British soldier, man for man, in the forest environment in which he had been schooled to arms and the trail from his infancy.
Each admitted the other's pre-eminence under certain conditions, and each protagonist came to admire the primal quality of valour in his opponent.'
This aspect of British colonial conflict was by no means unique, as the British soldier was always keen to pay such respect to the valour shown by his foe, and the Zulu warrior and Nepalese Gurkha drew similar respect that stands alongside that of the Maori.
 |
| Just one of many classic colonial style houses that caught the eye in beautiful Auckland |
Auckland was a very logical place to start our adventure, being the second capital city and one of the gateways into modern day New Zealand, whilst being also very much front and centre in the story of colonial New Zealand; that began in the wake of the signing of the Treaty of Waitangi, a treaty that both the British and Maori had different opinions on what it meant, and to quote Ian Knight;
'. . . while the treaty established the British Crown as the sole agent for land dealings, this merely placed the fledgling British administration at the centre of a developing territorial contest.'
Auckland is a glorious mix of colonial clapperboard, verandaed houses in among early 20th century classical 'art deco' to much more modern contemporary designs and Carolyn and I immediately felt very much at home whilst enjoying wide roads and pavements with far fewer people jostling about on them as you might find in the UK.
 |
| https://www.aucklandmuseum.com/ |
The other appealing aspect of Auckland is that it is home to the Auckland War Memorial Museum (AWMM), which among other things, is home to a fantastic collection of items that chart the history of the Maori people, together with a specific collection of items relating to the New Zealand Wars.
I have a fancy to build a collection of figures covering the wars, and it is one thing to see weapons and clothing of Maori warriors illustrated in a book like an Osprey title, but it is another thing entirely to see the actual items themselves, something that is nearly impossible at home in the UK but is so much more accessible here in New Zealand.
 |
| Inspiring artwork by Raffaele Ruggeri in Osprey's New Zealand Wars is brought to life by visits to museums such as the AWMM. |
Needless to say my camera was kept very busy creating my reference library when figures will need translating with the brush.
 |
| From left to right (11) Mere Pounamu, presented in 1890 to Ngati Maniapoto chief and war leader Rewi Maniapoto, (12) Wahaika Raku believed to have been taken by a European officer during the wars of 1860, and (13) Kotiate Paraoa (whalebone cleaver), used for thrusting in close combat and a favourite weapon on many warring chiefs. |
As well as weaponry, the New Zealand War is all about characters, this being a war of relatively small forces, very comparable in style and scale to the French Indian War fought in colonial North America, as mentioned by Cowan.
 |
| Hitiri Te Paerata, renowned chief of the Taupo region, who fought in the Battle of Orakau in 1863, the last battle of the Waikato War. He gave an account that described the two day defence of the pa before the defenders ran low on ammunition, food and water, before breaking out on the third day rather than surrendering. He described the pursuit of the British troops; 'As we fled before them, they tried by out-marching on our flanks, to cut off our retreat and poured a storm of bullets which seemed to encircle us like hail'. |
The New Zealand War of course has its own twist, which takes the form of the incredible defensive works known as pa, created by the Maori in response to the introduction of mid and late 19th century black powder weapons used by the Europeans and giving a foretaste of what much larger armies would encounter in the early 20th century on the Western Front.
 |
| Model of Ruapekapeka pa, the Bats Nest, so named in reference to the many underground bunkers and tunnels with the defenders living like bats. This being a classic early 'gunfighters' pa from the Flagstaff War 1843-47 and attacked by the British for ten days in January 1846. |
Items associated with the characters that take centre stage in any conflict are always very interesting to see and further evoke the interest to better understand the effect these leaders had on the conflict at the level they led the men involved.
 |
| Colour-Sergeant Edward McKenna and Gustavus Ferdinand von Tempsky |
Edward McKenna was a thirty-six year old colour-sergeant in the 65th Foot (York and Lancaster Regiment) during the Invasion of Waikato (July 1863 to April 1864), perhaps the most important campaign of the wars as a whole, in an effort to break the will of the Maori Kingitanga Movement, that was an alliance of several Maori tribes under one king and saw at its peak 14,000 British and European troops versus 4,000 Maori warriors drawn from more than half the major North Island tribal groups.
McKenna's citation for the award of his VC records his exemplary leadership, for which he was later promoted to Ensign, after the fifty man detachment he was part of was badly shot up in a mishandled attack and forced to retreat, whilst being hunted through the bush until nightfall;
'For gallant conduct at the engagement near Cameron Town, New Zealand, on the 7th. of September, 1863, after both his Officers, Captain Swift and Lieutenant Butler, had been shot, in charging through the position of an enemy heavily outnumbering him, and drawing off his small force, consisting of two Serjeants, one bugler, and thirty-five men, through a broken and rugged country, with the loss of but one man killed, and another missing. Lieutenant-General Cameron, C.B., Commanding Her Majesty's Forces in that colony, reports that, in Colour-Serjeant MacKenna, the detachment found a Commander whose coolness, intrepidity, and judgment, justified the confidence placed in him by the soldiers brought so suddenly under his command.'
The fight for Raupekapeka would follow a pattern established in many of the fights for previous pas, with the British troops attacking in the conventional manner, and usually being driven off, followed by the Maoris abandoning their position having made their point.
 |
| Colour-Sergeant Edward McKenna's Victoria Cross and New Zealand War medal and Gustavus von Tempsky's pistol |
Small wars very often attract military adventurers and perhaps Gustavus Ferdinand von Tempsky fits that description quite well, being from a Prussian noble family from Silesia and having served as an officer in the Royal Prussian Army until his desire for a more interesting life saw his departure in 1846 for the Mosquito Coast of Central America to accept a commission commanding a force of Mosquito Indians operating with British forces in the area.
Following this adventure von Tempsky would arrive in New Zealand in 1862 after further adventures in the California goldfields, Mexico, Guatemala and Salvador, getting married to the daughter of a British government agent, Emelia Ross Bell, and later emigrating to Victoria, Australia in 1858, before moving to New Zealand, having failed in his attempt to lead what became known as the Burke and Willis expedition to explore the interior of the Australasian continent.
 |
| The death of von Tempsky, aged 40, a folk hero to many European settlers, killed during an assault on Titokowaru's South Taranaki Pa, leading the Forest Rangers, 7th September 1868. |
In New Zealand von Tempsky settled in the Coromandel Peninsula as a gold miner and newspaper correspondent, later moving to Dury, south of Auckland where he would join the irregular volunteer force of Forest Rangers, as an ensign, specialising in patrolling the deep bush, and soon displaying the dash and élan he would be famous for, sporting his sabre, bowie knife and Colt Navy six shooter, alongside his men similarly armed and carrying breech-loading Calisher and Terry carbines.
I've really only touched on the collection housed in the AWMM, and a look at the collection as a whole could prove to be a post on its own, and it proved an excellent starting point and left me really looking forward to seeing the places associated with many of the items on display.
The Flagstaff War 1843 -1847
 |
| Modern day Russell, seen from Flagstaff Hill, named Kororareka by the Maoris meaning 'Sweet Penguin' in honour of a chief wounded in battle, who asked for penguin broth and afterwards declared 'Ka reka te korora' or 'how sweet is the penguin'. Today Russell has a population of about 1,000 and its people are involved in tourism, fishing, oyster farming and cottage industries, but a town still very conscious of its history. |
So with an extra day in Auckland due to yet more flight changes, we jumped in the hire car and headed north to the first capital of New Zealand, the lovely seaside town of Russell, Point 2, so designated between May 1840 and March 1841 by Governor Hobson, with the town named in honour of Lord John Russell, the British Colonial Secretary of the day, and with the capital shifted later to Auckland in 1841.
 |
| The flagstaff atop Flagstaff Hill overlooking Russell would be the spark to light the tinder box and the first expression of Maori dissatisfaction following the signing of the Treaty of Waitangi, seeing the flagstaff felled four times by Maori warriors led by Hone Heke Pokai, between July 1844 and March 1845. |
When Captain Cook sailed Endeavour into the Bay of Islands in 1769, the town was already an established settlement for the Ngare Raumati people, and Cook was soon followed by other explorers and whalers looking to use the port for reprovisioning and traders in search of kauri spars and flax.
 |
| A glorious rendition of the Nga Puhi chief Hone Wiremu Heke Pokai with musket in hand (1810 - 1850) from the wonderful Russell Museum. He was the first to sign the Treaty of Waitangi in 1840, but quickly grew disenchanted with British rule and its emblem of power that flew over the town, namely the Union flag. Felling it four times, with the last occasion in 1845 signalling the start of an attack on the town, supported by an ally, Chief Kawiti of the Ngatihine iwi. He would resist British military efforts for a further year, eventually making peace, but certainly not surrendering, brought to the negotiating table by pro-British chiefs among the wider Maori people. |
The town grew with the arrival of more Europeans but seeing the township gain an unenviable reputation for lawlessness until British government was established in 1840, but with the capital moved to Auckland and the towns economic decline that followed, Maori dissatisfaction grew in the area, that would see the British flagstaff above the town cut down four times in protest and the sacking of the town by Hone Heke's warriors leading to its abandonment, provoking a British military response later called the Flagstaff War 1843-47.
 |
| A map from the Raupekapeka pa site illustrating the troop movements in the north following Heke's attack on Russell and the arrival of some 700 soldiers from the 58th and 99th Foot, supported by 300 sailors and marines 70 armed civilians and 450 Maori allies with Heke and Kawiti's force numbering some 600 warriors |
From Russell, we made the short drive to perhaps one of the most famous pa sites that featured significantly in the Flagstaff War, Ruapekapeka, built by Hone Heke's ally, the Ngatihine chief, Kawiti in December 1845 and illustrated above with the model seen in the AWMM.
 |
| An overview of the Raupekapeka battle site, seen from the site of the British camp, with the area of open ground in the centre of the view, the site of the British forward bombardment area and the Raupekapeka pa site on the open forward slope of the hill seen in the background https://www.doc.govt.nz/globalassets/documents/conservation/historic/by-region/northland/ruapekapeka-heritage-assessment.pdf |
The fight for Raupekapeka would follow a pattern established in many of the fights for previous pas, with the British troops attacking in the conventional manner, and usually being driven off, followed by the Maoris abandoning their position having made their point.
In this fight the pa would be abandoned prior to the British assault on the breaches made in the forward palisade, but seeing the bulk of British casualties suffered, twelve killed and twenty-nine wounded, when they pushed through the defences into the bush beyond before finally withdrawing from their pursuit.
 |
| A contemporary view compares well with the picture above, showing the British camp and smoke above it, from firing between the British forward area and the pa. |
The British assembled an impressive arsenal: three 32-pounders, one eighteen-pounder, two twelve-pounders, and assorted lighter pieces including mortars. It took three weeks to get everybody up to the site of the battle;
'Taking the guns up to Ruapekapeka, was a feat not accomplished without difficulty and hard work, the landing and getting the thirty-two pounders up a perpendicular hill being in itself quite an undertaking. They were afterwards moved fourteen miles over the most hilly county it has ever been my fate to travel, without a particle of road, and passing thorough a dense wood.'
 |
| 'A corner of a foreign field is forever England'. In December 2017, the twelve British fatalities from the storming of Raupekapeka were found more than 170 years after they died, having been laid to rest in a mass grave in the former camp site, It was great to see their final resting place formerly marked, including regimental and naval titles, and their names recorded. https://www.rnz.co.nz/news/te-manu-korihi/346241/british-soldiers-lost-graves-uncovered-at-ruapekapeka |
 |
| The protective entrance to Raupekapeka, demanding respect from those that enter sacred ground where blood was spilt in mortal combat. |
On 10th January the work was complete, and Colonel Henry Despard ordered all of the guns and rockets to open fire at once. The outer defences, robust as they were, could not withstand prolonged and concerted attention from the British cannons. By the end of the day the British could see a considerable breach in the defences.
On Sunday 11th January the British stormed the breach, but only after scouts had determined the pa was all-but-deserted. Kawiti’s troops were in the area behind the pa, accompanied by Heke and his men who had only just arrived.
Some of the troops pressed on beyond the pa as this contemporary account describes;
'Most of the soldiers remained in the pa firing through loop-holes … A few sailors and soldiers, however, went out a little gate at the back of the pa, but were no sooner out than they were shot by the people behind the trees. At least some forty or fifty soldiers got out, and a fight began outside.'
 |
| A contemporary illustration of the British assault on the breaches made to the forward palisade of the Raupekapeka pa on 11th January 1846, showing well the formidable nature and size of the trees used in its construction |
 |
| The British shelled the pa for ten days with limited effect and damage, although a carronade set up by the Maori defenders in the centre of it was destroyed by a direct hit and one section of the palisade damaged. The same carronade stands today defiantly pointing towards the British positions, with the remains of rifle pits seen close by. |
The Waikato War, July 1863 - March 1864
Returning to Auckland we prepared to head south, this time following a marvellous little guide prepared by the New Zealand Historic Places Trust together with an app describing the events surrounding the various sites listed.
 |
| The map of the driving tour we partly followed on our journey south from Auckland. Details in the link below. https://www.heritage.org.nz/places/places-to-visit/waikato-region/the-waikato-war |
We were following the old military road, now State Highway 1, built by the troops in 1863 as Governor George Grey initiated his war against the united Maori of the Waikato under their own king, he being under pressure from an ever growing population of settlers eager to occupy the fertile lands south of Auckland.
 |
| Work under way constructing the military or Great South Road into the Waikato from Auckland |
As we were heading for the Coromandel coast, Point 3, with a stop off on the way to spend a night in a hobbit hole, I kid you not and more anon!, we only had time to pick up a few of the thirteen sites listed, but those we did provided a fascinating glimpse at the terrain of this very pivotal campaign fought over ten months in 1863 and 1864.
 |
| Pukekohe Church - This tiny church built by the pioneers of Pukekohe bears the scars from one of the most dramatic battles of the Waikato War. |
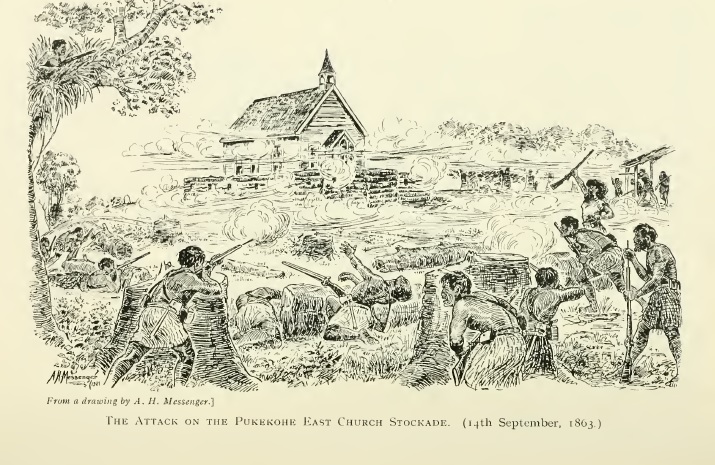
On a spring morning in 1863, 17 men and one 14-year-old boy held off a war party of about 200 Māori until reinforcements arrived, firing from a half finished stockade.

Cowan describes the first attack between 9 and 10am on Monday morning, 14th September, 1863;
'The first shot was followed by a charge. In an instant scores of figures leapt out from the trees, fired heavily on the stockade and on the riflemen running for shelter, and rushed down on the log fence, darting from stump to stump, some firing the remaining barrel and reloading, others reserving their fire for close quarters.
With the warriors was a woman, armed with a single-barrel gun, a cartridge-belt buckled about her waist. The little clearing, so quiet a few moments before, was filled with the bellowing of heavily loaded tupara and the sharp crack of rifles. High above the other sounds rose the screaming voice of the Maori amazon as she exhorted her warrior comrades, " Riria ! Riria! " ("Fight away ! Fight away ! ")'
 |
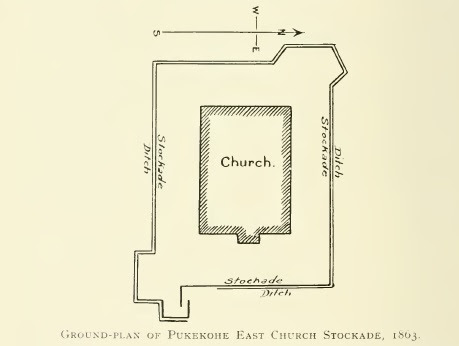
| There are still bullet holes evident in the walls and ceiling. |
'Sergeant Perry's first order to his little force was " Fix bayonets !
" He ordered them on no account to fire a vollev. The reason was that while the defenders were reloading their muzzle-loading Enfields the Maoris might charge in. Each man ran to a loophole, and in a moment the outer wall was bristling with bayonets projecting through the rifle-slits.
Independent firing began, and for the next six hours the settlers and their comrades the special constables fought a battle against many times their number of brown skirmishers, who kept up an extraordinarily heavy fire from behind trees, logs, and stumps, and from the treetops, and others from the shelter of a house (Easton 's), about 100 yards away, above the gully on the defenders' right flank.'
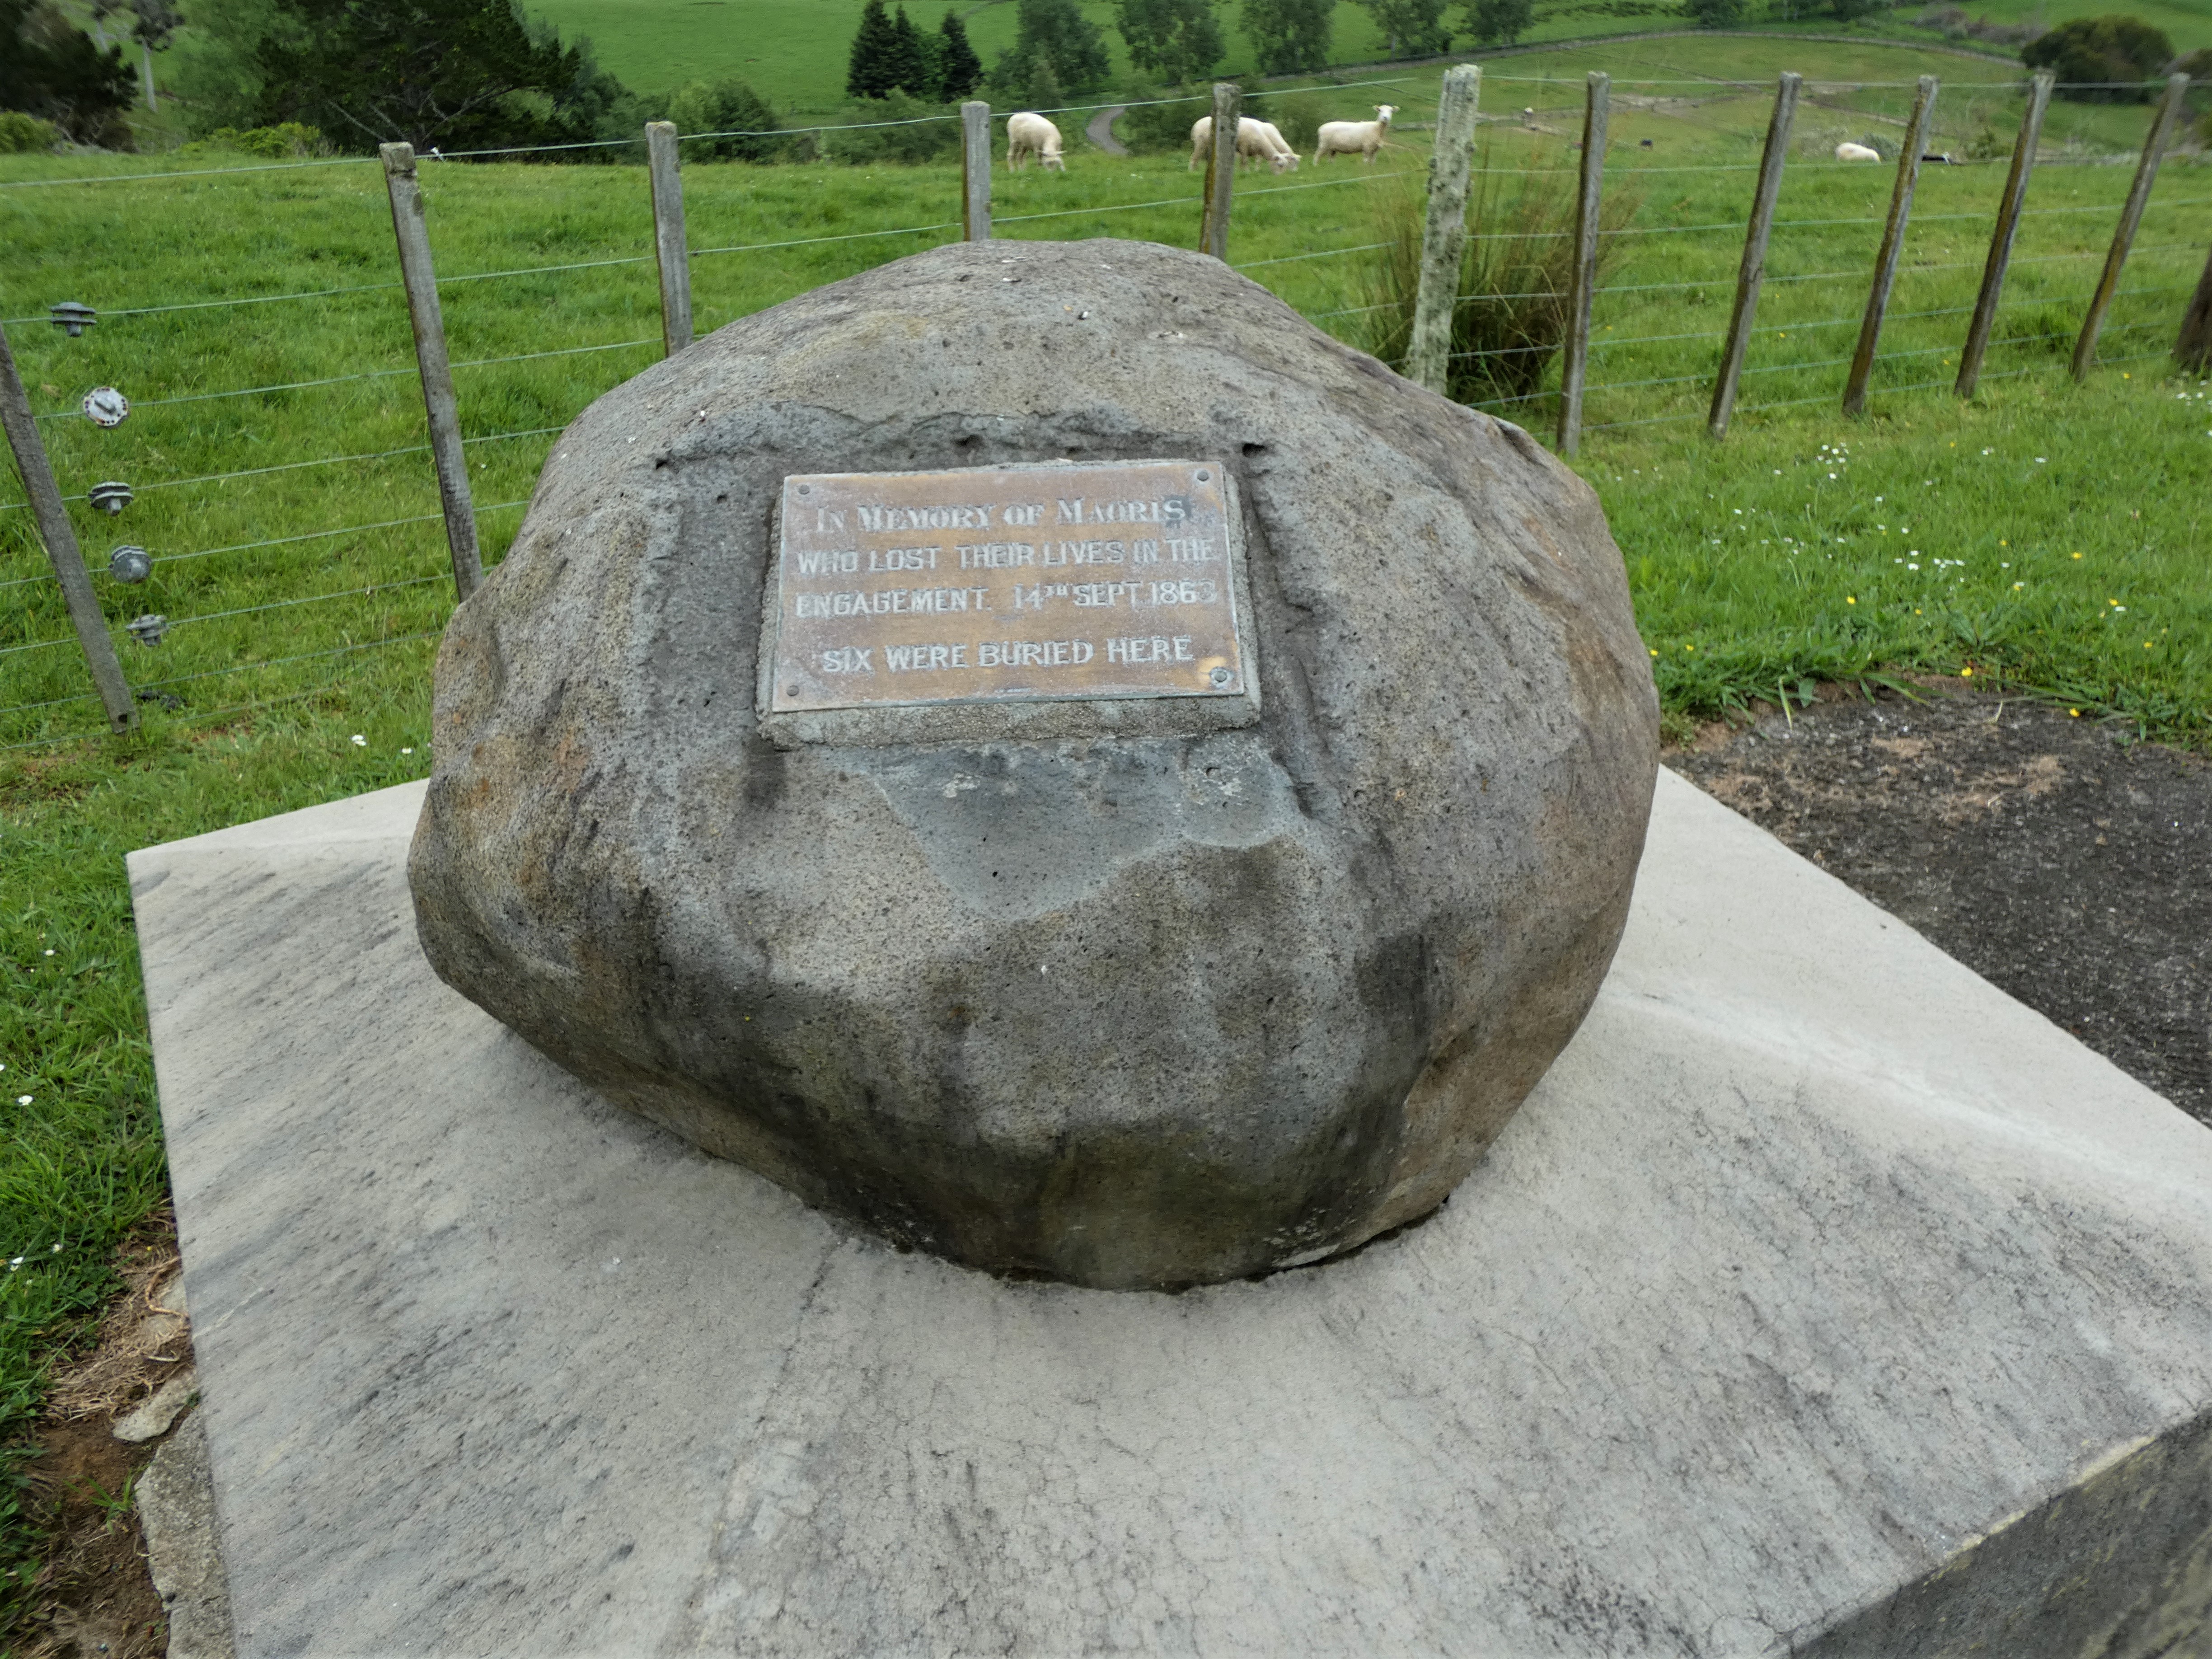
The Māori warriors hid the bodies of their slain in the hollows and branches of large trees around the church. A mounted boulder now marks their resting place in the cemetery.

Queen’s Redoubt was the largest built by Imperial troops in New Zealand. Here, some 450 men waited for word to attack.


Rangiriri was a complex earthwork built on a narrow strip of land lying between the Waikato River and Lake Waikare; it was attacked by the British in November 1863.


Although some outlying defences were successfully stormed the attacks bogged down in the deep trenches surrounding the main redoubts.

Cowan described the end of the fighting as darkness closed in;


We had a really enjoyable stay in New Plymouth being very aware of its connections and those of its earliest townsfolk haling from our home back in the UK, with names of roads that are very familiar in our part of Devon, and the site of gravestones in the New Plymouth Cathedral Church of St Mary of folks having left towns in Devon in the early 19th century to settle in the most farthest part of the British Empire hoping to make a new start in a very new world.

St Mary's is also a veteran of the New Zealand Wars and its cemetery is the final resting place of many of those, civilians, soldiers and Maori who were killed during the struggles in Taranaki.


The redoubt lay just north of the Mangatāwhiri stream, the aukati – a 'line that should not be crossed' –
between settler Auckland and the Māori King’s lands.
On 11th July 1863, Governor Grey ordered the Waikato chiefs to pledge allegiance to Queen Victoria.
When he issued his ultimatum, Governor Grey also accused Waikato Māori of planning 'to ravage the Settlement of Auckland and to murder peaceable settlers'.
The accusations were unfounded. The next day, before the message had been received, his soldiers crossed the stream and the war had begun.

The Pokeno Historic Cemetery is located close to the Queens Redoubt and the memorial seen below bears the names of twenty-four Imperial and Colonial troops who died during the Waikato War and are thought to be buried nearby.


'Bloody Rangiriri' was the key battle in the Waikato invasion. It threw open the river basin to imperial troops, but at a huge cost.
The British suffered more casualties than in any other conflict in the New Zealand Wars.

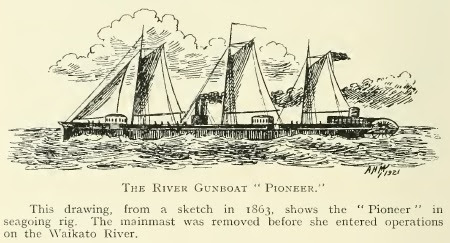
British troops under Lieutenant-General Duncan Cameron were landed from gunboats on the Waikato River and assaulted the position on 20th November 1863.


'It was now almost night, and the General was compelled by the darkness to cease the waste of brave men's lives. The pa was surrounded by the troops in readiness to renew the combat in the morning, and sailors and soldiers lay in the main ditch all night listening to the shouts and war-songs of the maddened Maoris, and occasionally returning the fire directed at them from the parapet.
Many of the Maoris contrived to escape during the night ; among them was Te Wharepu, a leading warrior, who was severely wounded. Hand-grenades were thrown into the redoubt in the darkness and caused a number of casualties.'


Among a great collection of weapons, vehicles, uniforms and other items recording the history of New Zealand's Army, it was great to find a specific gallery covering the New Zealand Wars specifically.

The following pictures of these wonderful dioramas depicting the British Army on campaign in the New Zealand Wars are truly inspiring and have me looking forward to taking up a paint brush on my return to the UK.


North Taranaki War March 1860 - March 1861


We continued back up the path into the old Pukerangiora Pa and made our way towards the cliffs overlooking the Waitara River, offering stunning views out over the surrounding countryside, but being very conscious of the very sad history of internecine warfare that had seen the deaths of innocents on the rocks below.

Behind its thick earth walls the Māori warriors knew they were facing defeat. At about 5am those who were left hoisted a white flag. There is evidence that the flag was not a sign of surrender, but of a desire to negotiate.
One officer, Lieutenant Pennefather, described how on seeing the defenders’ white flag, he
“at once scrambled into their redoubt, and with his men, mingled amongst them, shaking hands”.

The General came up about ten minutes later, complimented them on their bravery and demanded their
arms. According to Pennefather, the chiefs were reluctant to hand over weapons, explaining that they had hoisted the flag to discuss terms with the British. But in the end, resisting was out of the question.
More than 180 Māori prisoners were taken from Rangiriri, and many of the 200 who escaped overnight were seriously wounded.
The Kīngitanga fighting force could not survive the blow. In the aftermath of the battle, the British forced mass evacuations from tribal land, people were settled with different hapu, in what became known as the King Country.
Families were displaced and those who came back decades later found that their kāinga (villages) no longer existed, or had been taken over by others.

Official government records of the time proclaimed a stunning British victory at Rangiriri. But the troops’ commander, General Cameron, was shaken by the losses: 132 British were killed or wounded. Forty-one Māori died, including six chiefs.
National Army Museum, Waiouru
After an amazing time walking the Coromandel Coast, Point 3, we narrowly escaped an incoming cyclone that brought heavy rain, floods and blocked roads from mud slips as we moved on via a short detour to Hobbiton to Rotorua, Point 4, for a few days of delightful imbibing of traditional Maori culture mixed with plenty of hot pools and massages.
 |
| One of the most famous places in New Zealand |
Then we headed off to the Tongariro National Park to stay a few nights at Chateau Tongariro prior to walking the Tongariro Pass, or as Boromir would say, 'One cannot simply walk into Mordor!' but we did and I will do a post covering this adventure later.
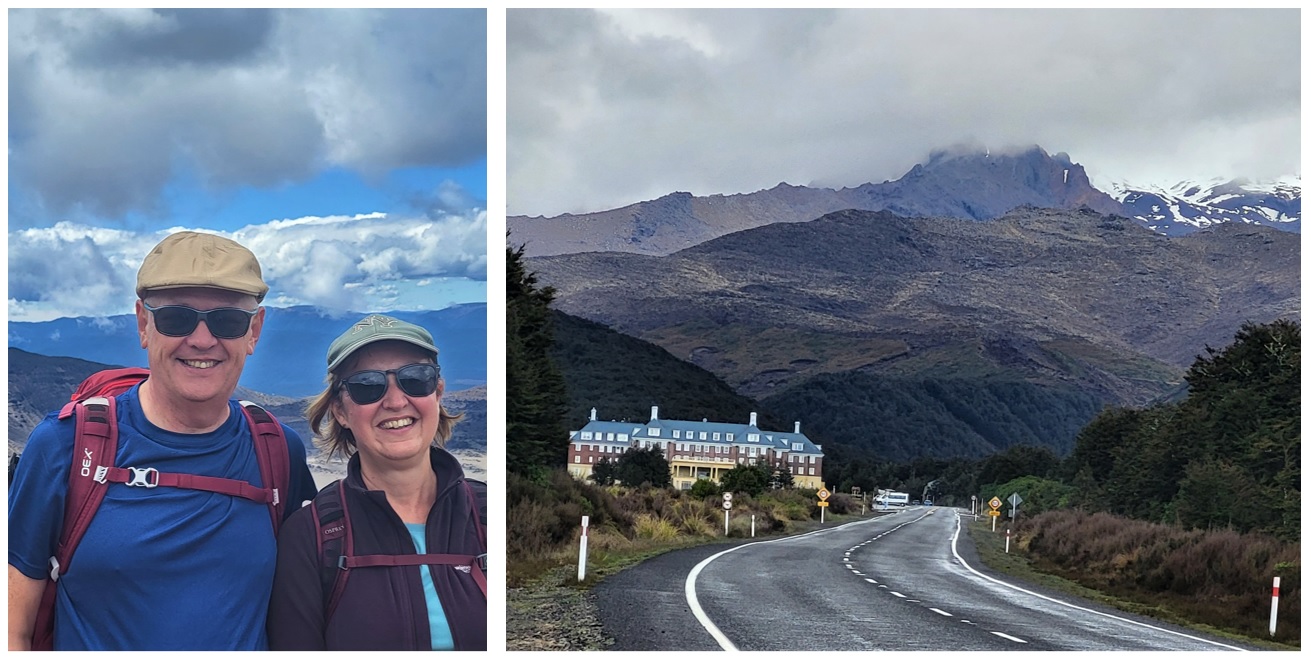 |
| Our walk into Mordor via the Tongariro Pass and our delightful accommodation, Chateau Tongariro |
After all this fun I was looking forward to seeing more of North Island and heading out towards the west coast at New Plymouth, Point 6, stopping off at the New Zealand National Army Museum, Waiouru on the way.
 |
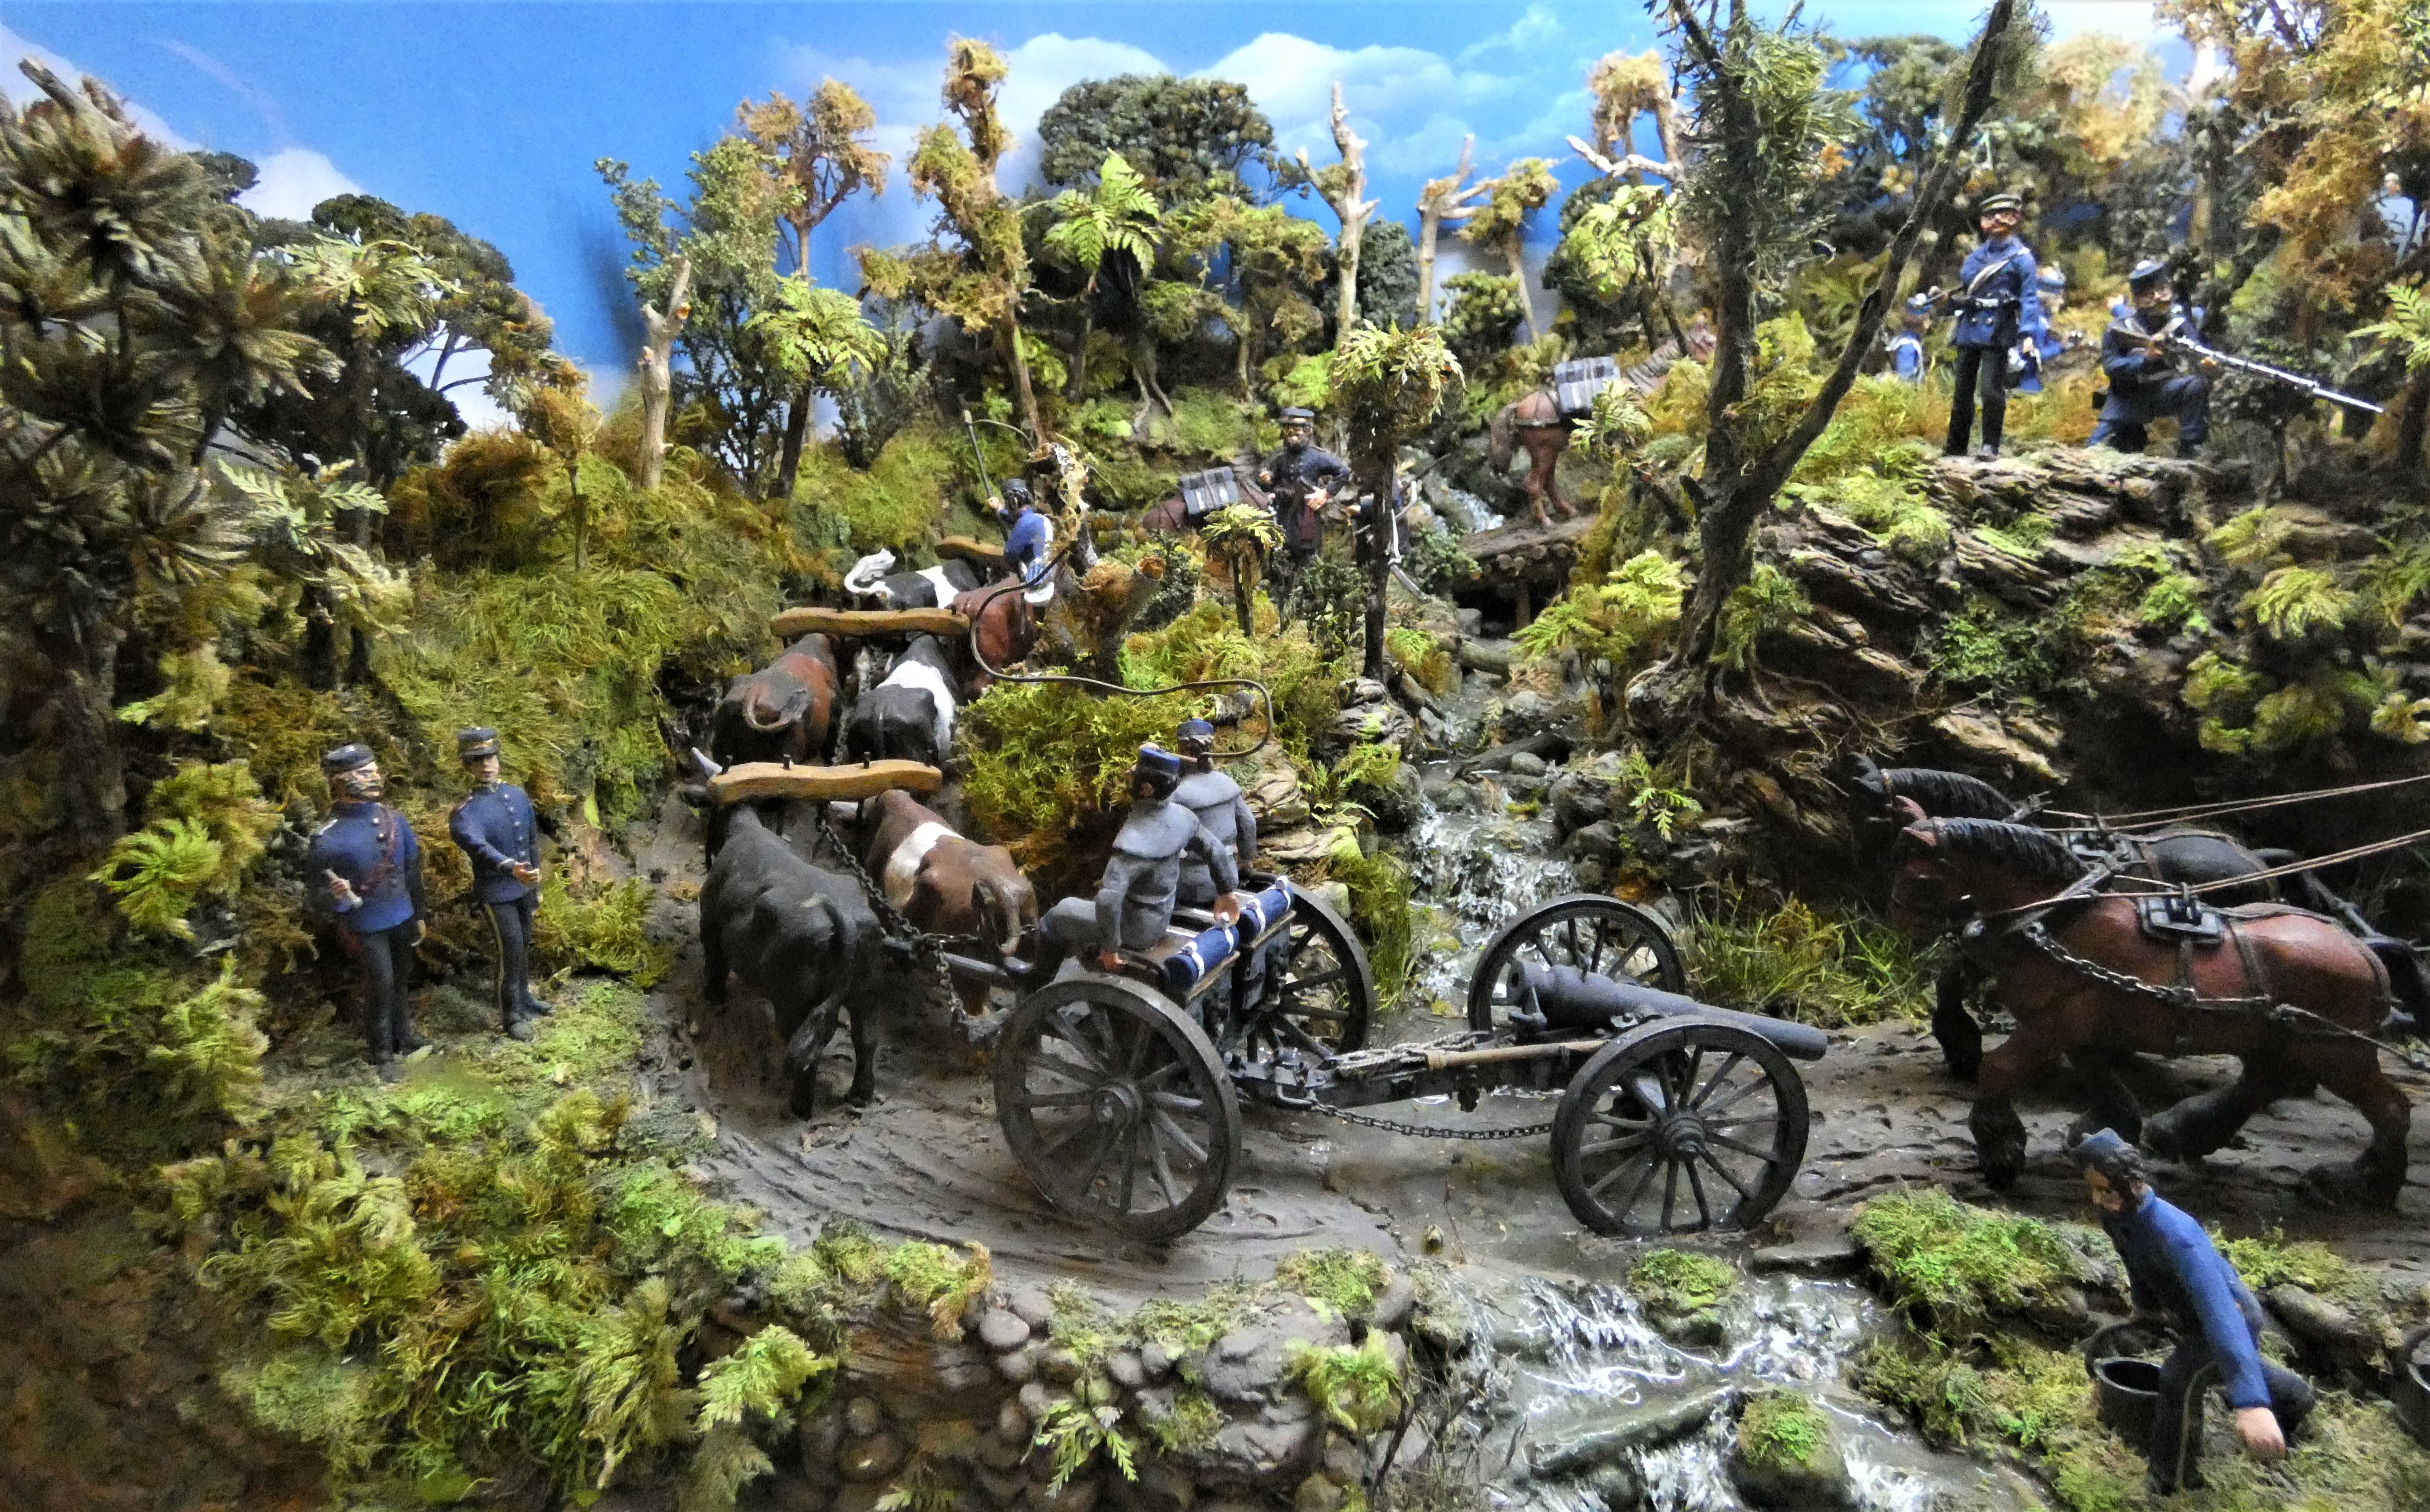
| This display shows a scene from the Gate Pa battle with Imperial troops dragging an Armstrong 6-pounder gun to a hill on the left of the pa from where it could provide enfilade fire. The 68th Regiment were in position at the rear of the pa, close to where the gun fired its contribution to the battle. |
 |
| Left to Right, New Zealand Volunteer forces. The Auckland Scottish Rifle Volunteers, The Arawa Flying Column, Armed Constabulary, The Forest Rangers. |

 |
| At the centre of this display cabinet is the Nock's 7 Barrel Volley Gun, first produced in 1780 for the Royal Navy. At the top is the trusty but old Brown Bess musket and below it, the pattern 1853 (Enfield) Rifle Musket, the primary weapon used throughout the New Zealand Wars by British and Colonial forces. At the bottom can be seen the Pattern 1822 British Infantry Officers sword with a pattern 1845 blade, engraved with the emblem of the 68th Durham Light Infantry who served in New Zealand from 1864 - 1866, seeing action in the Waikato, at Gate Pa and Te Ranga in Teranaki. |
 |
| Rutland used to be the smallest county in England, and they could be justly proud of the 58th Foot who bore their county name. |
The following pictures of these wonderful dioramas depicting the British Army on campaign in the New Zealand Wars are truly inspiring and have me looking forward to taking up a paint brush on my return to the UK.


We hadn't originally planned to travel out to New Plymouth, Point 6, but I'm so glad we included it in the itinerary, if not simply for the amazing view of Mount Egmont, or Taranaki, which ever you prefer, the volcano that dominates this western plain of North Island, overlooking the town of New Plymouth, and which is very rarely seen with its head out of the clouds, but Carolyn managed to get a picture of it peeping out to greet us as we drove along Highway 45.
 |
| Mount Taranaki peaks out of the clouds as we drive into New Plymouth |
 |
| The camp of the 68th Regiment at Waitara, 1860, with Mount Taranaki dominating the background. |
The opening shots of the first Taranaki War were fired when British troops attacked a pā built by Te Āti Awa chief TeRangitāke at Te Kohia, Waitara.
A minor chief, Te Teira Mānuka, had offered to sell Governor Thomas Gore Browne land in 1859. TeRangitāke (also known as Wiremu Kīngi) denied the validity of the sale and his supporters erected a flagstaff to mark their boundary.
Gore Browne overturned previous policy by pursuing a contested land sale. He hoped to win support from New Plymouth settlers desperate for land. When Gore Browne ordered surveyors onto the Pekapeka block, Māori pulled up their pegs. The governor declared martial law and sent in British troops.
 |
| Map from Cowan's history illustrating the proximity and layout of the Te Kohia pa and the nearby British camp in Waitara, just along the coast from New Plymouth. |
Te Rangitake’s L-shaped pā incorporated anti-artillery bunkers. Built overnight just inside the disputed land, it withstood 200 artillery rounds and close-range fire from 500 troops. No Māori had been killed by the time TeRangitāke and his 70 men abandoned the pā that night.
 |
| New Plymouth District Council purchased the Te Kohia site in 2016. |
Māori often constructed L-shaped pā in the 1860s to provoke attack by the British. Though durable, they could be built quickly and so were expendable.
The war dragged on until March 1861, with neither side winning a decisive victory. There would be more fighting near New Plymouth in 1863.
Te Kohia Pa, is a really important site with regards to the First Taranaki War, as it was the attack on it that brought Te Āti Awa the allies they sought from the Kingite Movement in Waikato to support them and which effectively swung the ensuing war in their favour, but which would ensure that Governor Gore Brown's replacement, Governor Grey would quickly come to terms in Taranaki and turn his full attention on dismantling the Kingite Movement and further resistance in Waikato.
The site itself is not much to see and took a bit of finding, and needless to say, it chucked it down with rain when we did, so I took the pictures from the car.
Hopefully, in time, a fuller archaeological survey will reveal more about this interesting site and allow a better presentation of it.


British forces suffered their worst defeat of the Taranaki War at Puketakauere Pa near Waitara on
27th June 1860.
 |
| The 1:50,000 map illustrates the two pas at Puketakauere. We parked in the road at the bottom of the map and followed the path towards the hill. The British attack came from the other side via State Highway 3, the Devon Road, coming from Waitara, whose outskirts can be seen at the top of the map. |
 |
| The Puketakauere Pa, an illustration from the Wellington Independent, dated 31st July 1860 |
 |
| At the top of the path the two pas are easily identified with Puketakauere to the right and the older Onukukaitara, the smaller hill top to the left. The tree line running below the hills marks one of the streams that runs either side of the position and at the bottom of the hill. |
During June the Te Atiawa chief Hapurona began work on strengthening the old sites of Puketakauere and Onukukaitara. These pa could be seen from Camp Waitara. Major Thomas Nelson led 350 men out from Waitara on the morning of 27th June, determined to ‘teach the troublesome natives a lesson they would never forget’.
Dividing his force into three distinct columns, as described by Cowan;
'The main body, under Nelson, crossed the Devon Road and marched across the fern plain. A detachment of sixty men of the 40th Regiment, under Captain Bowdler, marched to the left, with orders to occupy a mound south-east of the camp, in order to prevent the natives escaping along the left flank of the main body and attacking the camp.
If this was not attempted, Bowdler was to double up to the support of his Major. The other division, 125 strong, consisting chiefly of the Grenadier Company of the 40th, under Captain Messenger . . . was detailed to get possession of Puke-ta-kauere mound, to cut off the retreat from the other pa, and to bar the way to Maori reinforcements.
 |
| Puketakauere Pa. - The ground around the site is given over to pasture land for cattle, but would it seems have had more cover from ferns and scrub back in 1860, as described by Cowan. |
The main body (Naval Brigade numbering sixty-five, Royal Artillery with two 24-pounder howitzers, Royal Engineers, and the Light Company of the 40th) moved in extended order towards the south-west side of the fortifications, and was soon engaged by the Maoris in large force.
The artillery opened fire at 7 a.m. from level ground northwest of Onuku-kaitara, but failed to make a large-enough breach in the stockade—in the Major's view—to justify an order for the assault.
 |
| Onukukaitara Pa |
The Maoris, however, did not wait to be attacked in their forts, but came out into the fern and manned their outlying trenches. Their first fire was directed upon Captain Messenger, who was struggling around to the rear of the position on the Waitara side; but Nelson and Beauchamp-Seymour were soon in the thick of it. Large Maori reinforcements hurried down from the Kairau and other settlements in the rear, and quickly worked round the British right flank.
Captain Bowdler now brought his division up at the double, but the combined strength was not sufficient to deal with the foe, who were fighting with the utmost fearlessness and determination.


 |
| The natural ground cover around the stream seems more likely to represent the cover the Maoris defenders were able to make best use of across the area of the two pas. |
The bluejackets and marines, led on by their captain and supported by the Light Company of the 40th, carried a long trench on the right front, but were held up by a deep gully and two more entrenchments dug on the slopes in the fern, and found themselves under a destructive fire from the Maori double-barrel guns, loaded and discharged with lightninglike rapidity. Some survivors declared the fire encountered was hotter than anything in the great Indian battles or in the attack on the Redan in the Crimea.
The British right flank came under what was described as a terrible fire from a series of trenches on the sides of the gullies.
In this tight corner Major Nelson looked anxiously, but in vain, for expected reinforcements from New Plymouth. He had arranged with Colonel Gold, Officer Commanding, who had left the time of attack to him, that he would signal with ship's rockets on the night before the movement against the pas, Gold undertaking to march at daylight with four hundred men and two guns and take the "Maoris on their left flank.

Through an artillery non-commissioned officer's default this signal—which would have been seen at the Bell Block stockade and repeated to Marsland Hill — was not sent up. The sergeant forgot to use the rockets, and Gold was unaware of Nelson's attack until the heavy firing was heard in New Plymouth.
The force which was then hastily marched to the relief only got as far as the Waiongana. The river was in flood, and, as the firing had ceased, Gold considered there was no need for assistance, and marched his men back to town.
Meanwhile Major Nelson's force and the division under Captain Messenger had desperate work, and the 40th suffered a heavy defeat at the hands of the Maori musketeers. Nelson's regiment and the " Pelorus " men fought well, but they were no match for their active opponents, who came at them with the long-handled tomahawk when the commander began the heavy task of withdrawing his force from the field.
It was with great reluctance that he gave the order to sound the " Retire," but there were many casualties, the obstacles in his front were great, there was no sign of reinforcements, and ammunition was running short. With the utmost difficulty the force was extricated; the Light
Company was the rearguard. There was ferocious fighting in the fern at close quarters. The killed and many of the wounded were left behind. Captain Beauchamp-Seymour was shot in the leg, and had to be carried off the field. The howitzers, under Lieutenant MacNaghten, R.A., covered the retreat with a steady fire of case shot.'

The Maori force at Puketakauere numbered 400 at most. The pa itself was garrisoned by around 140 Ngati Maniapoto. The rest of the Maori force took position in rifle pits in front of nearby Onukukaitara pa and in the gullies on each side of the approach to Puketakauere. This was the real strength of their position and something Nelson failed to notice when planning his assault.
While Nelson claimed that between 130 and 150 Maori had been killed, more reliable sources put
the number at between five and eight, whilst 32 British soldiers were killed and another 34 wounded in other words a loss of one in five of the force engaged.
 |
| Māhoetahi New Zealand Wars memorial cross |
In early November 1860, 150 Ngati Haua reinforcements led by Wetini Taiporutu arrived in Taranaki to ‘kill soldiers’. On the 5th November they occupied the old pa site of Mahoetahi, a ‘small volcanic hump’ between New Plymouth and Waitara.
Next morning they were caught unawares by Major-General Thomas Pratt and a force of 1000 British troops who by coincidence were planning to occupy the site. With their defences incomplete, Ngati Haua were quickly routed.
Nearly a third of the Maori force was killed. Most of these casualties were buried in a mass grave on the western slope of Mahoetahi. Wetini and several other chiefs killed at Mahoetahi were buried in the grounds of St Mary’s vicarage in New Plymouth.
A wooden cross to mark the mass grave was erected in 1911. In 1941 it was replaced by this cross
erected by the New Zealand government.
 |
| The translated inscription reads; In remembrance of the brave chiefs of Waikato, of Wetini Taiporutu and his comrades who fell close to this spot in the battle fought on the 6th November 1860. |
 |
| Pukerangiora Historic Hill Pa |
In the wake of the disastrous battle of Puketakauere Pa, Colonel Charles Gold came under heavy criticism, with charges of cowardice and outrank stupidity that would eventually lead to a replacement in British command with the arrival of Major-General Thomas Pratt in August 1860, with plans of a new strategy to break the cordon of Maori pas that had encircled New Plymouth.
 |
| An 1864 sketch of Pukerangiora Pa looking up from the British position with Pratt's Sap to the right and the Maori palisades beyond. |
With his arrival and an additional 1400 troops coupled with the retirement of the Te Atiawa part time fighters to return home to plant crops, the British force set about destroying pa north and south of New Plymouth, many of them unoccupied, but giving the illusion of progress; and relieving the hard pressed occupants of the town that had suffered in the winter from disease caused by overcrowding, as settlers and their families were forced to evacuate the countryside and seek the protection of the town and its garrison.
 |
| One of the outlying Maori rifle pits overlooking the furthest end of Pratt's Sap. Perhaps it was from here that Maori riflemen directed their fire against Colour Sergeant John Lucas and his men. |
In December 1860, Major-General Pratt began operations against a major Māori defensive line called Te Arei ("The barrier") on the west side of the Waitara River, barring the way to the historic hill pā of Pukerangiora.
In 1831, during the Musket Wars, Te Atiawa, suffered a major defeat here at the hands of the Waikato iwi, armed with muskets, who invaded Taranaki and cornered 4,000 Te Atiawa in the same pa and after a three month siege, defeated them and saw some 1,200 Te Atiawa killed with many of their women and children jumping to their deaths from the cliff tops overlooking the Waitara River.
 |
| The view from from the forward palisade line of Te Arei and Pratt's Sap below |
In 1861 old enemies were now in alliance with a common foe, as General Pratt, wary of attacking Maori in prepared defences, decided instead to dig trenches and sap up the slopes to Te Arei Pa in front of Pukerangiora.
 |
| The most forward point of Pratt's Sap with the Maori rifle pits pictured above just off to the left and below the lighter coloured area on the left of the bank beyond. |
 |
| The forward section of Pratt's sap can be clearly delineated, zig-zagging its way forward to the Te Arei forward defence on the embankment above. |
Although the sap was time consuming and laborious work, the screen provided by the covering fire from traverses allowed the attackers to reach their objective with minimal risk from Maori fire, with the intention of tunnelling forward to undermine the defences of the pa or destroy them with explosives.
 |
| British counter-engineering based on Pratt's Sap - Maori Fortifications, Osprey Note the coehorn mortar illustrated in the forward part of the sap, very useful for lobbing shells over palisades. |
During the construction of the 768 yard sap the Maori defenders launched several attacks on the works that resulted in some fierce clashes as illustrated above and it was in one of the very last attacks that Colour Sergeant John Lucas of the 40th Foot was awarded the VC for his role in driving off the attack as indicted in the citation;
 |
| Colour-Sergeant John Lucas VC, 40th Foot |
'On the 18th of March, 1861, Colour-Serjeant Lucas acted as Serjeant of a party of the 40th Regiment, employed as skirmishers to the right of No. 7, Redoubt, and close to the Huirangi Bush, facing the left of the positions occupied by the natives.
At about 4 o’clock P.M., a very heavy and well-directed fire was suddenly opened upon them from the Bush, and the high ground on the left. Three men being wounded simultaneously, two of them mortally, assistance was called for in order to have them carried to the rear: a file was immediately sent, but had scarcely arrived, when one of them fell, and Lieutenant Rees was wounded at the same time. Colour-Serjeant Lucas, under a very heavy fire from the rebels, who were not more than thirty yards distant, immediately ran up to the assistance of this Officer, and sent one man with him to the rear.
He then took charge of the arms belonging to the killed and wounded men, and maintained his position until the arrival of supports under Lieutenants Gibson and Whelan.'
 |
| One of the covering traverses in still clearly visible and connected at the mid point of the sap |
In the end the Maori abandoned the position when the sap became dangerously close. A ceasefire was eventually arranged on the 18th March 1861 after the intervention by the Kingite chief, Wiremu Tamihana, who later helped to negotiate a truce that ended the First Taranaki War.
 |
| Back up the hill the paths lead the visitor into the interior of the old Pukerangiora Pa |
We continued back up the path into the old Pukerangiora Pa and made our way towards the cliffs overlooking the Waitara River, offering stunning views out over the surrounding countryside, but being very conscious of the very sad history of internecine warfare that had seen the deaths of innocents on the rocks below.


 |
| The men of the 57th (West Middlesex) Regiment form a significant cohort of those British soldiers laid to rest at St. Mary's and this picture of officers of the regiment at Wanganui in 1864, gives a good idea of the look of these men in New Zealand. |

 |
Three members of the Sarten family died during the tumultuous year of 1860. John Edmund Sarten had the dubious distinction of becoming the first official fatality of the Taranaki War when as a member of the mounted volunteers he died from wounds received during the assault on Te Kohia on 17 March. His father Edmund died in August and his brother Joseph was killed in a raid on the village of Henui in December. |
 |
| Lt. Edmund Charles Macnaughton arrived in New Zealand in 1859, and on St Patrick's Day 1860 he commanded the mortar detachment on Mount Pleasant at Brixton which fired the first shots of the Taranaki War. One year later to the day, he was killed during the month-long campaign to advance upon Te Arei Pa, near Pukerangiora. He is also mentioned by Cowan in the account quoted above, as the officer commanding the artillery component of the rear-guard during the retreat from the disastrous battle at Puketakauere 27th June 1860. |
This post provides a snapshot of some of the places we visited during our tour through North Island New Zealand and has left me very enthused at looking to try and model a collection of figures around some of these actions, looked at in this account.
As mentioned, there is nothing quite like seeing items used by warriors and soldiers from a given era or theme, up close and in detail, and likewise there is no substitute for being able to walk the ground of actions and battles described in books, to help one get a better understanding of what was going on, taking into account the likely changes in the terrain in the past one-hundred and seventy odd years with fern and scrub giving way to open pasture for example.
I have another post in mind that will come back to this particular theme, and perhaps some thoughts about my own plans to look at a future collection.
More anon and the tour goes on!
JJ
What a fascinating, detailed and informative report. It's really helpful to see the combination of illustrations, museum-type exhibits and especially the real-world photos. I knew next to nothing about this era but now feel very much better informed, so thank you very much. And it looks like a great trip!
ReplyDeleteColkitto
Hi Colkitto,
DeleteThank you, and yes we are having a lot of fun exploring New Zealand.
So glad you enjoyed the read and, as someone still learning about the New Zealand Wars, putting a post like this together helps cement my own knowledge whilst sharing with others.
Cheers
JJ
A very extensive post with heaps of detail. I have lived in Pukekohe for twenty years but have never actually visited Puke East Church! Although I have been to the Alexandra Redoubt at Tuakau many times, as well as stopping at the Rangiriri site. About two months ago, while on a business trip to Tauranga, I also managed to fit in a brief visit to the Gate Pa Reserve. My wife and I had a week in New Plymouth about six months ago and I believe we visited that same cemetary, I may even have posted images of some of the same gravestones! I have been to the QEII Army Museum a couple of times too, but not for many years.
ReplyDeleteI hope you enjoy the rest of your time here in New Zealand, unfortunately, the weather has not been the best in the last month or so, but hopefully you got to see some sunshine along the way! Looking forward to reading the next episode of your visit.
Oh, by the way, Von Tempsky is under a bit of a cloud in our new, revisionist way of viewing wars of the colonial era...there is even a move afoot to have his name removed from a street in Hamilton, as he is a "war criminal" apparently!
If you would like a Maori perspective and have a bit of spare time in the evenings, have a look on YouTube under " Mihingarangi Forbes NZ Wars " ...she did a three part series that covers basically everything you have seen so far...the Far North in 1846 plus Taranaki and the invasion of the Waikato.
Hi, and thank you.
DeleteThe weather in New Zealand is extraordinary, and believe me that is quite a compliment coming from a Brit, as we tend to be very familiar with extraordinary weather, but I have to say we have been incredibly blessed with the elements being very kind when we have needed it for weather reliant activities on certain days.
It was great to see how well the authorities in NZ seem to have protected the sites we visited and that it seems all communities have been involved in that preservation and presentation. The UK is covered in a lot of such sites spanning the centuries and it has seemingly proved more difficult to achieve a similar outcome.
Yes I tend to view revisionism as just another part of the historic conversation that will over time just add to or be discarded from the all round understanding of the behaviour and motives of historic characters and indeed nations, for future generations. I think we have to be careful judging both by modern standards and see those aspects in the times they occurred and the standards that applied then, bearing in mind that the concept of a war criminal is a 20th century idea.
Thanks for the YouTube reference as I have quite a library of mainly NZ generated viewing that I watched before coming out, but I don't think I am familiar with that one.
Cheers
JJ
Hi JJ -
ReplyDeleteWow! There's a history lesson upon the topic of the 'New Zealand wars' right here! In this country those conflicts are sometimes called 'the Land Wars', though, truth be told, more lands were alienated from Maori through the Law Courts and the NZ Colonial legislature, than from military 'conquest'.
Waitara is my home town (born there), lived about 5 minutes' walk from the Pukekohe Domain (though we called it the 'Camp Reserve') but I never quite discovered where Puke-ta-Kauere was. About 30 years ago, looking through archives of the 'Lyttelton Times' of 1860-1, I discovered that a relative of mine - a Lieut Dowman - served in the 65th Regiment at the time of that battle. Not an ancestor - probably a great uncle (my own great grandfather arrived in New
Zealand with his family (Christchurch) in 1873). I visited Pukerangiora Pa several times - in amongst the pine overgrowth the trenches were still clearly visible. An evocative site.
If you can get hold of them, I recommend the following:
James Belich 'The New Zealand Wars' (1982). I'd take 'cum grano salis' his more extreme claims in respect of his 'modern pa' thesis, but there is no doubt that Maori conduct of the wars shows just how far necessity gives birth to invention. I reckon his comparison of Titokowaru with Napoleon is a bit of a stretch, too, which (to my mind) has the effect of distracting and diminishing the very real threat he represented to South Taranaki settlement. Nevertheless: a good read, and debunks some of the romanticism surrounding the history of the Land Wars.
Ron D. Crosby 'The Musket Wars' - internecine war among Maori that left the Pakeha settler population pretty much untouched. Fascinating story, if altogether rather sad. Incidentally, Ngai Tahu (South Island Maori) supported the Pakeha side in the First Taranaki war with money donations. They had fairly recent memory of maltreatment from the Te Atiawa...
Errol Brathwaite's Land Wars trilogy of novels (if you can find them): 'The Flying Fish', 'The Needle's Eye' and 'The Evil Day'. Rather romanticised (the Battle of Rangiaowhia in the second of these never really happened as described, but it's an exciting read, all the same). Written in the 1960s they are certainly a product of the time (Waitara High School library must have snapped up its copies pretty quickly, as I read them whilst still in high school).
I am, by the way, the Ion (that's the spelling) you met this last weekend at the Woolston Club, trying, with notably poor success, to defend a wagon train.
Cheers,
Ion A. Dowman
Hi Ion,
DeleteGreat to hear about your own experiences and lovely to meet up and chat the other day, and spelling noted for future reference.
I watched the New Zealand Wars series by John Belich on Youtube before coming out and thought his pronouncements there and in other references to be a little preferential, but then, as mentioned above, adds to the historic conversation, and I had his and Crosby's books on the list of reading material, following my recent viewing of the Kiwi Codger on Youtube and his fun series looking at battle sites from the musket wars.
Really enjoyed rolling some bones on the weekend and just chatting wargaming nonsense and will aim to post some pictures and thoughts here on the blog in a few days time.
All the best
JJ
Thank you for sharing your photos with us. Great landscape and many nice museums. These are memories for a lifetime.
ReplyDeletecheers
Uwe
Hi Uwe,
DeleteThank you, glad you enjoyed the post, and yes Carolyn and I are making the most of this trip that has been a while in the planning and as always it much more fun to share with others.
Cheers
JJ
Really enjoyed the write up of your trip covering this fascinating period of history. Thanks for sharing. Here is a link to our club blog showcasing our attempts to wargame the Maori Wars:
ReplyDeletehttps://nottinghamwargames.blogspot.com/search/label/Maori%20Wars?m=0
Hi and thank you, glad you enjoyed the read.
DeleteGreat link, now you've got me itching to get back to the paint desk.
Cheers
JJ
This was really informative and it's now firmly on my bucket list. Thank you.
ReplyDeleteI've always wanted to visit New Zealand, so this was very educative. I appreciate the time it must have taken you to write this, thankyou.
ReplyDeleteHi and thank you for your comments. It's great to hear back when people enjoy reading the posts and even better when they come away inspired to go see for themselves.
DeleteAll the best
JJ