

Today, August 6th 2022, is International Naval Wargames Day, an opportunity to promote the pleasures of naval wargaming to the wider gaming community and encourage more folks to expand their gaming curriculum into this interesting area of our hobby.
In support of this worthy objective I got together earlier this week with John and Bob here at JJ's HQ to run a couple of historical small-ship engagements from the French Revolutionary Wars, with a few objectives in mind, namely to play-test some new scenarios I've been working on together with the setup rules and victory conditions that apply to them, as well as supporting today's initiative.
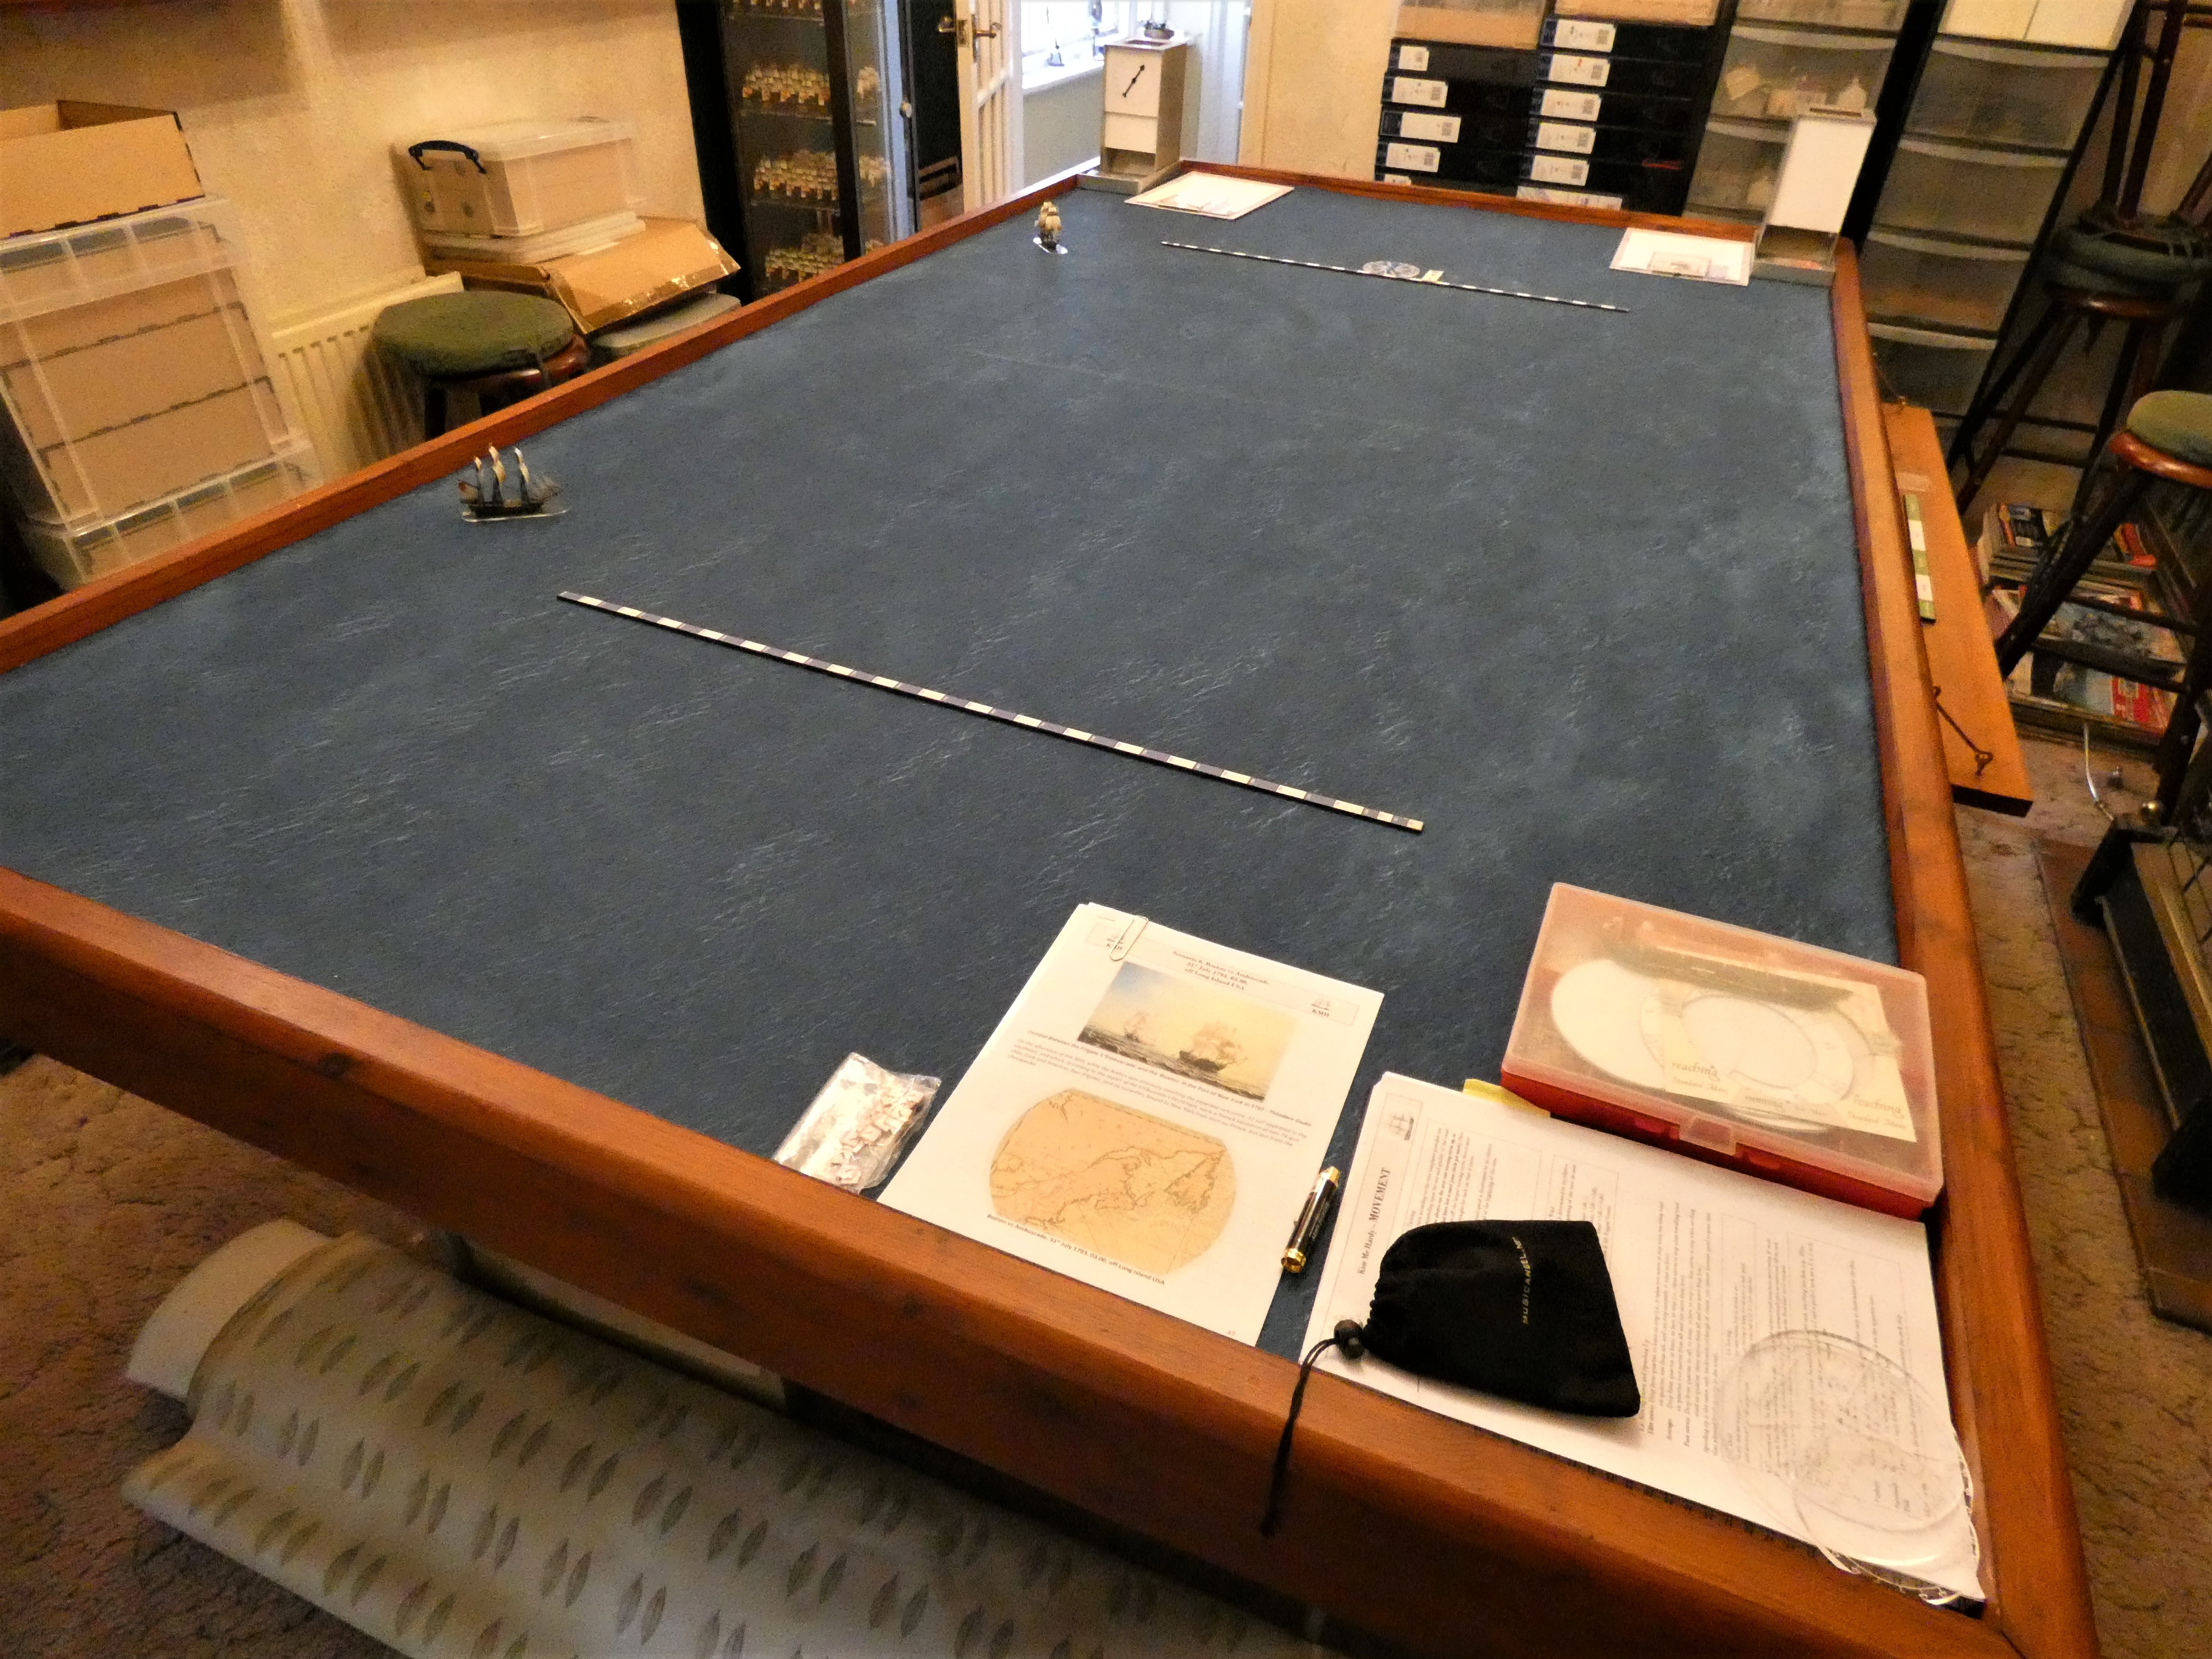 |
| It's midweek and the room is prepared to welcome my guests, John and Bob, in readiness to support International Naval Wargames Day with some historical small ship actions prepared. The table dimensions are designed to set the stage in the closing stages of either a Chase or Meeting Engagement scenario. |
Since my adventure into building a collection of 1:700th model ships from the Warlord Black Seas range of Napoleonic era model warships, as well as developing a collection to facilitate the big historical battles of the era such as Trafalgar and Cape St. Vincent, I was keen to also develop a collection of the smaller types to allow me to focus on the much more common types of naval actions that characterised the period, with small groups or single vessels ranging in size from luggers, cutters and schooners to mighty ships of the line encountering similar opponents, whilst engaged in patrols away from the main battle fleets.

When considering these historical smaller types of engagements often between single ships from each side, there are two references I turn to for inspiration, William James and his Naval History of Great Britain, copies of which are readily available on the internet, and a more recent tome by naval historian Dr Sam Wills and his marvellous book on the subject of warfare at sea during the eighteenth century entitled 'Fighting at Sea', a book I reviewed here on JJ's back in January 2020
 |
| JJ's Wargames - Fighting at Sea, Book Review |
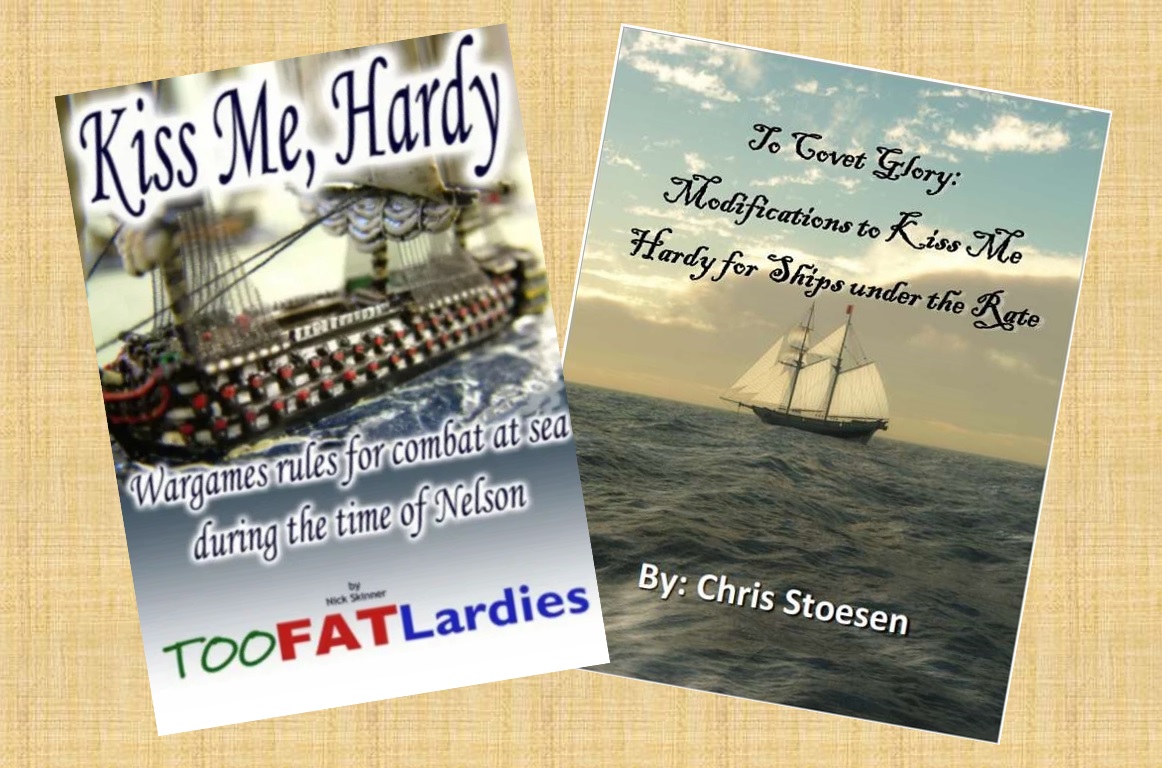
Small ship engagements in the age of sail present the naval wargamer with some interesting challenges to recreate in a scenario format, something I have been working on now for the last three years as my collection has grown and I have gradually put together a format for playing these games that has led me to complete 50 of an initial planned 100 scenarios themes for using with my preferred rules, Kiss me Hardy and the below the rate addition, To Covet Glory.
Those of us interested in the more intellectual side of gaming, namely reproducing the challenges faced by the actual commanders on the day, as best we can, and comparing our results on the table with those seen in the actual fight as a means of assessing victory or defeat; rather than simply pitching our model ships at each other in a duel to the death type of game, which bears little resemblance to the sea-fights described in the histories and takes little count of the restrictions and drivers placed on the actual captains involved, need a structure to base our games in, that help recreate those drivers on the players.
 |
| The front page of the scenario book I'm developing, that will allow me to select any one from a hundred of these historical match ups to play, as and when, with victory conditions and set ups based around the structure of the Meeting Engagement and Chase, that tended to characterise these small ship actions. |
Over the three years of pulling together these types of games and several rewrites of the various scenarios, I have gradually developed a structure of additional rules, based around defining these actions into two distinct types, Chases and Meeting Engagements, with the possibility that a scenario starting as one type could easily develop into the other depending on how things develop in the game.
The classic meeting engagement scenario, that is where both opposing commanders have decided, usually based on their observations, but sometimes by prior agreement such as in a classic 'War of 1812' duel situation, to meet their opponent in battle or were forced to face the other through an inability to escape, might see an opportunity through manoeuvre at a later stage, perhaps having caused enough damage to a stronger opponent, to permit them to break contact and thus bring on a potential chase if their opponent then decides to try and prevent their departure.
Likewise in the scenario that sees an obviously weaker opponent identify his predicament and decide to run from the start, bringing on the classic chase situation, might during that evasion have the opportunity to briefly turn and deliver a damaging response that weakens the pursuer enough to allow the previous quarry to turn on the pursuer and convert the Chase to the Meeting Engagement.
Over this layer of situations is applied the other layer of considerations for the players, namely what does the scenario demand from me to meet the victory conditions, which will usually compare the result and performance against the historical outcome as a gauge for the level of success or failure. So not just a simple win-lose, blow my opponent out of the water kind of game - well that's the intention!
Thus with James providing all the background information on each of the historical actions which describes the ships involved, why they were there and what happened during and after the actions; with his acquaintance with a lot of the naval officers he refers to, from his letters to them, and from personal interactions with them, adding all the colour and drama to his descriptions mixed with his gloriously biased and nationalist prose that seems somewhat bold in this day and age, I then can balance the historical reality of the problems faced by the commanders involved by stripping away some of James' colourful descriptions and referring to Willis' guide to what each opposing commander would have likely been trying to achieve.
 |
| Sam Willis' quote 'no situation perhaps more difficult and demanding so much caution as the occasional meeting with a doubtful ship.' was well illustrated in our first game, Boston vs Ambuscade, 31st July 1793. Both commanders approached their opponent with caution in the opening moves, unsure of the identity and fighting strength of the other and seeking out that key tactical advantage with 'a doubtful ship' . |
Sam Willis has some great guiding quotes that I refer to again and again when working on these scenario set ups, for example, his opening paragraph to his chapter entitled 'Contact'.
'Any sea fight necessarily began with the meeting of two ships or fleets. It was a critical time: it tested the seamanship and decision-making skills of the officers, dictated the tactics that would be most effective, and provided opportunities for tactical advantage to be won or lost.
It was also a particularly delicate situation for the captains concerned. A captain needed to exercise prudence to prevent a potential enemy from taking advantage of any inaction on his part, and also to avoid assaulting friends and countrymen. Hundreds of lives, great wealth, and personal and professional reputations were at stake. To compound matters, it is equally clear that the identification of friend or foe was not straightforward. To be good at it required experience and skill, intuition and judgement.
One contemporary with considerable personal experience of the navy and of combat believed that there was in fact
'no situation perhaps more difficult and demanding so much caution as the occasional meeting with a doubtful ship.'
So to our first scenario which followed a player briefing explaining how they could win the scenario that included the possibility of breaking off the action should either feel that they were likely to lose more heavily than their historical counterpart and how to prevent a break off should the other feel inclined to press home the advantage.
Boston vs Ambuscade, 31st July 1793 off Long Island, USA
 |
| Boston vs Ambuscade, 31st July 1793 off Long Island, USA |
This first scenario was a meeting engagement described by James:
'On the 31st, at 3 a.m., a ship, apparently large, was descried coming down before the wind, in the direction of northeast by east. The Boston immediately cleared for action. At 3 h. 30 m. a.m. the strange ship passed about three miles and a half to windward, making signals with false fires. At 3h. 50 m. a.m. the ship was discovered to be a frigate, under French national colours. The Boston now hoisted the same colours; whereupon the stranger ran up at her peak a blue flag with a white cross, and thus made herself known as the Embuscade.
At 4 A.M. the latter wore to the eastward, and the Boston set her mainsail; as did also the Embuscade. At 4 h. 45 m. a.m. the Boston tacked, hauled up her mainsail, hauled down the French, and hoisted English colours; and was passed by the Embuscade, at about a mile and a half distance.
At 5 a.m. the Boston again tacked; when the Embuscade bore up, and at 5 h. 5 m. a.m. ranged along the former's larboard and weather side. The Boston thereupon fired her larboard guns; which were promptly answered by the starboard ones of the Embuscade, as the latter lay with her main topsail to the mast. The Boston then wore, and, on coming to on the starboard tack, laid her main topsail to the mast also; and an animated fire was kept up by both ships. At this time the high land of Neversink, in the Jerseys, bore north-west, distant four leagues.
 |
| The approximate setting for our first action off Long Island, New York |
At 5 h. 20 m. a.m. the cross-jack yard of the Boston was shot away; and at 5 h. 45 m. a.m. her jib and foretopmast staysail, with the stays themselves, as well as all the braces and bowlines, met the same fate; consequently, she had no further command of those sails.
At 6 h. 10 m. a.m. her main topmast, and the yard with it, fell over on the larboard side, and the mizen derrick was shot away. At 6 h. 20 m. a.m. Captain Courtenay, and Lieutenant James Edward Butler, of the marines, while standing at the fore-part of the quarter-deck, were killed by the same cannon-ball. At this time, too, the mizen, mizen topmast, and mizen staysail were shot away; the mizen-mast was also expected, every moment, to go by the Table, and the only two lieutenants, John Edwards and Alexander Robert Kerr, were below, wounded; the latter with the temporary loss of sight in one, and with total blindness in the other, of his eyes, and the former by a contusion in the head, which rendered him senseless.
At 6 h. 40 m. a.m., finding that the crew were in some confusion for the want of officers to give orders, Lieutenant Edwards, although still suffering greatly from the stunning effects of his wound, came on deck, and took command of the ship. At 6 h. 40 m. a.m. the Embuscade dropped a little astern, with the view of putting an end to the battle at once, by a raking fire; and which the Boston, having no use of her sails, with difficulty wore round in time to avoid. On coming to on the larboard tack, the Boston could not use many of her guns, because the wreck of the main topmast lay over them. Thus circumstanced, with her principal officers dead or disabled, the British frigate put before the wind, under all the sail she could set; and at 7 h. 7 m. a.m. the Embuscade, who, to all appearance, was nearly as crippled as herself, stood after her.
At 8 A.M., however, when about four miles off', the French frigate brought to with her head to the eastward and was soon lost sight of by the Boston.
 |
| The scenario set up as the two frigates close, trying to confirm the identity of the other, with Boston initially flying French colours. |
Besides the long-gun establishment of her class, the Boston mounted six of those useless monkey-tailed 12-pounder carronades; making her guns in all 38. Her net complement was 217 men and boys; but, having sent away in a prize her third-lieutenant and 12 seamen, she had actually on board no more than 204. Out of this number, she lost her gallant commander, the lieutenant of marines, and eight seamen and marines killed, her two remaining lieutenants (already named), one master's mate, two midshipmen (whose names we are unable to give), and 19 seamen and marines (the chief of them badly) wounded; total, 10 killed and 24 wounded.
The Embuscade was armed like her class-mate, No. 7, in the table below, except in having but two instead of four carronades.

Her established complement was not above 280 or 300, but Captain Bompart, while lying in New York, had augmented the number to 340, and his ship's company, for effectiveness, far exceeded the generality of French crews of the same numerical strength. Deducting the 13 absentees on board the Boston, 327 remain: out of which number, according to the New York papers of the day, the Embuscade had 50 killed and wounded.
This long and close-fought action was viewed, from beginning to end, by crowds of American citizens, standing on the Jersey beach. The superior size of the Embuscade attracted the notice of everyone; and few among the spectators, on observing the Boston haul off, were so prejudiced as not to admit that, to all appearance, the British frigate had no hopes left of bringing the combat to a favourable termination.
Although none of the Embuscade's masts fell during the contest, on her arrival at New York the French frigate had to take all of them out; and her yards, rigging, and hull must also have been considerably injured, or the Embuscade, doubtless, would have continued the chase, in order to consummate her victory. The Embuscade lay at New York, from the 2nd of August to the 9th of October, getting in her lower masts, and repairing the damages she had sustained by the Boston's fire.
The Boston, after losing sight of the Embuscade, had a very narrow escape. She was about entering the Delaware to refit in that river, when the pilot gave information, that two French frigates (believed to have been the Concorde and Inconstante) were lying at anchor opposite Mud Fort. No time was to be lost, and the British frigate, discharging the pilot, hauled up for St. John's, Newfoundland; where, on the 19th, the Boston arrived in safety.' (James' History Vol I)
With both players briefed to keep the details of their ships secret from each other, the only information they could go on once they had set up was that they faced a likely enemy frigate which would need spotting before any action against it could be taken.
John, who was commanding the HMS Boston, was really caught up in the lack of precise information, and not knowing precisely what was faced, suspecting that even the French Revolutionary colours on the other ship was just a ruse, along with the date of the action, to lull him into not realising his enemy was American and that we were in fact fighting a War of 1812 scenario, given our location off New York.
 |
| Both players have set their respective headings and positioned their ships within their twelve square inch set up corners, with Boston left and Ambuscade right of picture |
As the range started to close, both captains attempted to keep their broadsides facing the potential enemy, but, given the use of order-cards restricting the players options to predesignate whether they intended to turn, tack or sail straight on, placed faced down on the table, and prior to movement, never knowing exactly what the other player would do in the next opportunity to move or, given the chit draw activation, who would get to move and possibly fire first, even if they did identify the enemy.
Thus the situation and most of the uncertainties facing Captains Courtnay and Bompart were gloriously captured as the two model ships closed, leaving both players uncertain who might get the drop on the other.
The fact was that neither player knew both frigates were fairly evenly matched, being 32-gun types and both with average crews but with the British 'Jolly Jack Tar' rating giving them enough of an advantage to likely prevent the French ship recovering from a well directed broadside at close range, particularly from a stern or bow rake.
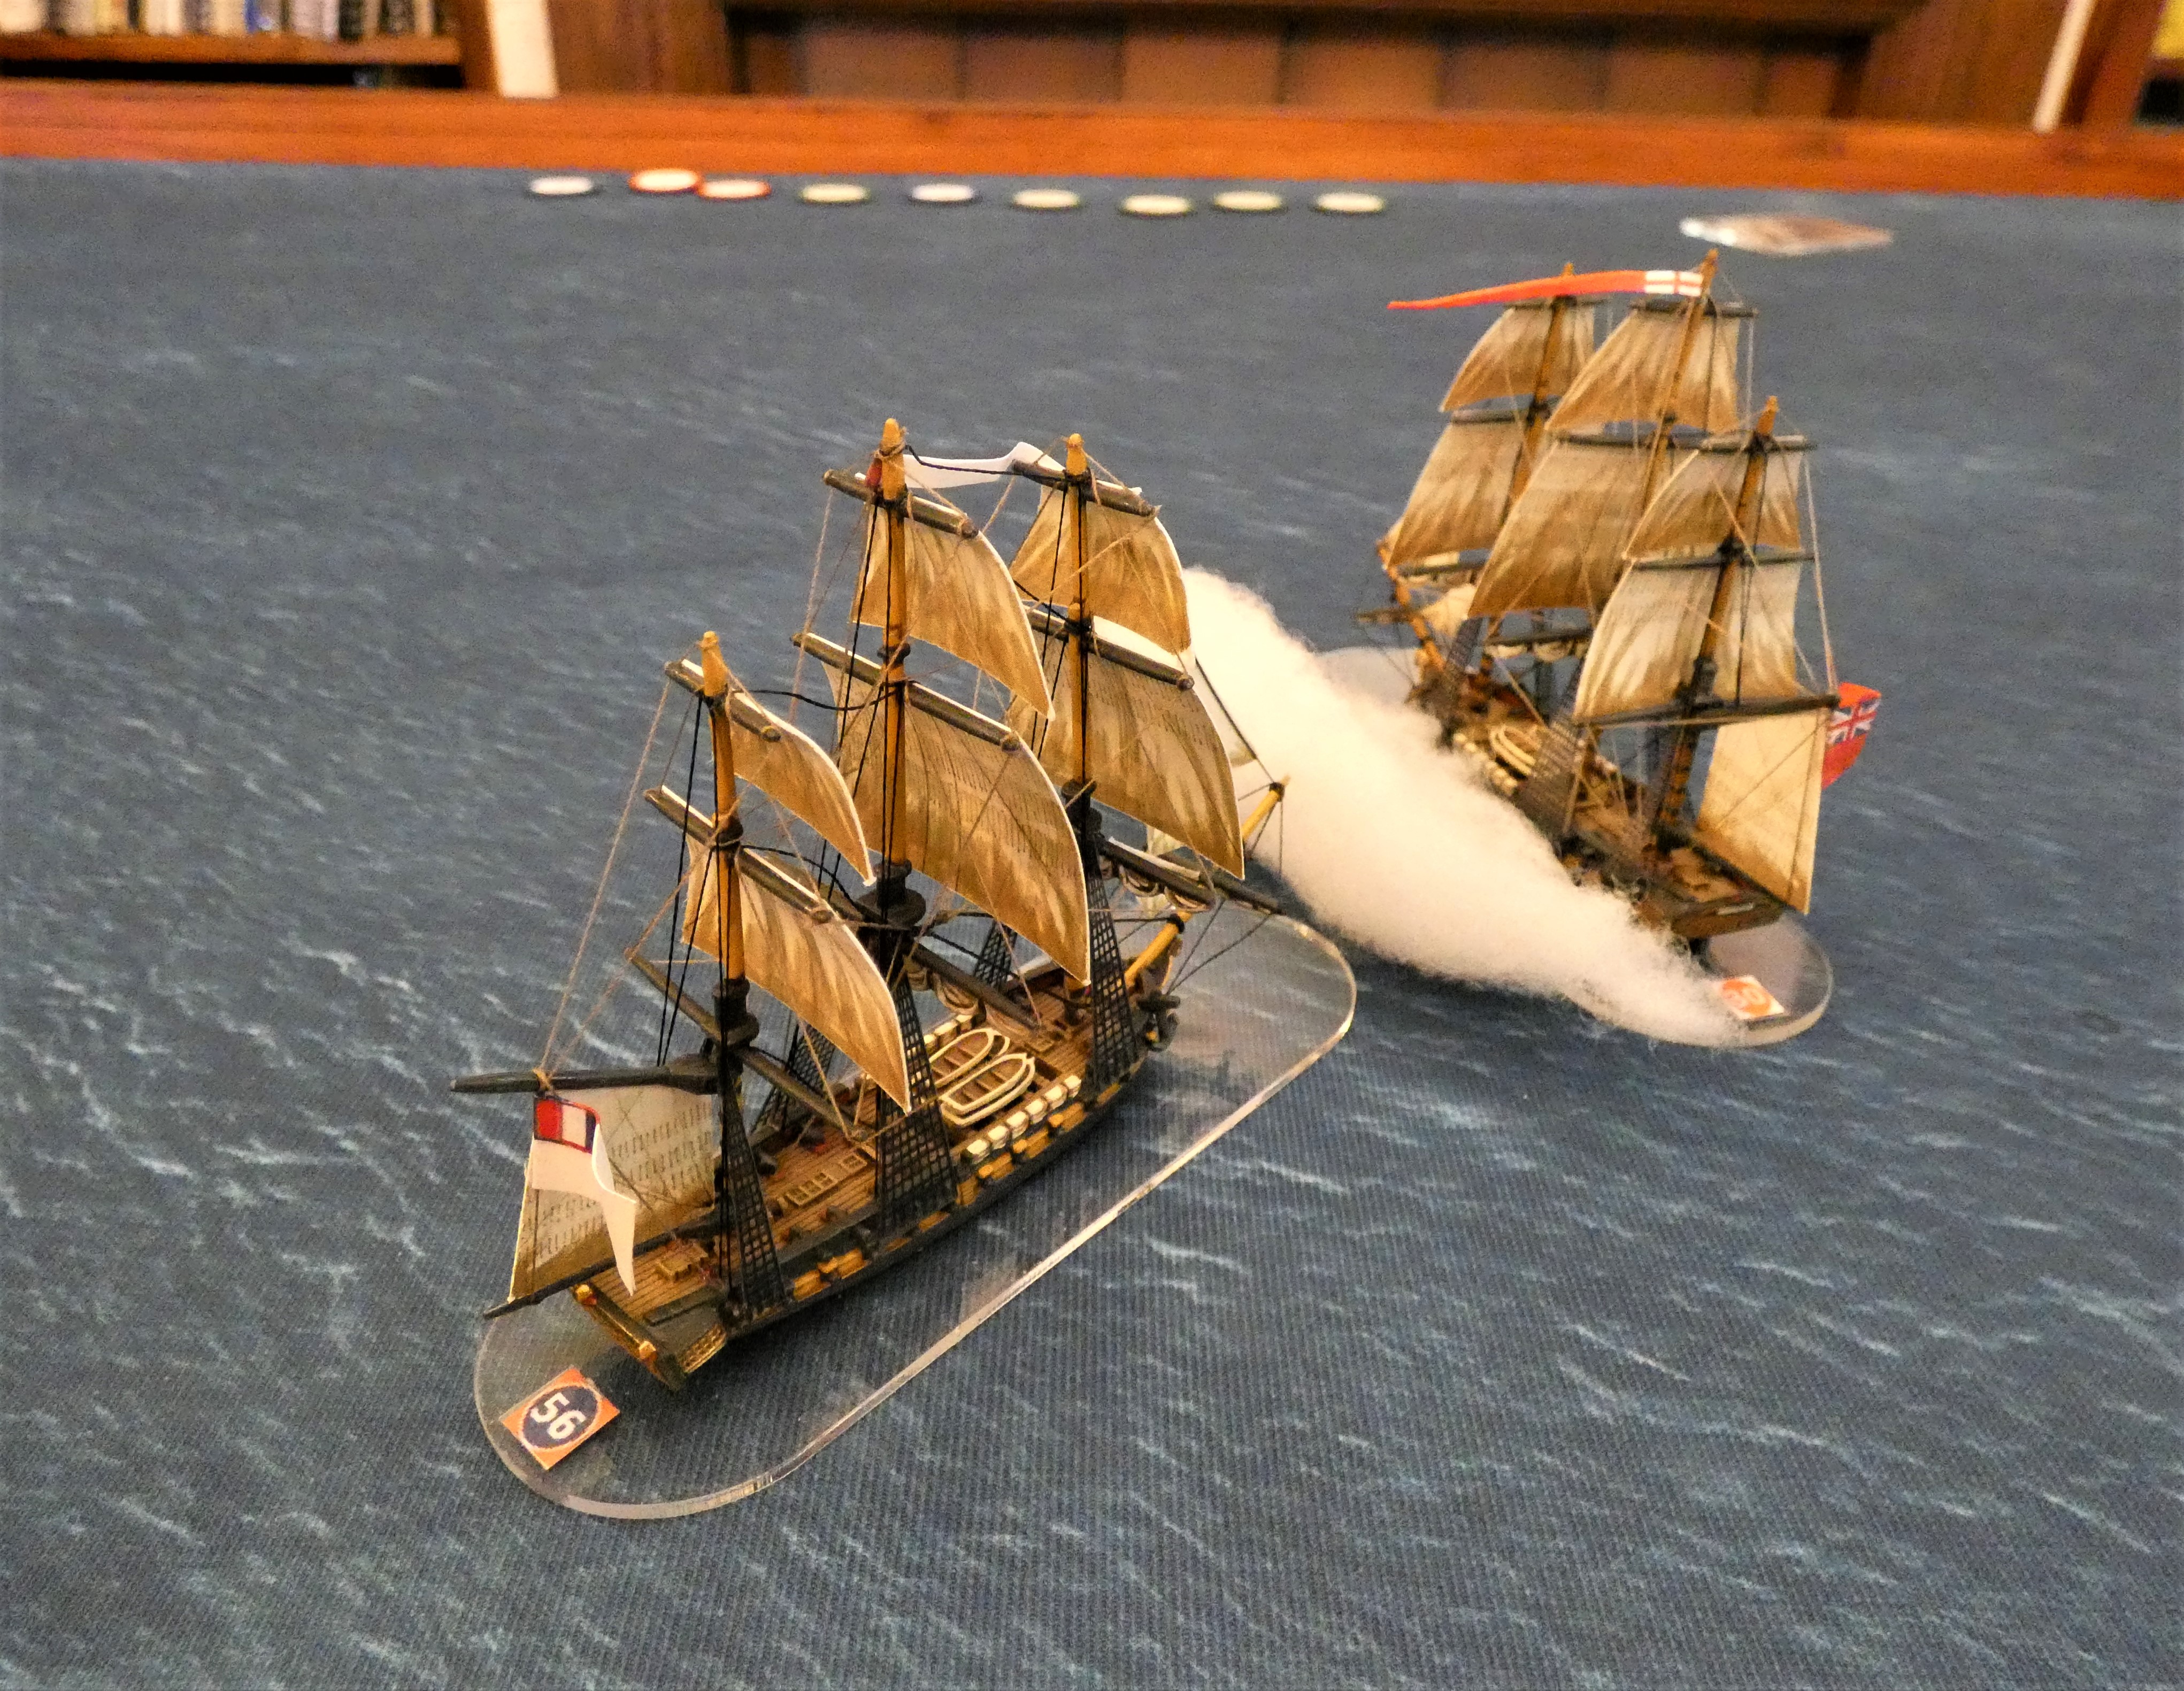 |
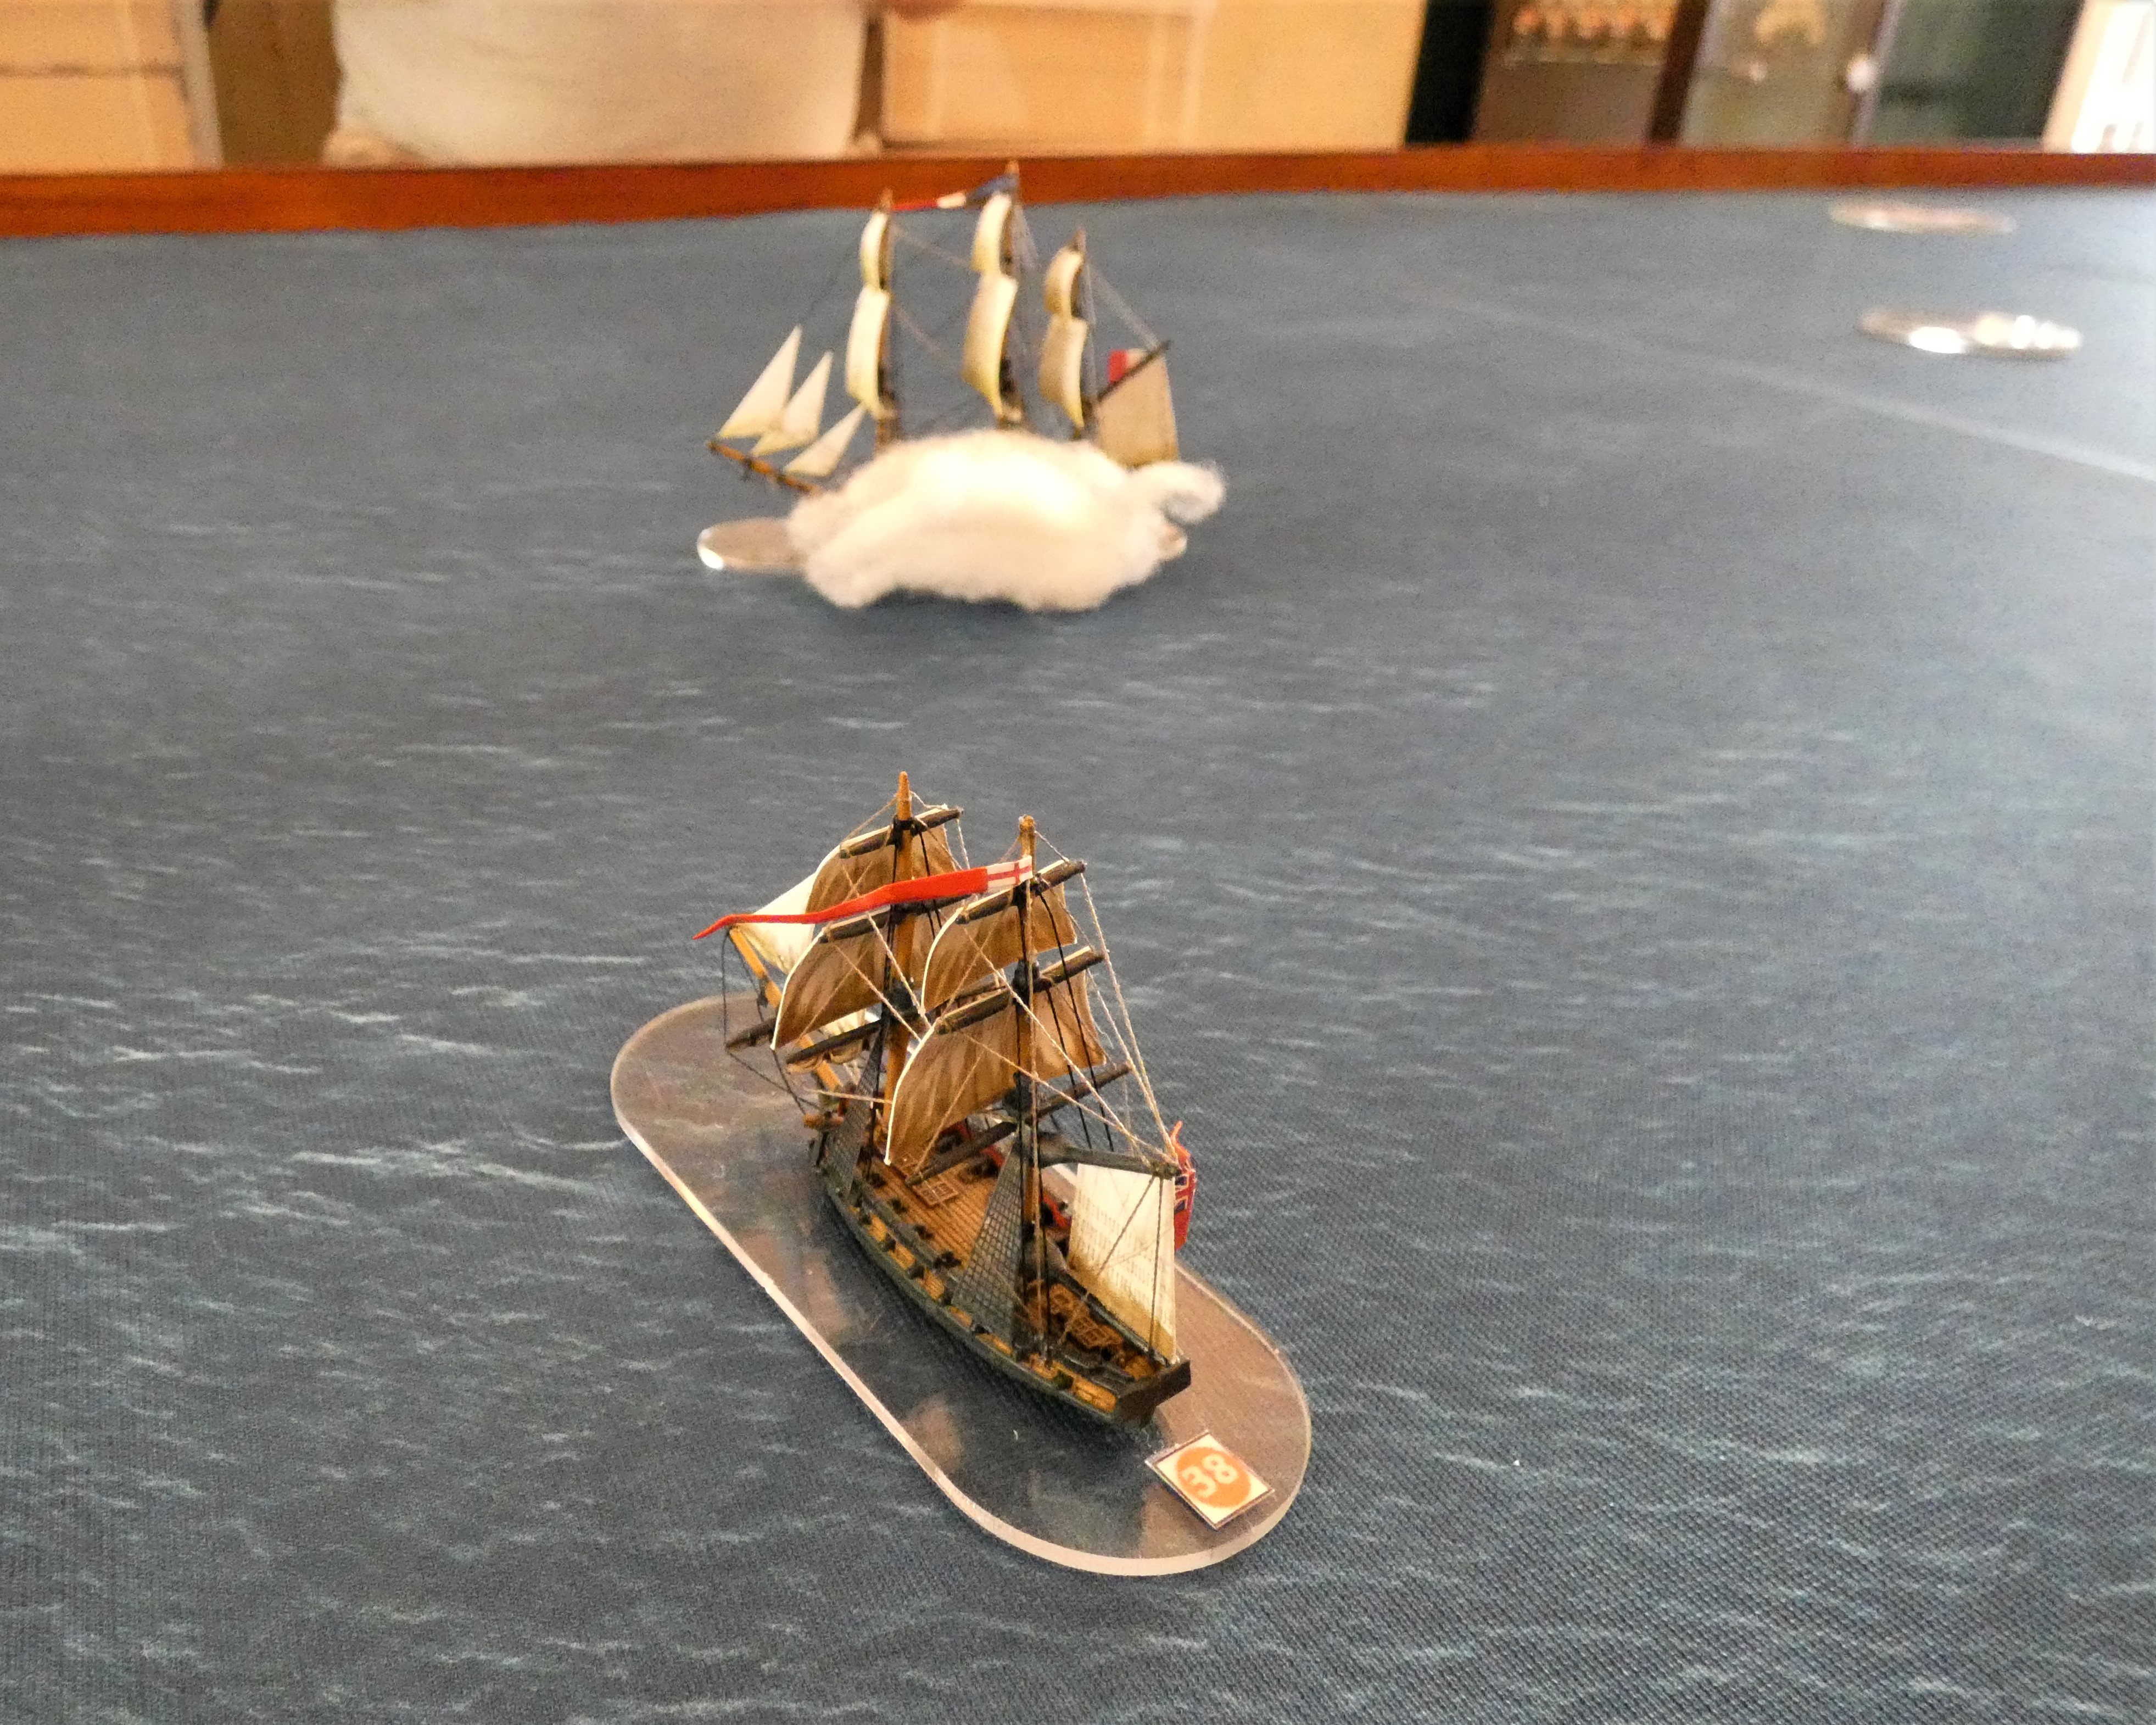
| Captain Coutney's HMS Boston gets the drop on Ambuscade, managing to get across her bow and deliver a first broadside bow rake at short range, putting the British ship in the 'driving seat' from the first exchange of fire. |
It was the Boston that grabbed the initiative as John took advantage of moving second together with having his fire chit in hand, and being astern of the Ambuscade took full advantage of a quartering wind after spotting the frigate was the enemy and, hoisting his true colours, used her speed advantage to turn in across the bow of the Frenchman and deliver a first larboard broadside bow rake at short range.
The Ambuscade passed the strike test that resulted from her being bow raked and with a cheer from his crew Bompart sniped away at the Boston as the latter attempted to wear around to resume the fight at close quarters and bring matters to a speedy conclusion, no doubt with a follow up boarding action.
 |
| Captain Bompart now with a bit of sea room and with his enemy on a reciprocal heading sees his chance to avoid the likely inevitable loss of his ship following the damage he received in the first exchanges with the Boston |
As the two ships turned away from each other and with the range between them having taken on a more pronounced distance through several moves to bring broadsides to bear, Bompart realised the error Courtnay had made giving the Frenchman enough sea room to take the chance to break contact and fight another day, all be it surrendering the action to the British, but escaping with his ship damaged uncaptured.
 |
| Ambuscade shows her damage that has already reduced her starboard battery to half effect at the moment she chose to make her escape |
Thus as the next turn began and before sailing orders were placed, Bob announced his intention to break contact, seeing John countering with his intention to chase.
In a break off attempt, the quarry ship can have two attempts to break contact only needing to succeed in one of them to evade a pursuit, but if failing to evade on the second attempt, forcing the quarry ship to haul down her colours; recreating the crew and commander recognising their situation and now, having thrown guns and stores overboard in their vain attempt to get away, leaving them defenceless to offer further resistance.
 |
| Boston relatively unscathed when her quarry evaded her attempts to finish things. |
The test is an opposed die roll with no movement, but based on the current speed of each ship at the moment of testing, which saw the Frenchman on a quartering wind, the fastest option, and the British frigate on an opposing heading facing a bow wind, significantly slower.
The potential movement in centimetres is divided by three to determine how many dice to roll with the rolled dice generating 1 point or 2 points based on the scores rolled, to which are added points for the distance between the opposing ships, their headings and other associated factors to produce opposing totals.
 |
| Ambuscade makers her escape to live to fight another day and with battle honours even |
In the end Bob's roll beat John's by four points indicating the Frenchman's successful breakoff.
However escaping is one aspect of these scenario set ups, but victory outcome still has to be measured against the historical outcome.
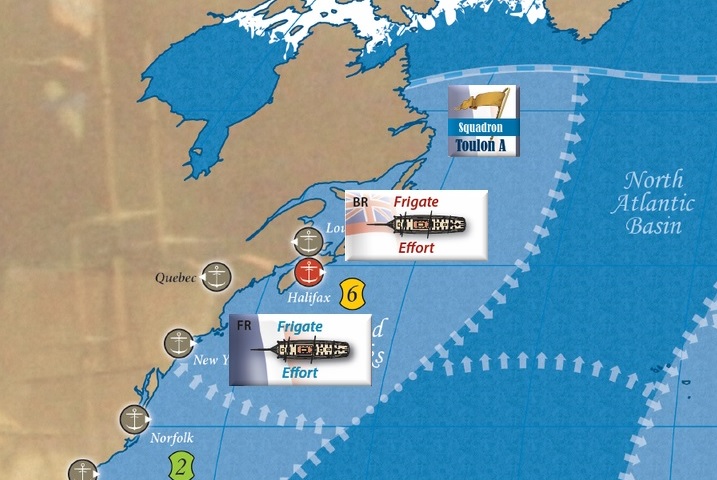 |
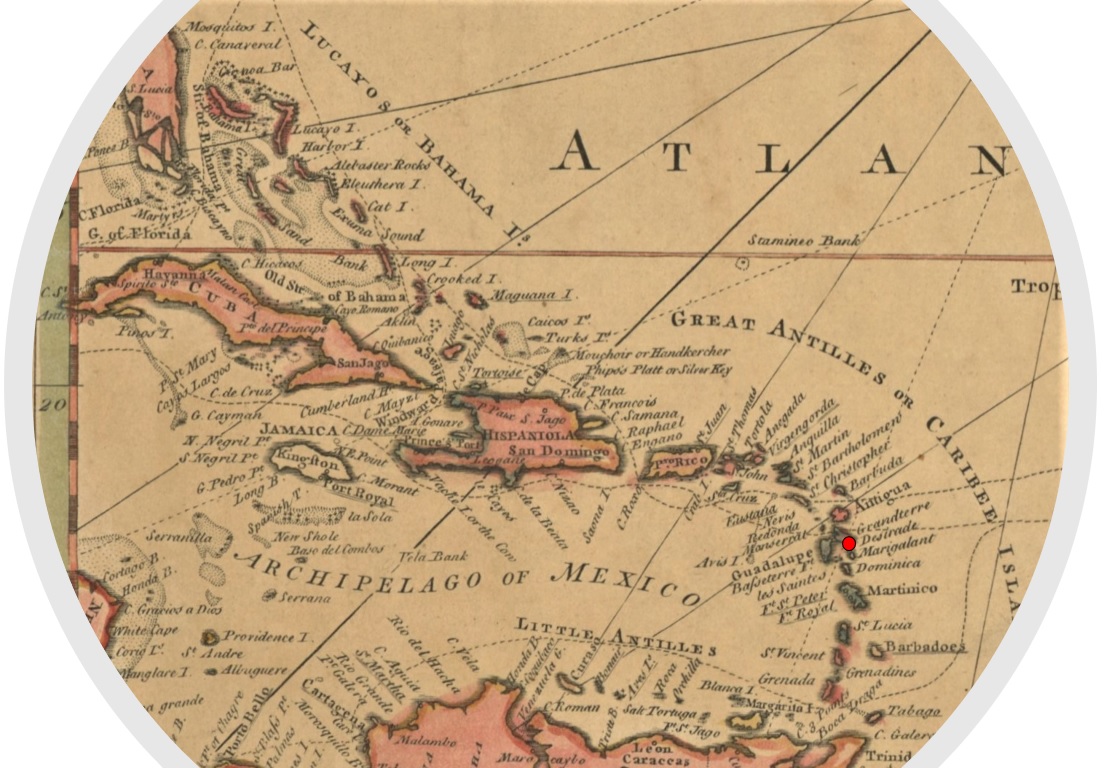
| It's 1794 in our Revolutionary Naval War campaign and it generated just one action that needed resolution to see if alongside the Toulon A squadron occupying the Grand Banks sea area for 6 victory points, the French frigate could grab commerce raiding points as a bonus by beating or at least driving off the British opponent, prevented by the result gained here by HMS Boston. https://jjwargames.blogspot.com/2022/05/all-at-sea-french-revolutionary-war.html |
In the end given that Ambuscade escaped still only carrying light damage as was Boston, as in the historical longer fight both ships retired with similar damage levels so leaving honours even when the respective victory points were added up, but as this was also a campaign action as part of our KMH French Revolutionary War Campaign meant that Boston had successfully stopped the French from claiming commerce raiding points for their occupation of the sea area off Halifax.
Pelican vs Médée, 23rd September 1796 25 miles NW of La Désirade Island, Guadeloupe

'On the 23d of September, at daybreak, the island of Désirade bearing south-east by south distant six or seven leagues, the British 18-gun brig-sloop Pelican, Captain John Clarke Searle, mounting sixteen 32-pounder carronades and two long sixes, found herself close on the lee beam of an enemy's frigate. Not over-desirous of engaging where the odds were so decidedly against him, Captain Searle made sail to the north-west, and was followed by the frigate; who, having the weather gage, and sailing remarkably fast in the prevailing fresh breeze, rapidly approached the Pelican.
 |
| Pelican vs Médée, 23rd September 1796 25 miles NW of La Désirade Island, Guadeloupe |
Having away in prizes her master and several of her petty officers and seamen, the brig could not muster, at this time, more than 97, out of her established complement of 121, men and boys; and some of the seamen appeared to hesitate about engaging a ship of such evident superiority of force.
But, when Captain Searle called to their recollection the frequent occasions on which they had distinguished themselves while under his command and expressed a hope that they would not sully their well-earned reputation, nor place less confidence in him than they had been accustomed to do, the fine fellows gave three cheers, and at once declared their resolution, rather to sink with their commander than forfeit his good opinion.

As soon as she had made all ready, the Pelican, to the great surprise, no doubt, of all on board the frigate, shortened sail and at 7 a.m., the French 36-gun frigate Médée, having arrived within gun-shot, opened her fire. The brig reserved hers until her carronades could reach with effect. Having at length got within the proper distance, the Pelican commenced a very brisk fire, and kept it up until 8 h. 53 m. a.m. ; when the Médée, whose crew appeared to be in some confusion, hauled on board her main tack, and made off to the northward under all possible sail. Having had every brace and bowline, all the after backstays, the main-stay, several of the lower shrouds, the topsail ties, and other parts of her rigging, shot away, her sails very much torn, and her mainmast, main topsail yard, and fore yard a good deal injured, the Pelican was not in a condition for an immediate pursuit ; and the Médée, being thus left to herself; soon ran out of sight. With all her heavy damage, the Pelican had no person killed, and only one slightly wounded.
Now thoroughly up to speed with calculating victory requirements and how to control an action once in a position of superiority to prevent any escapes, and on the back of a fortifying lunch, we commenced playing our second scenario, that given the significant differences in the two ships involved, very much emphasised the need for not revealing the strength of them to the opponent.
 |
| The decks are cleared and the models in position for our second scenario, HM Brig-sloop Pelivan vs French frigate Médée |
This scenario took us a few play throughs to test the victory conditions, given the outcome achieved by Captain Searle and his robust 'Pelicans' as they turned to meet the Médée in this interesting Meeting Engagement.
Given the fact that the French 40-gun fifth rate was unable to prevail against the British brig armed with short range carronades, I rated Médée's crew as poor which meant her sailing qualities caused her to turn at the same rate as a 3rd rate ship of the line, whilst the elite Pelican was quite capable of tacking perfectly on a sixpence and waltzing around her larger opponent.
 |
| As the exact wind conditions and set-up are unspecified in James' account, this scenario requires the wind to be established using the table below with the Pelican set up first, two 'gates away from that through which the wind is blowing, then placing the Médée on the opposite gate, with the players setting up within twelve inches of said gate and on a heading of their choice towards an opposite gate of their choice. |
 |
| Likely wind options for this part of the Caribbean |
However should the French captain suspect the Pelican of being armed primarily with the short-range, hard-hitting, 32-pounder carronades, he would have an opportunity of taking apart the brig's rigging and masts from a relatively safe range, preventing any likely escape and allowing the brig to be easily overcome once in a crippled state.
 |
| The players were learning fast to behave like their historical counterparts by assuming nothing and approaching cautiously, prepared to break off just as readily as being prepared to engage and assessing the enemy based on how well they sailed or not as was the case of the Médée whose manoeuvring was hard to disguise. |
The victory conditions generated by Searle and his formidable crew are a tough ask to replicate seeing the Pelican gain a decisive victory and administering heavy damage to the Médée before she made her escape.
As in all these games, until a suspected enemy is identified as being such, any approach has to be cautious as even a brig that spots first and gets its firing chit first with an opportunity to blaze away at close range can cause a lot of hurt, particularly one such as Pelican with a very nasty sting if not handled with care.
In the end Bob running the Médée got the first spotting success, clearly identifying the Pelican as an enemy man-o-war and getting in a telling medium range broadside to open her account
 |
| The Médée successfully identifies Pelican as a British brig and opens fire |
 |
| The Pelican snipes away with her 6-pounder bow chasers as she strives to outmanoeuvre the big French frigate into carronade range. |
In the end John tried to force such a boarding action but failed by one on the score required as the Frenchman fended off the attempted embrace, leaving us running out of time to continue play and assessing the result as a likely drawn fight, but seeing a minor French victory given John's inability to match that of Captain John Clarke Searle and his Pelicans.
 |
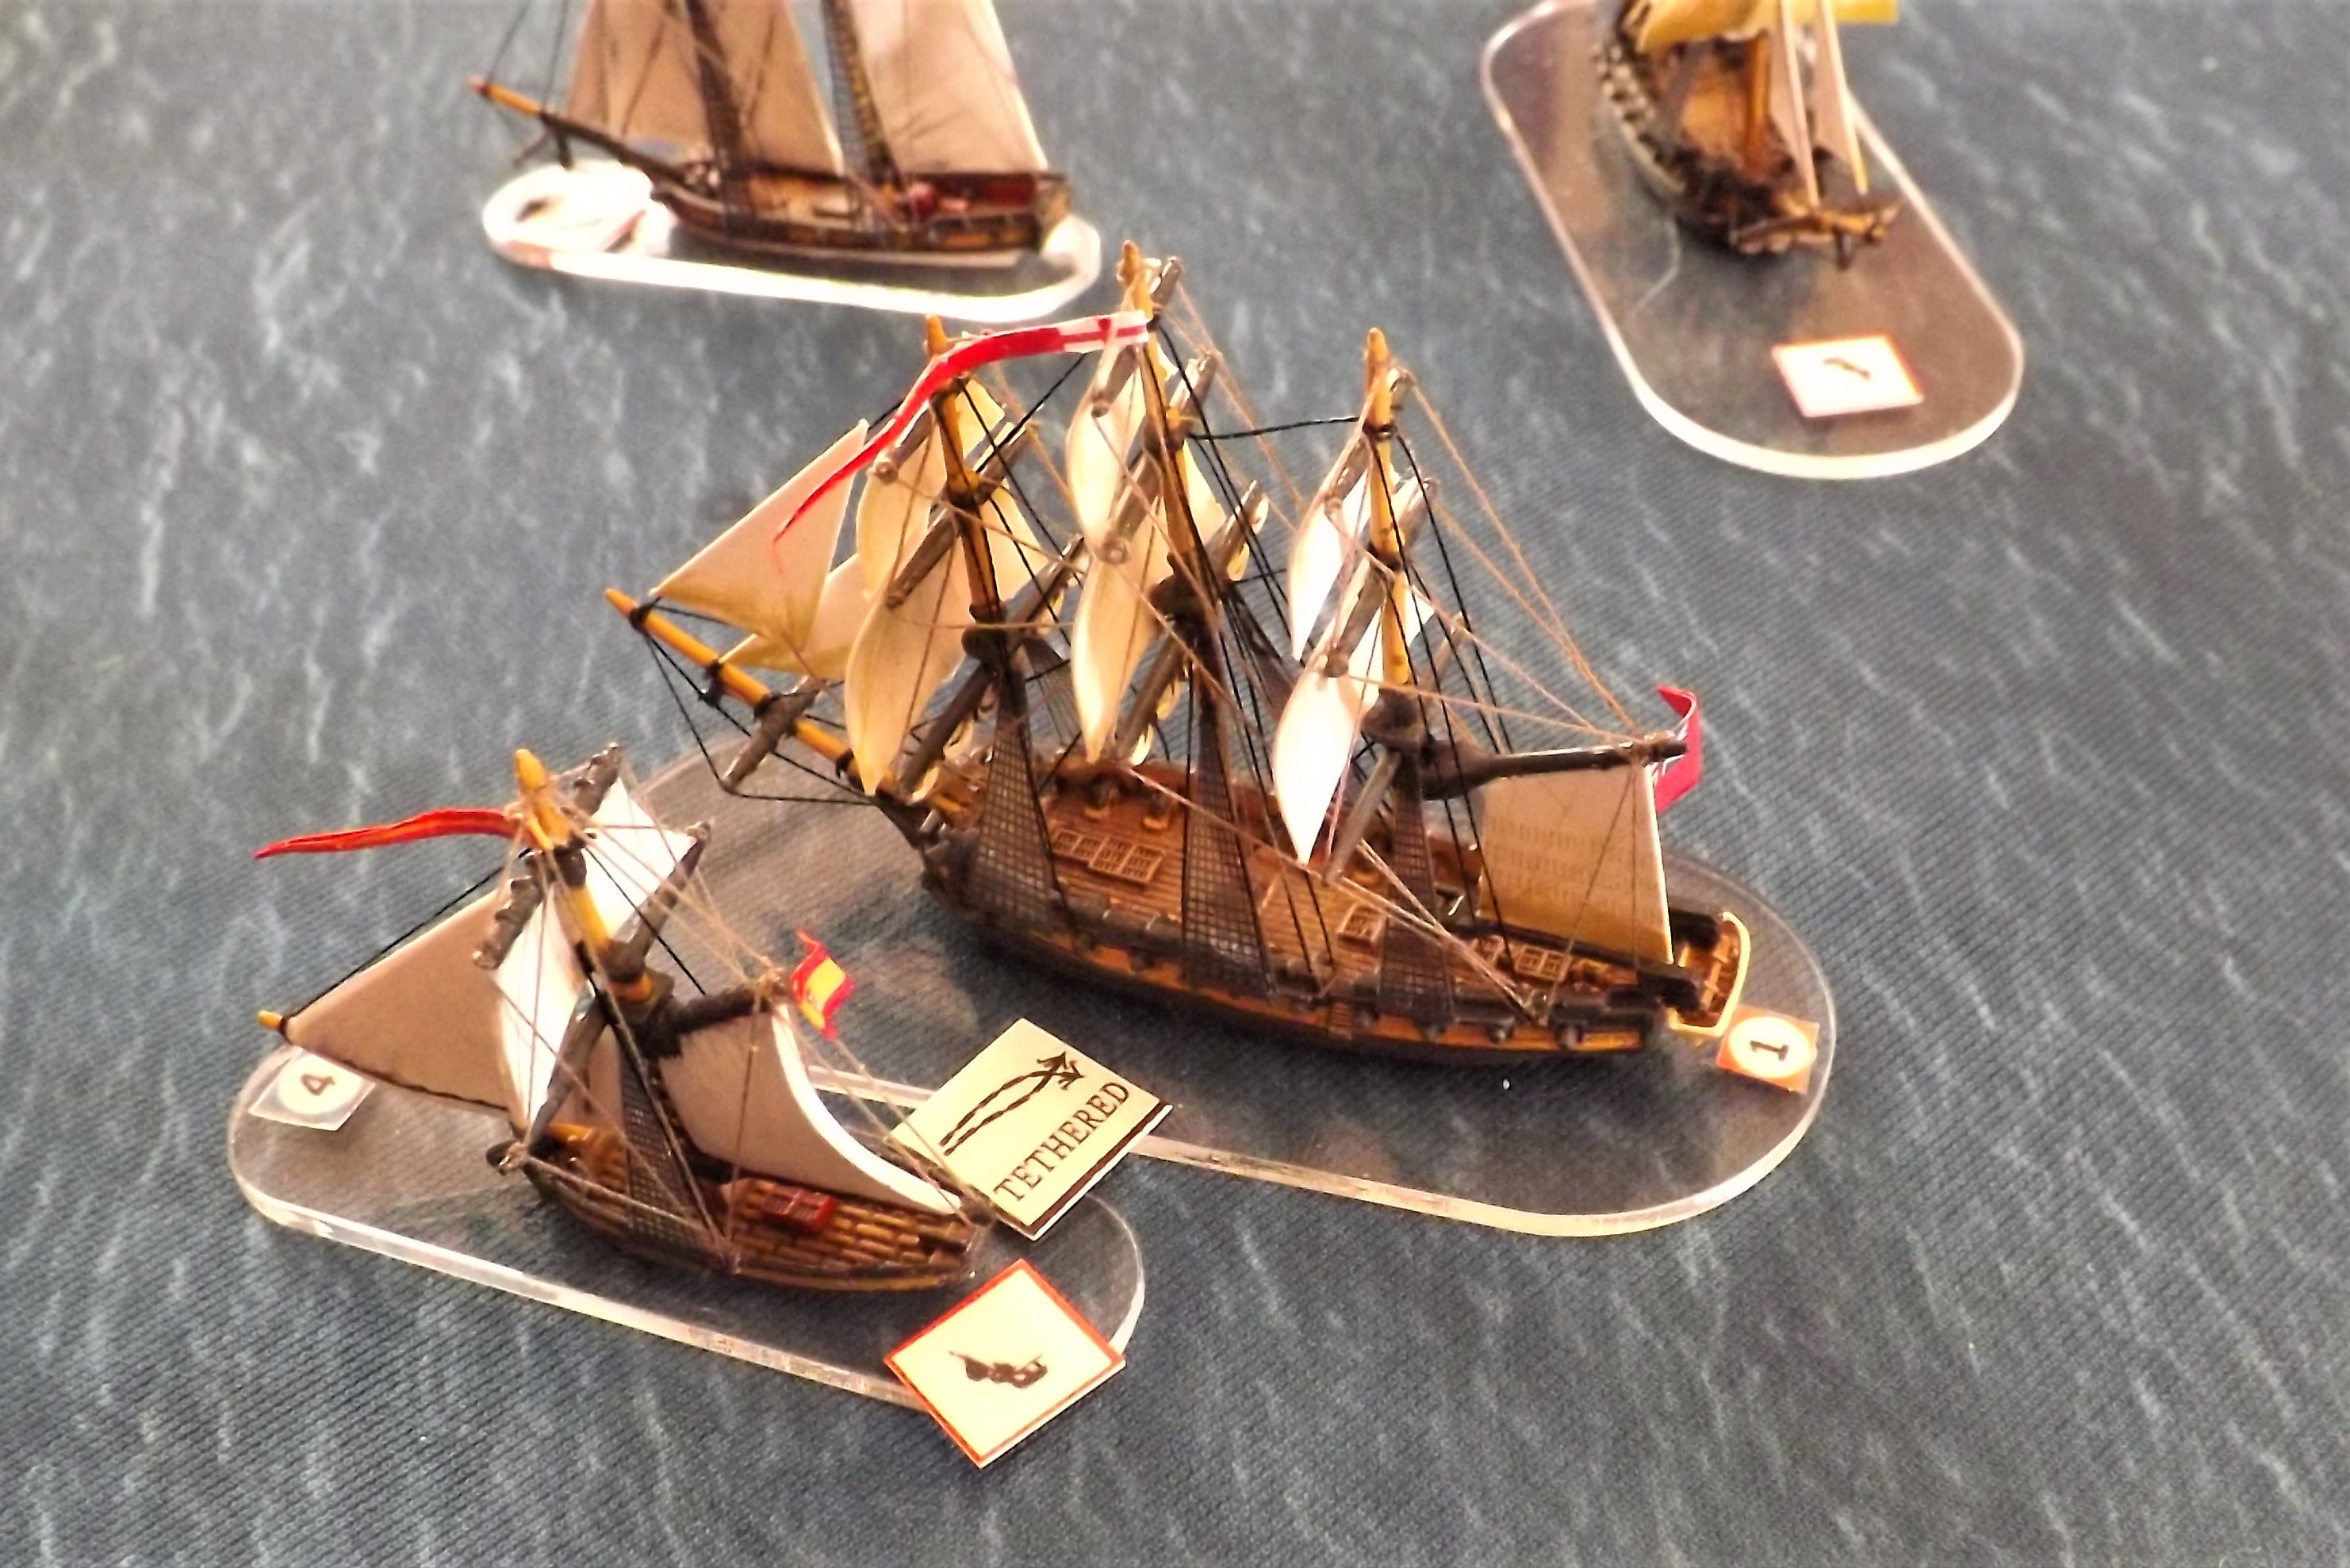
| Having chased the Médée around the table for several turns, John attempted to grapple and bring on a boarding action to avoid the Pelican from taking death by a thousand cuts as the frigate contented itself in picking away at the brig's battered hull and rigging. However with the sun dipping, and an immediate result unlikely, we called the game in favour of the Médée. |
The likely butchers bill for the respective surgeons is borne out by the two ship record cards, with the Pelican seen below having taken a lot of hits on her relatively small hull from Médée's main deck battery of 12-pounders and her rigging much cut up as well.

However the hull of the Médée has been given a working over by Pelican's 6-pounder bow chasers and a partial broadside of 32-pounder carronades, which coupled with her poor crew attributes explains why Bob was quite keen to avoid being grappled.

Despite the disparity in tonnage 369 tons for the Pelican versus 1150 tons for the Médée as illustrated in the hull boxes for each model, the Pelican could deliver a punch well above her weight with a 369 ton broadside versus Médée's 290 tons and this disparity together with the crew qualities made this a fascinating little action which when glanced at by the average gamer might at first not seem to offer much in gaming potential.
We all agreed that the way the scenarios are set up, driving the players to behave more like their historical counterparts and bringing out the potential for the better sailed vessel to overcome a much larger but poorly sailed enemy means that no one scenario is likely to be much like another and I am looking forward to testing more of them at club going forward.
Additionally, based on the feedback from the chaps who played in my previous 'All at Sea' adventure, testing a scenario designed by Chris Stoesen for his forthcoming War of Jenkins Ear scenario and campaign book, link above. I got to try out my adjusted Ship Record Cards that illustrate this post, complete with a redesigned Ships Fighting Abilities section including deck plan to indicate where the various batteries of guns are positioned.
Thanks to John and Bob for getting to grips with the games and various set-ups. There efforts produced much entertainment and really brought the scenarios to life and helped me work though the ideas behind them.

I'm moving on next to play-test another one of the scenarios, recreating an action in the Indian Ocean from 1796 between two British 74-gun third rates and six French frigates, entitled Sercey off Sumatra, that will be my presentation game for Clotted Lard in September.

Then in October I'll be running The Leeward Line scenario which I and some of the chaps from Devon Wargames Group will be taking to the Naval Wargames Society meeting at the Fleet Air Arm Museum, RNAS Yeovilton on the 15th October, just in time for Trafalgar week - so if you fancy coming to that you can come and see part of the the collection in action and say hello.
More anon - JJ
Fantastic piece of work and much appreciated, look forward to the updates, is there a campaign OOB or a series of actions for the campaign, what boardgaem are the map and counters from in the above screenshot with the wo frigates
ReplyDeleteHi and thank you.
ReplyDeleteIf you follow the link directly below the picture of our campaign map set up, it will take you to my post covering the first turn of our campaign game that covered 1793 and the details around it.
We are using Sovereign of the Seas board game from Compass Games using the Vassal module to run the campaign and then fighting any resulting actions using KMH and TCG.
We will be running the games as they present from the campaign and I will report on them here on JJ's as we go.
Hope that helps.
JJ
Always loved small ship actions, catching the bug after reading James Henderson's "The Frigates". I must have fought Lissa 1811 a dozen times, back in the day (sadly I no longer own sailing ships, though I still have quite a nice little library).
ReplyDeletehttp://olicanalad.blogspot.com/2010/07/my-naval-book-list.html
At the time, I remember searching high and low to find out what a six gun xebec looked like! Funny what you remember from twenty plus years ago.
Hi James,
DeleteMy own romance with the period probably started with one of my English teachers reading Hornblower to the class and completely captivating me with the drama and my own imprecise imaginings, that was enough to prompt me to go off and read the Richard Bolitho adventures by Alexander Kent in the late 70's and early 80's.
I have dabbled in age of sail ever since, getting the flame rekindled by Rod Langton and his models and him taking the time to give me a crash-course in rigging. However I yearned for a more 'in-your-face' scale of model on the table, which I felt would be much more impactful, and so stopped building any more for fifteen odd years, just pulling out the Langton collection every now and then when the itch needed scratching.
Then Warlord presented their new models at Salute a few years ago, and I was captivated by the scale and the table presence, using them for big or small encounters, and here we are four years later, and I'm having a lot of fun enjoying another daft strand of this ridiculously enjoyable hobby.
Thanks for your comment mate.
JJ